✨To support my free patterns, this post includes affiliate links for materials I love. Thank you for your support! 💖
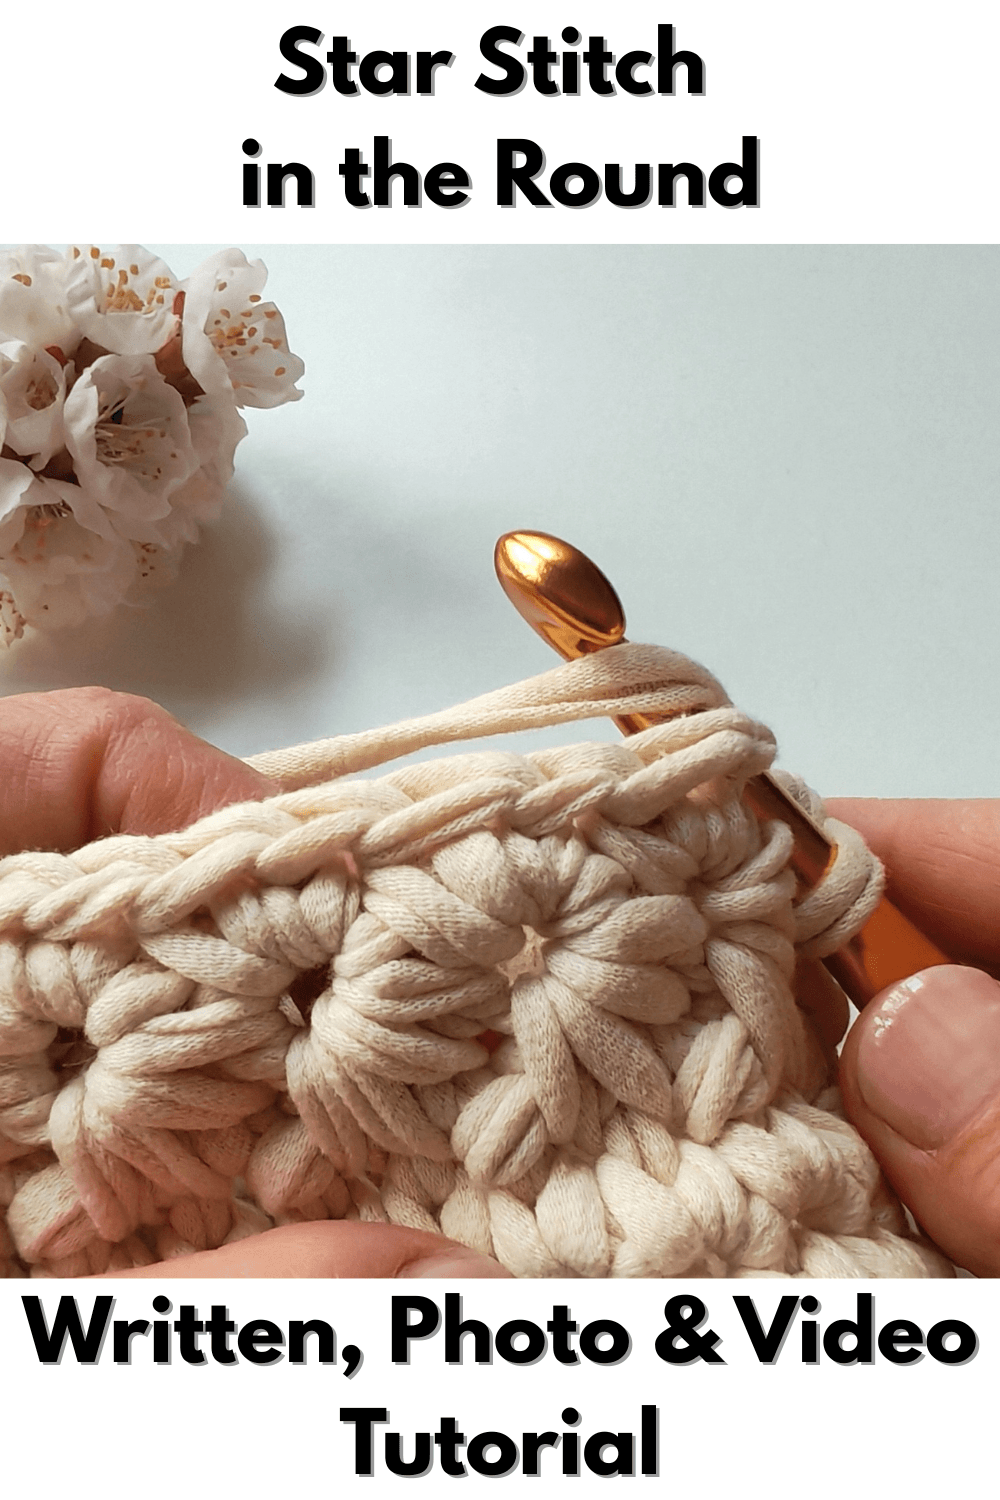
If you are looking to elevate your amigurumi projects with a touch of elegance and floral texture, learning the crochet star stitch in the round is a total game-changer. Also known as the Daisy Stitch, this technique creates a thick, star-shaped pattern that looks incredibly professional and high-end. Whether you are working on a dress for a crochet doll or a textured accessory, this stitch adds a unique “wow” factor that regular single crochets simply cannot match.
While it is true that the crochet star stitch is a bit of a “yarn eater”—meaning it consumes more thread than your standard stitches—the result is absolutely worth every extra meter. The dense, squishy texture provides a sturdy structure and a sophisticated look that makes any handmade toy stand out. It transforms a simple surface into a field of tiny, embossed flowers, which is why it’s a personal favorite for my spring-themed designs.
In this tutorial, I will guide you through the process of making this modified star stitch (Daisy Stitch) specifically for circular projects. It might look intimidating at first, but once you find the rhythm of pulling up those loops, you’ll see how addictive it can be. Let’s grab our hooks and dive into the world of textured crochet!
Where to Use This Stitch: Daisy the Spring Bunny
If you’ve been following my work, you know I love a clean, professional finish on my amigurumi. I recently used this beautiful technique in my Free Easter Crochet Bunny Pattern: Daisy the Spring Bunny.
The Daisy Stitch is what gives her onesie that irresistible, floral texture that makes the whole design pop. It’s the perfect project to practice your crochet star stitch in the round because you can see how it creates a seamless, blooming effect on a 3D shape. If you haven’t started your bunny yet, you can find the full free pattern here on my website.
What You Will Need to Practice the Star Stitch
Before we start, let’s make sure you have the right tools. To get the best results with the crochet star stitch in the round, I recommend using:
- 100% Cotton Yarn: Cotton provides the best stitch definition, which is essential for showing off those delicate “star” petals. I use cotton yarn from my local store. The best match and my top recommendation is Paintbox Yarns Cotton DK.
- The Right Hook Size: Use the hook size recommended for your yarn. However, if you naturally crochet very tightly, you might want to go up half a size (e.g., from 2.5mm to 3.0mm) to make pulling through those 6 loops much easier. I highly recommend Clover Amour Hooks for the best experience.
The Difference: Classic Star Stitch vs. Modified Star Stitch
If you have ever crocheted a star stitch blanket, you might notice that this modified star stitch (Daisy Stitch) works a bit differently. Here are the two main changes that make this version perfect for amigurumi:
- Working in the Round (No Turning): In the classic version, you typically work the first row on the right side and then turn your work to do the second row on the wrong side. For this modified version, both rounds are worked on the right side. This ensures that the “pretty” side of the stitch always faces out on your toys.
- The Second Round Choice (SC vs. HDC): While the classic star stitch usually uses half double crochets (hdc) in the second row to close the stars, we use single crochets (sc) here. This keeps the stitch height more compact and the texture tighter, which is exactly what you want when making a sturdy, high-quality crochet doll.
Understanding the Rhythm of the Daisy Stitch
The Daisy Stitch is a beautiful two-round process that requires a bit of patience, but the result is a stunning, flower-like texture. Here is how the magic happens:
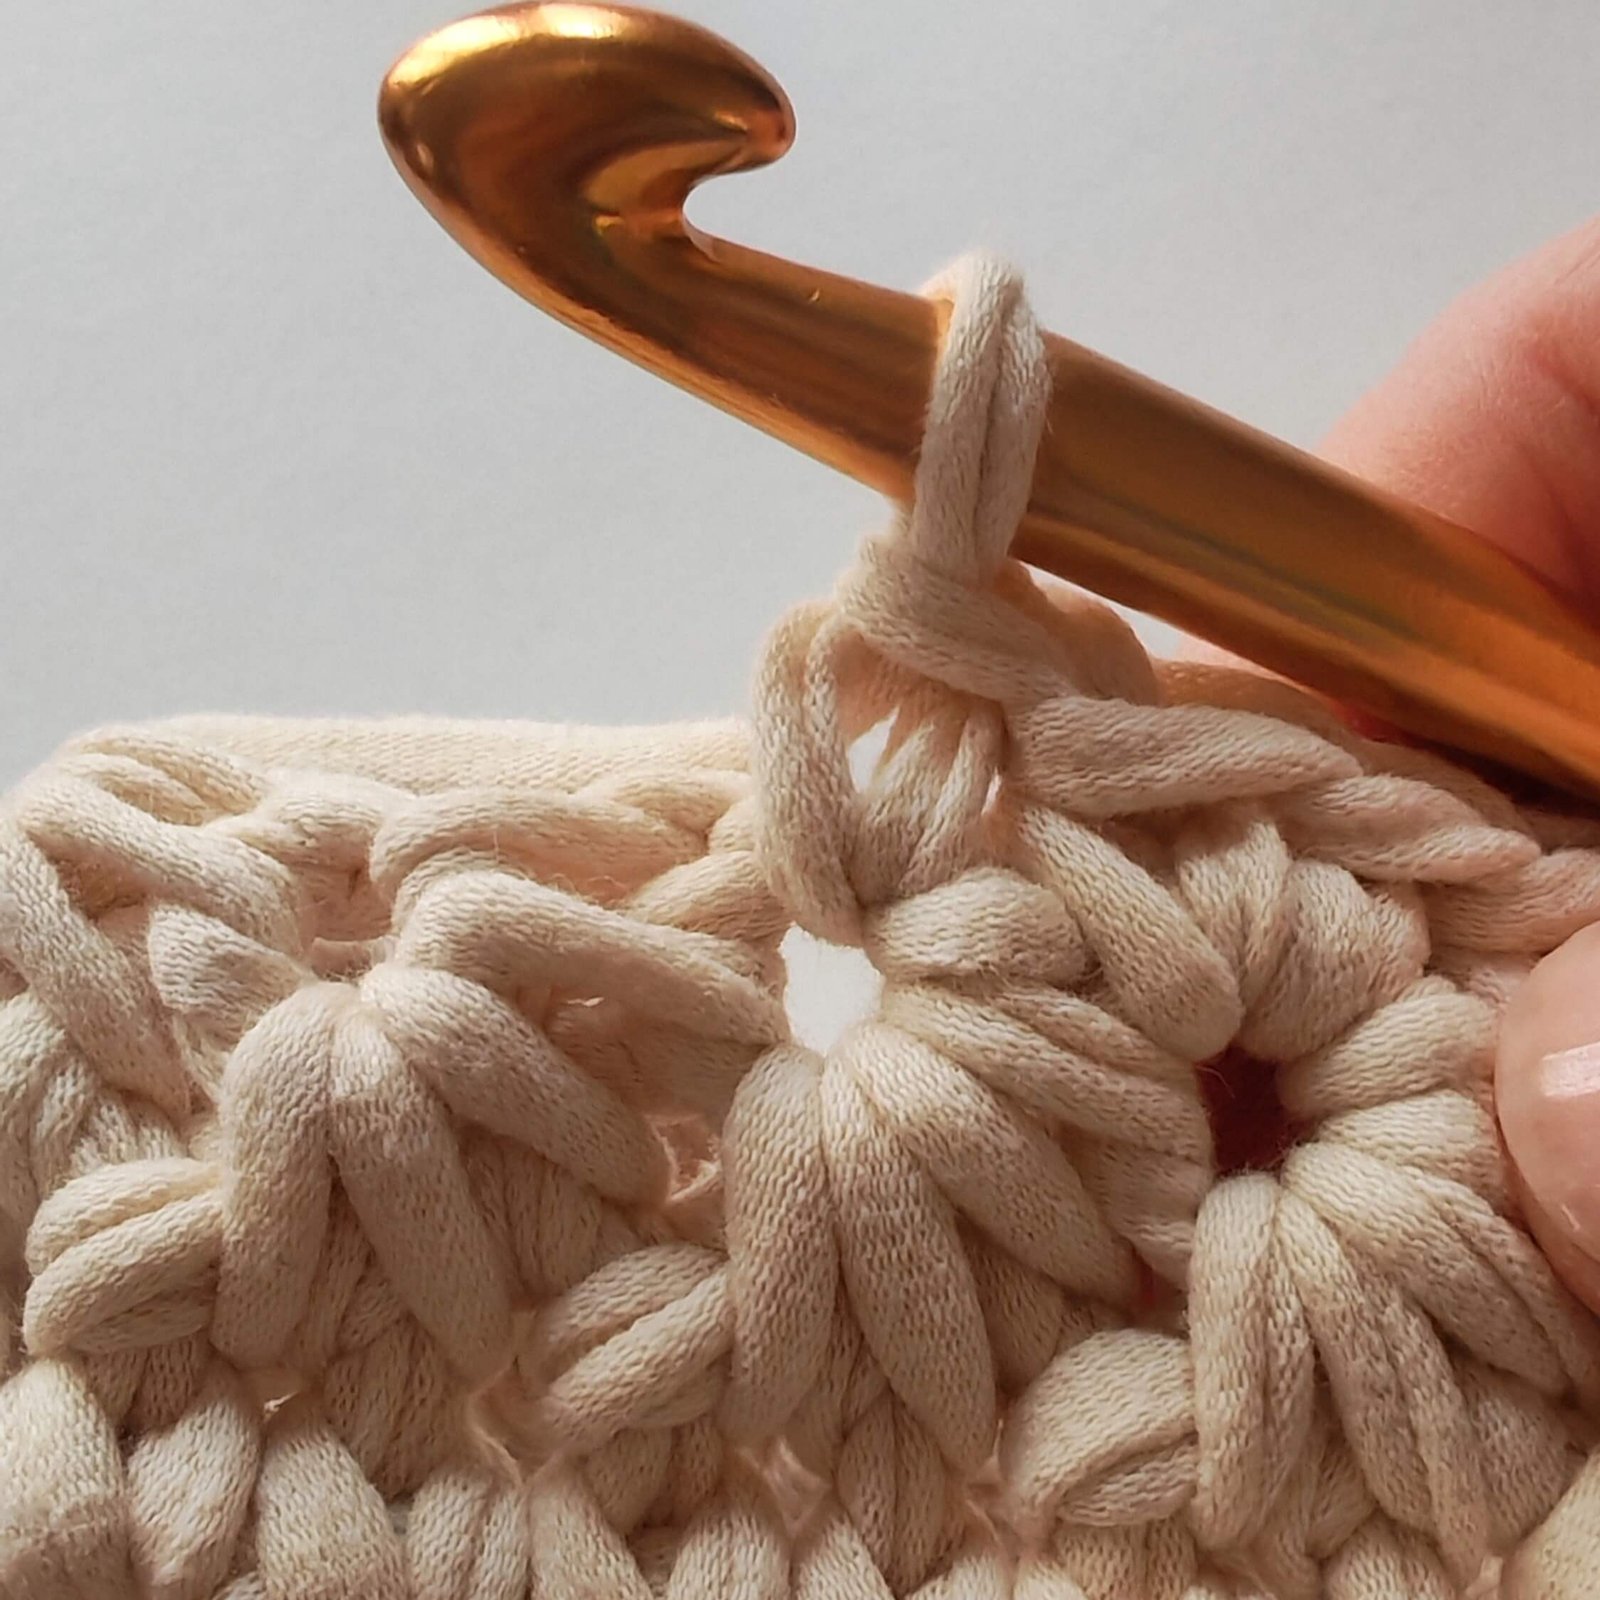
- The First Round: This is where you build the base of your stars. You will pull up loops to create the “spokes” and then close them with a chain stitch. This crucial chain stitch forms the “eye“ of the star.
- The Second Round: In this round, you will “bloom” the star. By working two single crochets into each “eye“ you created in the previous round, you form the top two petals of the flower, completing the daisy look.
It is important to keep your tension consistent, especially when pulling up those loops in the first round, to ensure each “eye” is easy to find when you come back around.
Step-by-Step: Creating Your First Star Stitch
To start your crochet star stitch in the round, make sure you are working on the right side of your project. This technique is a two-round process that will transform your single crochets into a beautiful floral texture.
Round 1: Building the Base and the “Eye”
The first star of the round is slightly different because you need to create the initial loops from your starting chain.
Step 1: The First Star
- Ch 2.
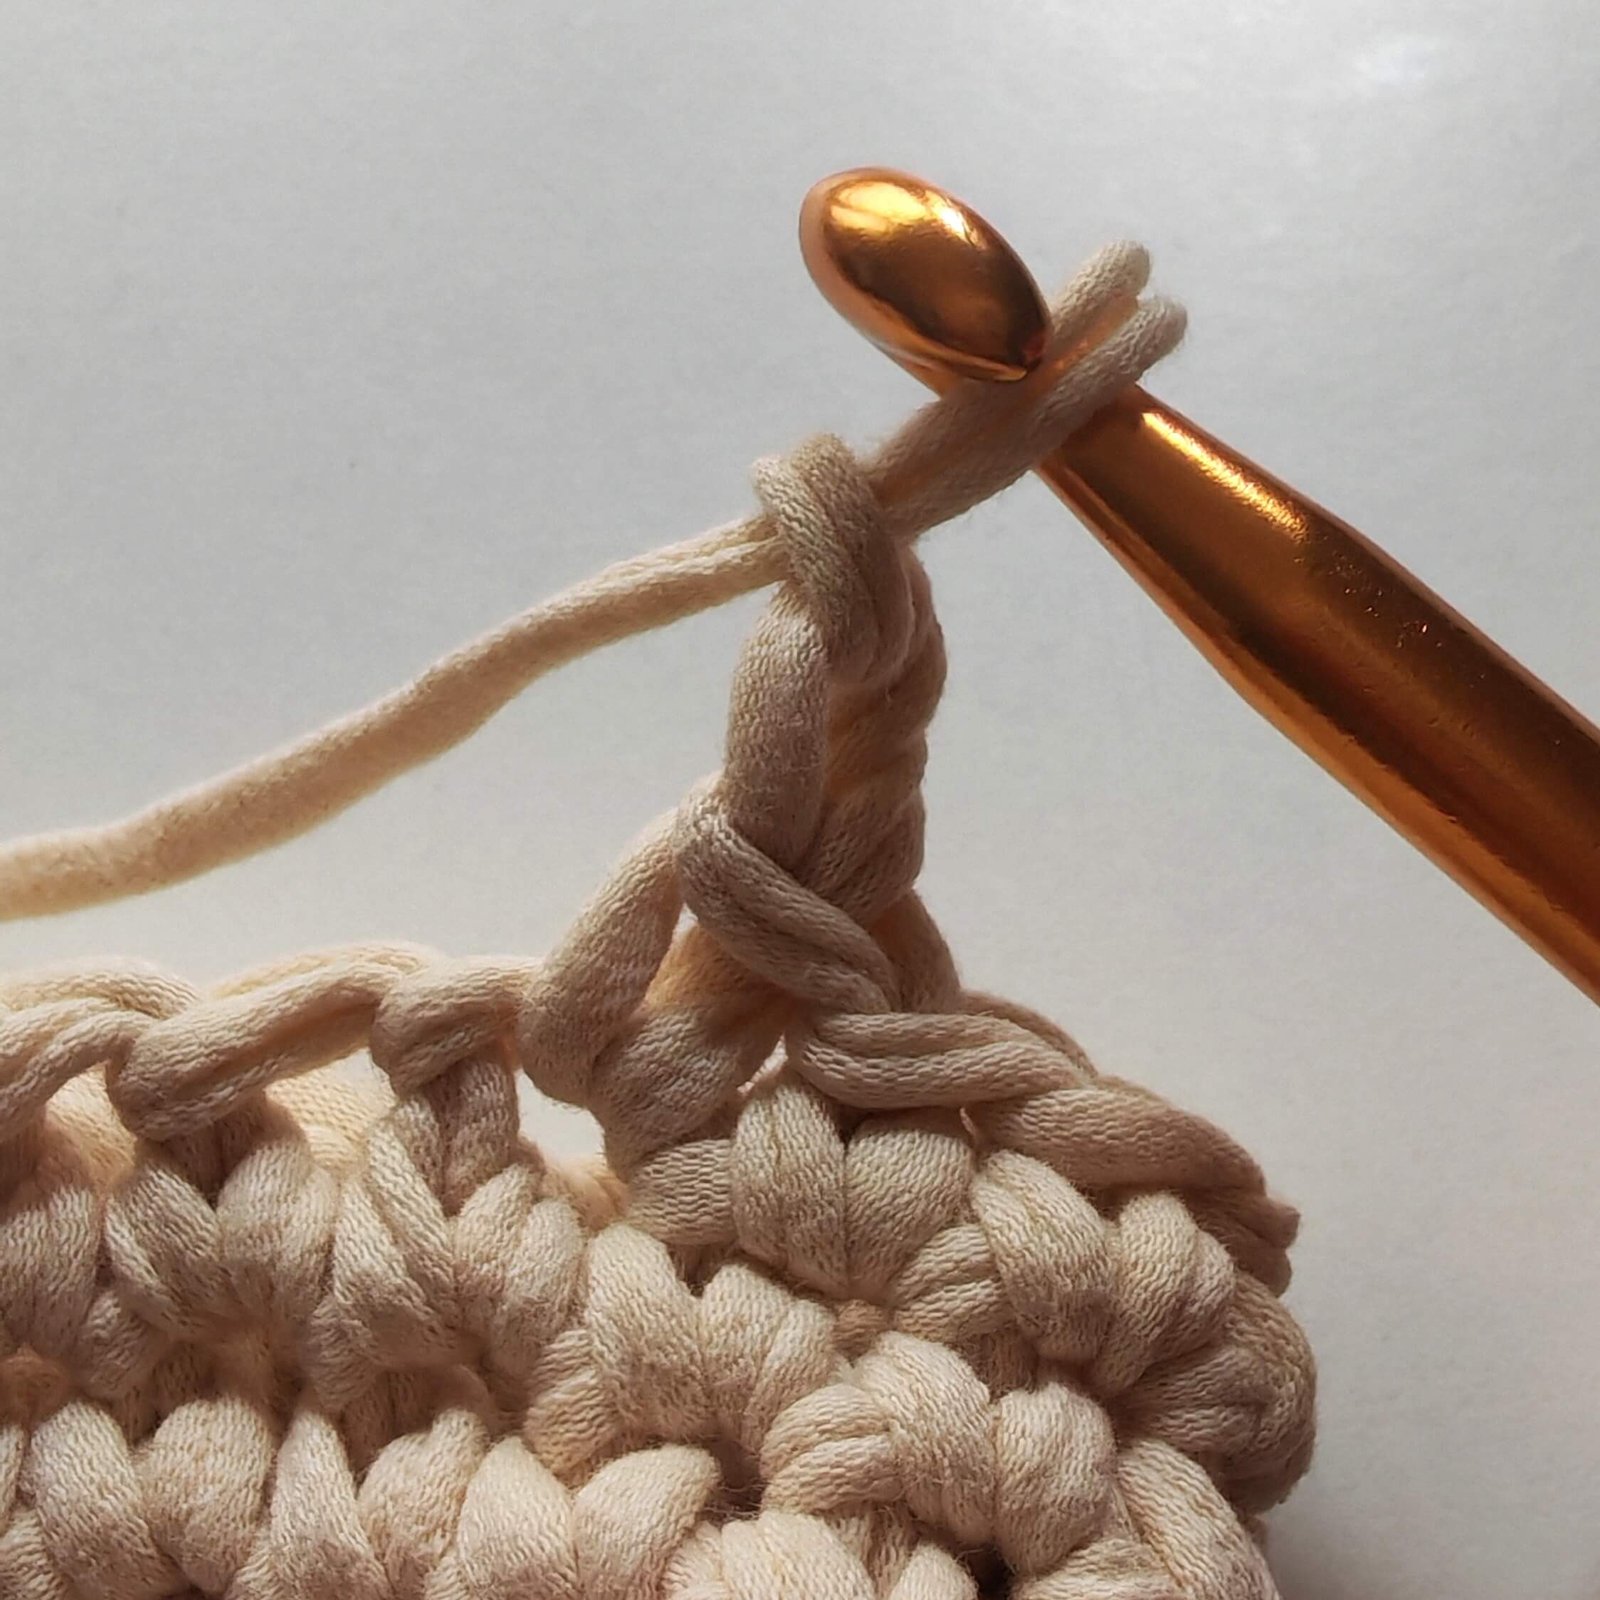
- Insert hook into the 2nd chain from hook and pull up a loop (2 loops on hook).
- Insert hook into the “body” (the side loop) of the previous stitch and pull up a loop (3 loops on hook).
- Insert hook into the base of the same stitch where the chain was made and pull up a loop (4 loops on hook).
- Insert hook into the next stitch and pull up a loop (5 loops on hook).
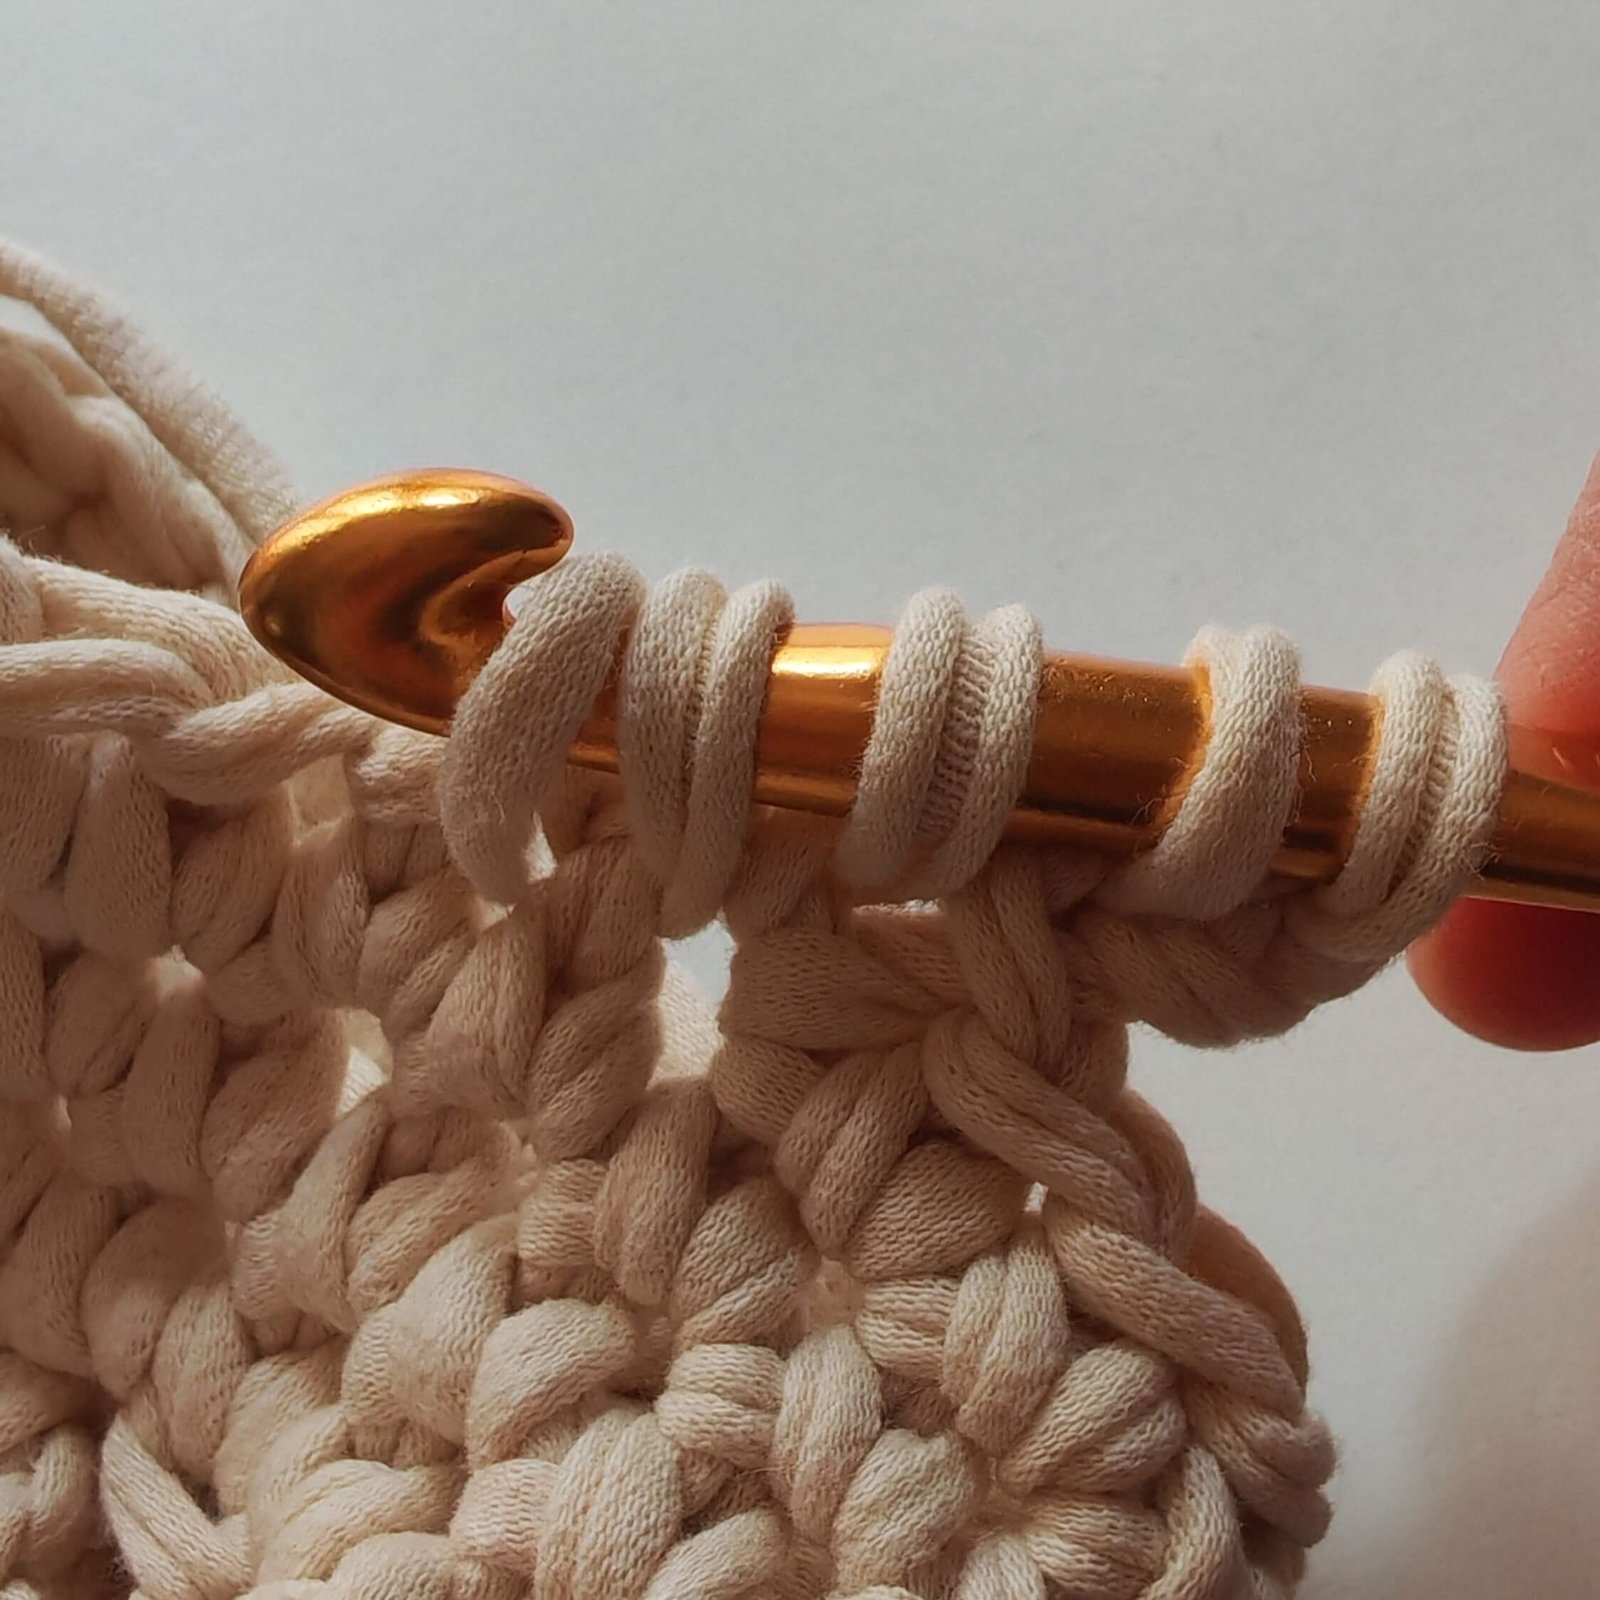
- Insert hook into the following stitch and pull up a loop (6 loops on hook).
- Yarn over and pull through all 6 loops.
- Chain 1 to form the “eye” of the star.
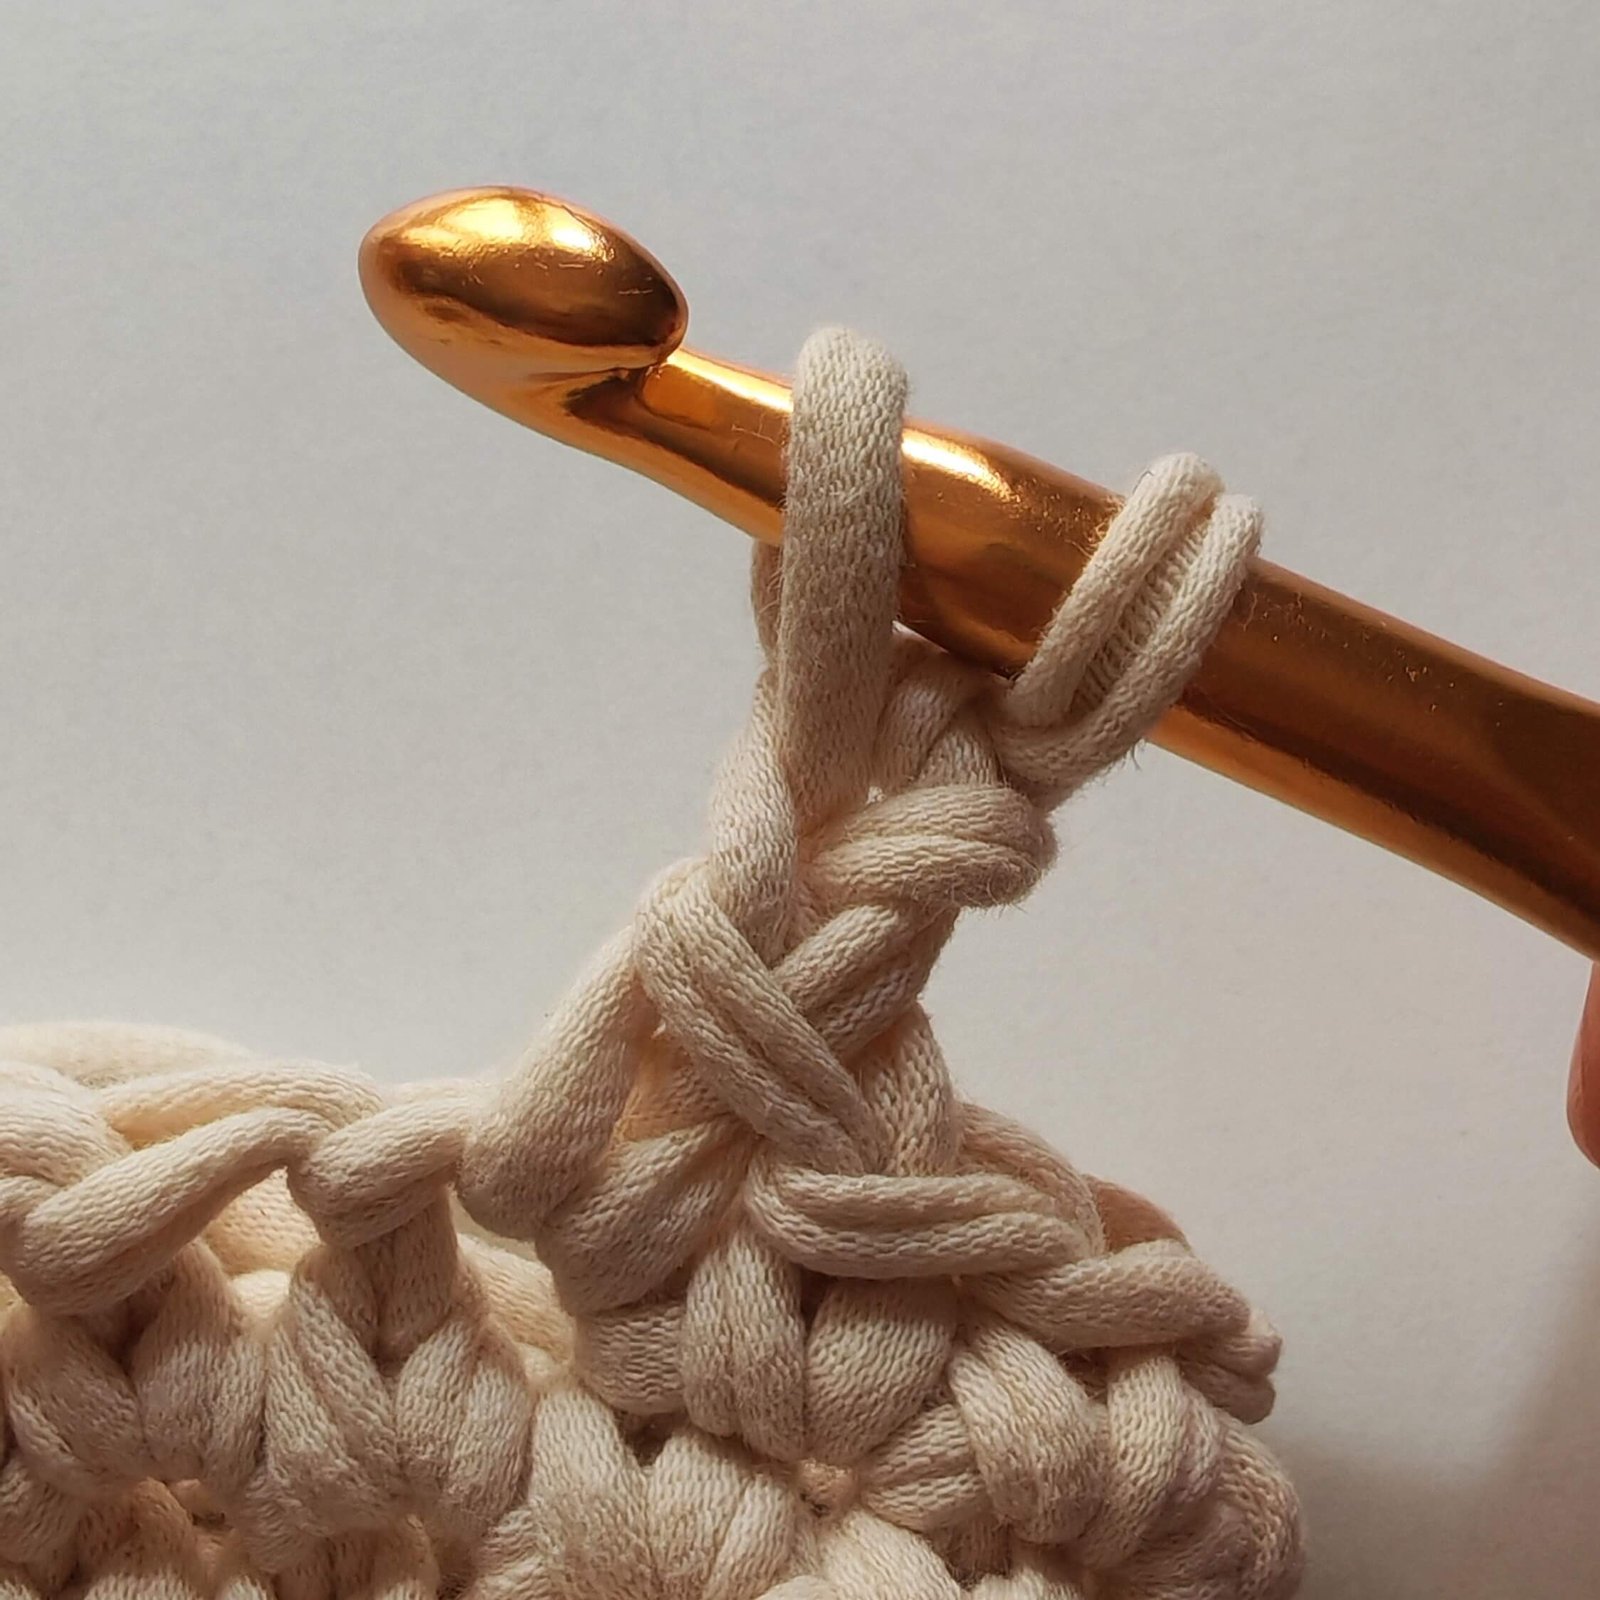
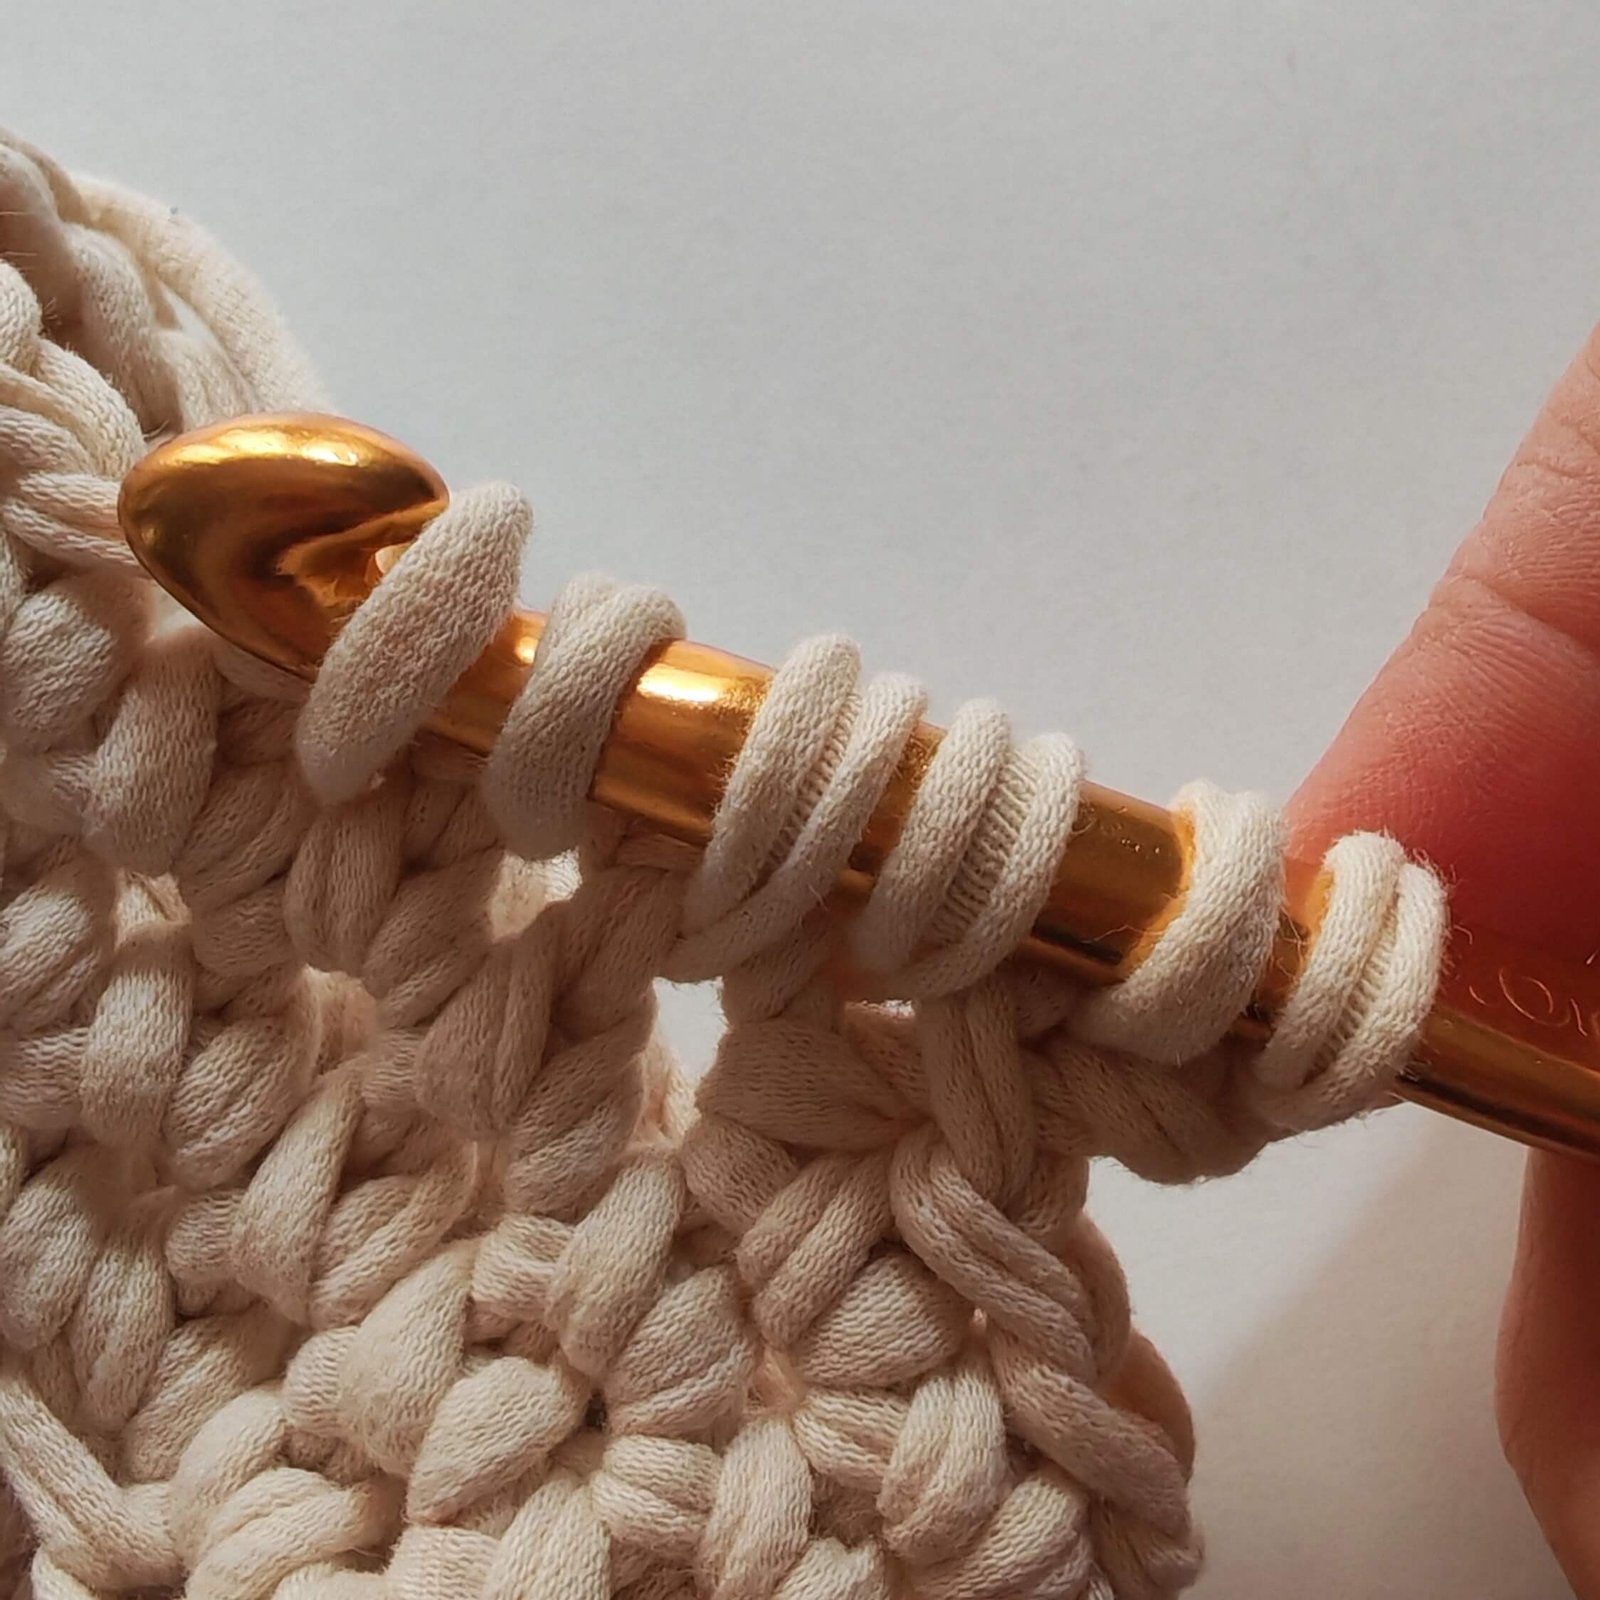
Step 2: Subsequent Stars
For every following star, you will already have 1 loop on your hook:
- Insert hook into the “eye” of the previous star and pull up a loop (2 loops on hook).
- Insert hook into the “body” (the last loop of the previous star) and pull up a loop (3 loops on hook).
- Insert hook into the same stitch where the last loop of the previous star was worked and pull up a loop (4 loops on hook).
- Insert hook into the next stitch and pull up a loop (5 loops on hook).
- Insert hook into the following stitch and pull up a loop (6 loops on hook).
- Yarn over, pull through all 6 loops, and chain 1 to close.
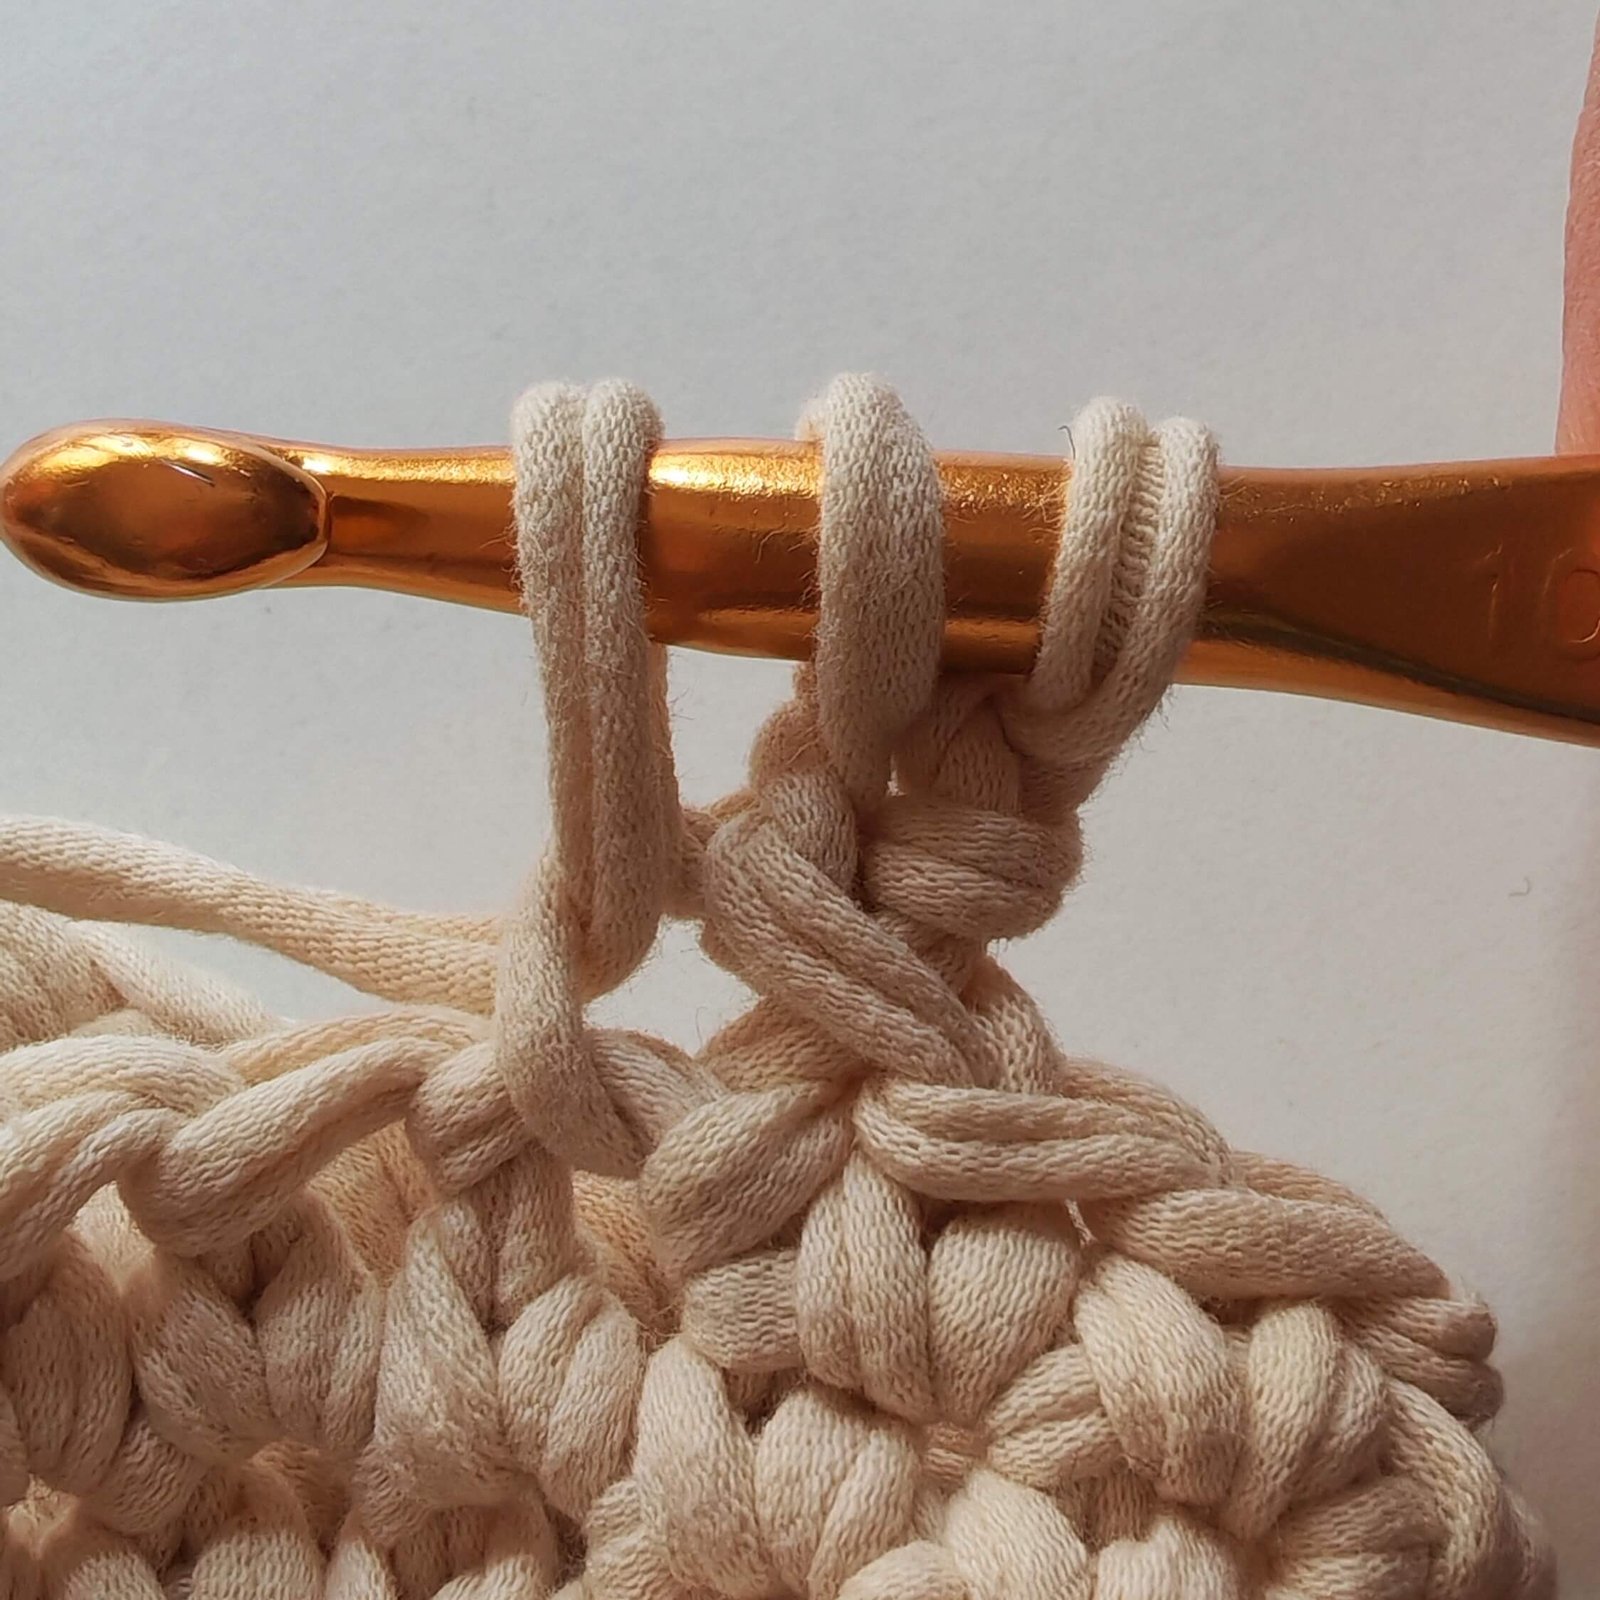
For the last star of the round:
- Pull up all 6 loops as usual.
- Yarn over, pull through all 6 loops.
- Instead of Ch 1, slip stitch into the initial Ch 2 from the start.
This joins the round perfectly!
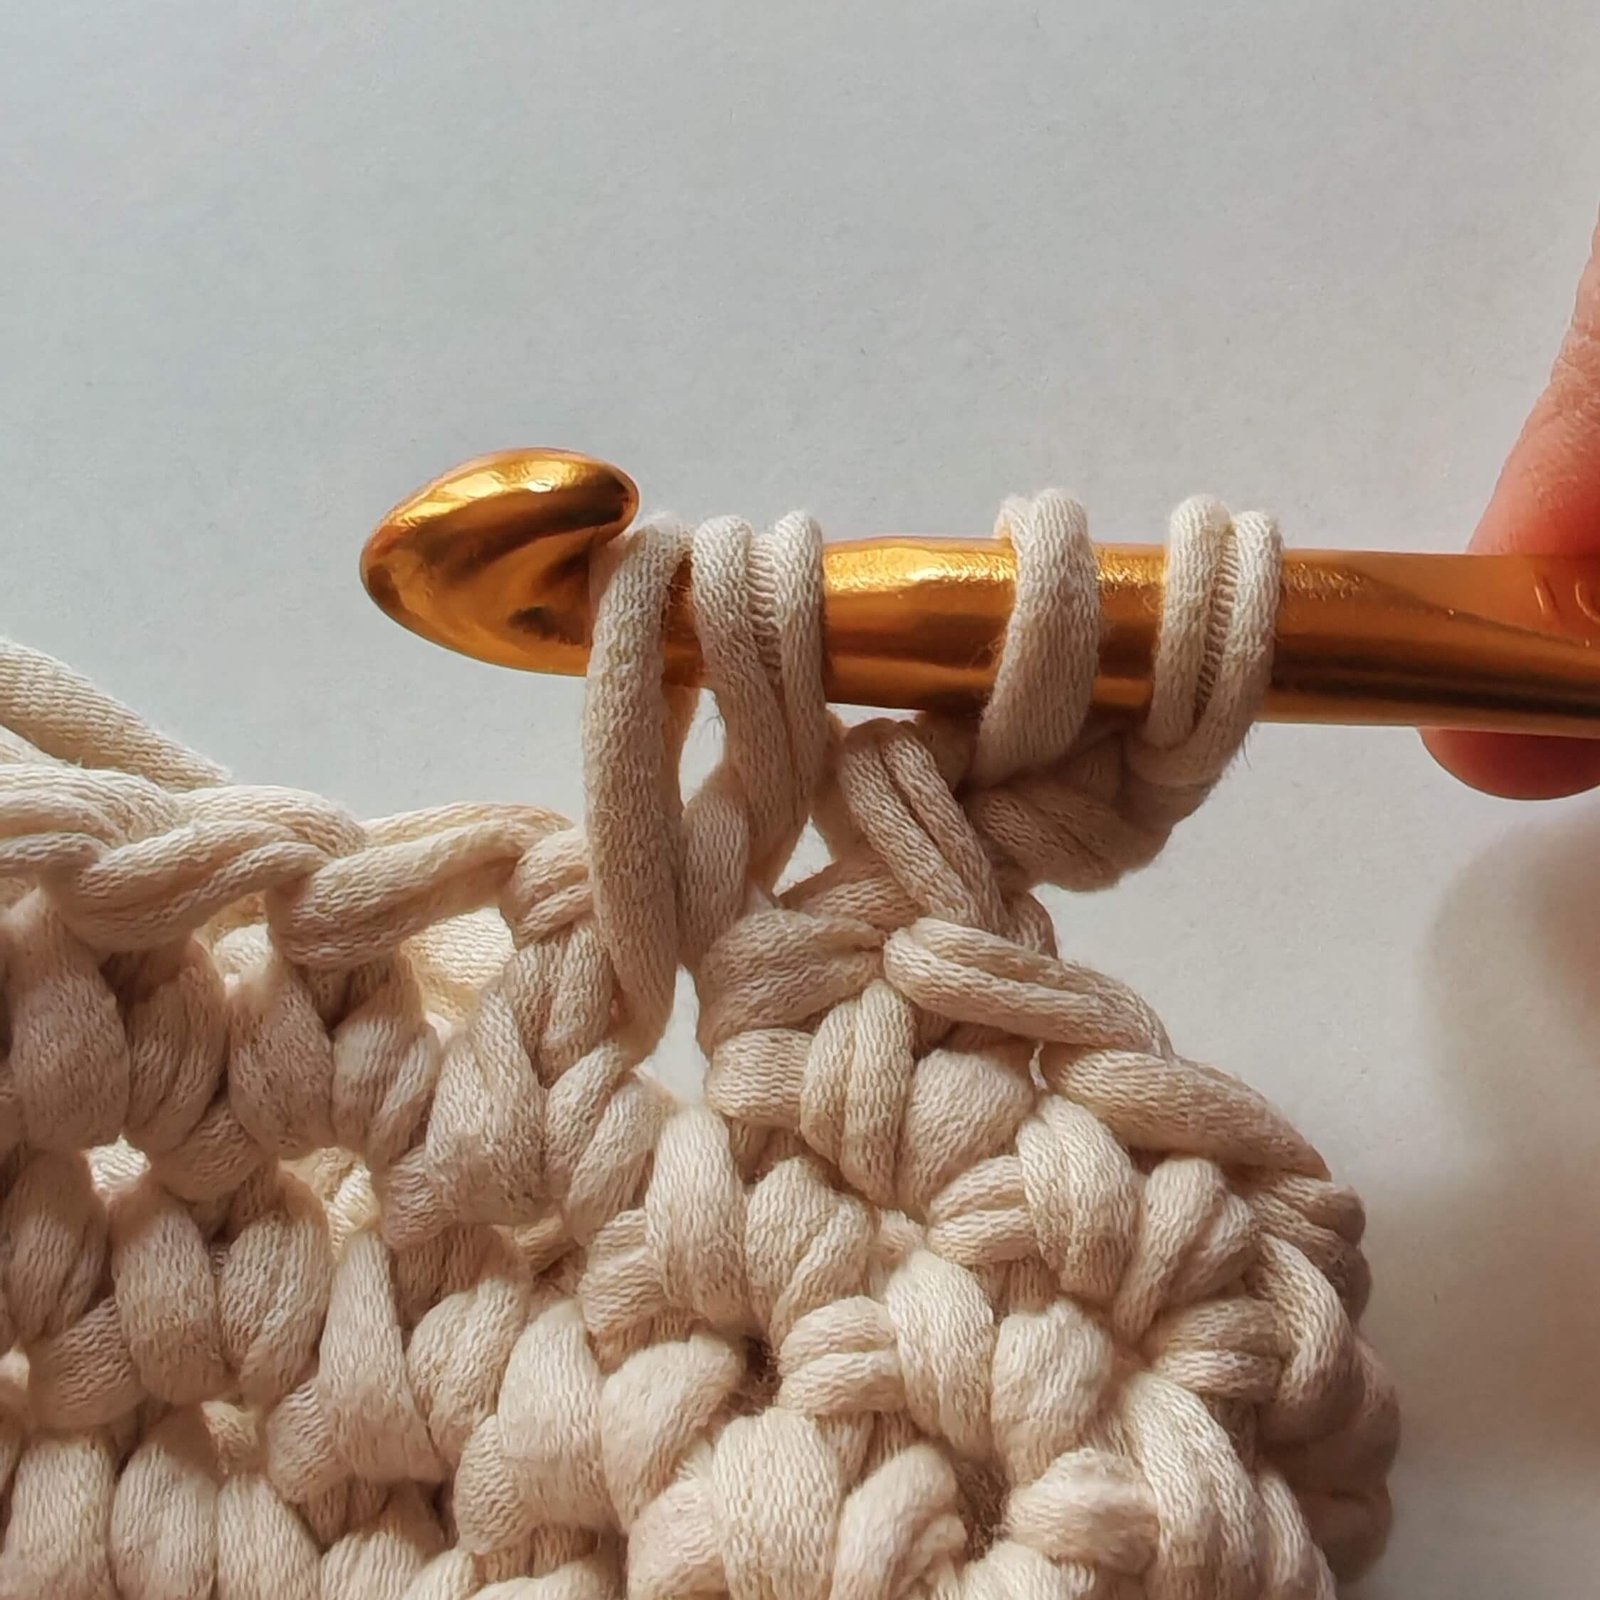
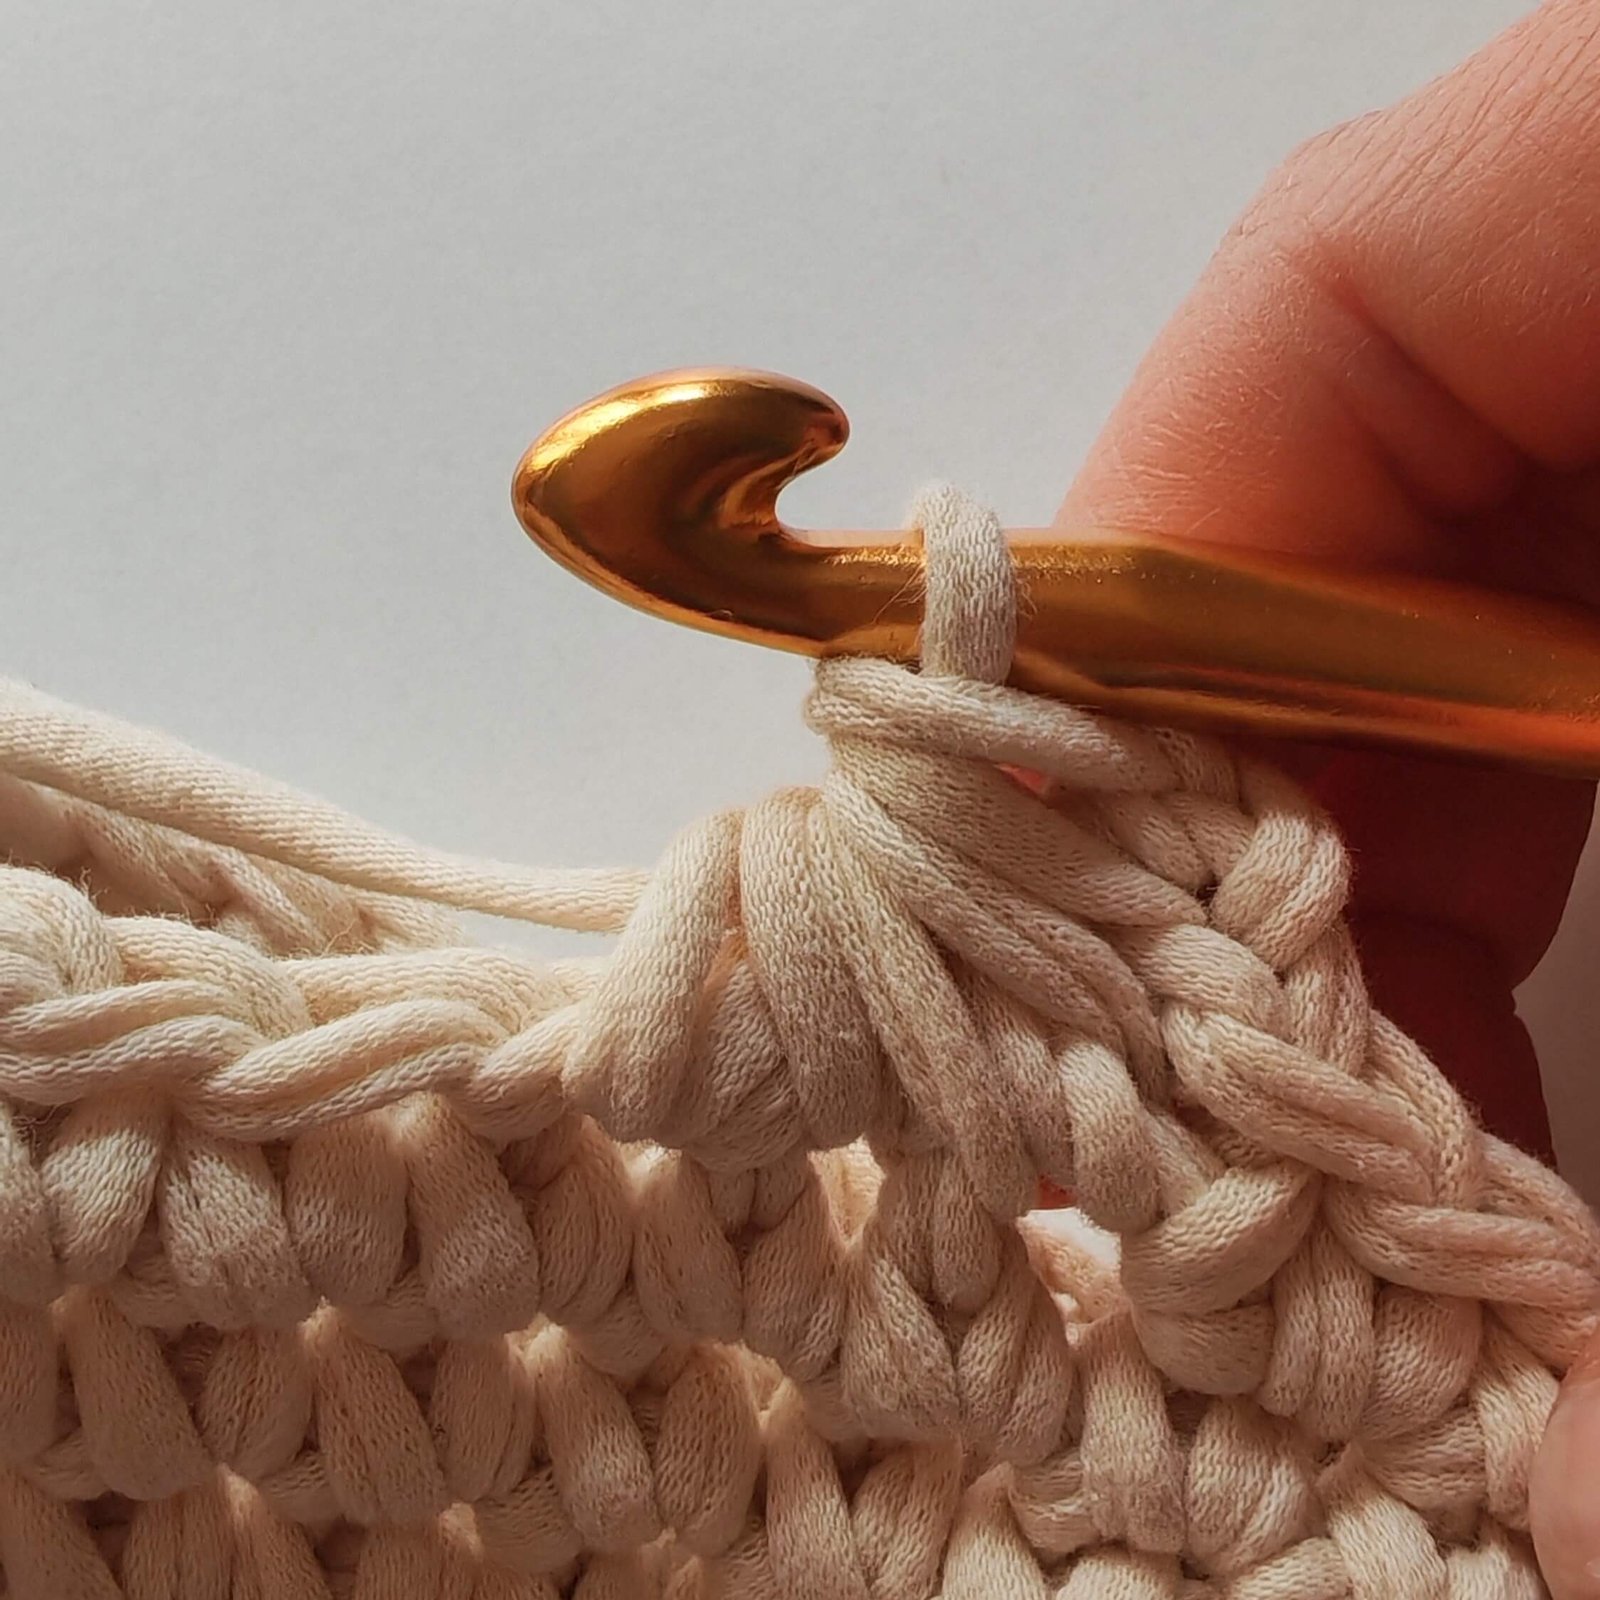
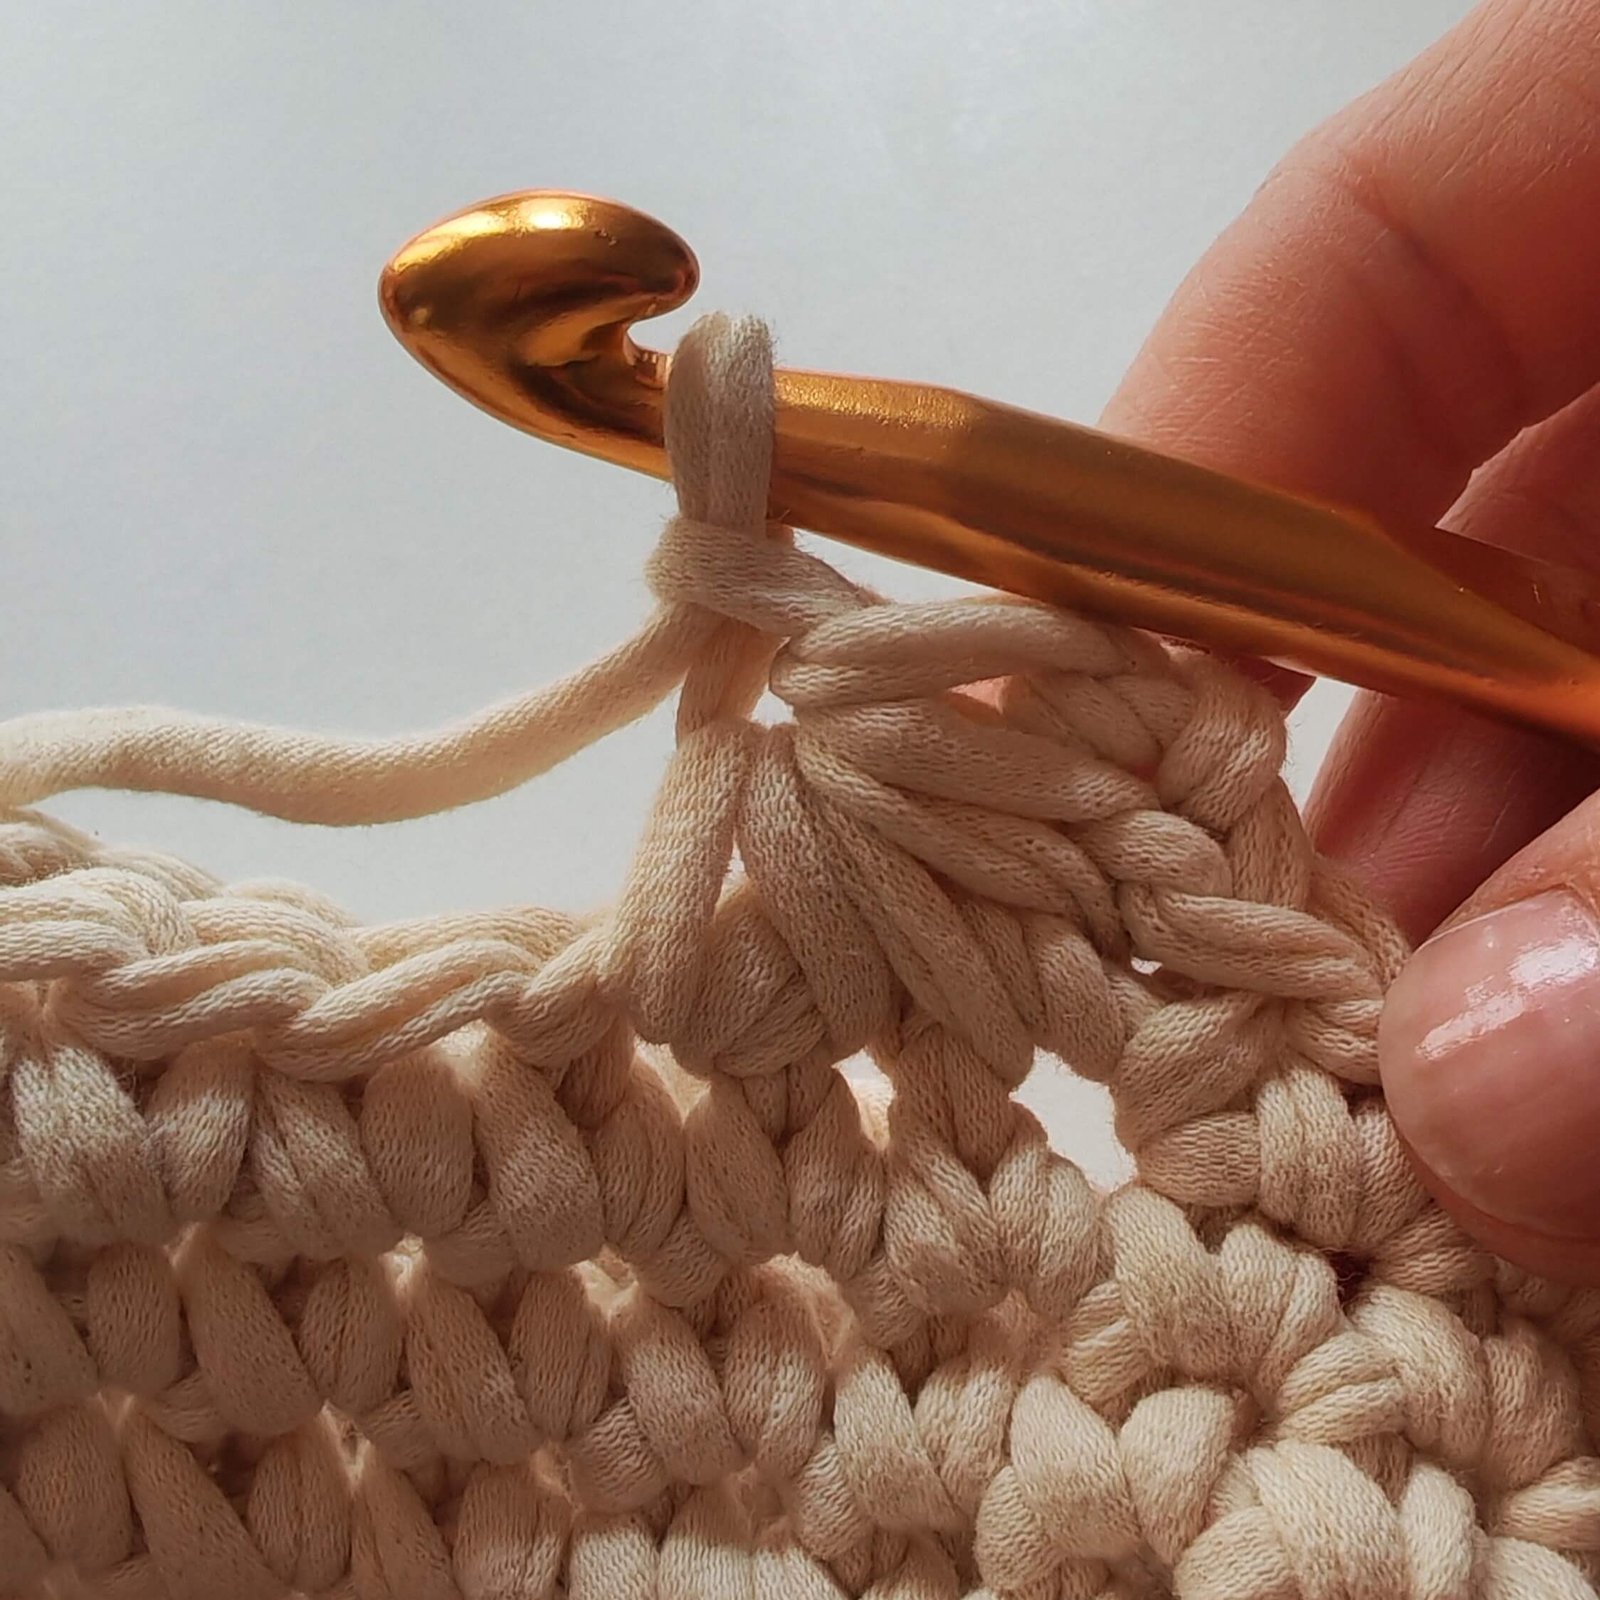
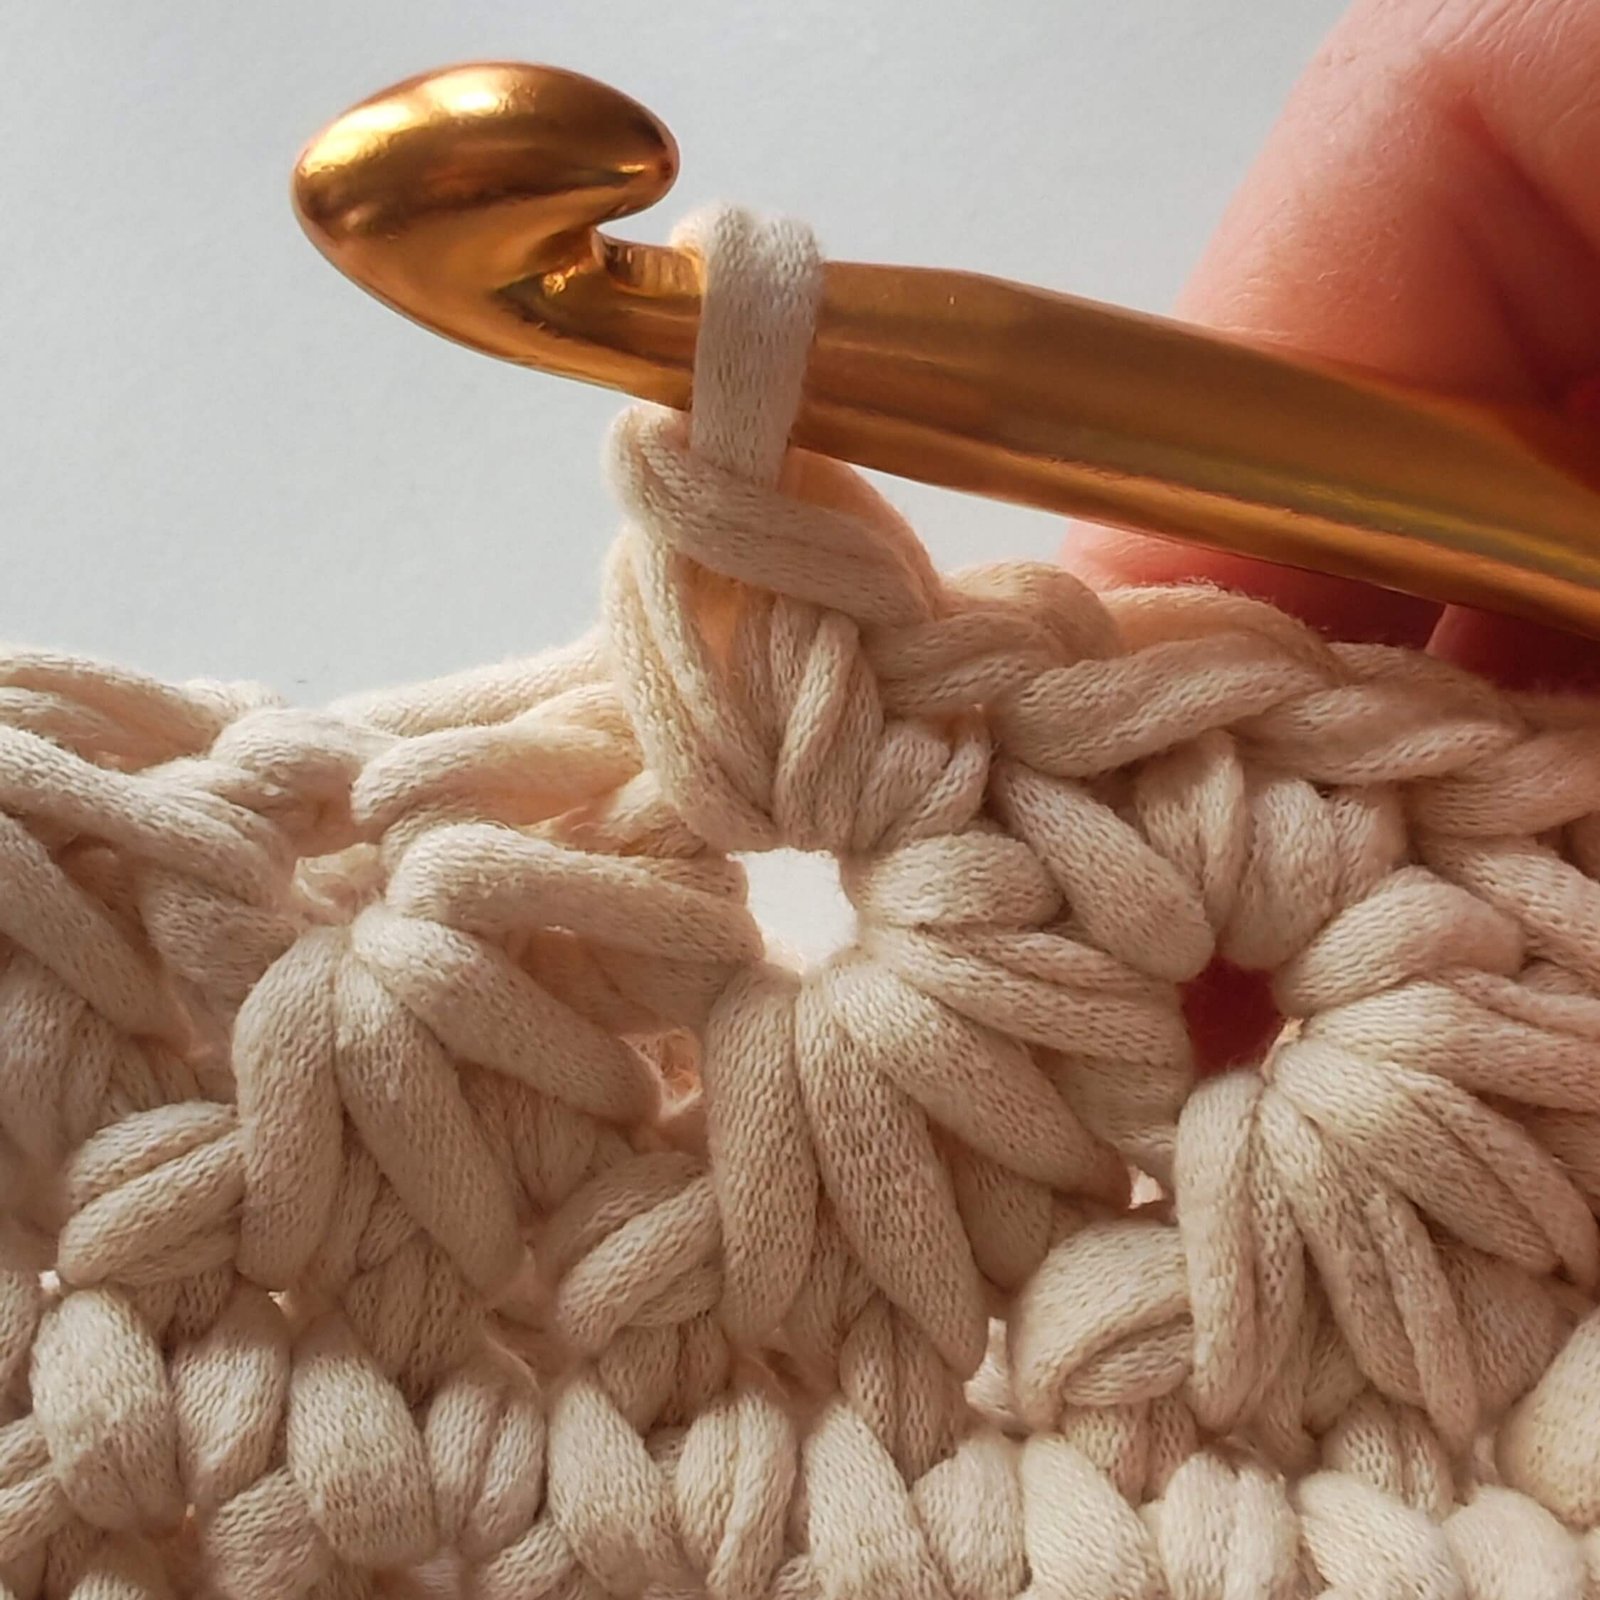
Round 2: Blooming the Daisy
Now that you have completed the base, it’s time to give the stars their signature “Daisy” look.
- The Finish: For the second round of this technique, you will work 2 single crochets (2 sc) into every “eye” of the stars from the previous round.
- By placing two stitches in that central point, you create the top two petals of the flower, perfectly completing the star shape.
Crochet Star Stitch in the Round – Daisy Stitch by EmmaS Dolls
If you’ve already gone through the written instructions and photos above but still find the star stitch a bit tricky, don’t worry! To make it even easier for you to master this beautiful texture, I have prepared a detailed step-by-step video tutorial. Watch the video below to see exactly where to insert your hook and how to maintain the perfect tension while working in the round.
Crochet Star Stitch in the Round – Daisy Stitch by EmmaS Dolls
Pro Tips for a Flawless Star Stitch Finish
To ensure your crochet star stitch in the round looks high-end and neat, pay close attention to your tension. Because this stitch requires pulling up six loops at once, the fabric can easily become too tight or start to “cup” (curl inward). My best advice is to pull your loops slightly taller than you would for a standard single crochet. If you find it difficult to pull your hook through all six loops, try using a hook that is half a size larger (e.g., switching from a 2.5mm to a 3.0mm) to keep the texture soft and breathable.
When it comes to counting your stitches, the easiest way to stay on track is to count the “eyes” of the stars. If your pattern calls for 12 stars in a round, you must have exactly 12 holes (eyes) at the end of the first round. In the following round, when you work your 2 sc into each eye, you should end up with 24 stitches in total.
The beauty of the Daisy Stitch is its versatility in amigurumi. Beyond the onesie for my Daisy the Spring Bunny, this stitch is perfect for adding texture to doll accessories like beanies, tiny baskets, or even as a decorative border on a plushie’s sweater. It provides that embossed, luxury feel that makes any handmade toy truly stand out from the crowd.
Common Questions & Troubleshooting (FAQ)
Why is my work curling or pulling inward? This usually happens if your tension is too tight. The crochet star stitch in the round creates a dense fabric, so try to pull your loops a bit taller. If it still curls, switching to a 0.5mm larger hook for the star rounds should fix it!
How do I count my stitches in this round? Always count the “eyes” (the little holes) created by the ch1 in the first round. Each eye represents one star. In the second round, you will have double the number of stitches because we work 2sc into each eye.
Final Thoughts & Next Steps
Mastering the Daisy Stitch opens up so many creative possibilities for your handmade toys. If you are ready to put this technique into practice, you can find the premium, ad-free PDF version of Daisy the Spring Bunny in my Etsy shop and on Ravelry.
Looking to level up even more? Check out my other Advanced Amigurumi Techniques for more tips on achieving that professional, high-end look.
Don’t forget to sign up for my newsletter! I have many more free patterns and deep-dive tutorials coming your way, and I wouldn’t want you to miss them. If you make something using this stitch, please share your work on Instagram and tag me @emmasdollsstudio—I absolutely love seeing your beautiful creations!
Pin It for Later!
Crochet Star Stitch in the Round – Daisy Stitch by EmmaS Dolls
Since this pattern is free, please help me keep it that way by not taking screenshots. Keeping the page open while you work supports my studio! Happy crocheting!✨