✨To support my free patterns, this post includes affiliate links for materials I love. Thank you for your support! 💖
There are moments in crochet when you encounter a stitch that completely mesmerizes you with its symmetry and rich texture. The jasmine stitch crochet tutorial I’ve prepared for you today is dedicated to exactly that—a technique that gives every project a luxurious, three-dimensional look and an incredible softness. The jasmine stitch is not just a sequence of loops; it is a true piece of art that creates perfect six-petal flowers right across your fabric.
If you were to ask me what my absolute favorite stitch is, the jasmine stitch would undoubtedly be at the top of the list. There is something magical about the way the yarn intertwines to create a dense yet airy structure. It brings the spirit of spring into every thread, regardless of the season outside. While working on this stitch, it honestly feels as if your hands are blooming a garden that “smells” like the first spring blossoms and the freshness of nature awakening.
This stitch is incredibly versatile and practical. Because of its thickness and sturdy nature, the jasmine stitch is the ideal choice for crafting modern crochet bags that need to hold their shape. It is equally perfect for oversized, squishy scarves that will keep you cozy during chilly days. If you want to add a touch of elegance to your home decor, coasters or decorative pillows made with this flower-like technique quickly become the focal point of any room.
At first glance, it might look intimidating because of the specific way you pull up loops to create the “puff” petals. However, once you master the rhythm, it will become your favorite mindful crochet technique. To make your learning journey as easy as possible, I have created two comprehensive video tutorials: one for crocheting in rows (perfect for scarves and blankets) and another for crocheting in the round (ideal for hats and bottom-up bags).
Perfect for Every Skill Level
Before we dive deep into the jasmine stitch, I want to make sure everyone feels confident starting this project. If you are just beginning your crochet journey, I highly recommend checking out my guides on Crochet Abbreviations, Amigurumi for Beginners, and How to Crochet Basic Stitches. These will give you the solid foundation you need before tackling more textured patterns. For those of you who are already comfortable with the basics and want to explore different tricks, my post on Amigurumi Advanced Techniques is packed with professional secrets to level up your work. And, if you find yourself falling in love with floral motifs today, you absolutely must see my Daisy Stitch tutorial—it’s another wonderful way to bring a garden of yarn to life!
Why the Jasmine Stitch Cochet Tutorial is a Must-Learn
Beyond its beauty, this stitch offers a unique tactile experience. It uses more yarn than your average double crochet, but the result is a fabric that feels premium and handmade in the best way possible. Whether you are an experienced maker or a brave beginner, adding this to your repertoire will elevate your crochet game to a professional level.
Best Yarn Choices for the Jasmine Stitch
To get the most out of your jasmine stitch crochet tutorial, choosing the right yarn is crucial. Because this stitch is composed of multiple “puff” clusters that form the petals, the yarn you choose will determine how well those flowers “bloom.”
- Opt for Smooth Textures: I recommend using a smooth, multi-ply yarn. Avoid “fuzzy” or highly textured yarns (like mohair or boucle) for your first few attempts. A smooth yarn allows the hook to glide easily through the many loops on your hook without snagging, making the process much more enjoyable. Check out the yarn selection at this link. New customers can enjoy a 15% discount on their first purchase.
- Medium Weight (Worsted or DK): For beginners, a category 3 (DK) or category 4 (Worsted) yarn is the “sweet spot.” It’s thick enough to see exactly where your hook needs to go but not so bulky that the stitch becomes heavy or stiff.
- Fiber Content: Cotton blends are fantastic for bags and coasters because they offer great definition and keep the stitch’s shape. If you are making a scarf or a cozy blanket, a high-quality acrylic or a wool blend will provide that signature “squish” that makes the jasmine stitch so irresistible.
- Solid Colors vs. Variegated: If you really want to showcase the intricate geometry of the six-petal flowers, solid colors or very subtle gradients work best. Highly variegated or “busy” yarn can sometimes hide the beautiful floral pattern you are working so hard to create.
Choosing a light-colored yarn for your first practice piece will also help you see the “eye” of the flower more clearly, which is the key to mastering this technique. Once you have your yarn and hook ready, you are all set to follow my video guides for both flat rows and circular projects!
Step-by-Step: Mastering the Jasmine Stitch in Rows
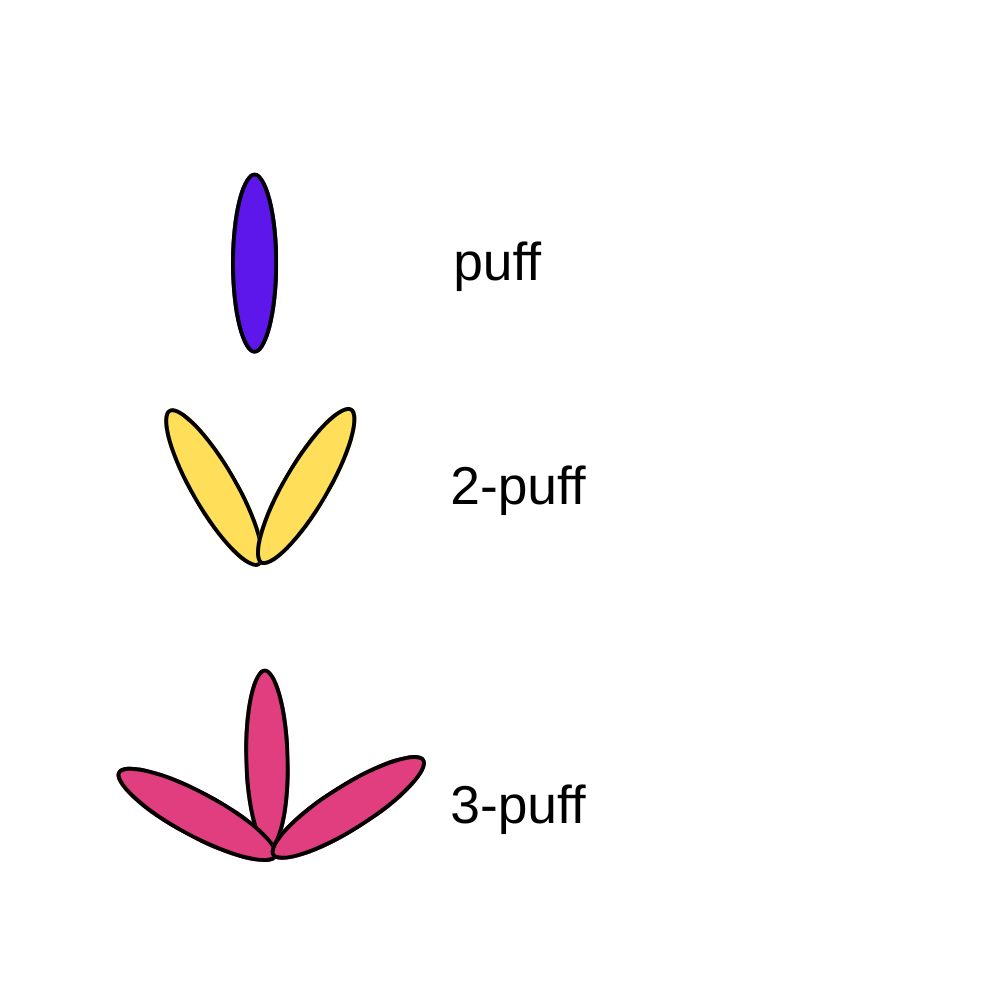
To truly understand the magic of this stitch, we need to break it down into two main components: the Foundation Row and the 3-Puff Stitch clusters.
The Foundation: Creating the Perfect Puff
Every jasmine stitch project begins with a series of individual puff stitches. Here is how you create your first one:
- Start with a slip knot and a single chain.
- Pull up a loop about a half-inch tall (this height is the secret to a fluffy, even texture!).
- Yarn over (yo), insert your hook into the chain, yo, and pull up a loop to the same height.
- Repeat this process 3 times until you have 7 loops on your hook.Note for Bulky Yarn: If you are using a very thick yarn and find the puff is becoming too massive, you can repeat this only 2 times (resulting in 5 loops) to keep the fabric manageable.
- Yarn over, but before pulling through, use your finger to pinch and hold the working yarn at the base of the hook.
- Pull the hook through all 7 loops.
- Insert your hook into the loop of yarn you were holding, yo, and pull through. You now have two loops on your hook. Yo and pull through both to secure the puff.
Continue making these puffs in a chain until you reach your desired length, plus one extra puff to act as your turning height for the first row.
Building the Fabric: The 3-Puff Stitch Technique
Once your foundation is ready, you will move into the heart of the pattern: the 3-Puff Stitch. This is what creates the “petals” of the flower.
Instead of finishing each puff, you will hold them on your hook. You start the first puff as usual, but once you have 7 loops, do not close it. Instead, move to the next “eye” (the center point) and pull up loops for a second puff (adding 6 more loops). Then, move to the third point and pull up loops for a third puff (adding another 6 loops).
With a total of 19 loops on your hook, you will:
- Yarn over and pinch the working yarn at the base.
- Carefully pull through all 19 loops.
- Insert the hook into the held yarn, yo, and pull through.
- Yo and pull through both loops to lock the cluster.
Repeat this 3-puff cluster across the entire row. When you reach the end, turn your work and start the next row with a single puff stitch to gain height, then continue with your 3-puff clusters.
Jasmine Stitch Crochet Tutorial by EmmaS Dolls
Master the Jasmine Stitch in the Round
Crocheting the jasmine stitch in the round is the secret to making those stunning, seamless crochet bags, hats, and circular coasters. While the basic puff technique remains the same, the way we connect the “petals” changes to ensure our circle stays flat and symmetrical.
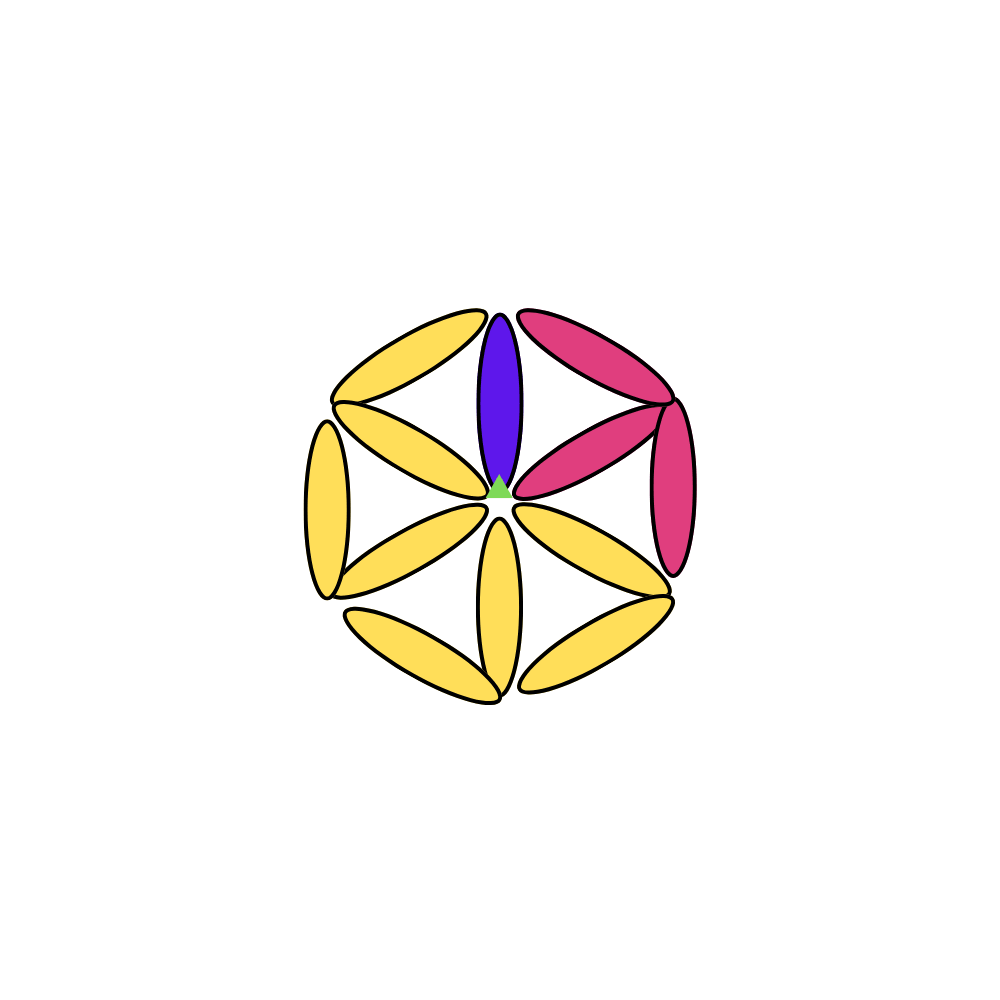
Starting Your Circle (The First Round)
Your project begins with a single puff stitch. From there, we build the first round by repeating a 2-puff stitch (two petals meeting at one “eye”) four times:
- Start your puff as usual, but when you have 7 loops on your hook, do not close it.
- Move to the next point and pull up loops for a second puff, adding 6 more loops (total of 13 loops on your hook).
- Yarn over, pinch the working yarn at the base, and pull through all 13 loops.
- Insert the hook into the held yarn, yo, and pull through. Yo and pull through both loops to secure.
To finish the first round and close the circle perfectly, you will finish with a 3-puff stitch.
Jasmine Stitch Crochet Tutorial by EmmaS Dolls
Jasmine Stitch Crochet Tutorial by EmmaS Dolls
Expanding the Circle (Round Two and Beyond)
To keep the circle growing without curling, we follow a specific increase pattern, much like you would with basic stitches.
- Round 2: Start with a single puff stitch to gain height. Then, repeat a sequence of (3-puff stitch, 2-puff stitch) five times around. To close this round, finish with a 3-puff stitch and a final puff stitch to bridge the gap.
- Round 3: Each subsequent round increases the number of 3-puff clusters. Start with a puff stitch, then repeat the sequence (3-puff x 2, 2-puff) five times. Finish with 3-puff x 2 and a final puff stitch.
As you continue, the number of 3-puff stitches between each 2-puff increase will grow by one in every row. This mathematical precision is what creates that beautiful, flat floral geometry!

Jasmine Stitch Crochet Tutorial by EmmaS Dolls
Video Tutorial: Jasmine Stitch in the Round
If you want to see exactly where to insert your hook to close the round seamlessly, watch my second video tutorial here:
Jasmine Stitch Crochet Tutorial by EmmaS Dolls
Final Thoughts & Creative Ideas
The jasmine stitch may take a little more yarn and a bit more patience than a standard stitch, but the results are incomparable. Whether you are using it to create a sturdy Jasmine stitch bag or a delicate spring scarf, the texture will always be a conversation starter.
Don’t forget to share your finished projects with me on Instagram, Facebook or TikTok (@emmasdollsstudio)! I love seeing how you bring these “yarn flowers” to life. If you found this jasmine stitch crochet tutorial helpful, make sure to subscribe to my YouTube channel for more tips and free patterns.
Explore More Free Patterns on EmmaS Dolls
Once you’ve mastered the jasmine stitch crochet tutorial, why not put your skills to the test with some of my other designs? If you love creating adorable characters, you’ll find plenty of inspiration right here on my website. For a touch of elegance, check out the Lola Ballerina Bunny pattern—she’s a favorite among my readers! Or, if you’re looking for something a bit more adventurous and fun, my Crochet Dinosaur pattern is a must-try. These patterns are completely free and designed to help you practice different techniques while making something truly special.
Get the Ad-Free PDF Versions
I know many of you prefer to have a printed copy or a clean digital file to work from while sitting on the sofa. If you’d like to support my work and get your hands on high-quality, ad-free PDF versions of my designs, please visit my Etsy shop or find me on Ravelry. Every purchase helps me continue providing free content and tutorials for our wonderful crochet community!
Stay in the Loop: Join the Newsletter!
The world of crochet is always growing, and I have so many more exciting projects in the works! From new “cute monster” collections to advanced amigurumi tips, you won’t want to miss what’s coming next to emmasdolls.com. To be the first to know about my latest free patterns, video tutorials, and exclusive updates, make sure to subscribe to my newsletter. Let’s keep creating beautiful things together—one stitch at a time!
Pin it for Later!
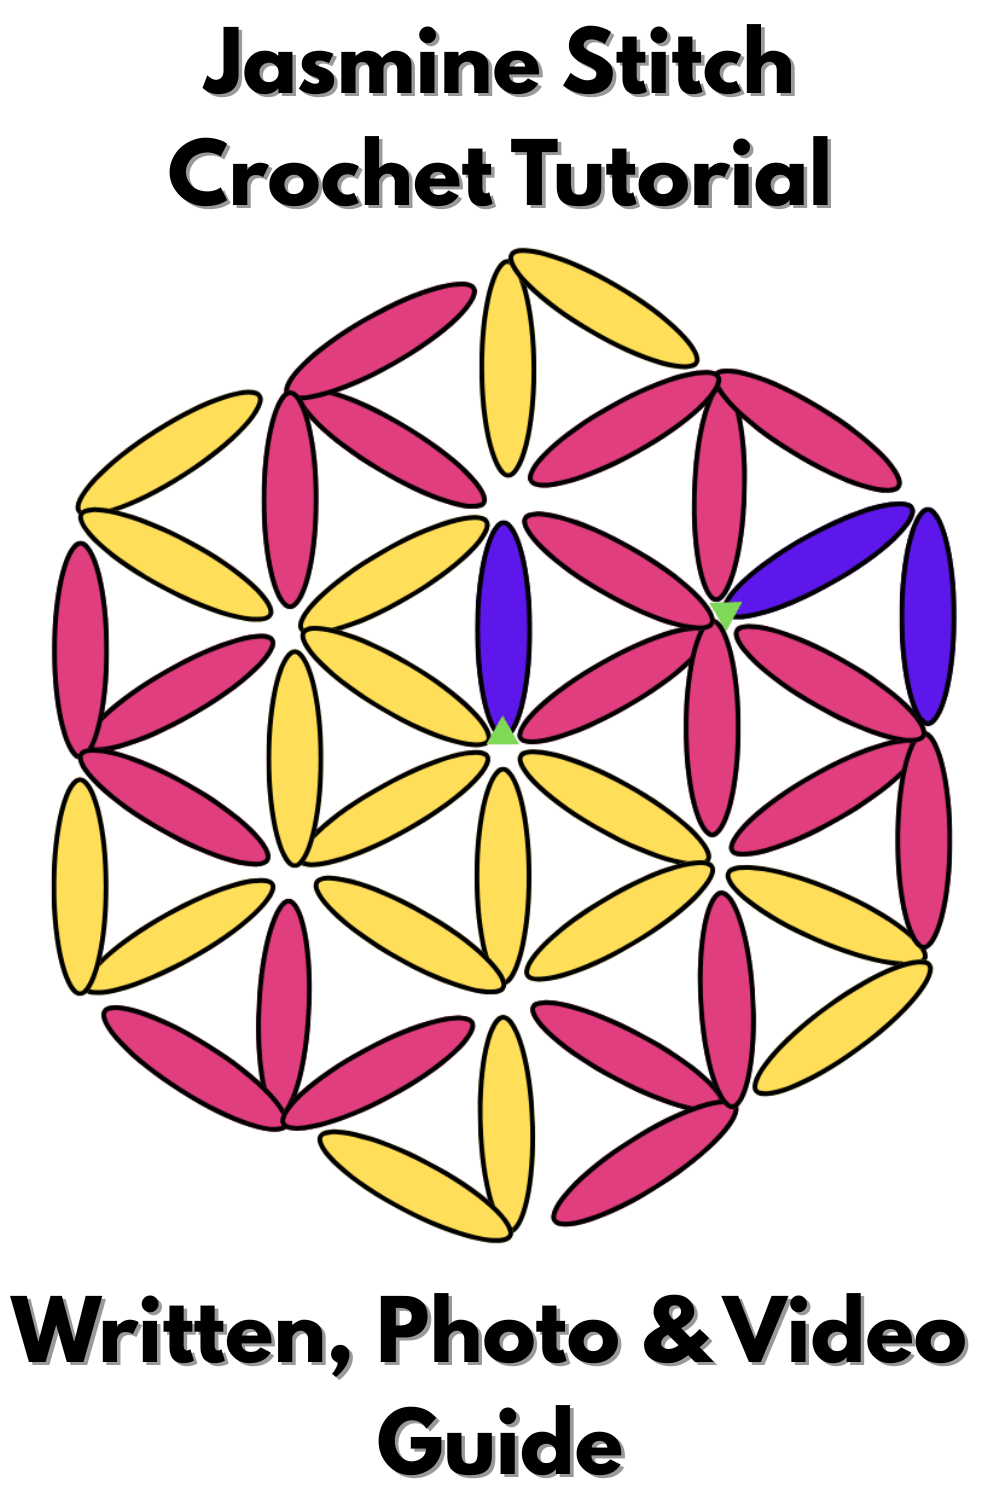
Jasmine Stitch Crochet Tutorial by EmmaS Dolls
Since this pattern is free, please help me keep it that way by not taking screenshots. Keeping the page open while you work supports my studio! Happy crocheting!✨