✨To support my free patterns, this post includes affiliate links for materials I love. Thank you for your support! 💖
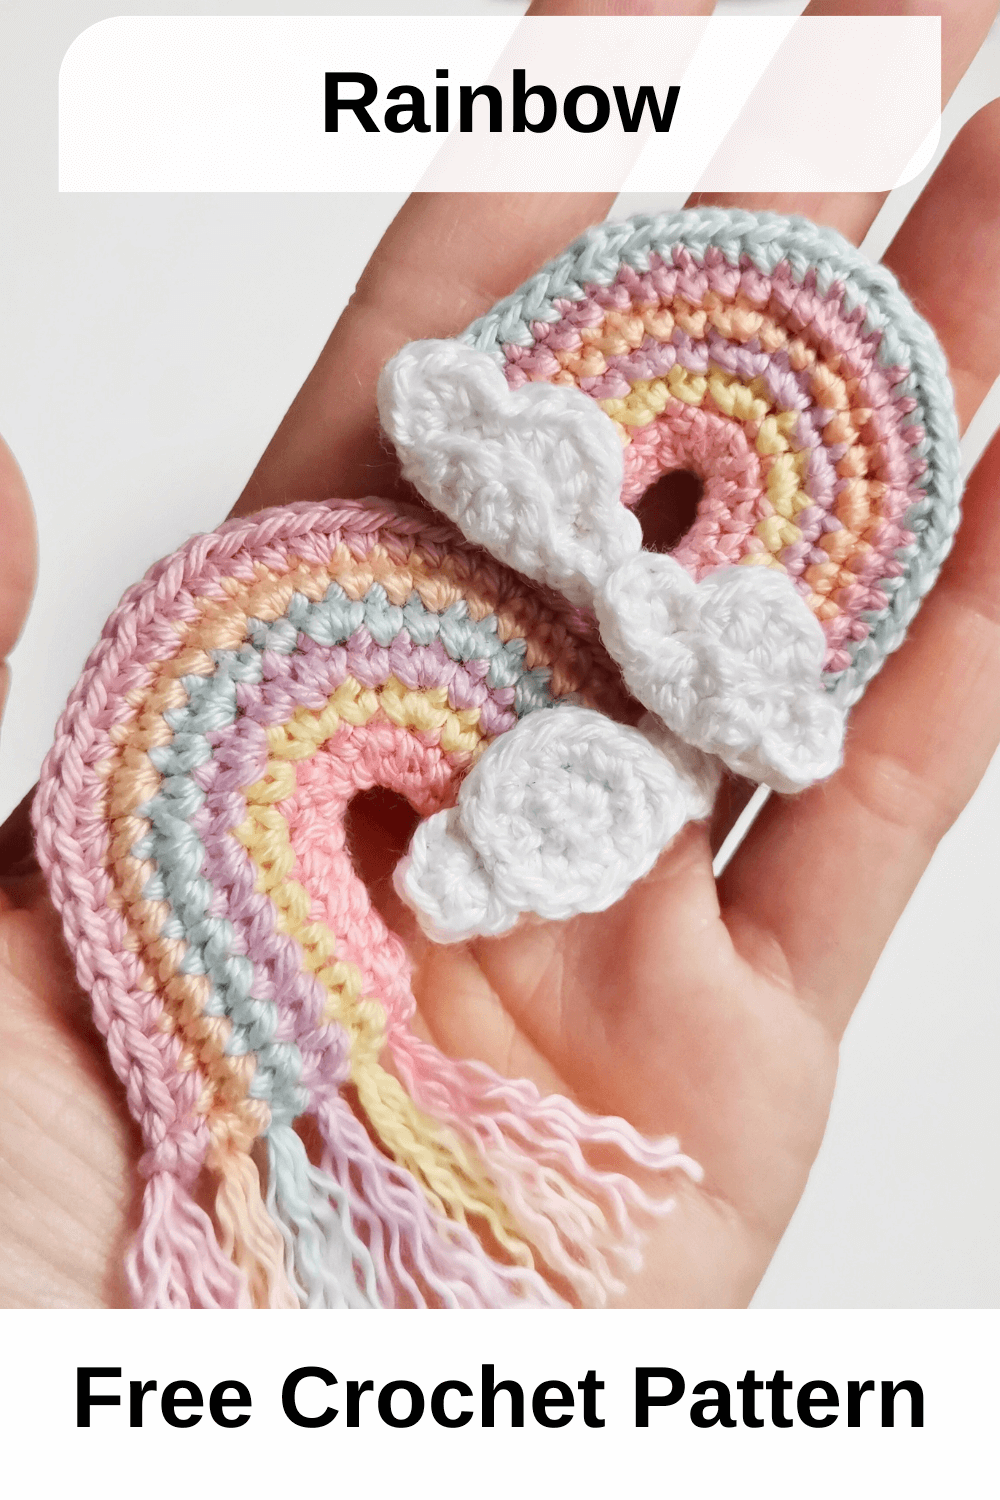
If you are looking for a project that is satisfying, fast, and uses up those tiny balls of yarn sitting in your stash, this free crochet rainbow pattern is for you! At EmmaS Dolls, I believe that the most beautiful things don’t always have to take days to complete. Sometimes, all you need is thirty minutes and some colorful yarn to create something magical.
What makes this pattern so special is its sheer simplicity. It is designed with beginner-friendly stitches, making it an ideal choice if you are just starting your crochet journey or if you need a quick, palette-cleansing project between larger amigurumi designs. You don’t need complex techniques or endless hours—just basic stitches and a little bit of creative inspiration.
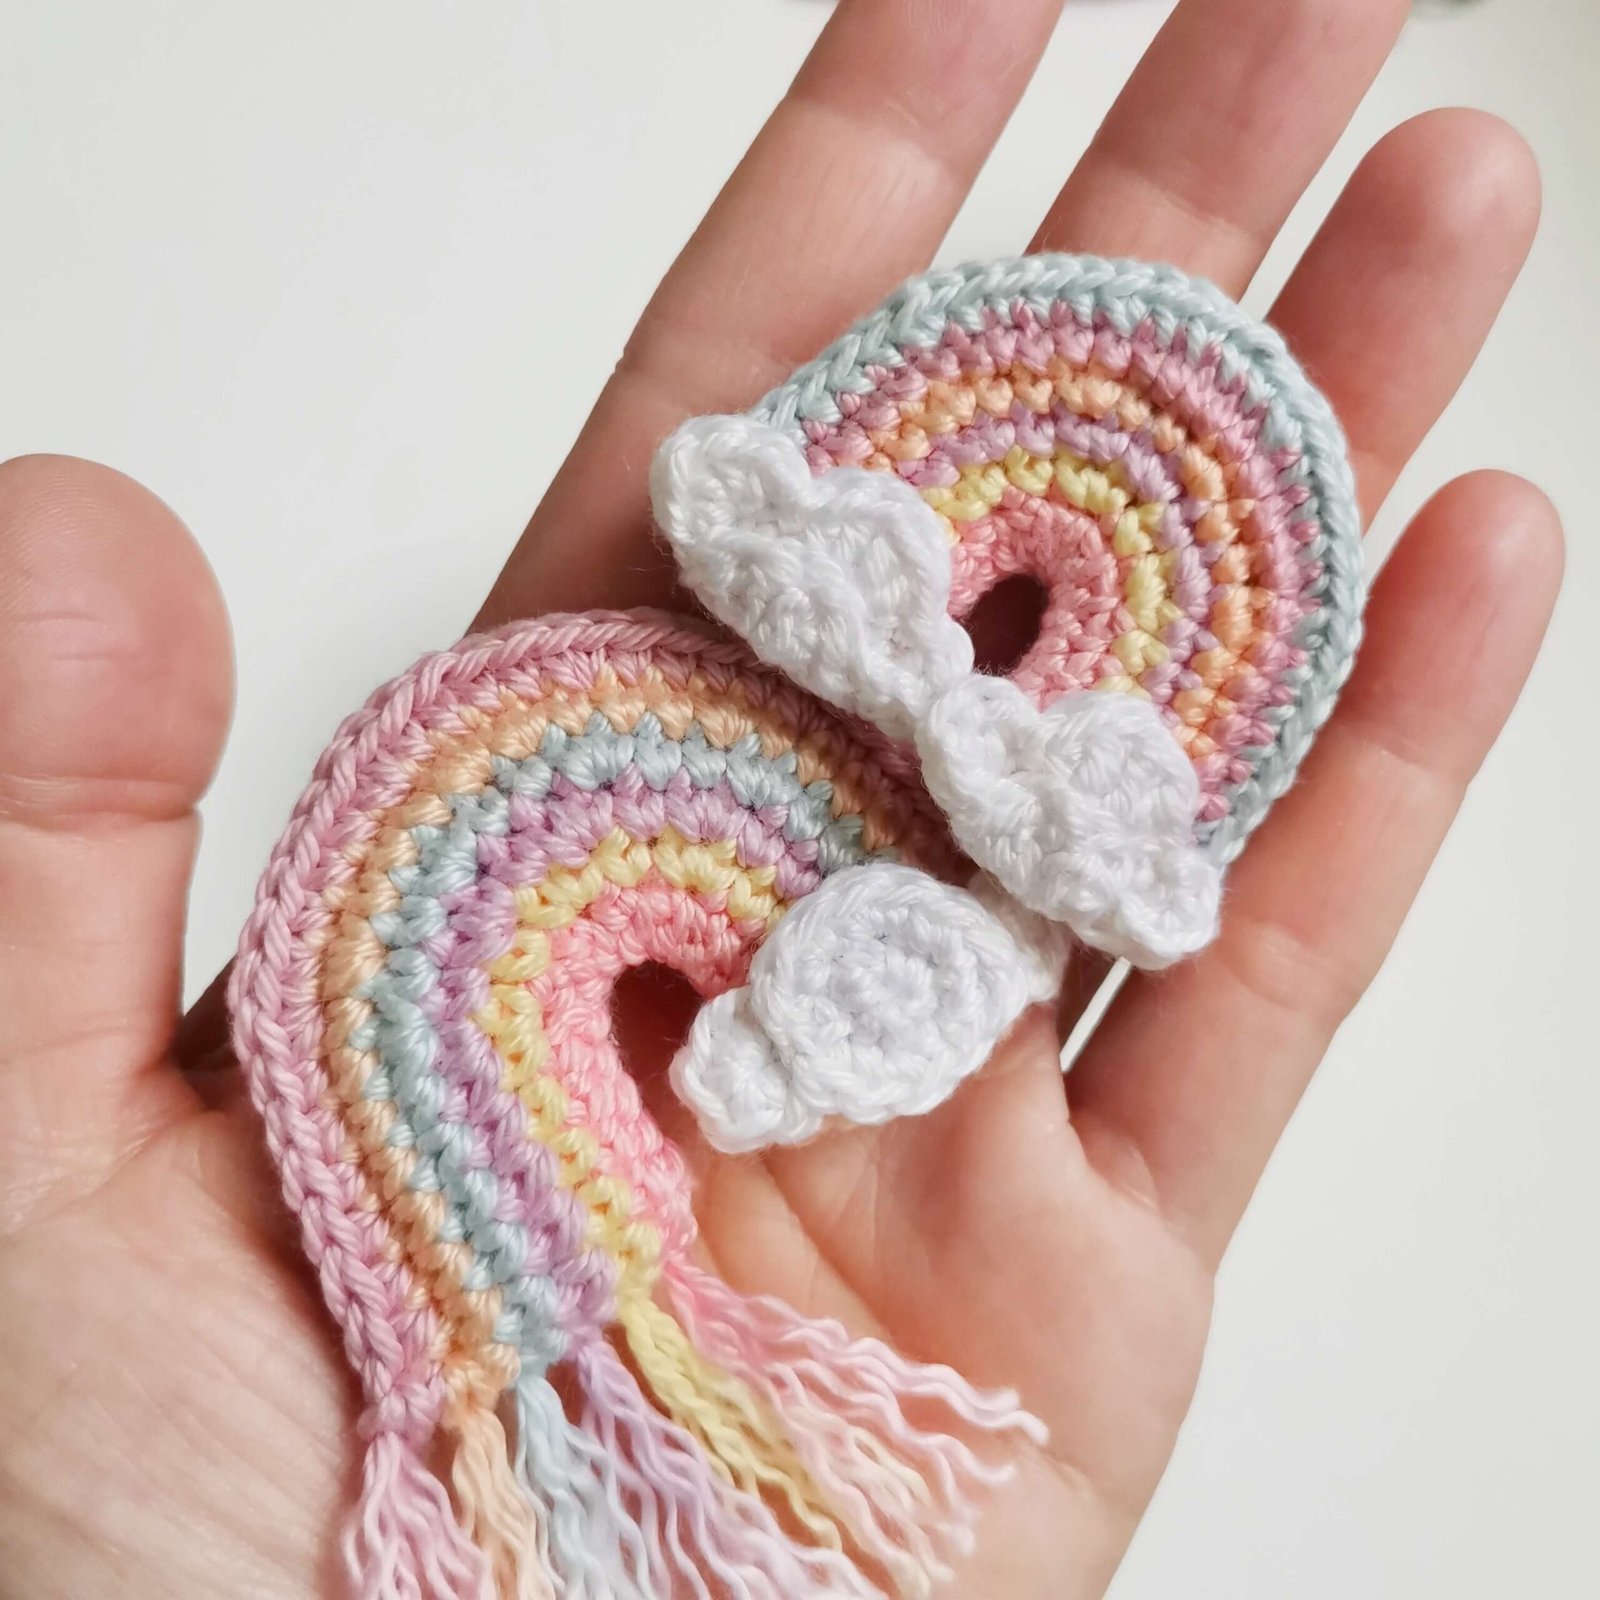
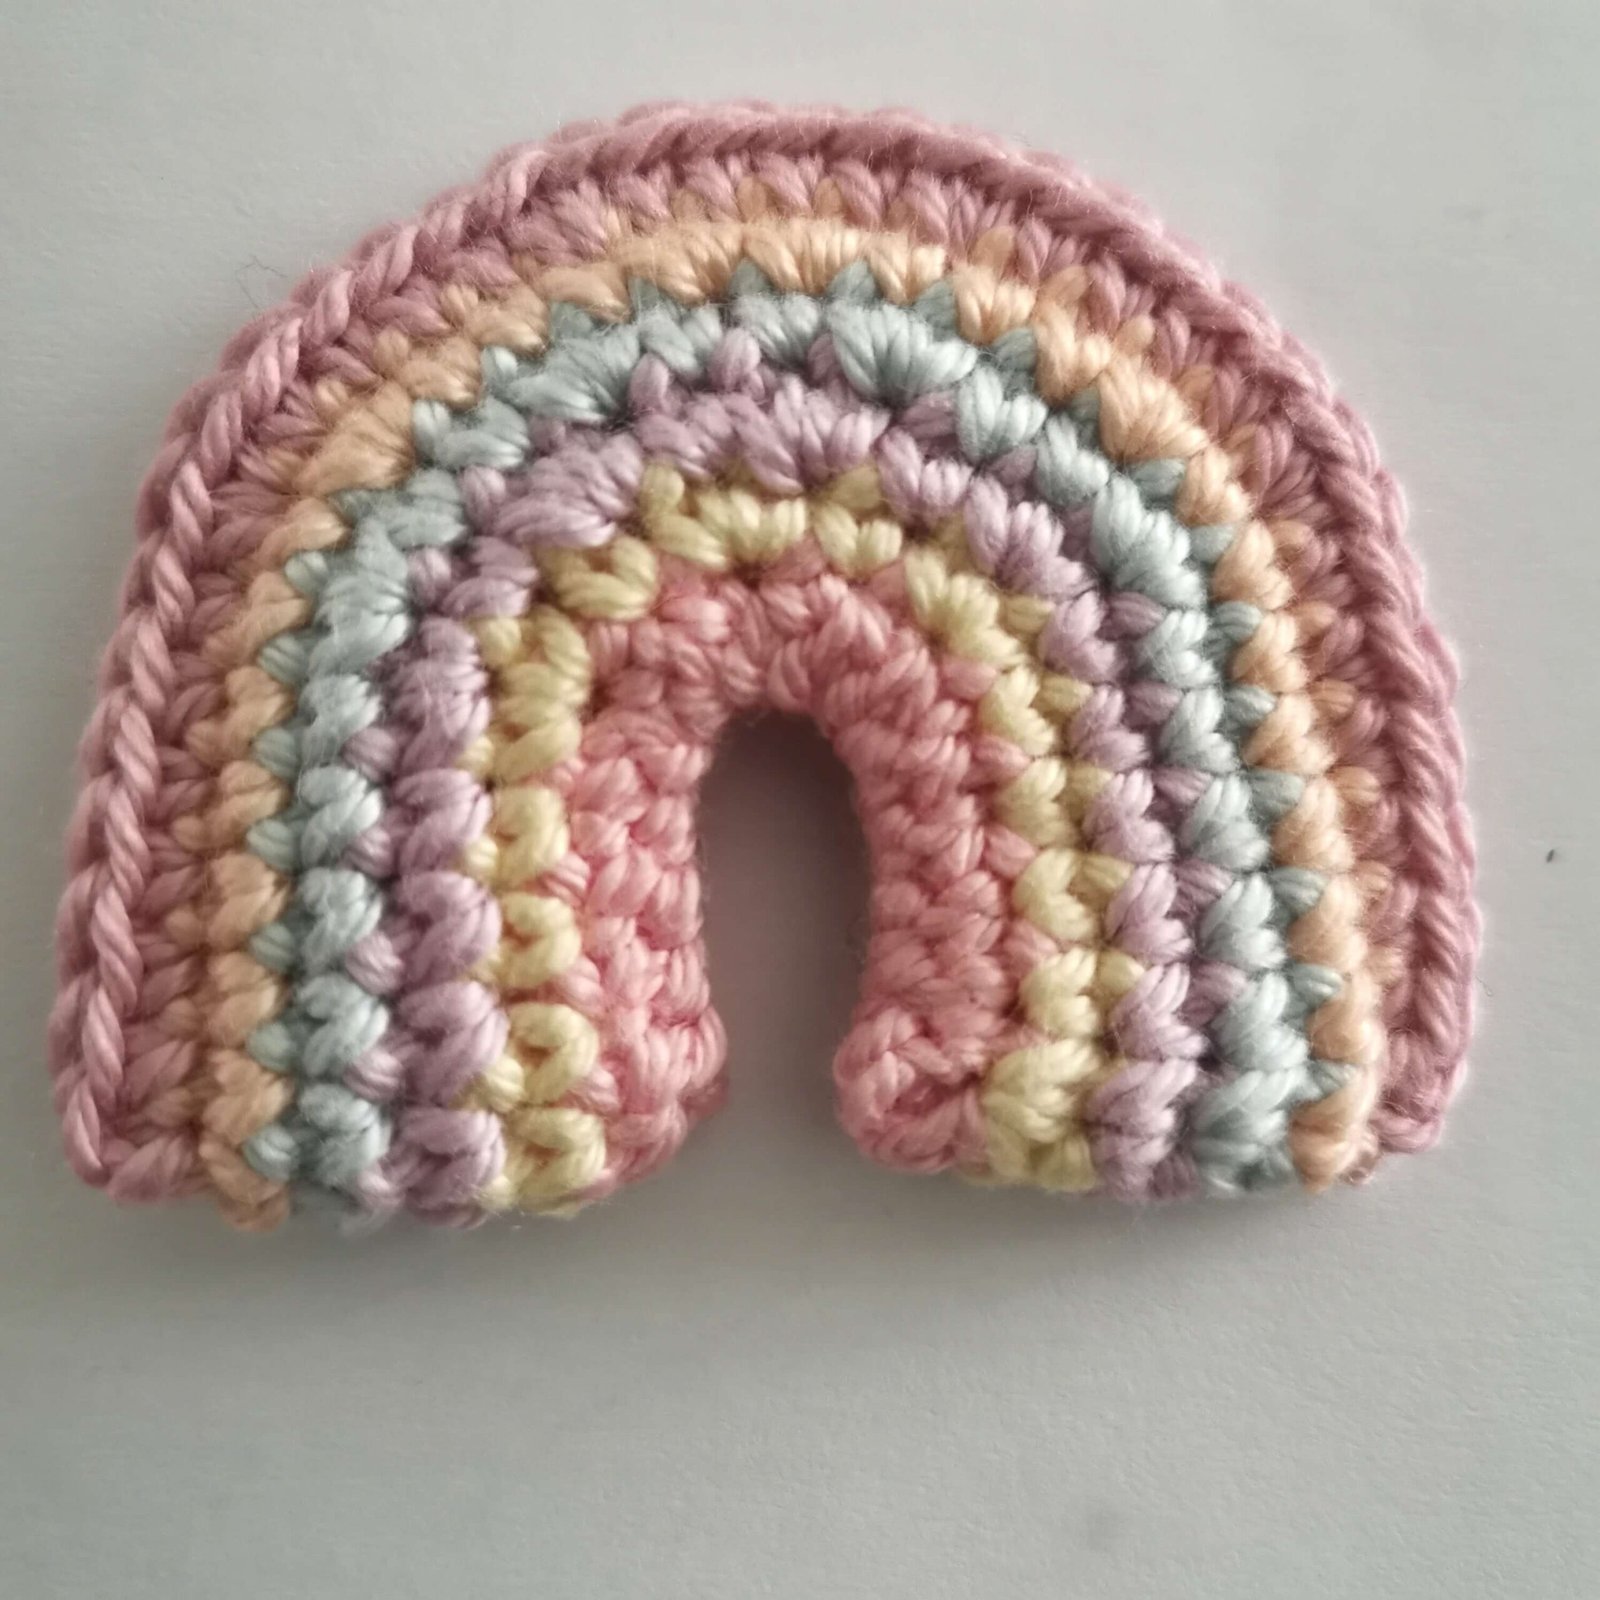
These rainbows have become a staple in modern nurseries and home decor. Their minimalist, boho aesthetic fits perfectly into any room, and the best part is that you can completely customize the vibe just by changing the color palette. Whether you prefer the soft pastels shown in my photos or bold, vibrant primary colors, the result is always stunning.
Creative Ways to Use Your Crochet Rainbows
One of the reasons I love this pattern so much is its versatility. Once you finish your first one, you’ll find yourself wanting to make a dozen more! Here are some fun ways to use them:
👶 Nursery & Baby Accessories
- Pram & Stroller Mobile: Suspend a few rainbows from a wooden ring or silicone clip to make a charming, handmade mobile for your baby’s stroller.
- Nursery Wall Decor: String a series of rainbows together with natural wooden beads to create a trendy boho garland for a crib backdrop or play area.
- Teething Ring Companion: Securely attach the rainbow to a natural beechwood ring or baby clip to turn it into a stylish, sensory-friendly baby accessory.
🔑 Everyday Accessories & Gifts
- Keychains & Bag Charms: Attach a gold lobster claw or sturdy keychain ring to the top. It instantly becomes a chic accessory for backpacks, purses, tote bags, or even car keys.
- Car Rearview Mirror Hanging: Add a longer loop of yarn or leather cord to hang your rainbow from your car’s rearview mirror for a sweet pop of color on your daily commute.
- Blanket & Bag Appliqués: If you have a plain crocheted blanket, denim jacket, or canvas tote bag, stitching a few of these rainbow motifs onto the surface adds wonderful 3D texture and handmade charm.
- Holiday Ornaments: Swap out your everyday cotton yarn for metallic or sparkly yarn to turn these rainbows into unique Christmas tree decorations or festive gift toppers.
Tips for a Perfect Rainbow Fringe
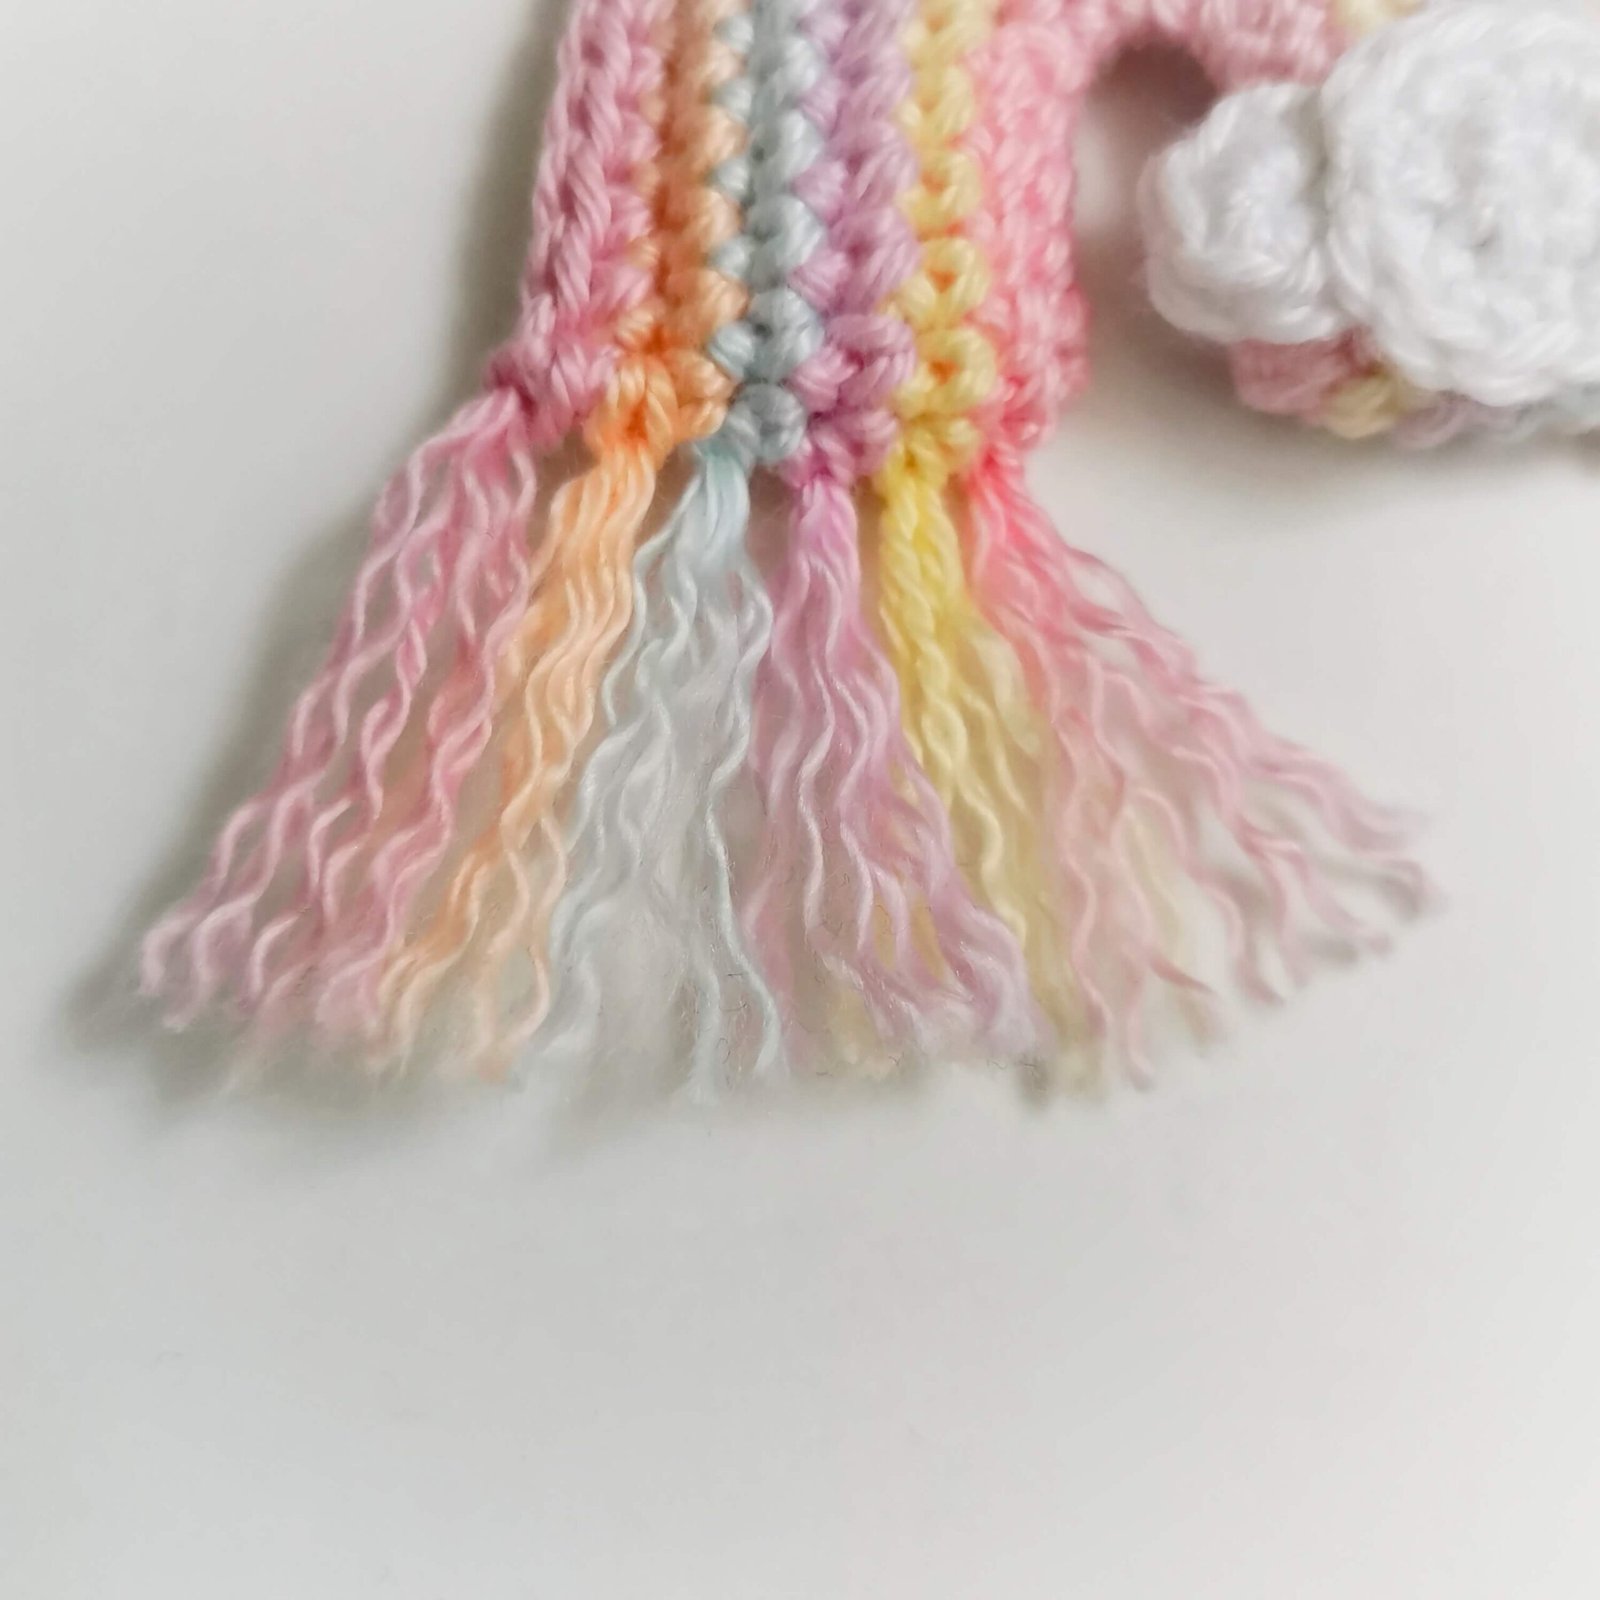
The “secret sauce” of this pattern is definitely the fringe at the bottom. To get that clean, professional look you see in the EmmaS Dolls photos:
- Steam Blocking: If your rainbow is curling a bit, give it a light steam with an iron (don’t touch the yarn directly!) to help it lay perfectly flat.
- Comb it out: Use a fine-tooth comb or even a clean pet brush to separate the yarn fibers. This gives it that fluffy, macramé-style finish.
- The Sharpest Scissors: Always use your best fabric scissors for the final trim. A straight, crisp cut makes a world of difference in the overall quality of your work.
🌸 Choose how you want to craft:
- 🌐 Read it free on this blog (supported by ads).
- 📄 Prefer a printable PDF? Get the clean, ad-free PDF version on my Ko-fi shop for symbolic price 💖
Materials Needed:
- Yarn: I use a 100% cotton yarn from my local store. The best match and my top recommendation for this pattern is Paintbox Yarns Cotton DK.
- Hook: I used a 2mm hook. I highly recommend Clover Amour Hooks for the best experience.
- Tools & Supplies:
- Scissors, and a tapestry needle.
- Find all these essentials here: Crochet Supplies & Accessories.
Crochet abbreviations:
MR – magic ring
SC – single crochet
HDC – half double crochet
DC – double crochet
INC – increase
SL ST – slip stitch
Pattern Notes:
- Language: English
- Skill Level: Beginner
- Terminology: US Terms
New to Crochet? If you are an absolute beginner or need a quick refresher on the basics, don’t worry! Before you dive into this pattern, check out my step-by-step guides on How to Crochet Basic Stitches (packed with helpful video tutorials!) and my detailed Crochet Abbreviations chart to help you read patterns with confidence. For even more in-depth tips, tension secrets, and yarn advice, be sure to explore my multi-part Perfect Amigurumi Guide series here on the blog to elevate your crafting skills!
Prefer a quick visual walkthrough? Check out the short video below to see how this boho rainbow comes together! It’s a fast-paced preview with pattern notes on screen—perfect if you want a quick step-by-step look at the process before you dive in.
FREE CROCHET RAINBOW PATTERN
Rainbow
• Note: For each round of the rainbow change color
Ch30
Round 1: 30sc, sl st in first [30]
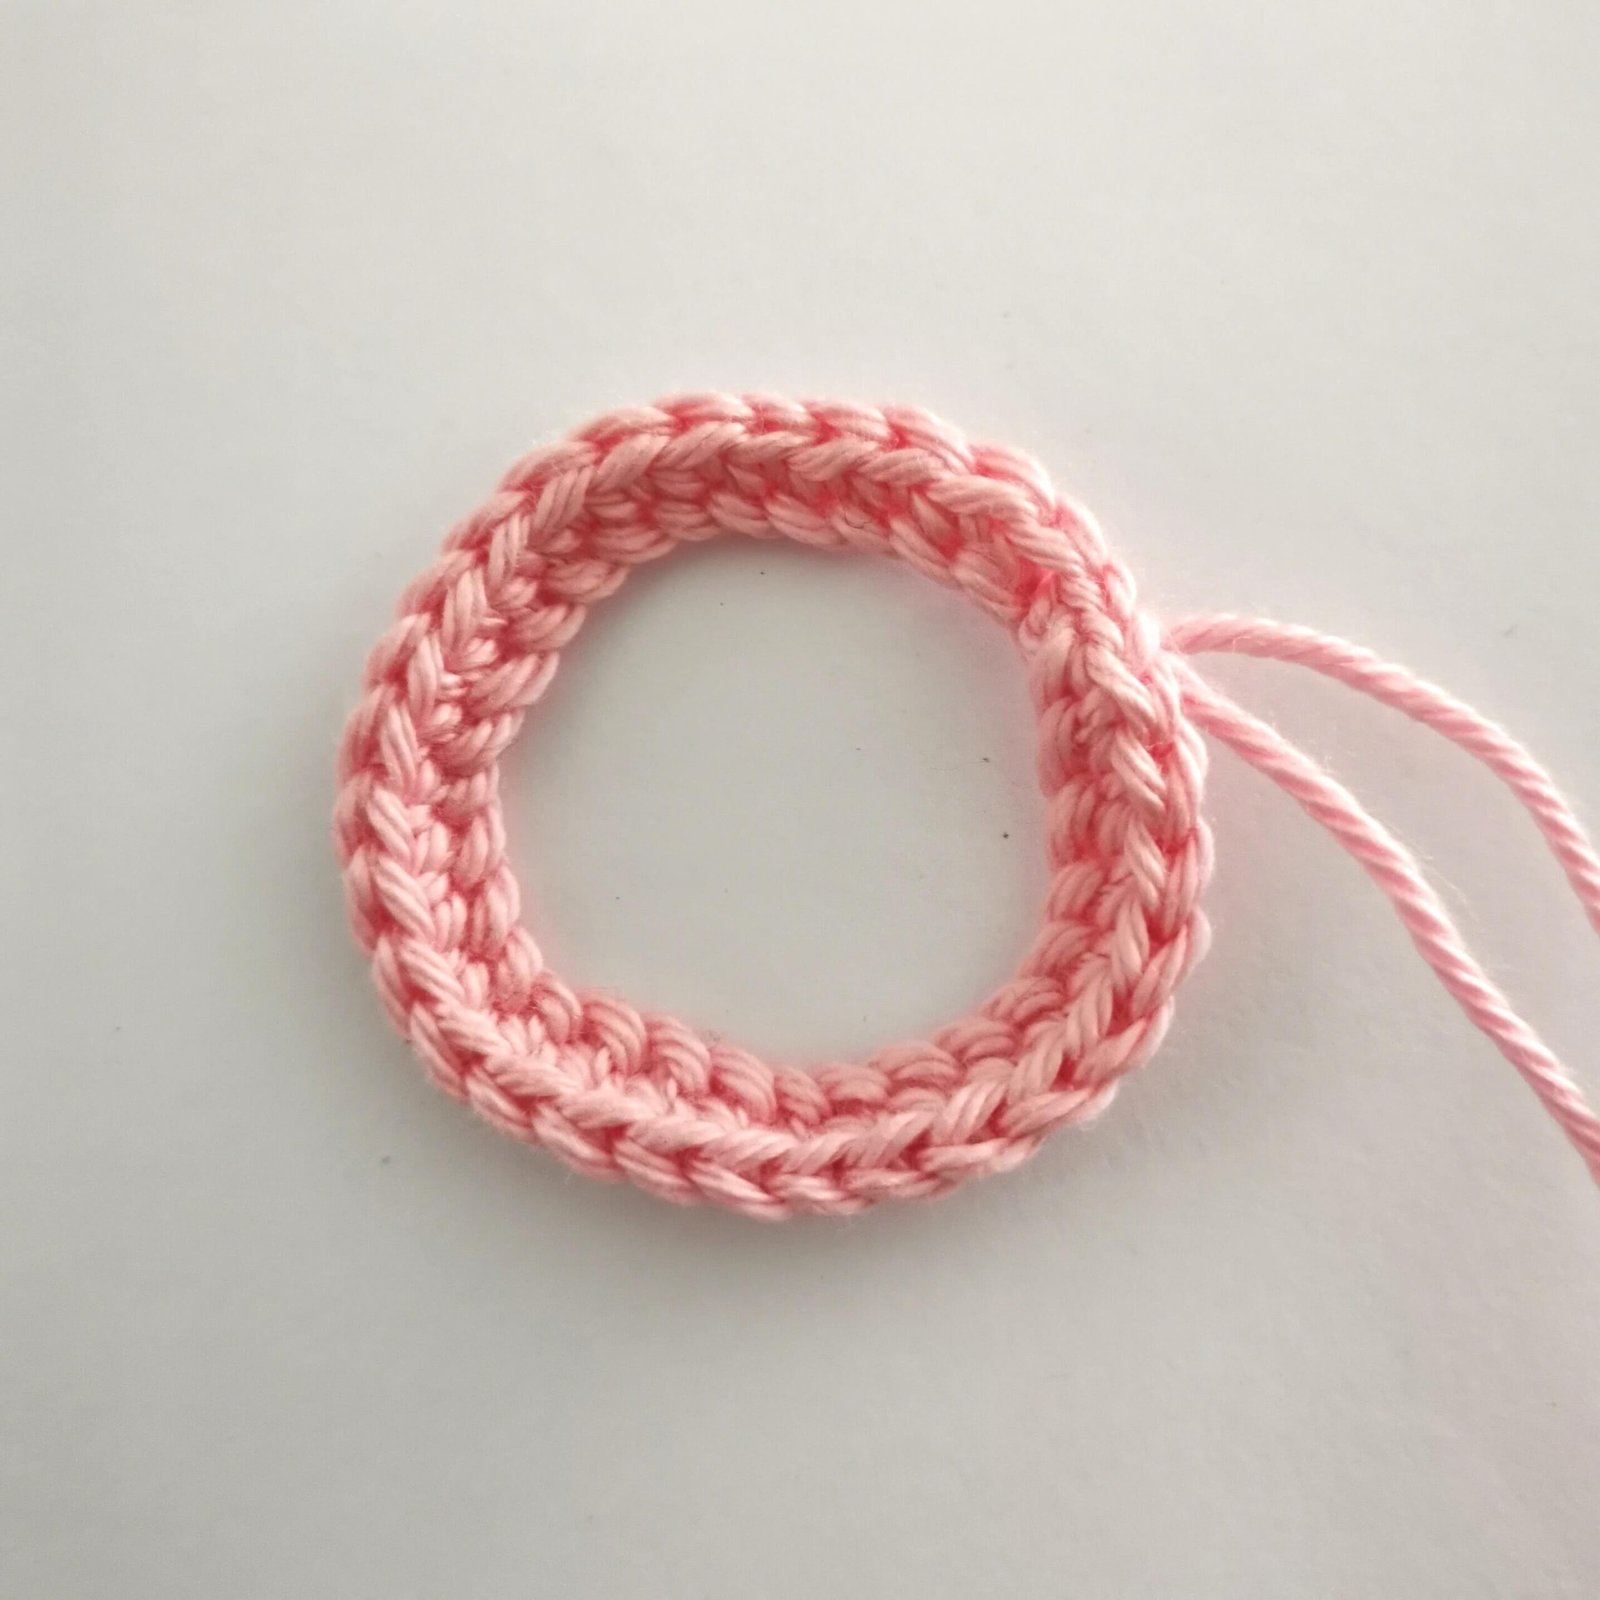
Round 2: ch1, (5sc, inc, sc, inc, sc, inc, 5sc) x 2, sl st [36]
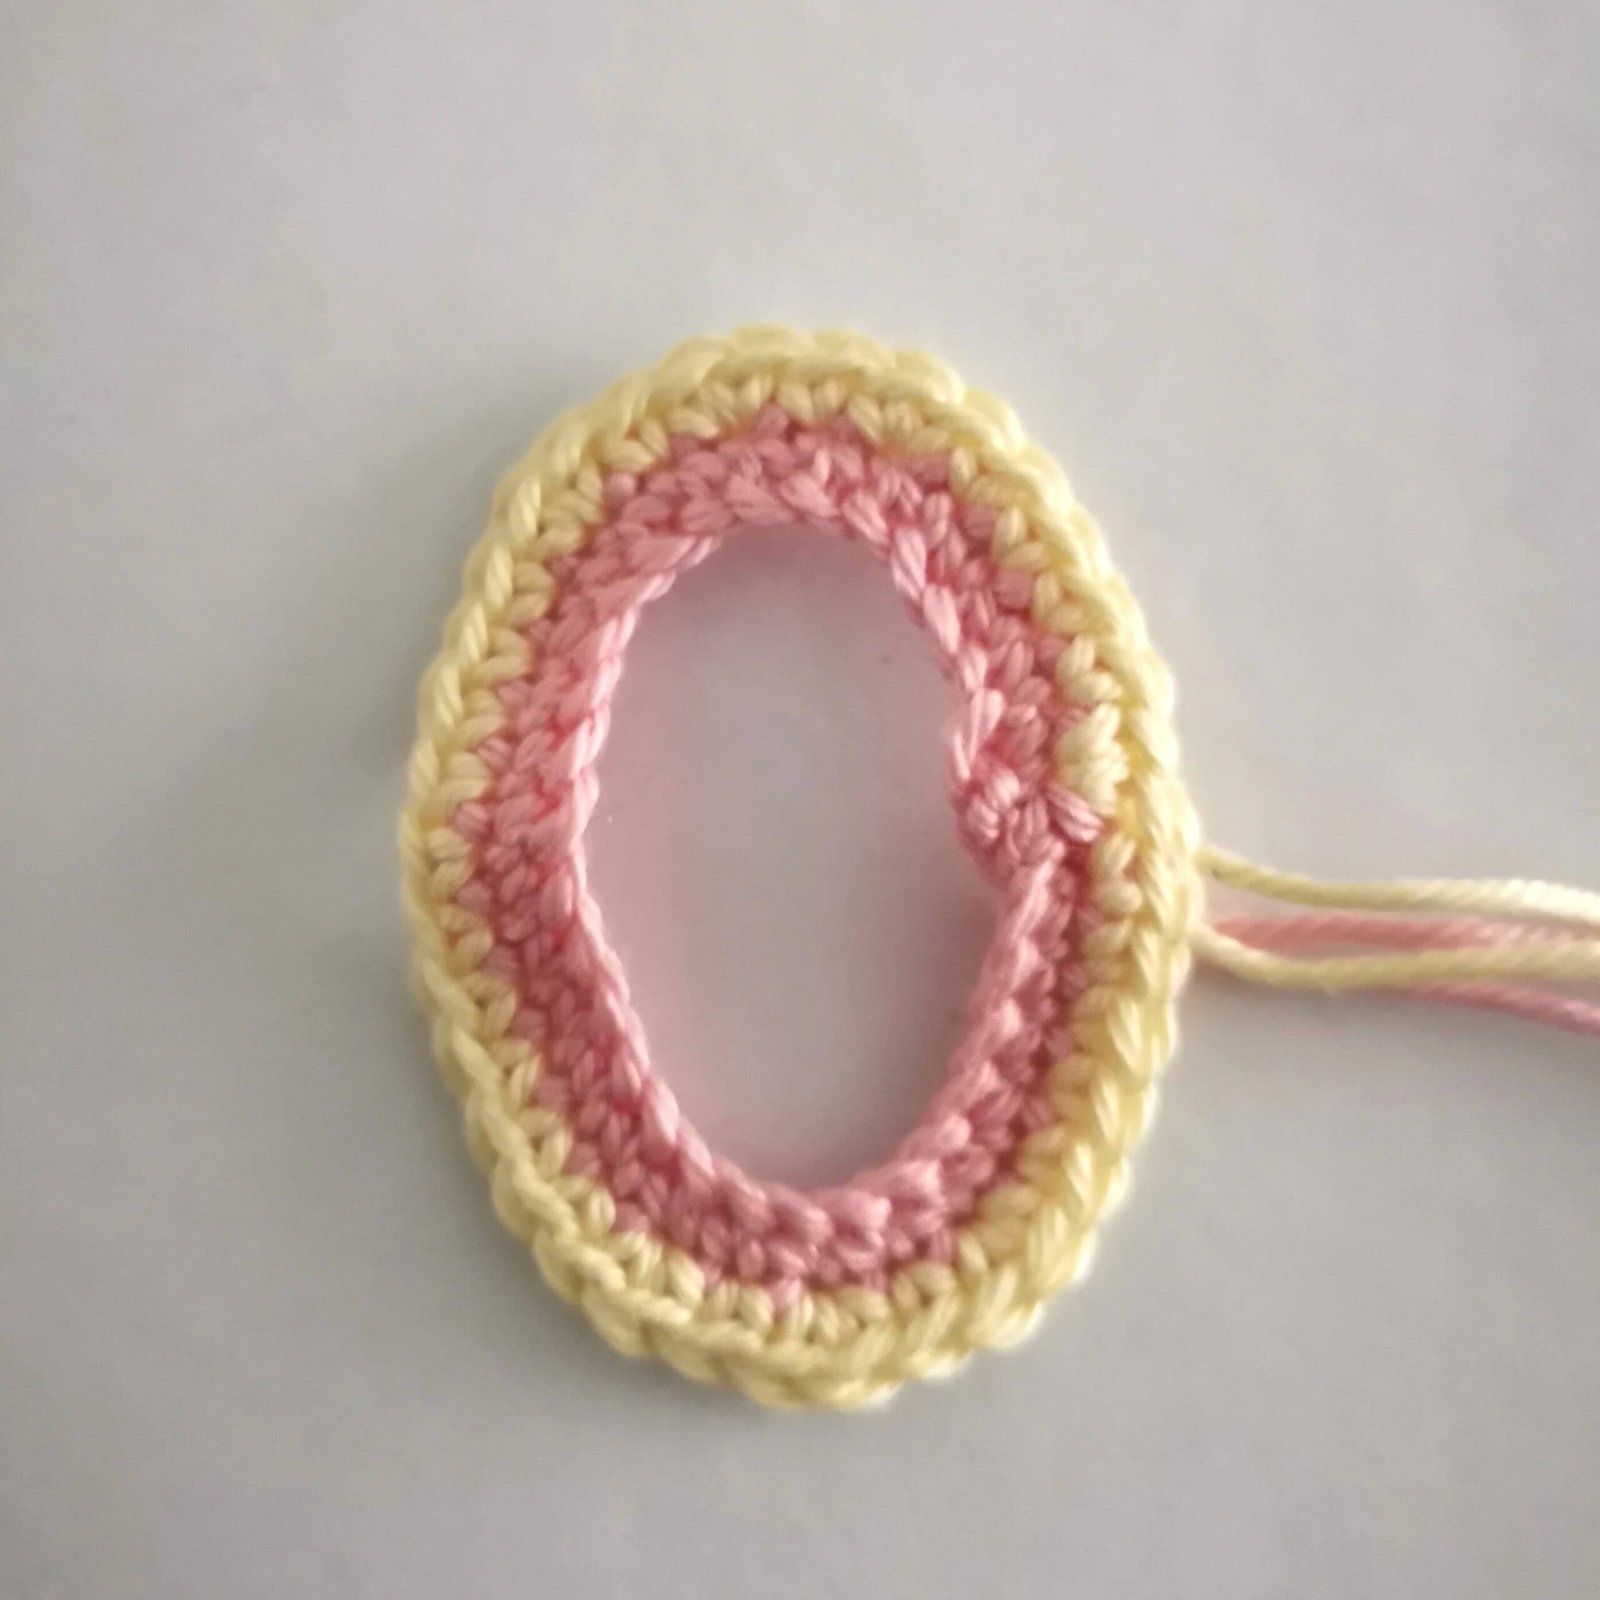
Round 3: ch1, (6sc, inc, sc, inc, inc, sc, inc, 6sc) x 2, sl st [44]
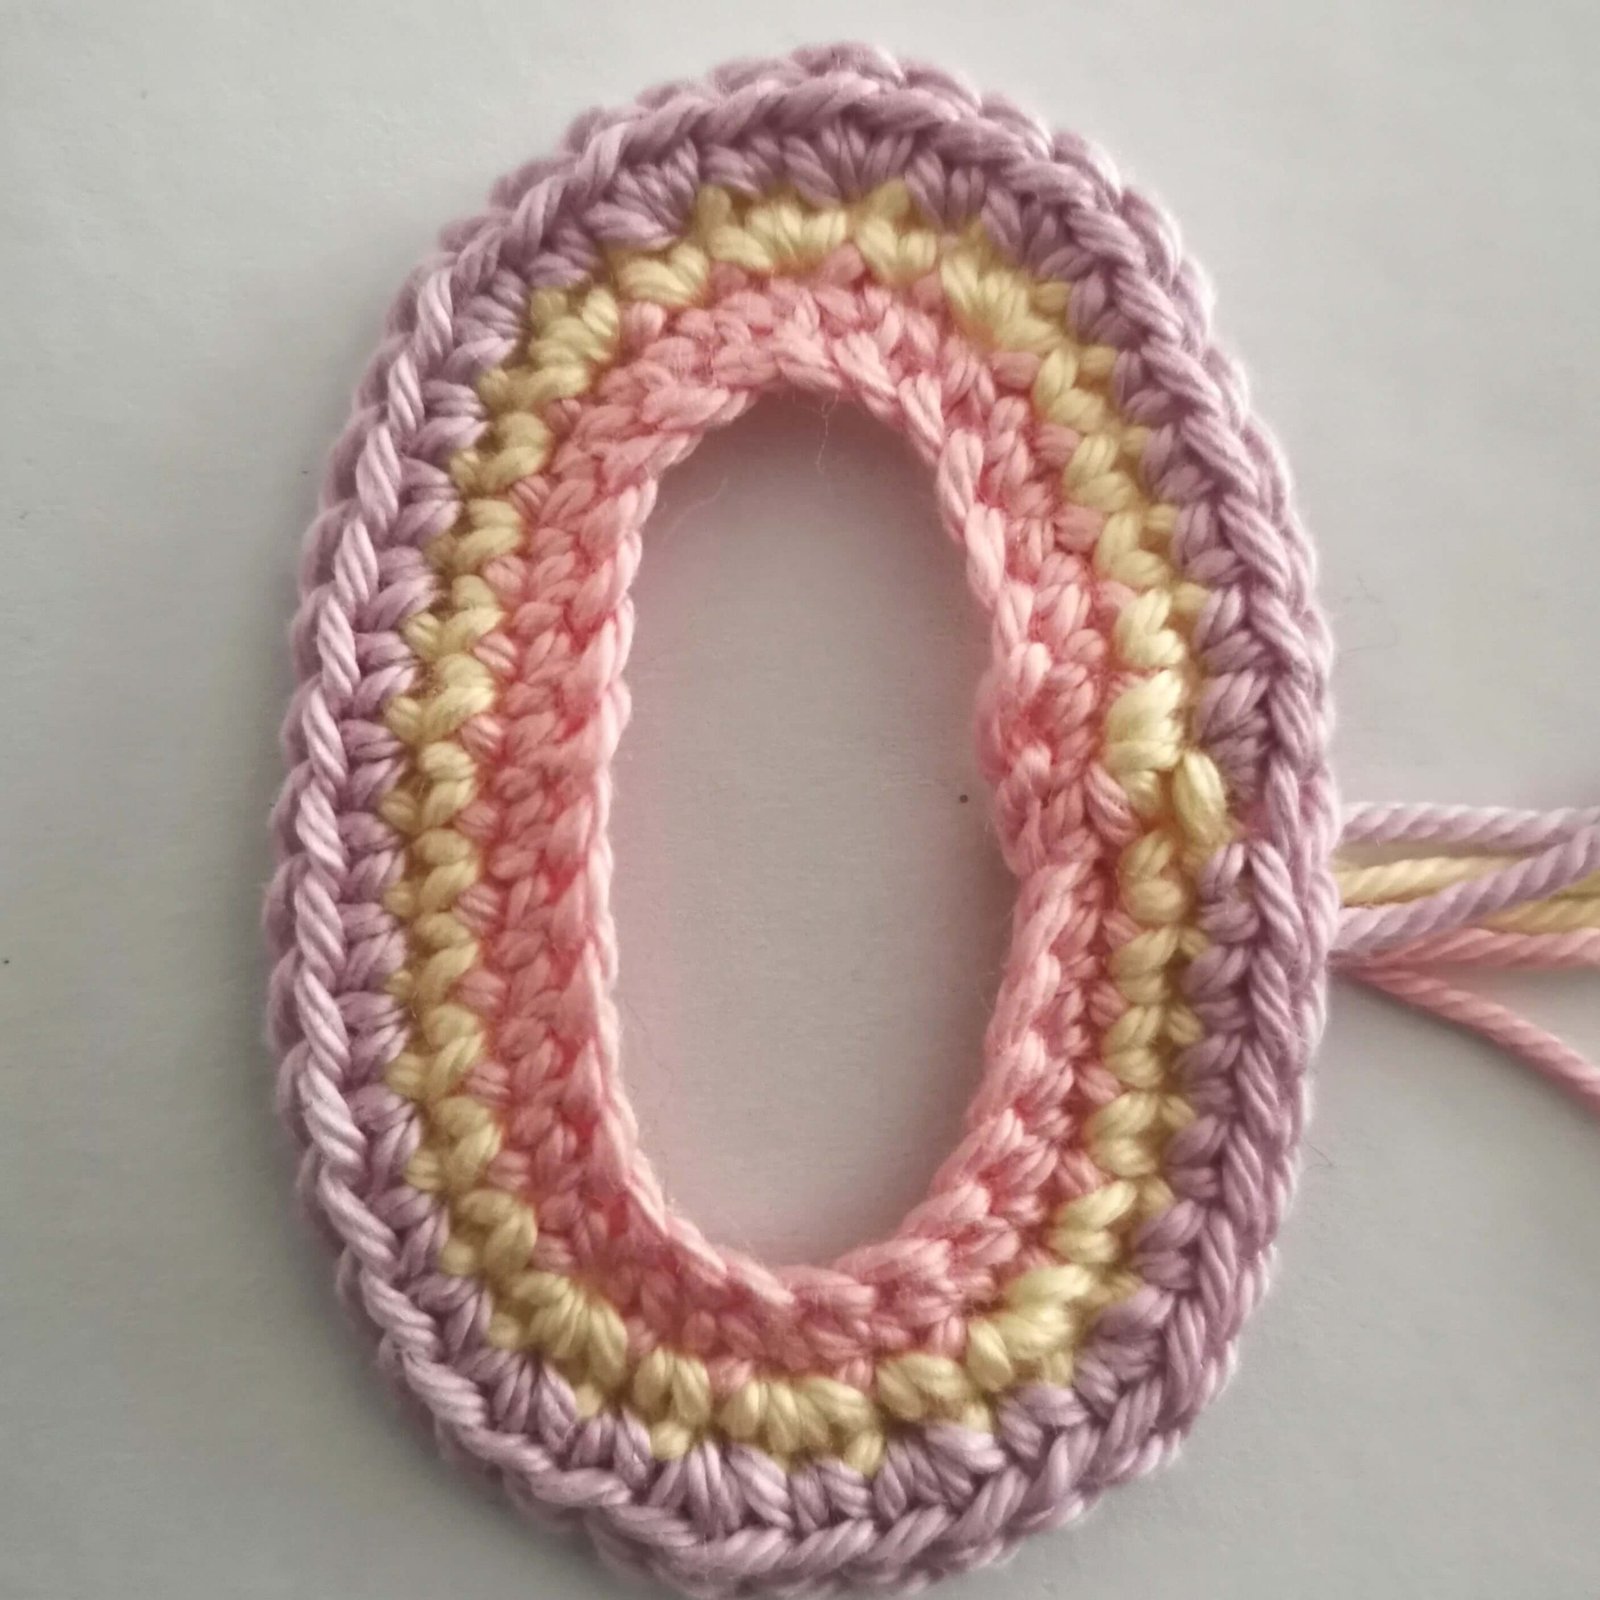
Round 4: ch1, (5sc, (sc, inc, sc) x 4, 5sc) x 2, sl st [52]
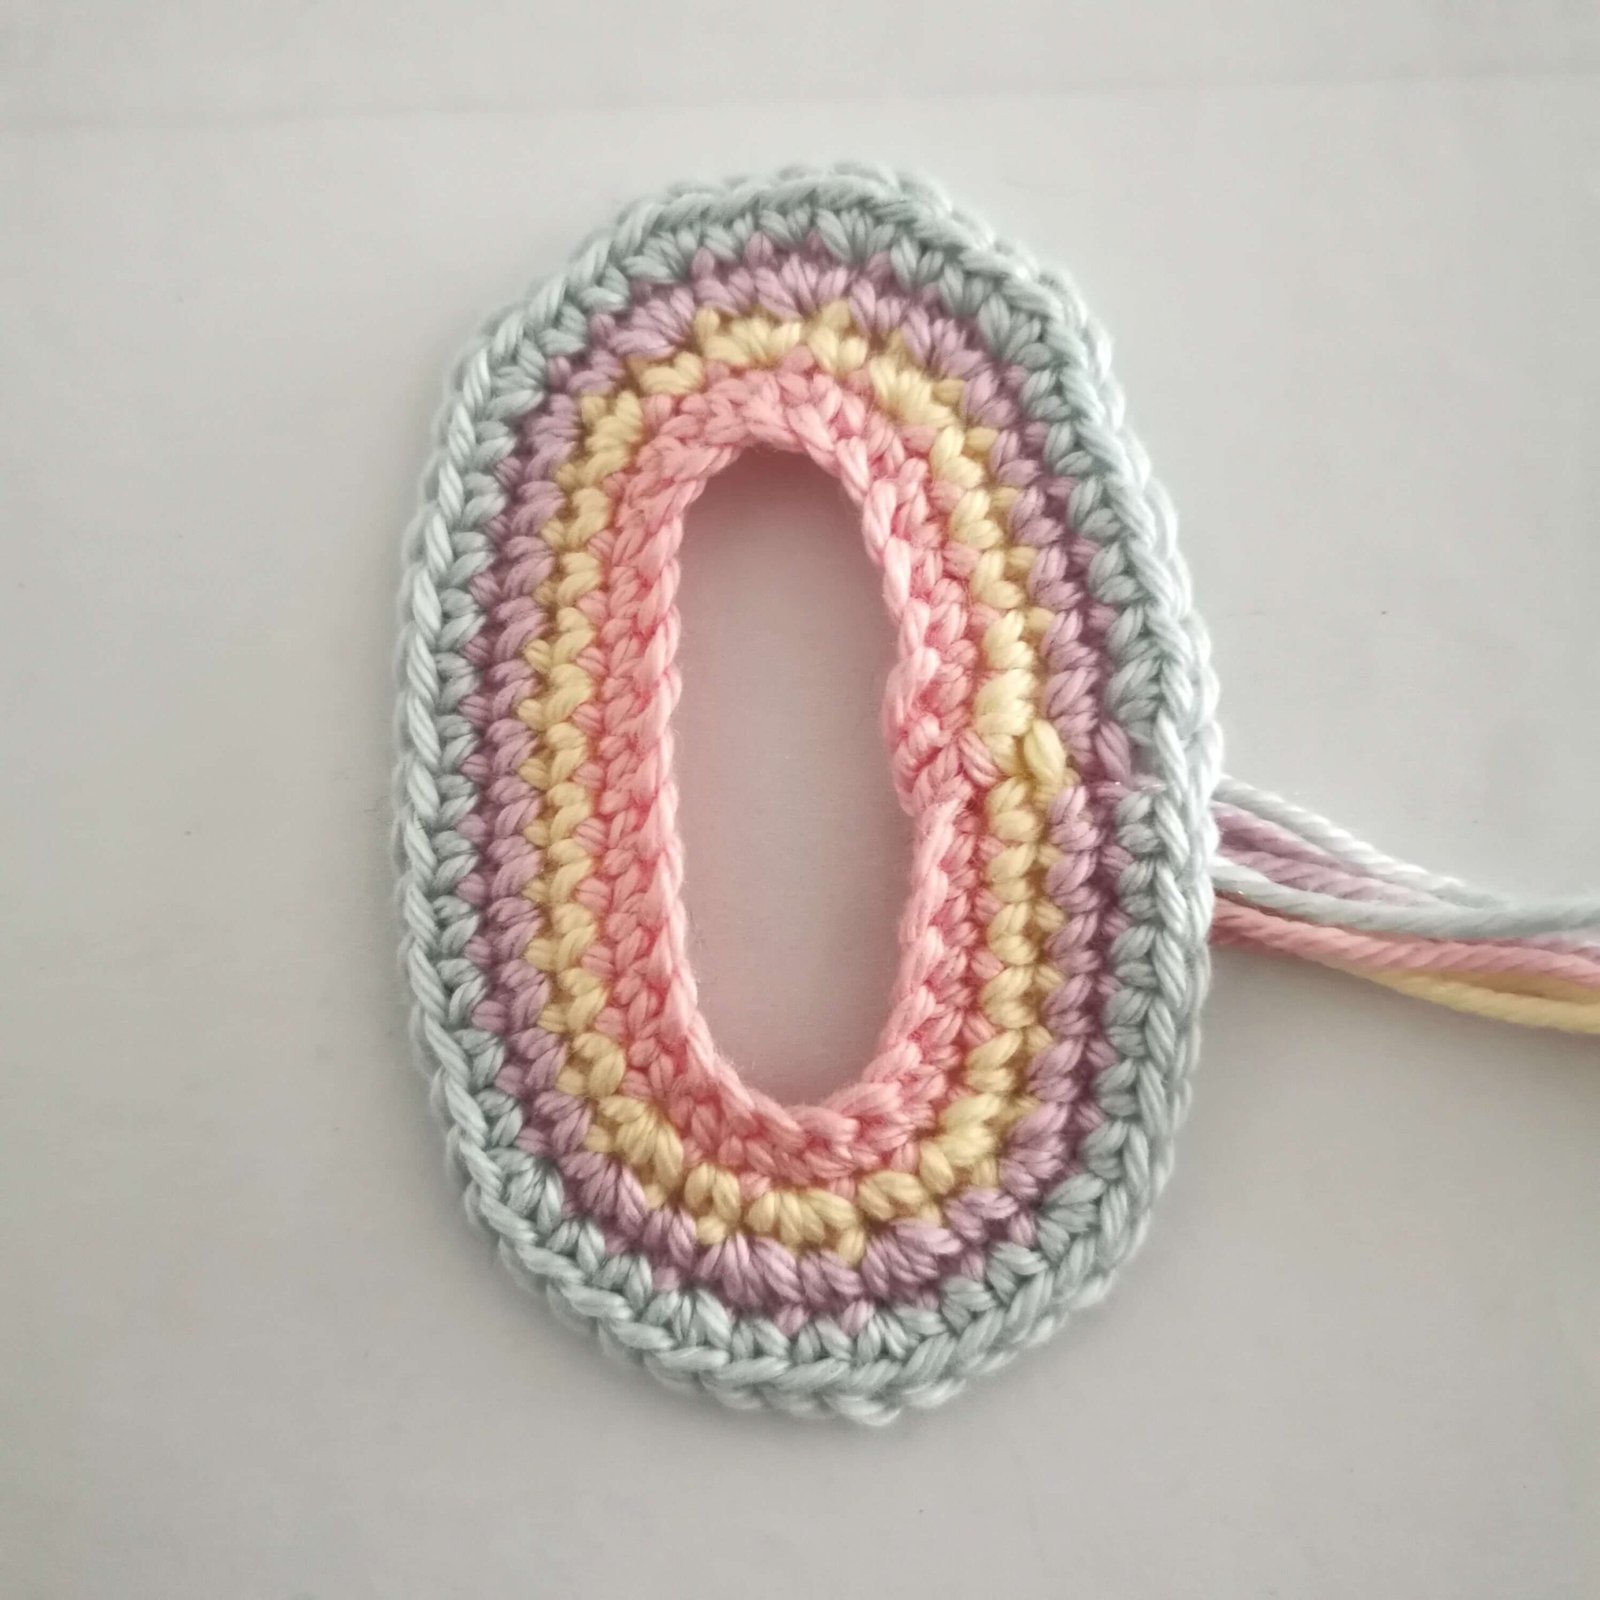
Round 5: ch1, (8sc, inc, 3sc, inc, inc, 3sc, inc, 8sc) x 2, sl st [60]
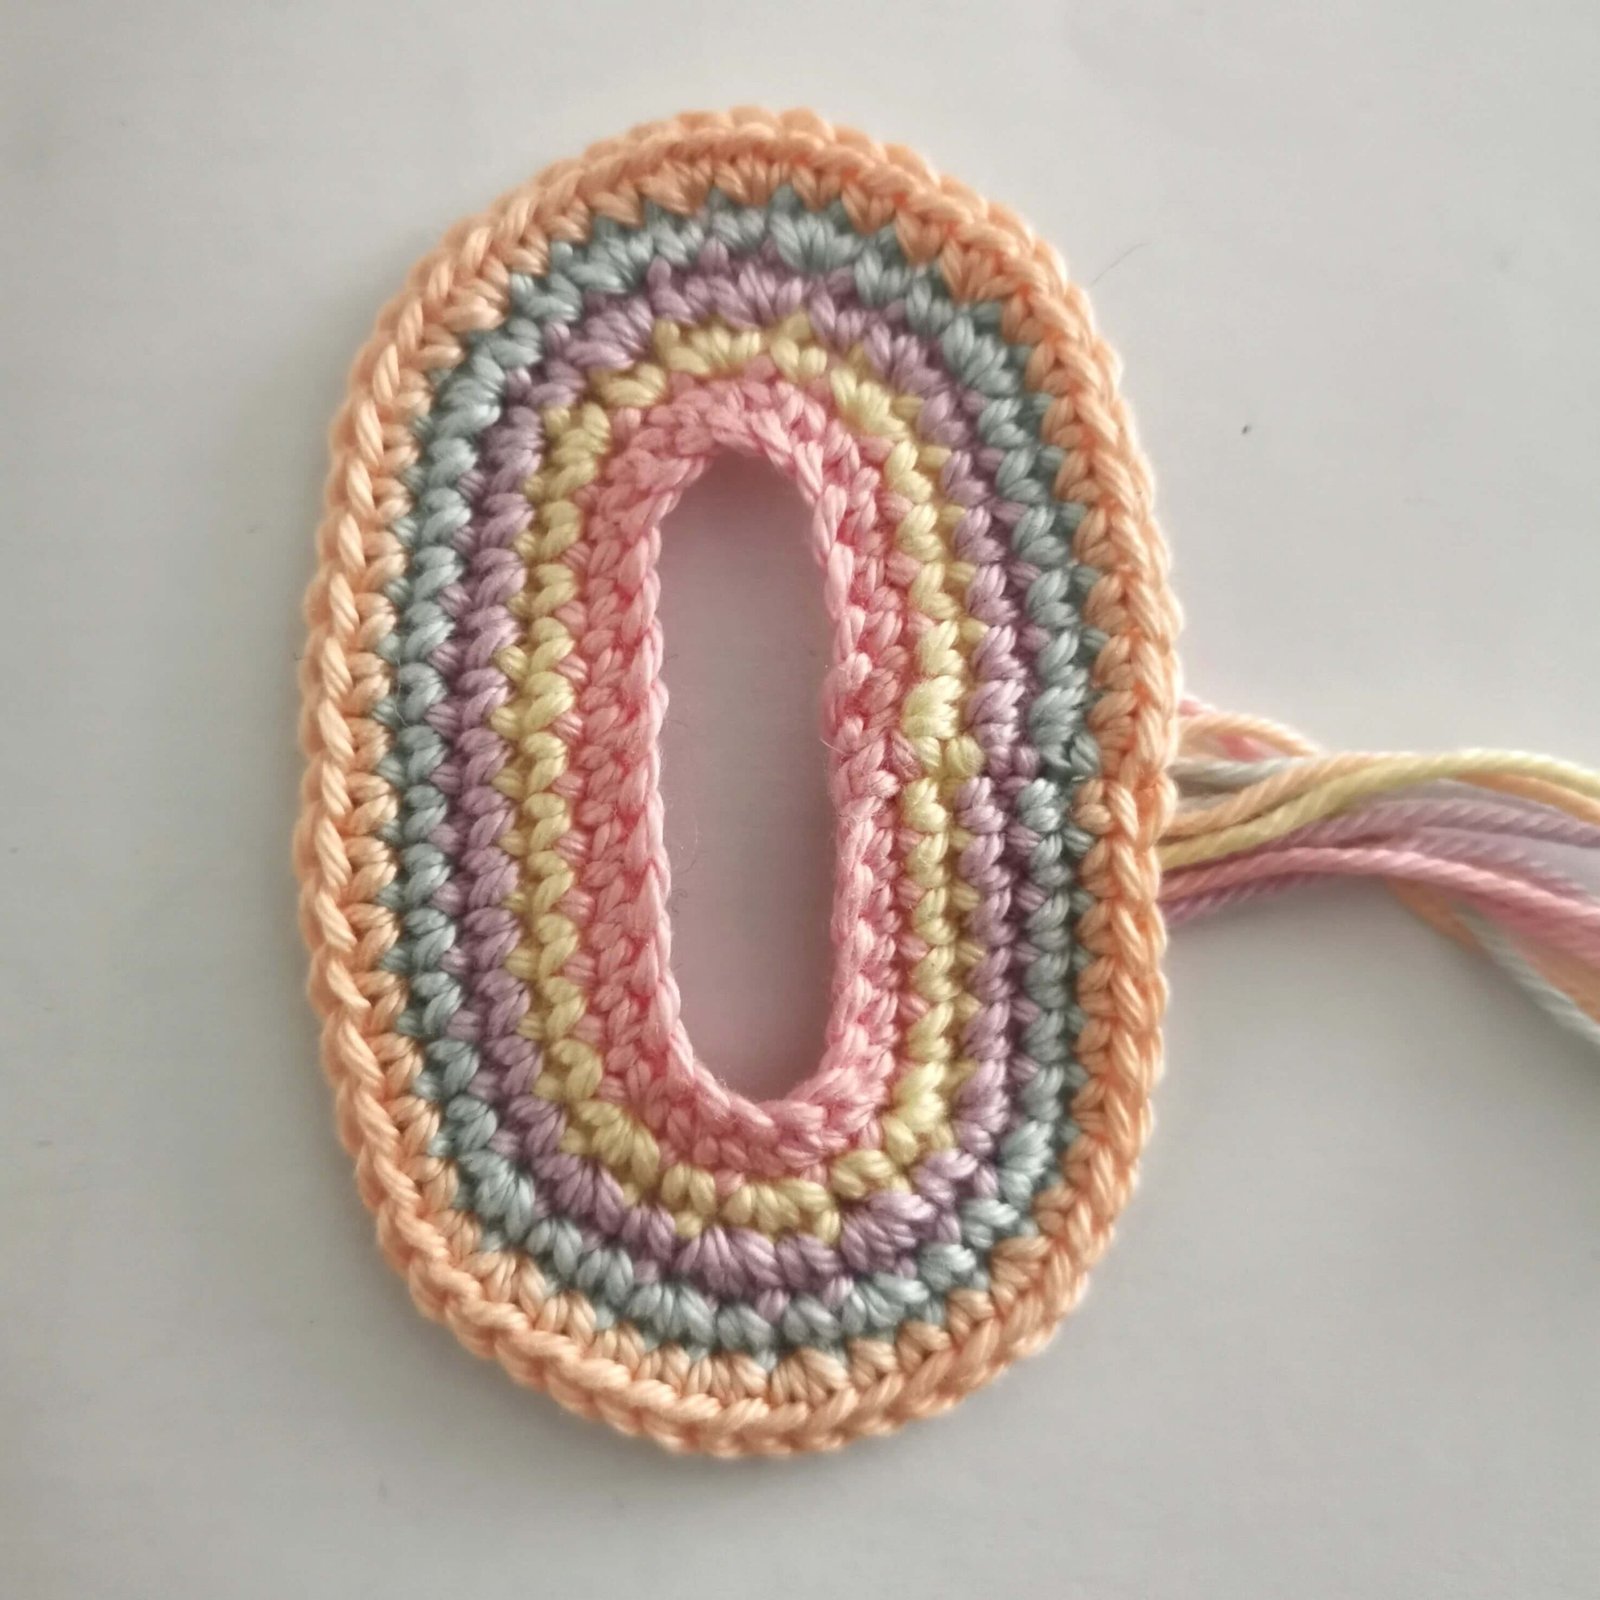
Finishing the Rainbow: Fold the piece in half. In the next round, you will work through both layers at the same time to close the shape.
Round 6: ch1, 5sc, (2sc, inc, 2sc) x 4, 5sc [34]
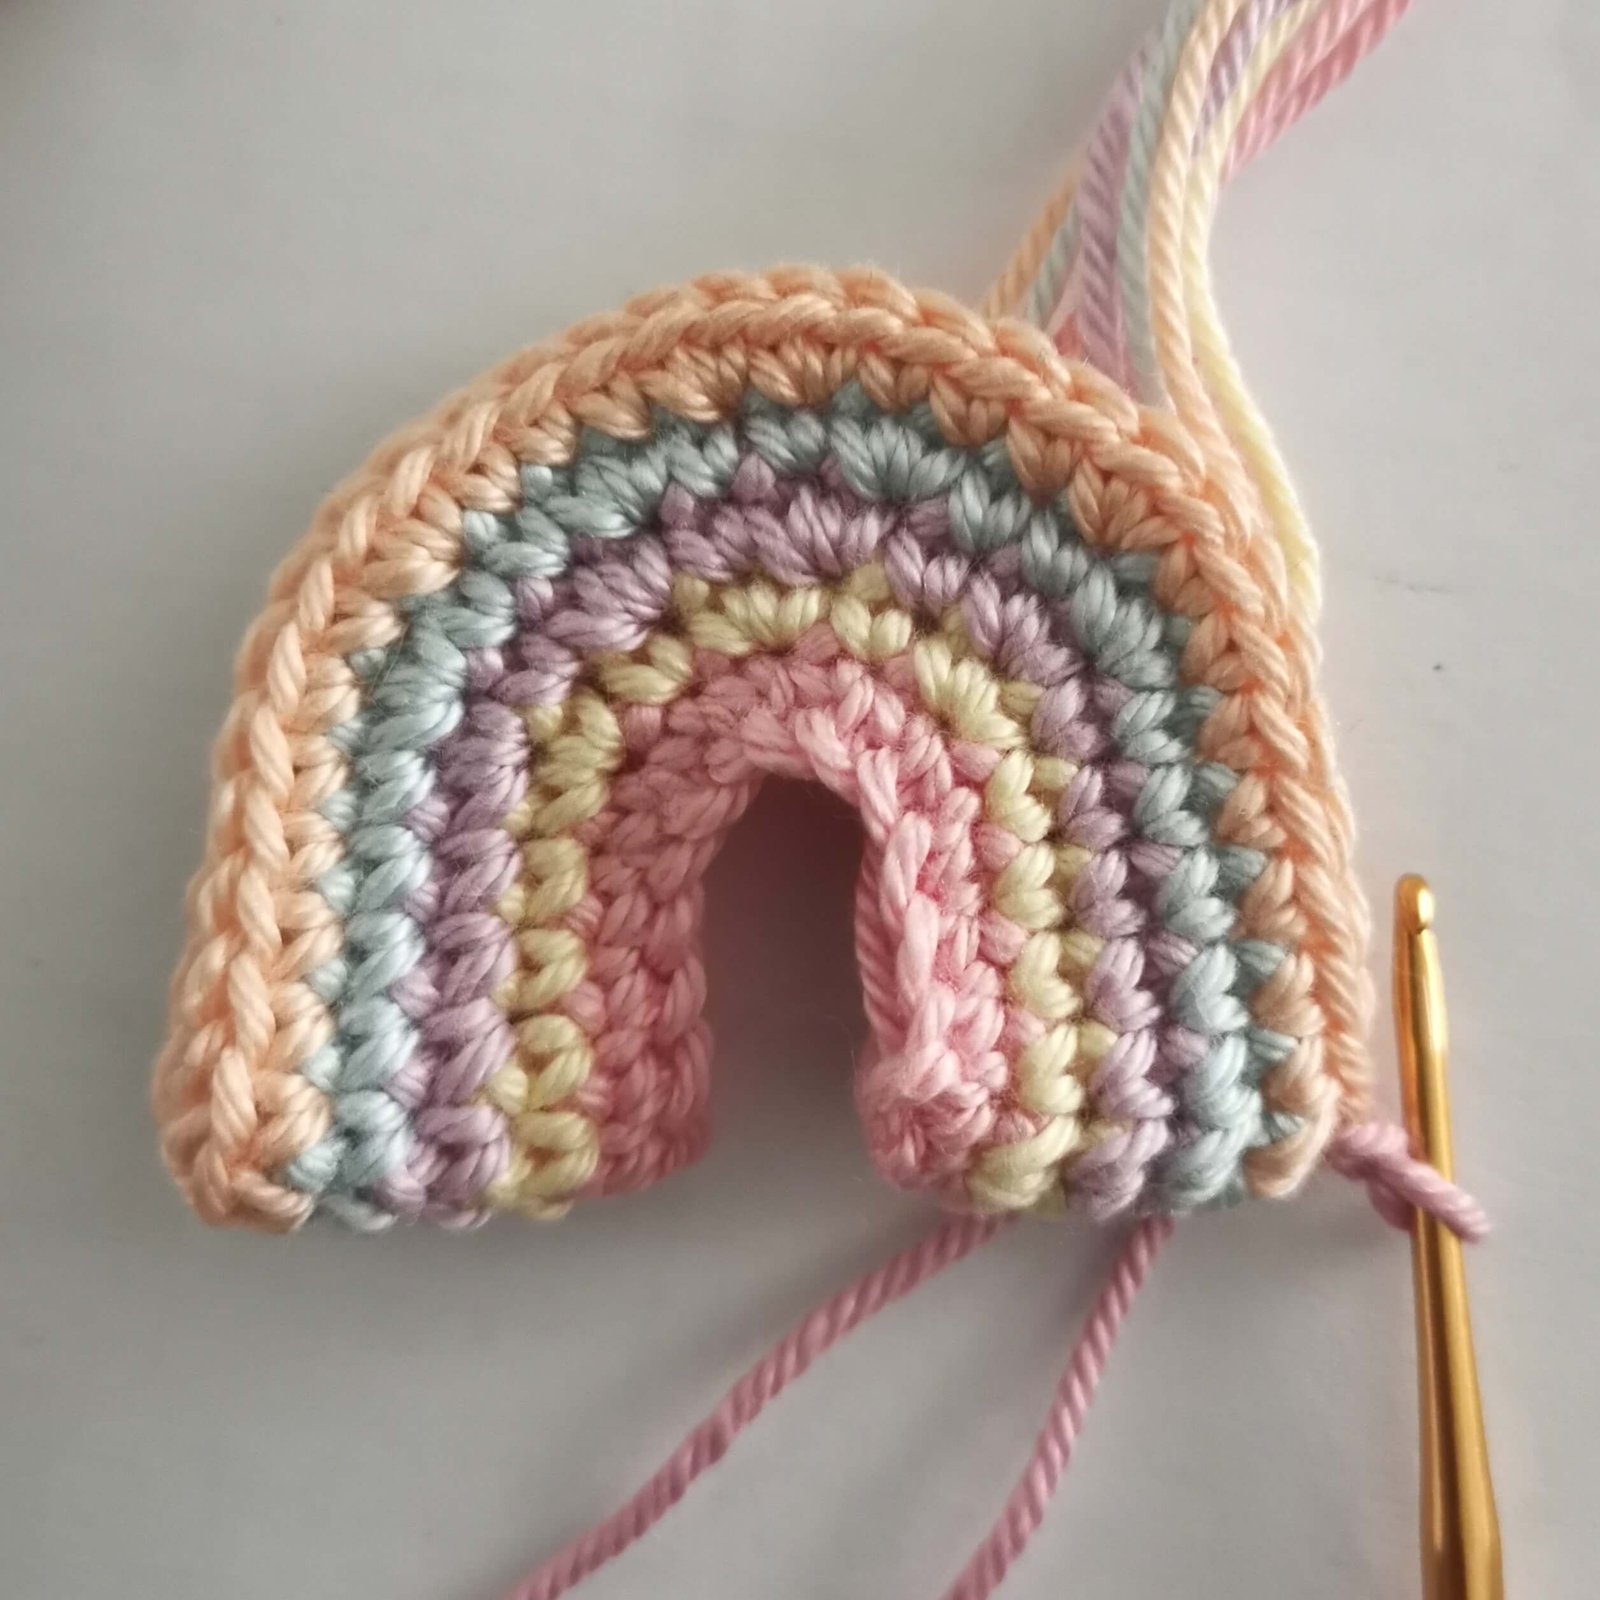
• Fasten off and weave in ends.
• Sew the opening of the first round together to close the center.
Clouds (Two Options)
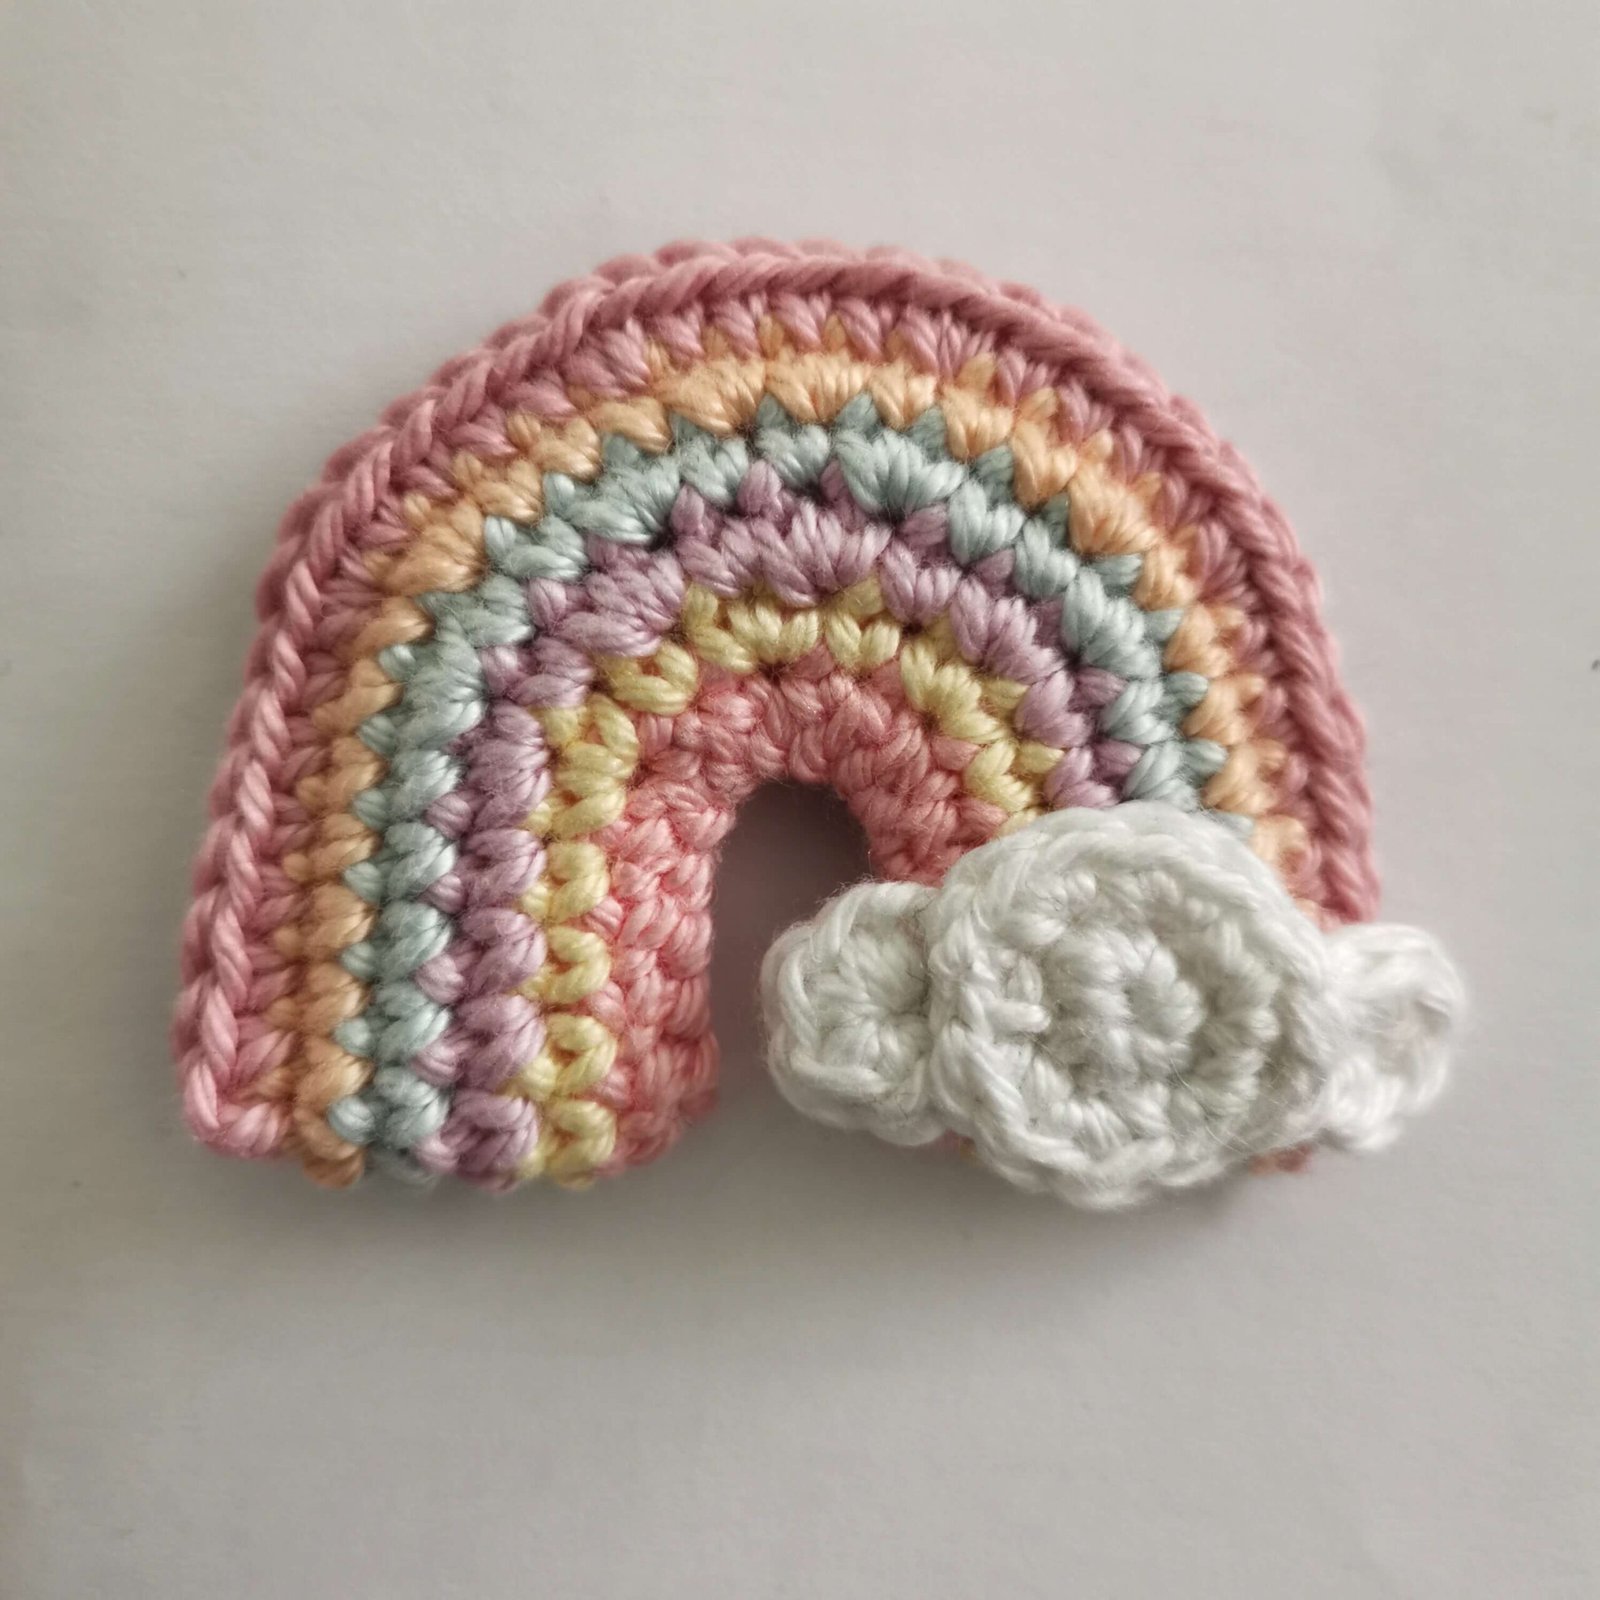
Option I: Multi-Part Clouds
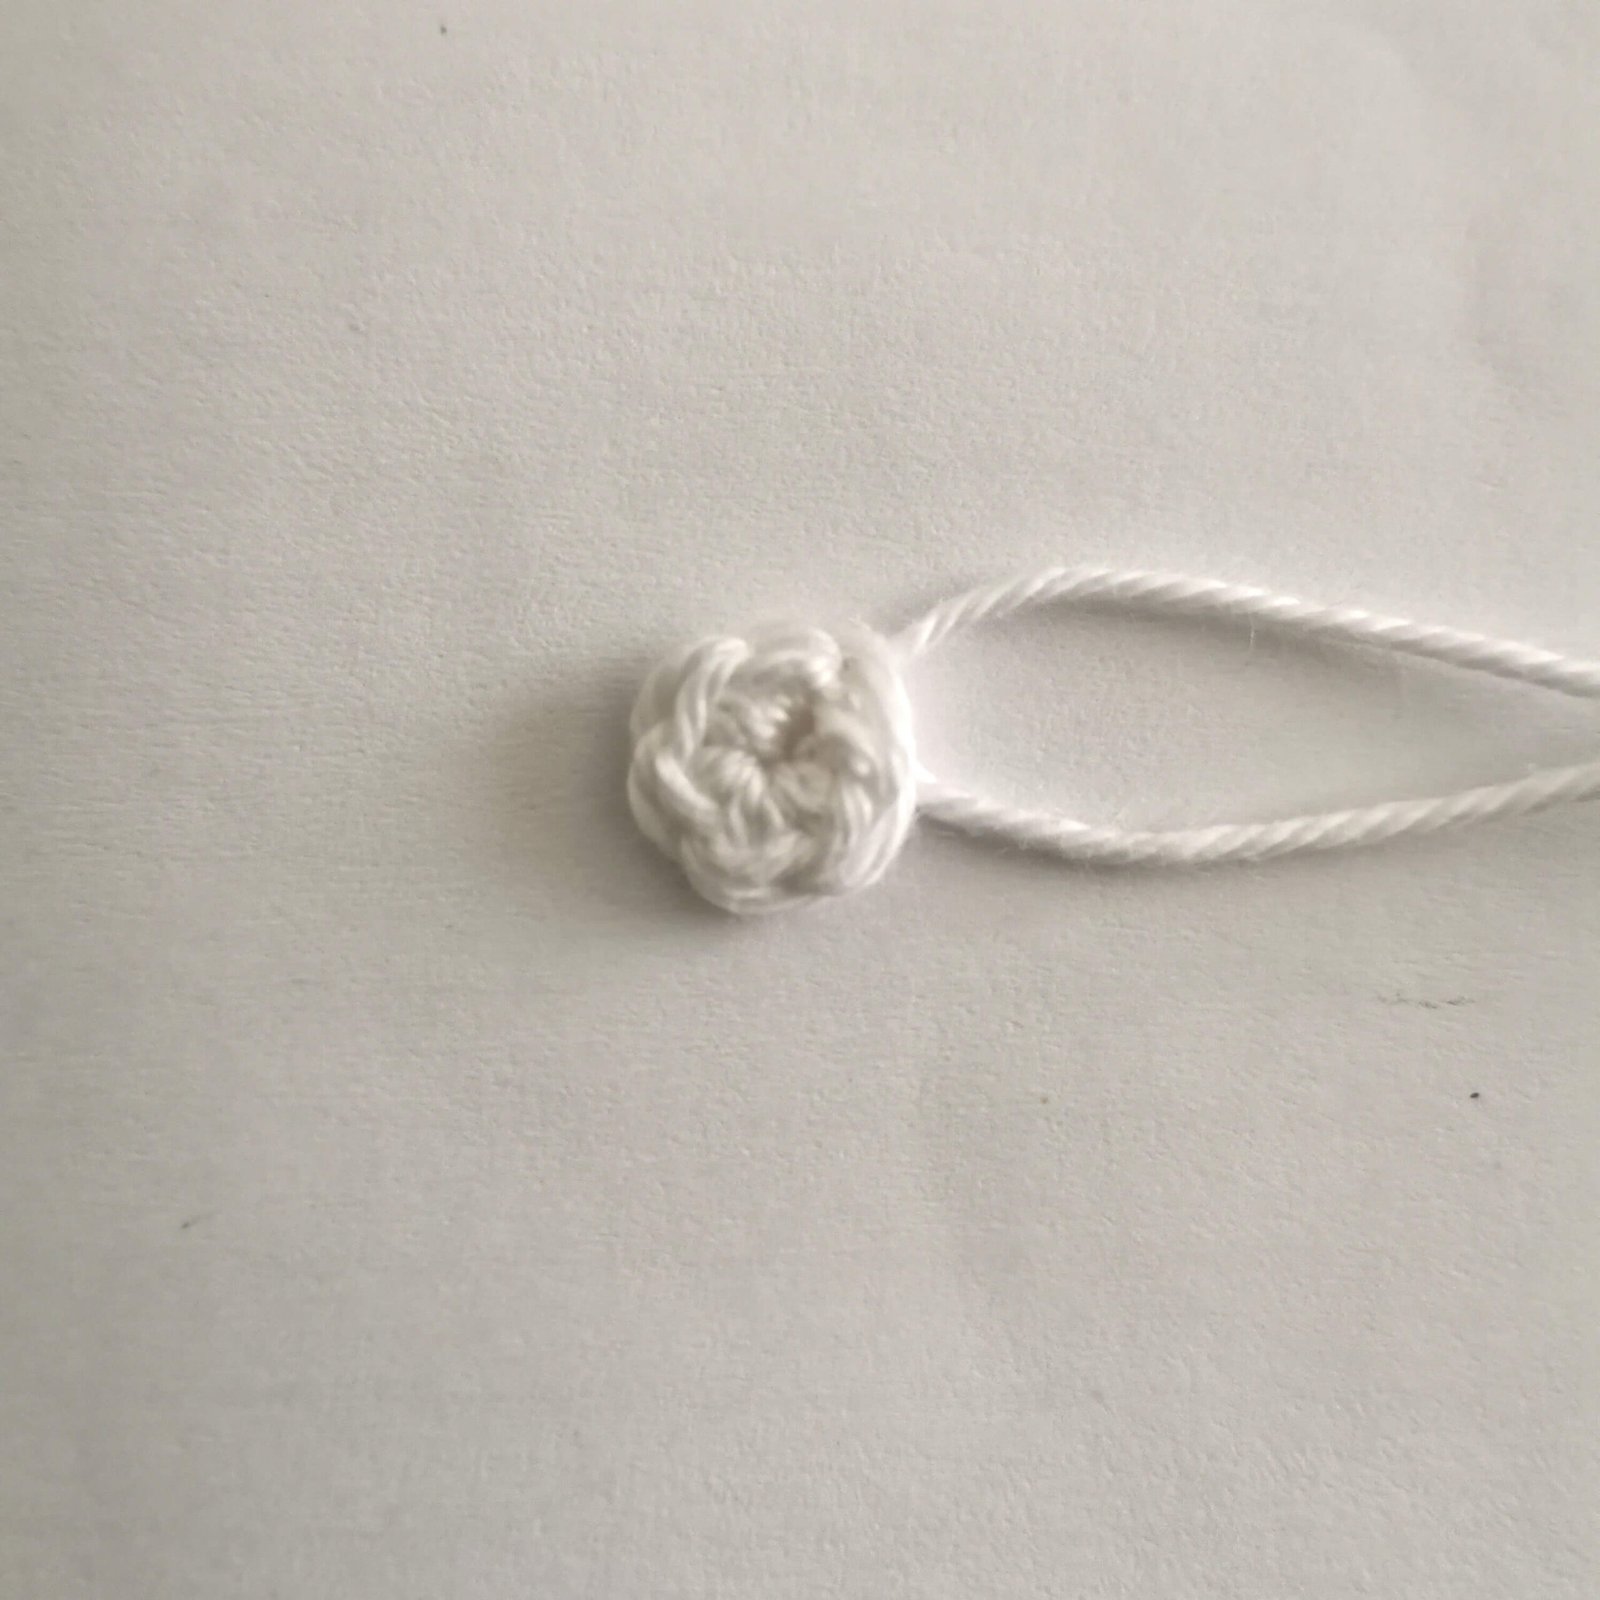
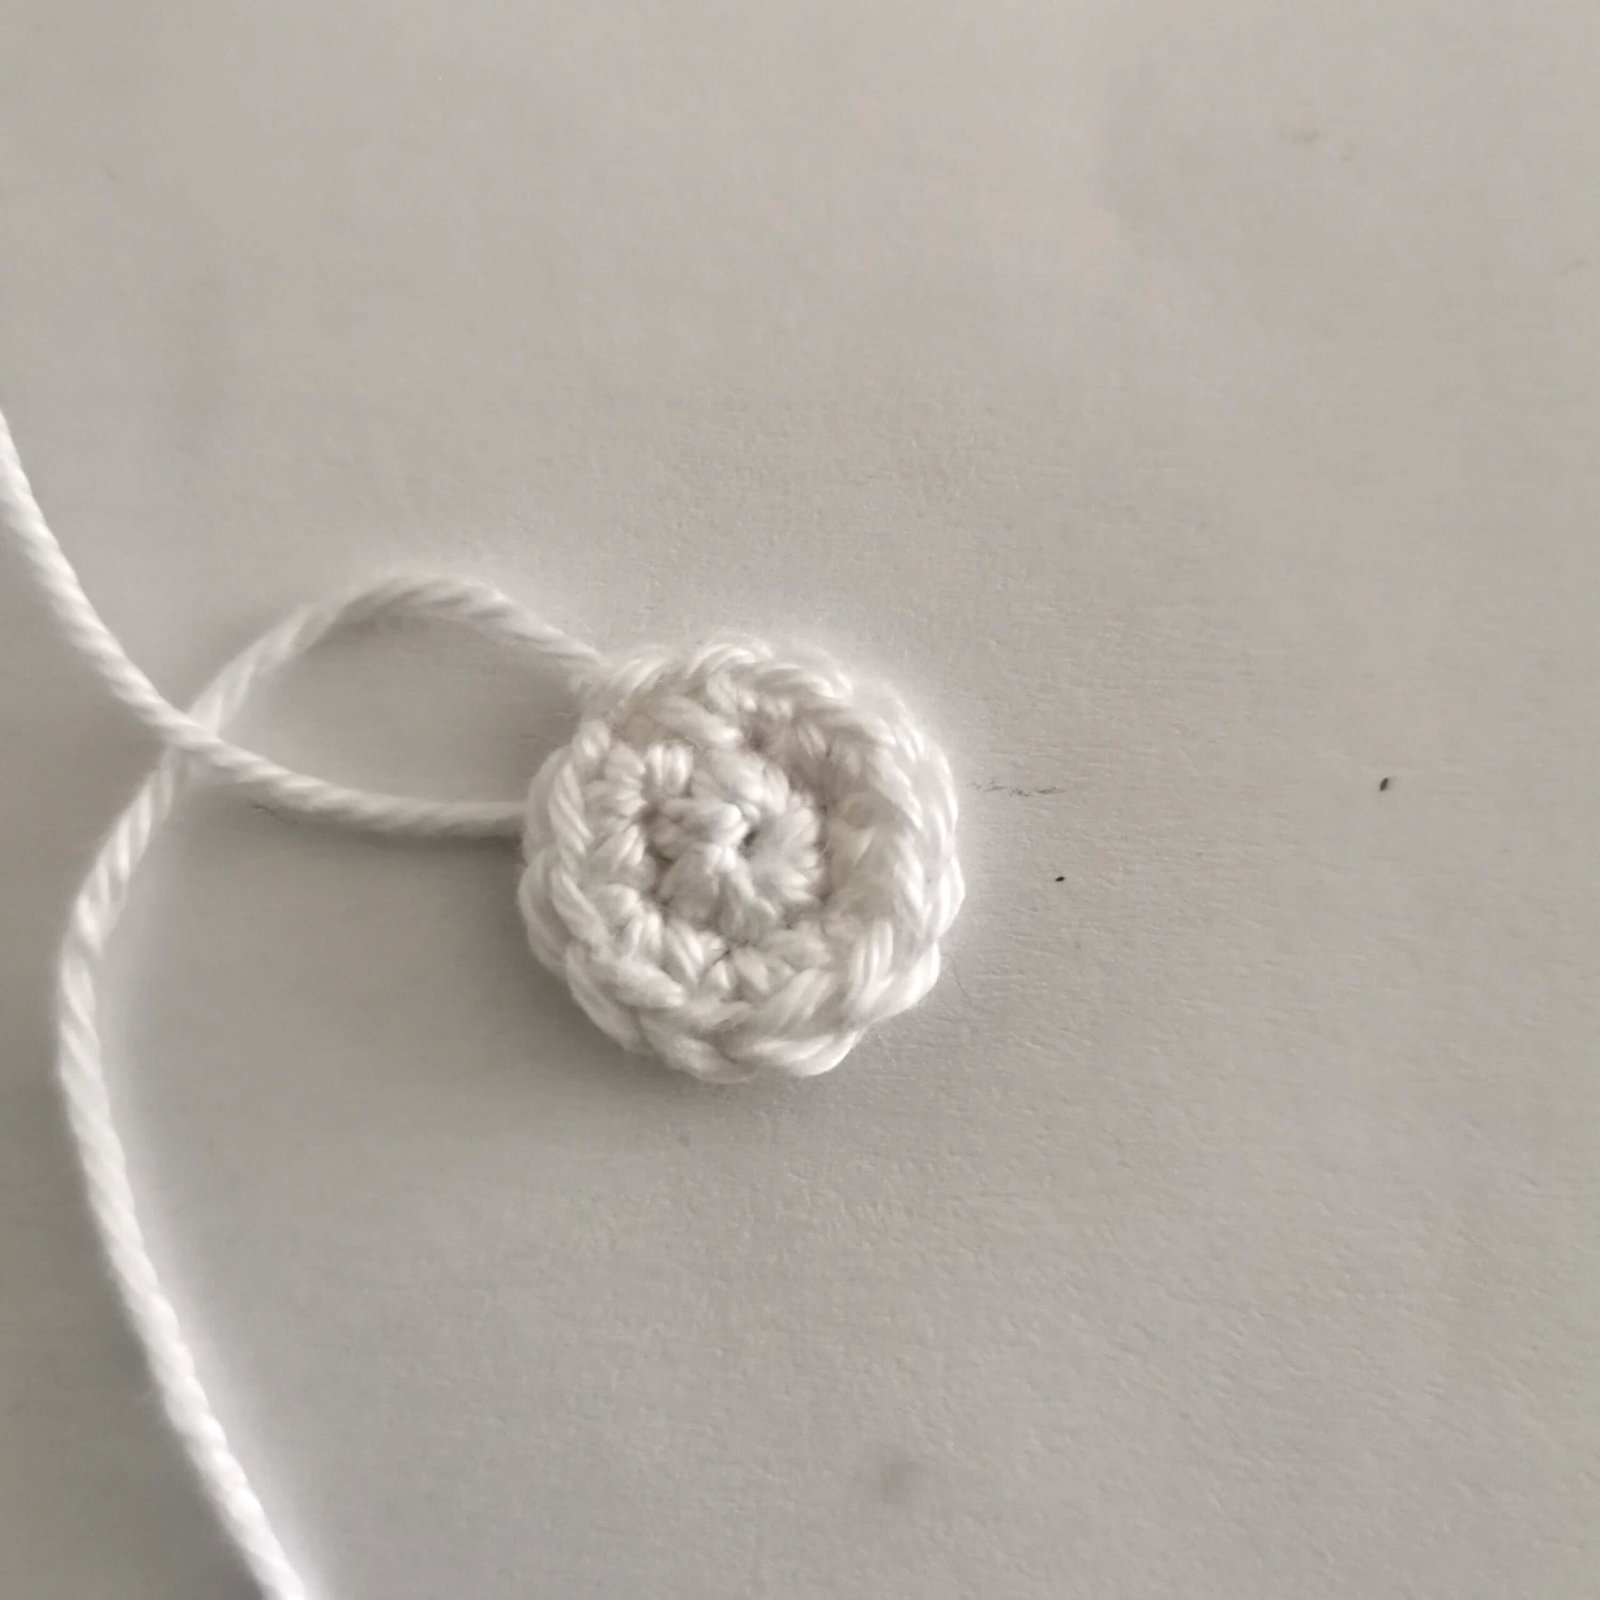
Create three separate parts for each cloud.
- For the first two parts:
- MR, 6 sc, sl st in the first stitch to join. Fasten off.
- For the third part:
- MR, 6 sc, sl st in the first stitch to join.
- Ch 1, 6 inc, sl st to join. Fasten off.
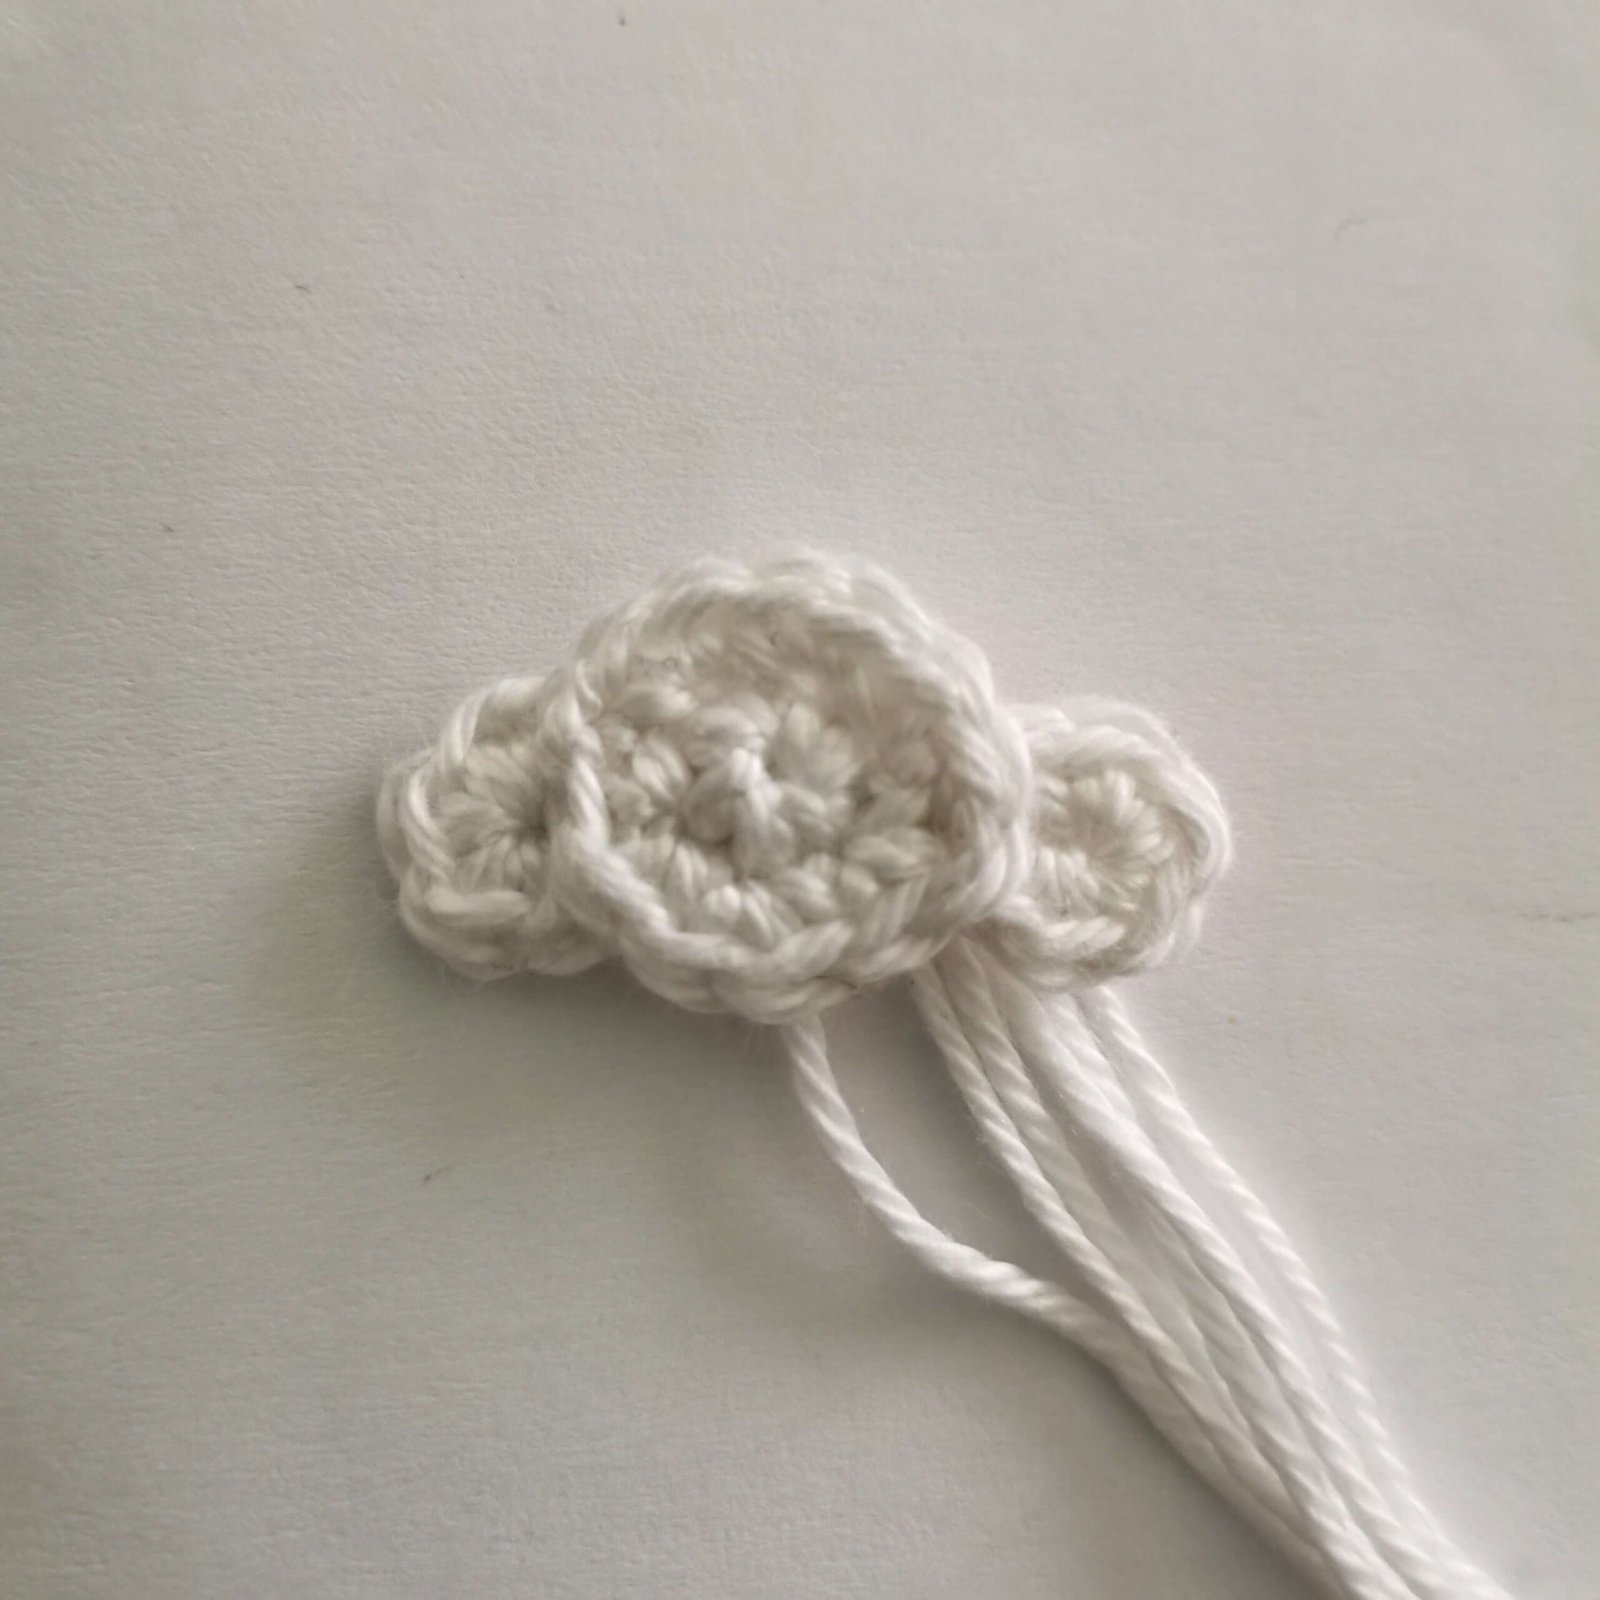
- Assembly: Sew the three parts together to form a fluffy cloud and attach them to the base of the rainbow.
Option II: One-Piece Clouds
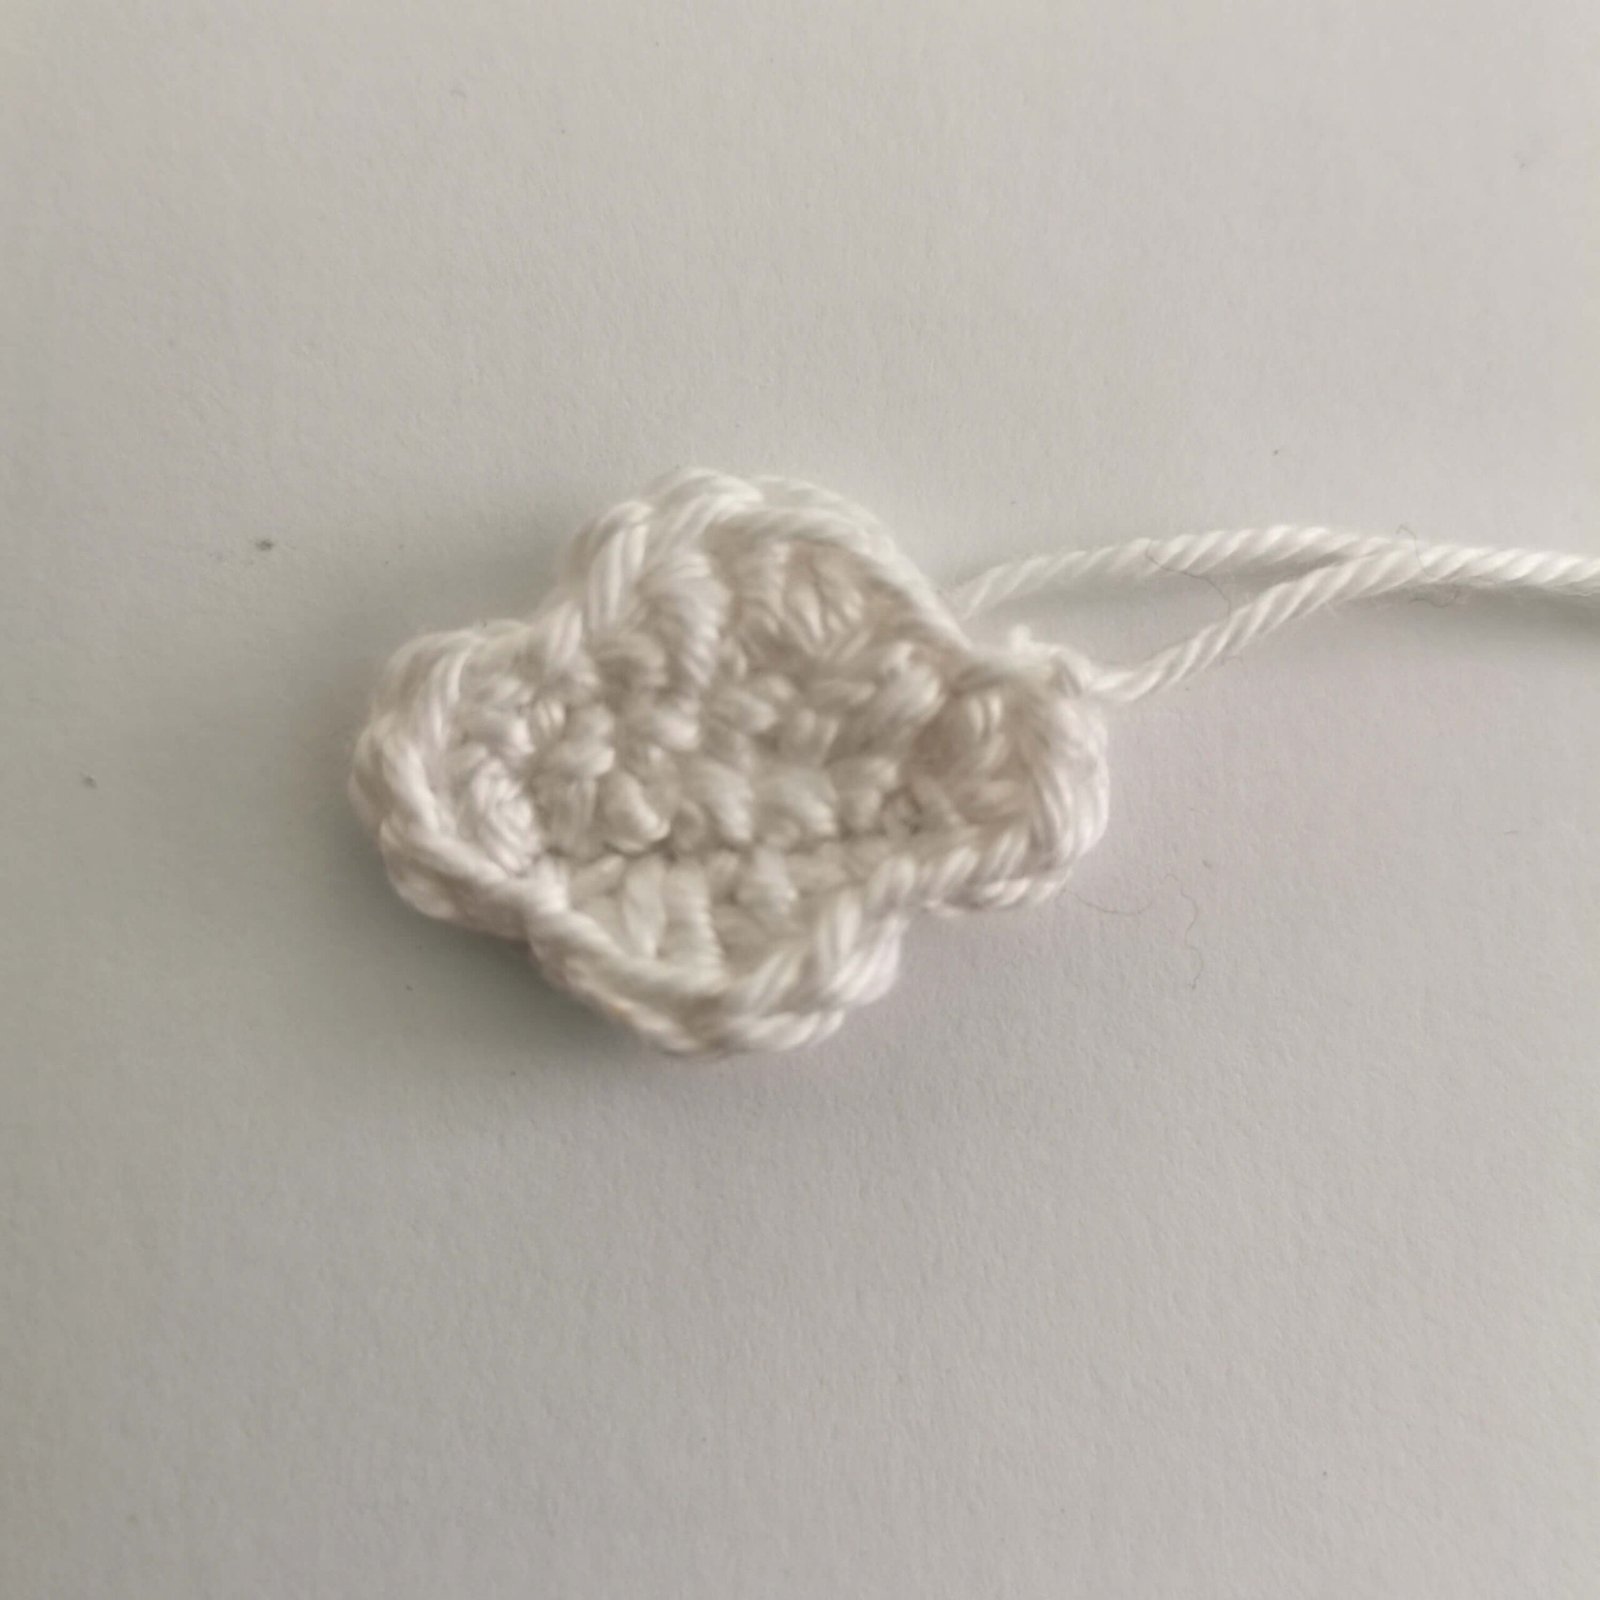
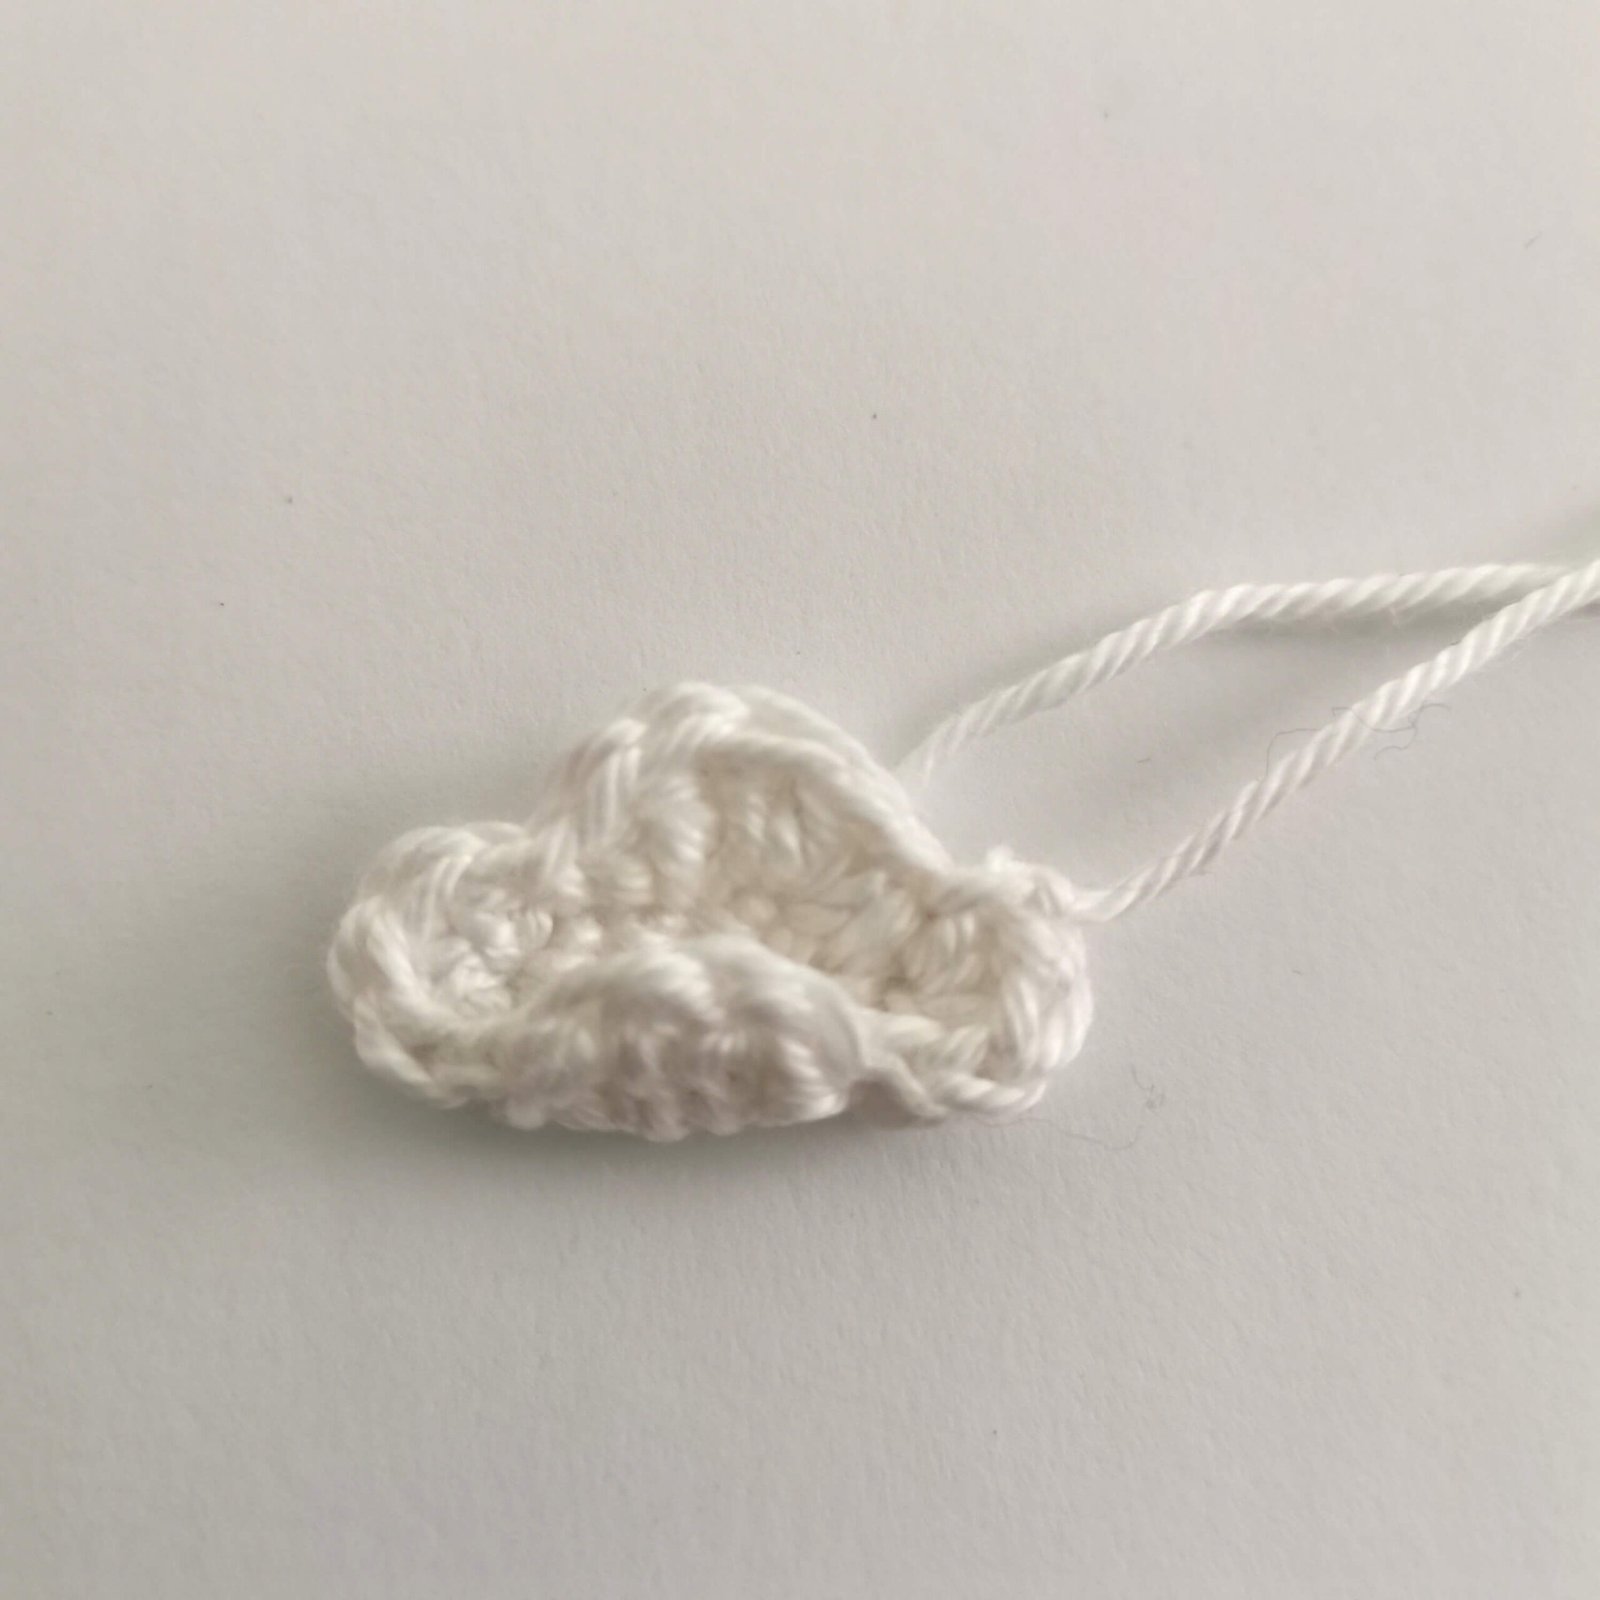
- Initial Chain: Ch 5.
- Round 1: 3 sc, 3 sc in the next stitch, 2 sc, inc in the last stitch [10]
- Round 2: Sl st, (hdc and dc in the next stitch), (dc and hdc in the next stitch), sl st, (3 hdc in the next stitch), sl st, (hdc and dc in the next stitch), (dc and hdc in the next stitch), sl st, (3 hdc in the next stitch).
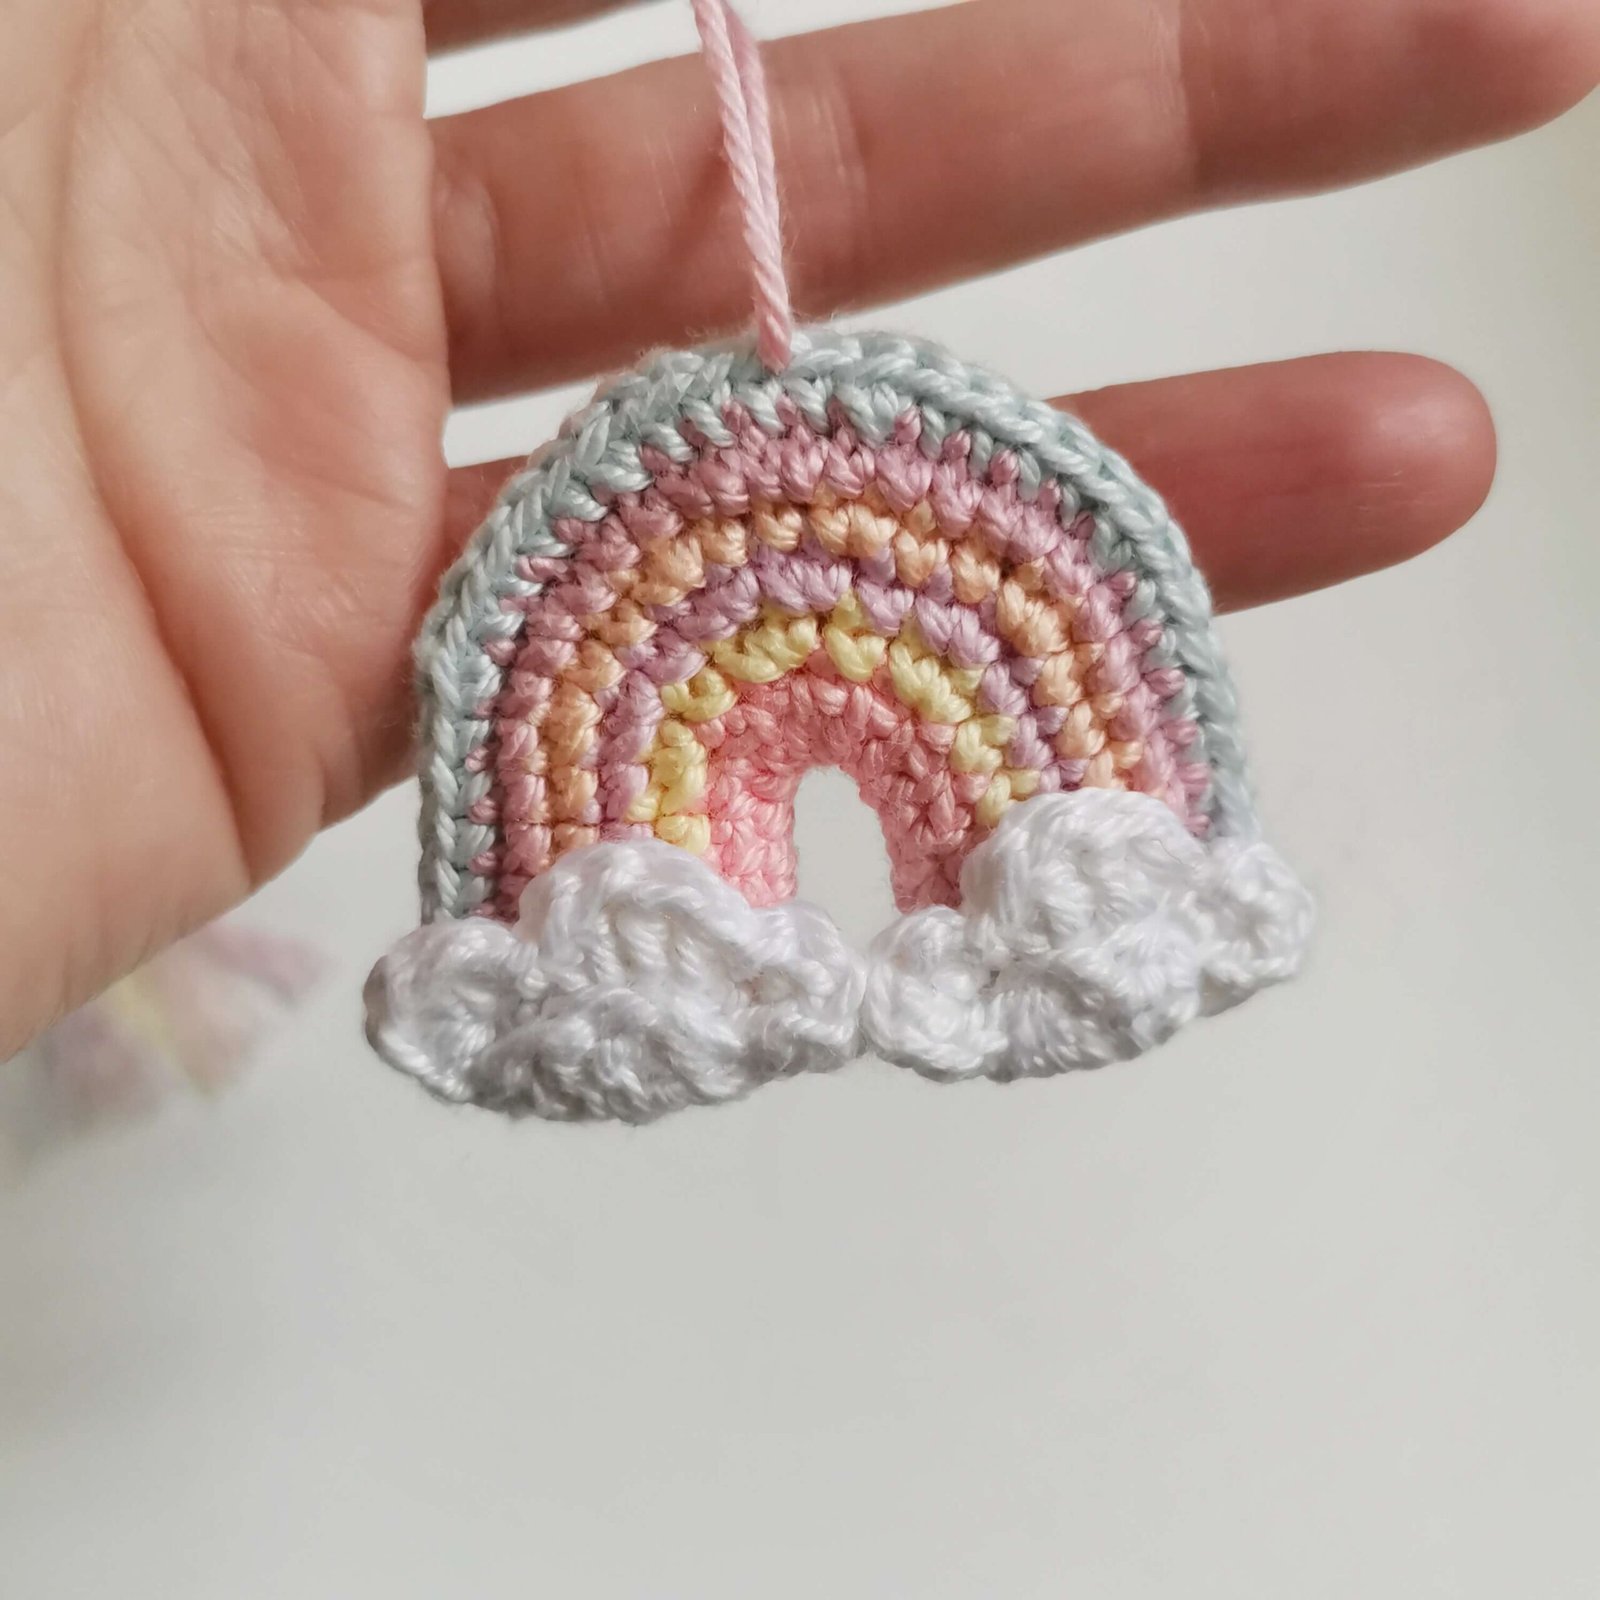
- Fasten off. Fold the bottom part up and sew it closed. Attach the clouds to the rainbow.
Final Touches
To complete the boho look, you can attach small threads to one side (or both) of the rainbow to create a fringe. Brush them out with a comb for a soft, macramé-style finish.
Explore More Free Patterns
If you enjoyed making this Free Crochet Rainbow Pattern, don’t stop here! I have a growing collection of free crochet patterns right here on emmasdolls.com. Whether you want to whip up a Plush Bunny for a gift, a Magic Unicorn, or a Teddy Bear, there is something for everyone. Check out my full library of free designs and start your next project today!
Get the Premium PDF Version
Love my designs and want to support EmmaS Dolls? You can find add free PDF version here Ko-fi shop, Etsy & Ravelry. Buying a PDF version is a wonderful way to help me keep creating free content for this blog, and it allows you to have the pattern handy even when you’re offline!
Join the EmmaS Dolls Newsletter
I have so many exciting new patterns waiting to be published, and I don’t want you to miss a single one! By joining the EmmaS Dolls newsletter, you’ll be the first to know when a new free pattern drops on the website. From seasonal decor to adorable amigurumi, there is much more coming soon—stay inspired and join our creative community!
Free Crochet Rainbow Pattern by EmmaS Dolls
Since this pattern is free, please help me keep it that way by not taking screenshots. Keeping the page open while you work supports my studio! Happy crocheting!✨
Pingback: Free Crochet Donut Pattern: Sweet, Fast & Irresistible - EmmaS Dolls
Pingback: How to Crochet Basic Stitches: A Step-by-Step Tutorial - EmmaS Dolls