✨To support my free patterns, this post includes affiliate links for materials I love. Thank you for your support! 💖
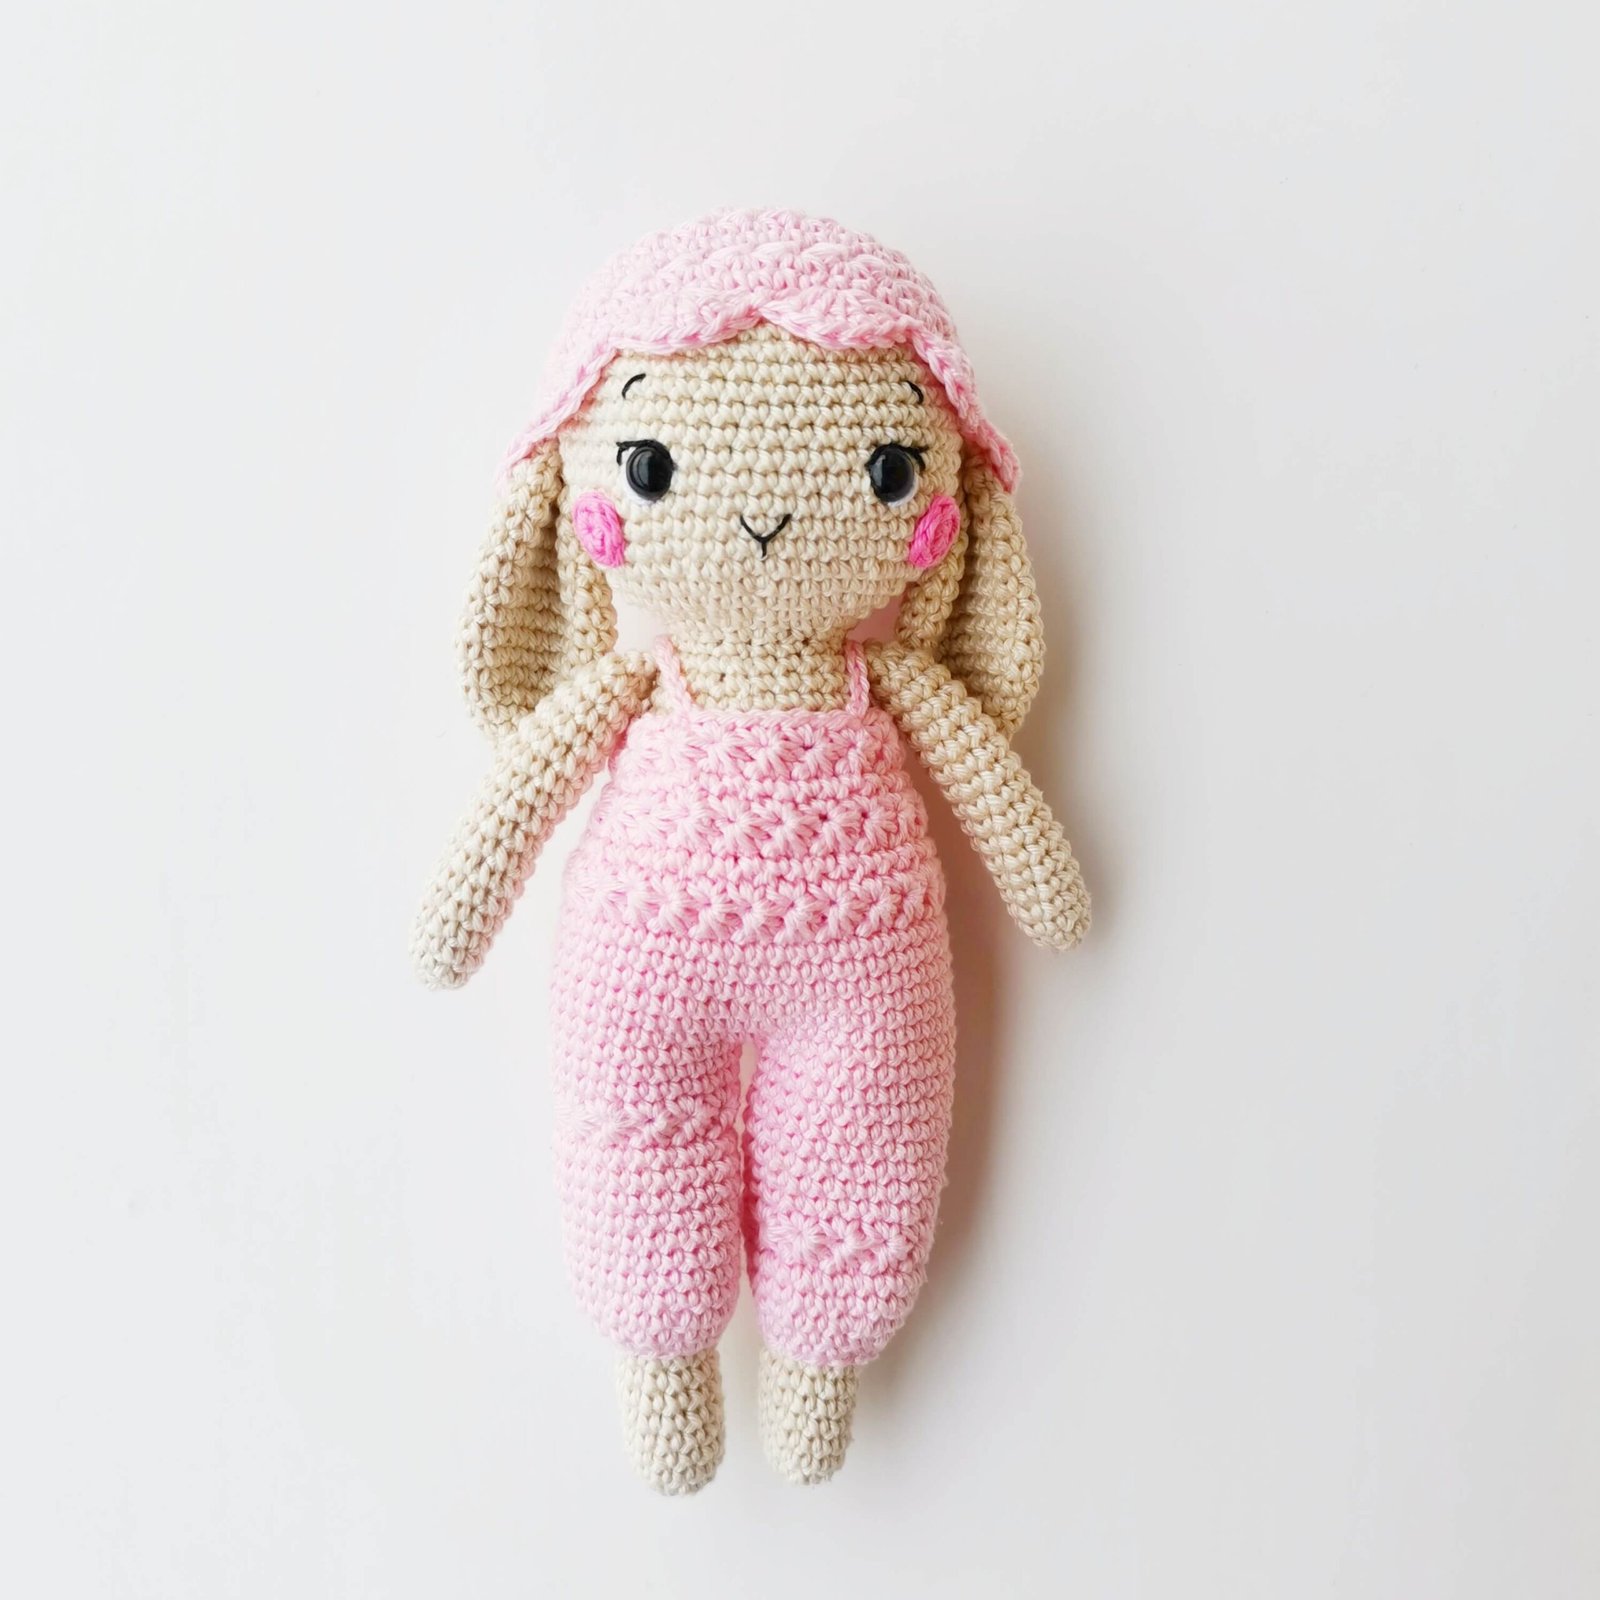
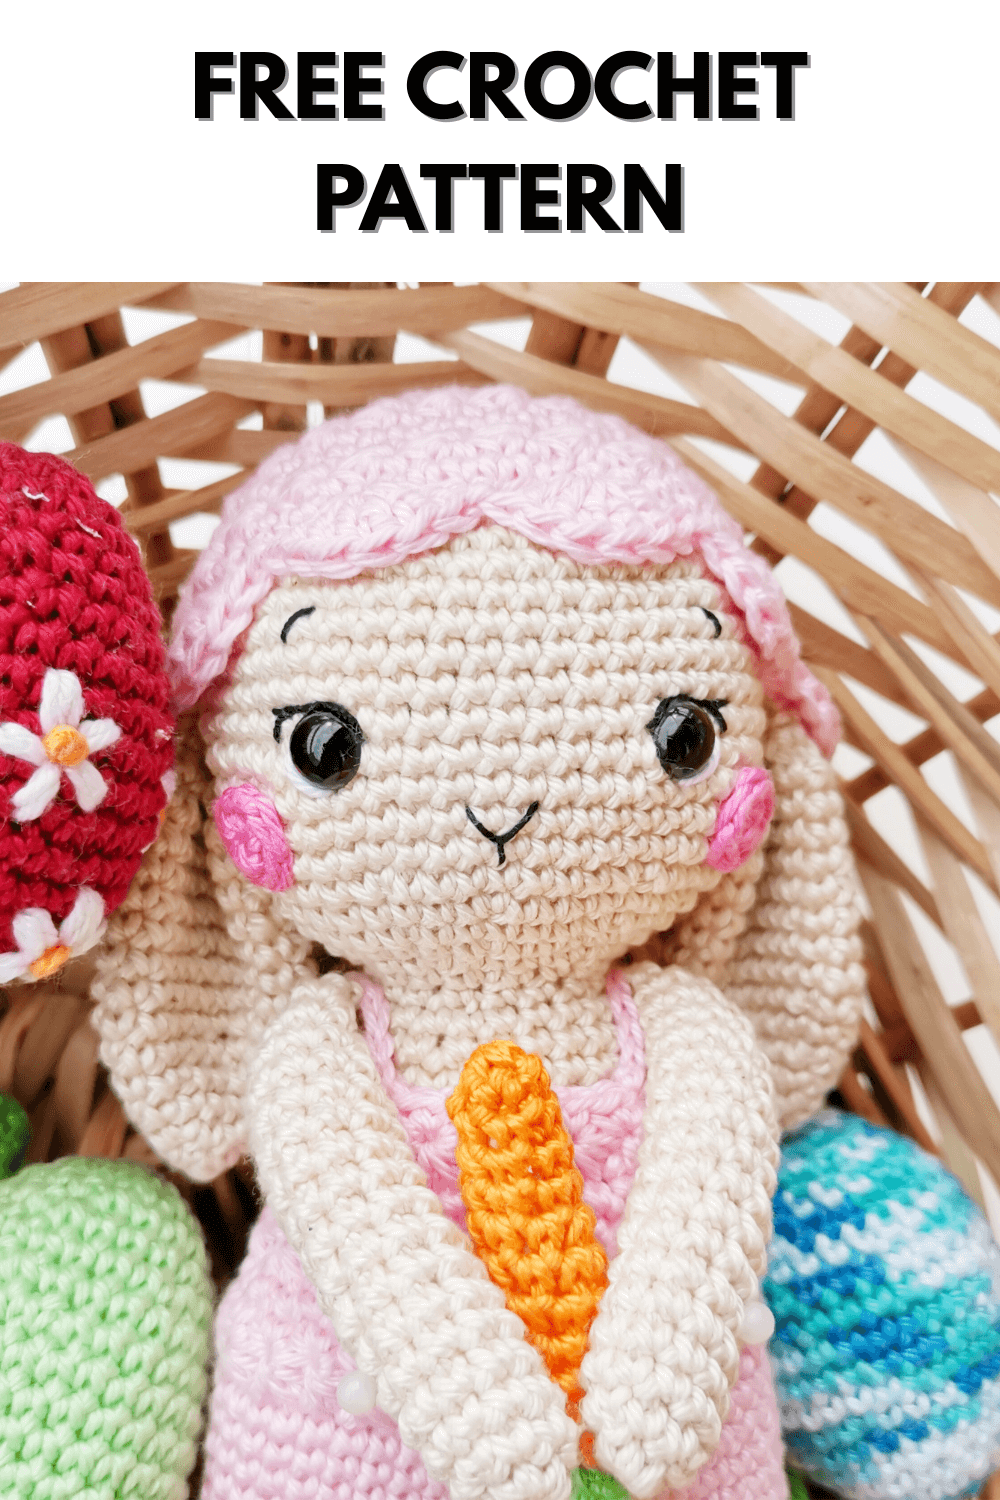
Are you looking for the perfect handmade gift for spring? You are in the right place! Today, I am sharing this free easter crochet bunny pattern for Daisy, a charming little rabbit that will steal your heart. Whether you are preparing your seasonal decor, searching for adorable handmade basket fillers, or just love soft long-eared friends, this detailed amigurumi tutorial is designed to bring joy to your hook and yarn.
Spring is all about fresh beginnings, bright colors, and cheerful crafts. Daisy the Bunny features a sweet pink outfit, delicate details, and a matching hat, making her a wonderful handmade Easter gift idea for kids, grand-kids, or anyone who appreciates handcrafted plushies.
Crafting amigurumi during the spring season is always a rewarding experience. As the days warm up, sitting down with a colorful ball of yarn and watching a cute character come to life is pure relaxation. Daisy makes a beautiful table centerpiece, a cozy nursery display piece, or a memorable addition to an Easter surprise basket.
Grab your favorite hooks, pick your yarn palette, and let’s start crafting this charming spring companion!
🌸 Choose how you want to craft:
- 🌐 Read it free on this blog (supported by ads).
- 📄 Prefer a printable PDF? Get the clean, ad-free PDF version on my Ko-fi shop to support my studio! 💖
Materials Needed for This Free Easter Crochet Bunny Pattern
- Yarn: I use a 100% cotton yarn from my local store. The best match and my top recommendation for this pattern is Paintbox Yarns Cotton DK.
- Hook: I used a 2mm hook. I highly recommend Clover Amour Hooks for the best experience.
- Tools & Supplies:
- Fiberfill, 8mm safety eyes, scissors, and a tapestry needle.
- Optional: Stitch markers.
- Find all these essentials here: Crochet Supplies & Accessories.
Crochet abbreviations:
| Abbreviation | Stitch / Technique |
| MR | Magic ring |
| CH | Chain |
| SC | Single crochet |
| DC | Double crochet |
| STAR ST | Daisy stitch |
| INC | Increase |
| DEC | Decrease |
| SL ST | Slip stitch |
| SK ST | Skip stitch |
| BLO | Back loop only |
| FLO | Front loop only |
Pattern Details & Difficulty
Before you begin, please note that this free crochet bunny pattern is rated as intermediate. While the basic stitches are straightforward, the assembly and some details on clothes require a bit of experience with amigurumi. When using the recommended yarn and hook size, the finished Daisy bunny stands approximately 8 inches (21 cm) tall. This makes her the perfect size for cuddling or as a centerpiece in a spring-themed nursery.
If you are a beginner but still eager to challenge yourself with this project, don’t worry—I’ve got you covered! Before diving into the pattern, take a moment to explore my helpful guides. You can get familiar with standard terms using the Crochet Abbreviations guide, learn foundational techniques with How to Crochet Basic Stitches, and master shaping and assembly through the Perfect Amigurumi Guide series alongside Amigurumi Advanced Techniques. These resources will give you all the background knowledge and confidence you need to bring Daisy to life smoothly!
FREE EASTER CROCHET BUNNY PATTERN
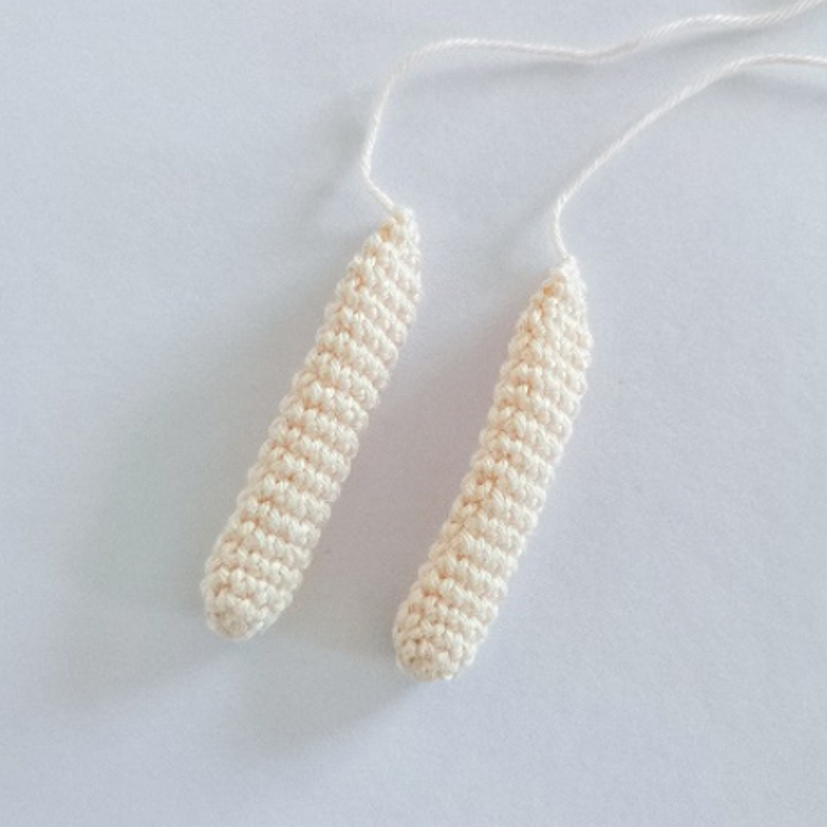
Arm (make 2)
Round 1: mr, 6sc [6]
Round 2: (sc, inc) x 3 [9]
Rounds 3-17: 9sc = [9] (15 rounds)
Round 18: (sc, dec) x 3 [6]
Stuff the arm. Join the sides and close with 3sc. Fasten off
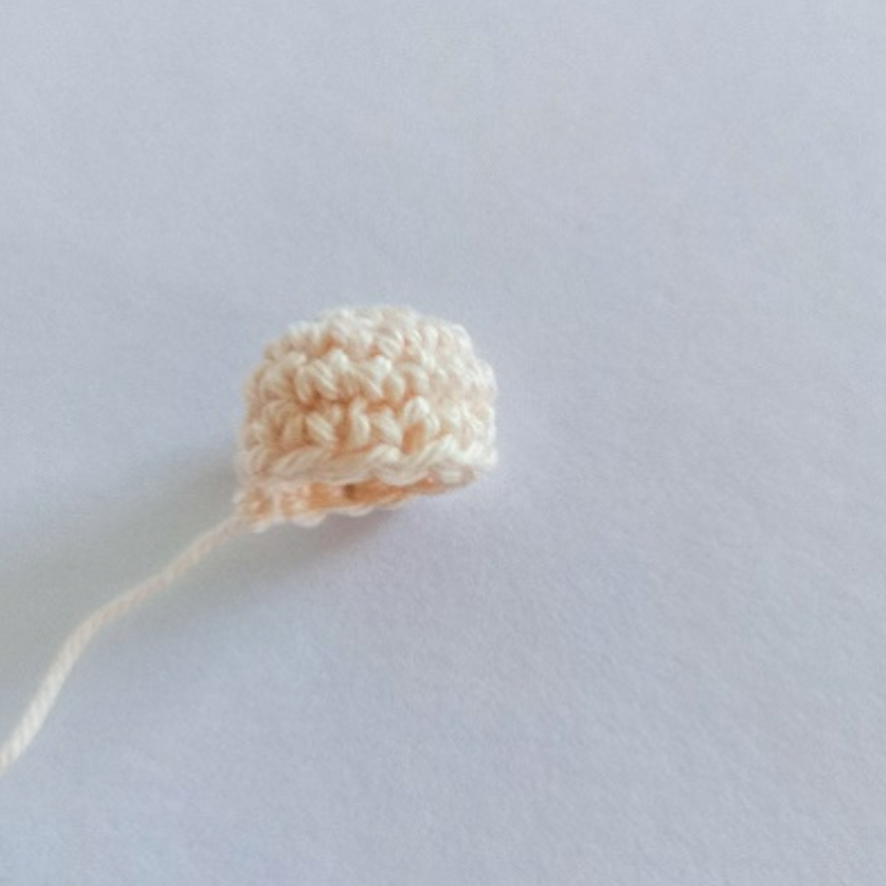
Tail
Round 1: mr, 6sc [6]
Round 2: 6 x inc [12]
Round 3: (sc, inc) x 6 [18]
Round 4: 18sc [18]
Round 5: (sc, dec) x 6 [12]
Fasten off, leaving long tail for sewing
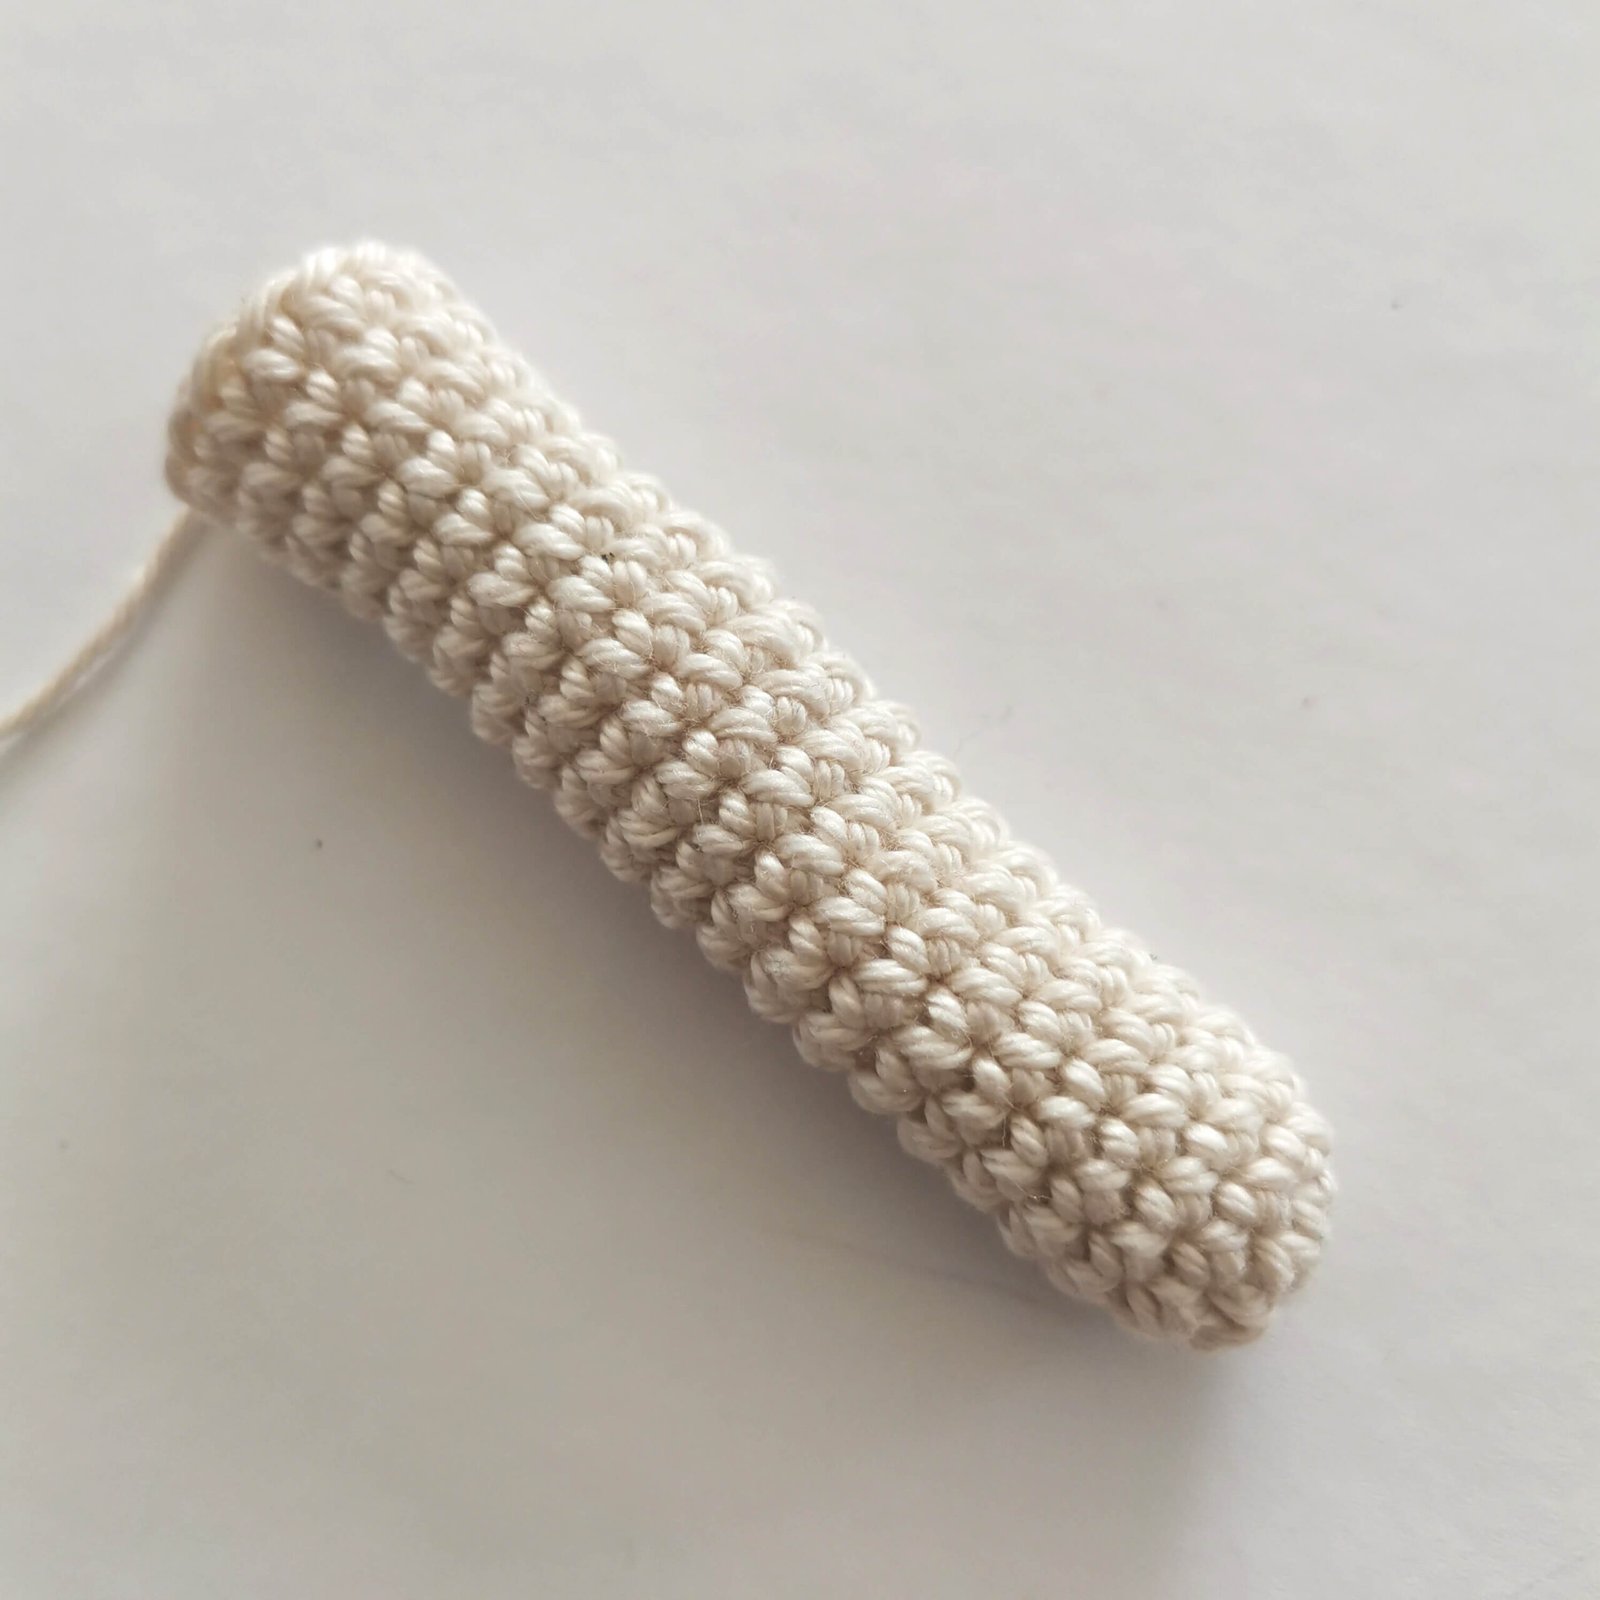
Left leg
Round 1: mr, 6sc [6]
Round 2: inc x 6 [12]
Rounds 3-20: 12sc [12] (18 rounds)
Round 21: inc, 11sc [13]
Round 22: sc, inc, 11sc [14]
Work 2 more sc. Stuff the leg. Fasten off.
Right leg
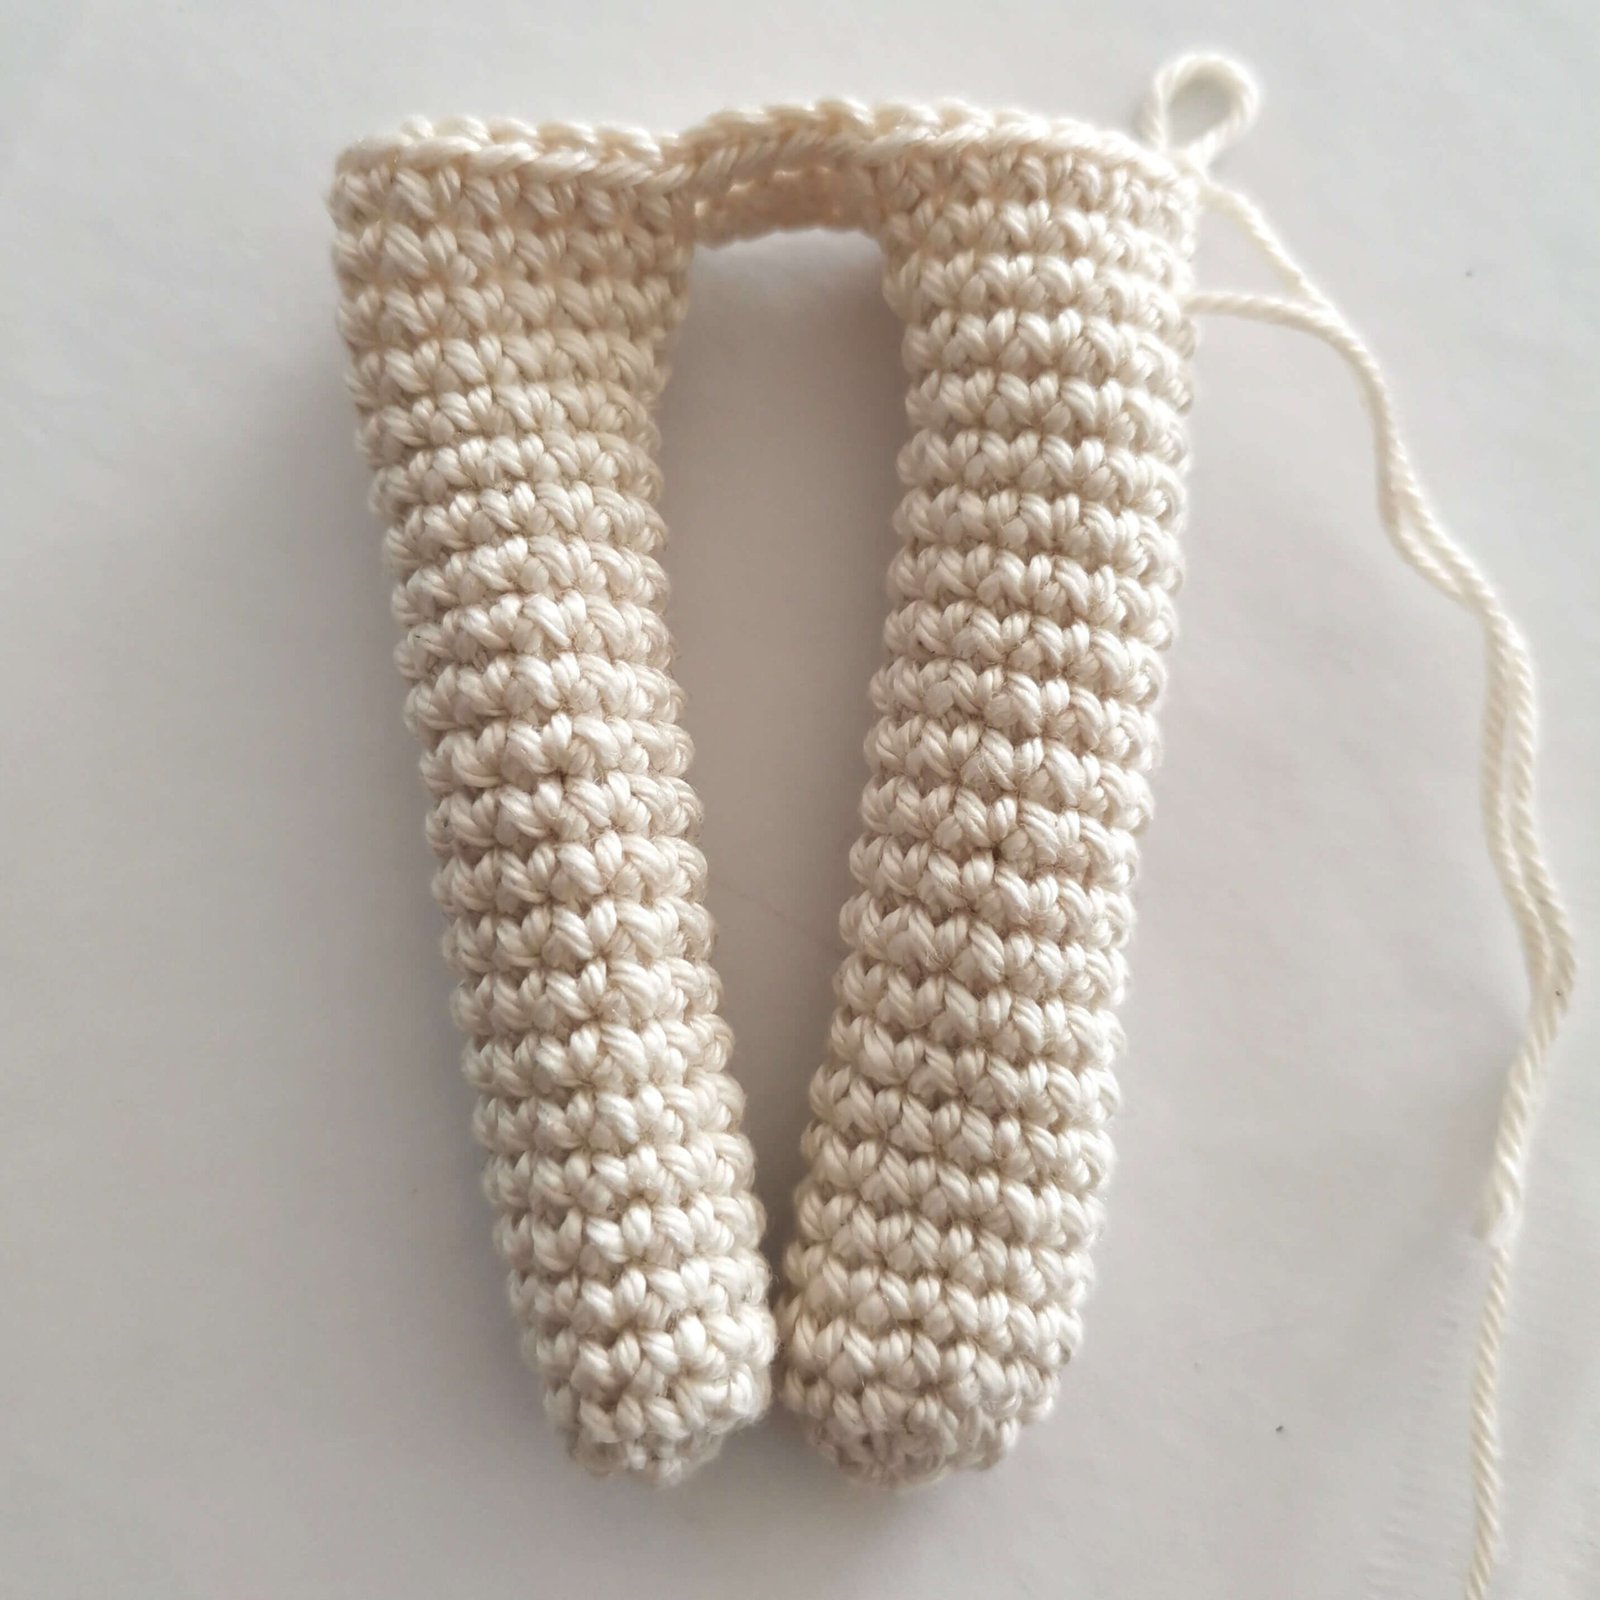
Round 1: mr, 6sc [6]
Round 2: inc x 6 [12]
Rounds 3-20: 12sc [12] (18 rounds)
Round 21: 6sc, inc, 5sc [13]
Round 22: 6sc, inc, 6sc [14]
Stuff the leg. Keep working without breaking the yarn to start the body.
Body
Round 1: 7sc (on right leg), ch4, 14sc (on left leg), 4sc (on chain), 7sc (on right leg) [36]
Round 2: 36sc [36]
Round 3: (5sc, inc) x 6 [42]
Rounds 4-9: 42sc [42] (6 rounds)
Round 10: (12sc, dec) x 3 [39]
Round 11: 39sc [39]
Round 12: (11sc, dec) x 3 [36]
Round 13: 36sc [36]
Round 14: (10sc, dec) x 3 [33]
Round 15: 33sc [33]
Round 16: (9sc, dec) x 3 [30]
Round 17: 30sc [30]
Round 18: (8sc, dec) x 3 [27]
Round 19: 27sc [27]
Round 20: (7sc, dec) x 3 [24]
Work 8sc to move the marker. Stuff the body.
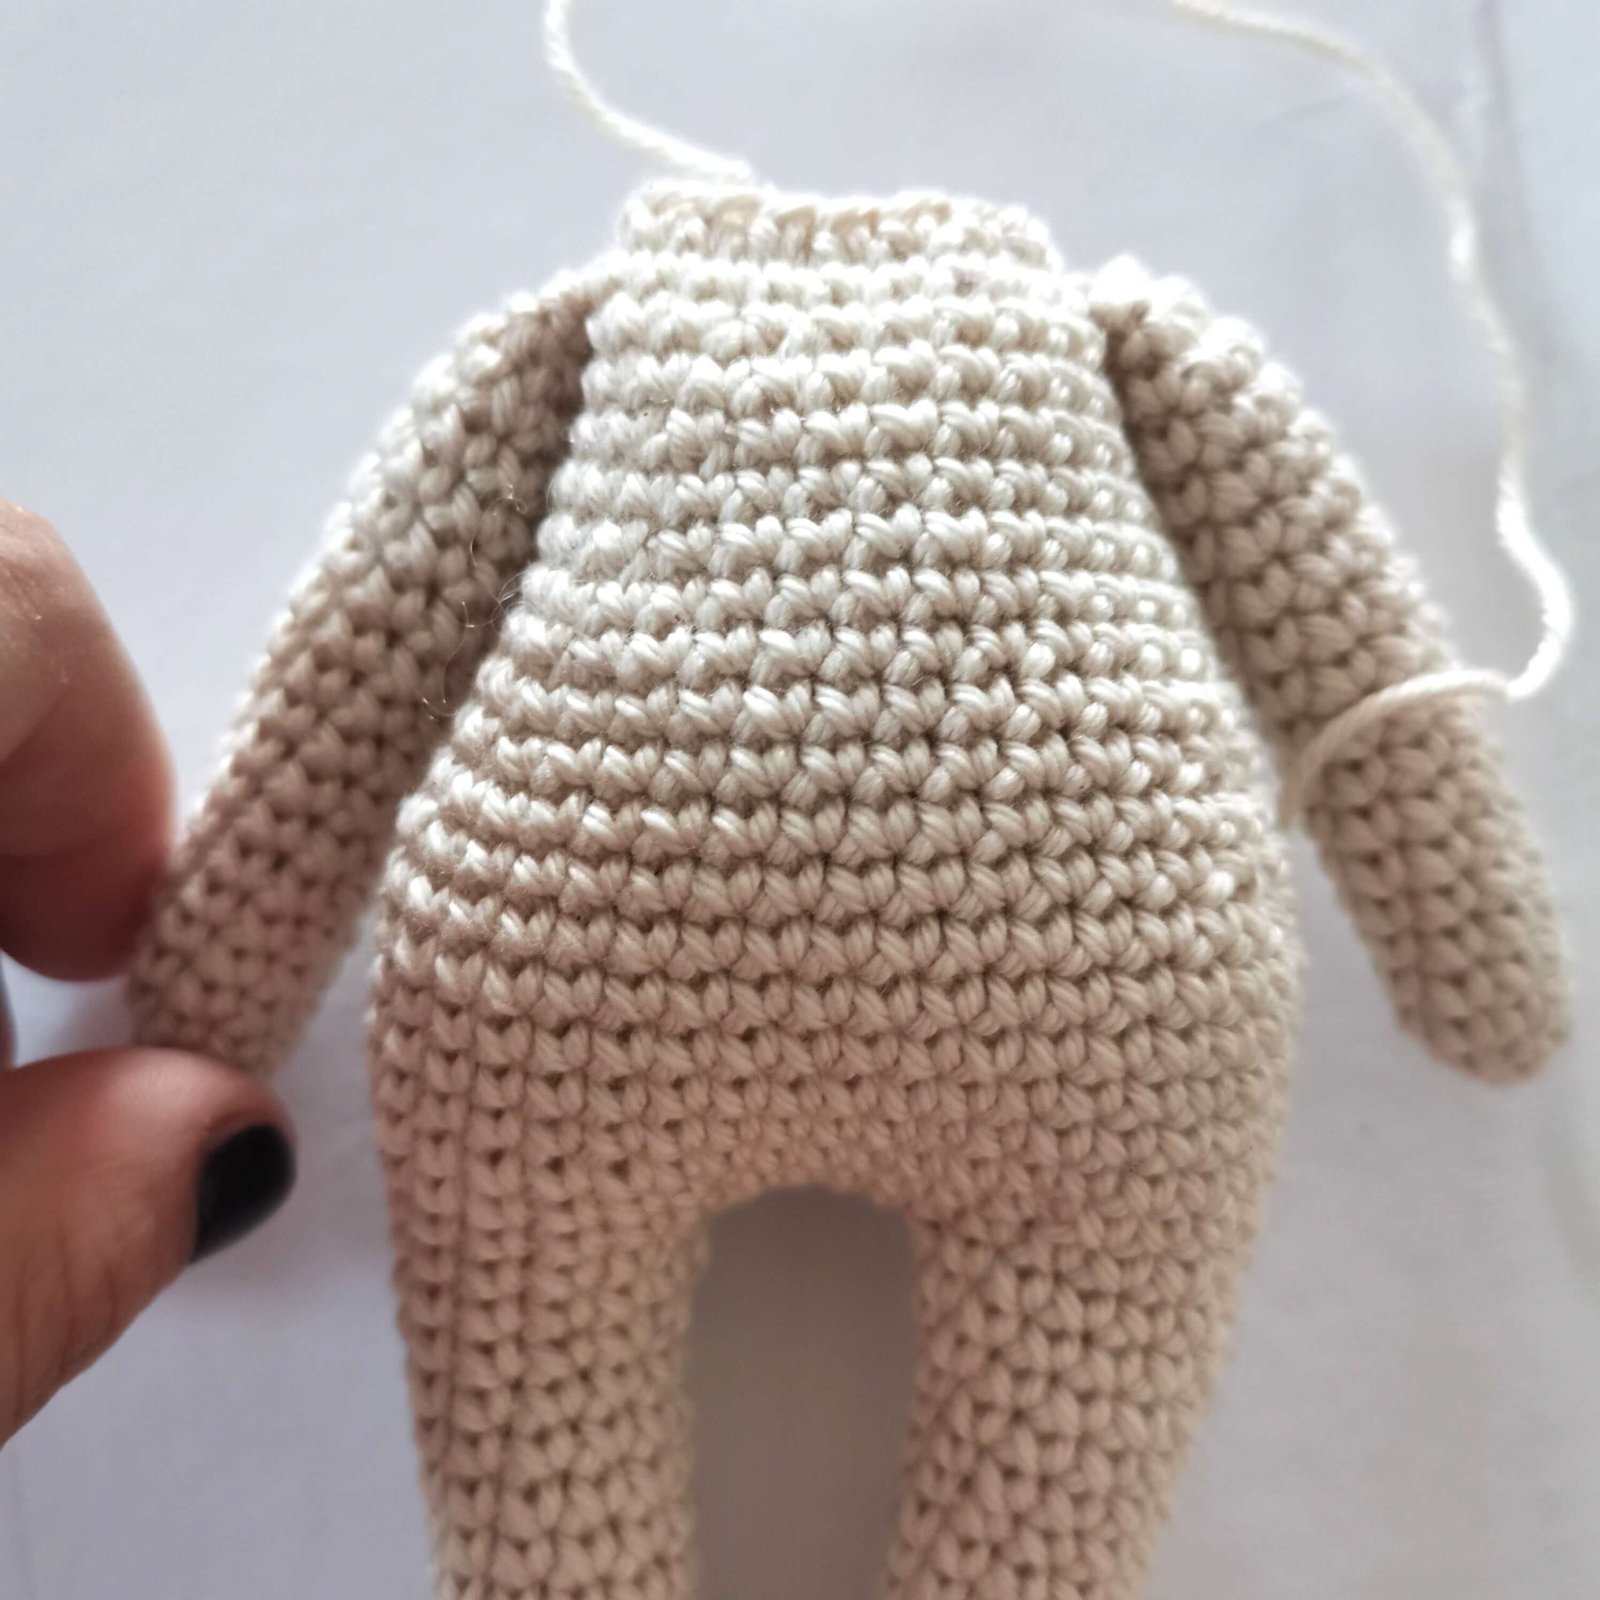
Round 21: 5sc, 3sc (connect left arm to body), 9sc, 3sc (connect right arm to body), 4sc = [24]
Note: Check that the arms are sideways on the body in relation to the legs. If they do not stand
straight, move them forward or backward for as much stitches as needed.
Round 22: (2sc, dec) x 6 [18]
Don’t break the yarn
Stuff the body firmly.
Onesie for this Free Crochet Bunny Pattern
Light pink yarn
Left leg
Ch15, sl st in first to connect
Round 1: 15sc [15]
Round 2: (2sc, inc, 2sc) x 3 [18]
Round 3: (sc, inc, sc) x 6 [24]
Rounds 4-5: 24sc [24]
• In the next two rounds we will be making a modified star stitch in this free Easter crochet bunny pattern.
Both rounds should be worked on the right side.
Round 6: Creating the Star Stitch
First Star of the round:
- Start with ch 2.
- Insert hook into the second chain from hook and pull up a loop (2 loops on hook).
- Insert hook into the “body” (side loop) of the previous stitch and pull up a loop (3 loops on hook).
- Insert hook into the base of the same stitch where the chain was made and pull up a loop (4 loops on hook).
- Insert hook into the next stitch and pull up a loop (5 loops on hook).
- Insert hook into the following stitch and pull up a loop (6 loops on hook).
- Yarn over and pull through all 6 loops on hook.
- Chain 1 to form the “eye” of the star.
Next 11 Stars (Regular Stars): Note: You start with 1 loop already on your hook.
- Insert hook into the eye of the previous star and pull up a loop (2 loops on hook).
- Insert hook into the “body” (the last loop of the previous star) and pull up a loop (3 loops on hook).
- Insert hook into the same stitch where the last loop of the previous star was worked and pull up a loop (4 loops on hook).
- Insert hook into the next stitch and pull up a loop (5 loops on hook).
- Insert hook into the following stitch and pull up a loop (6 loops on hook).
- Yarn over and pull through all 6 loops, chain 1 to close and form the eye.
Round 7: Finishing the Flower Look
Ch 1, then work 2 sc into each “eye” of the stars from the previous round. This will complete the petal shape and restore your stitch count.
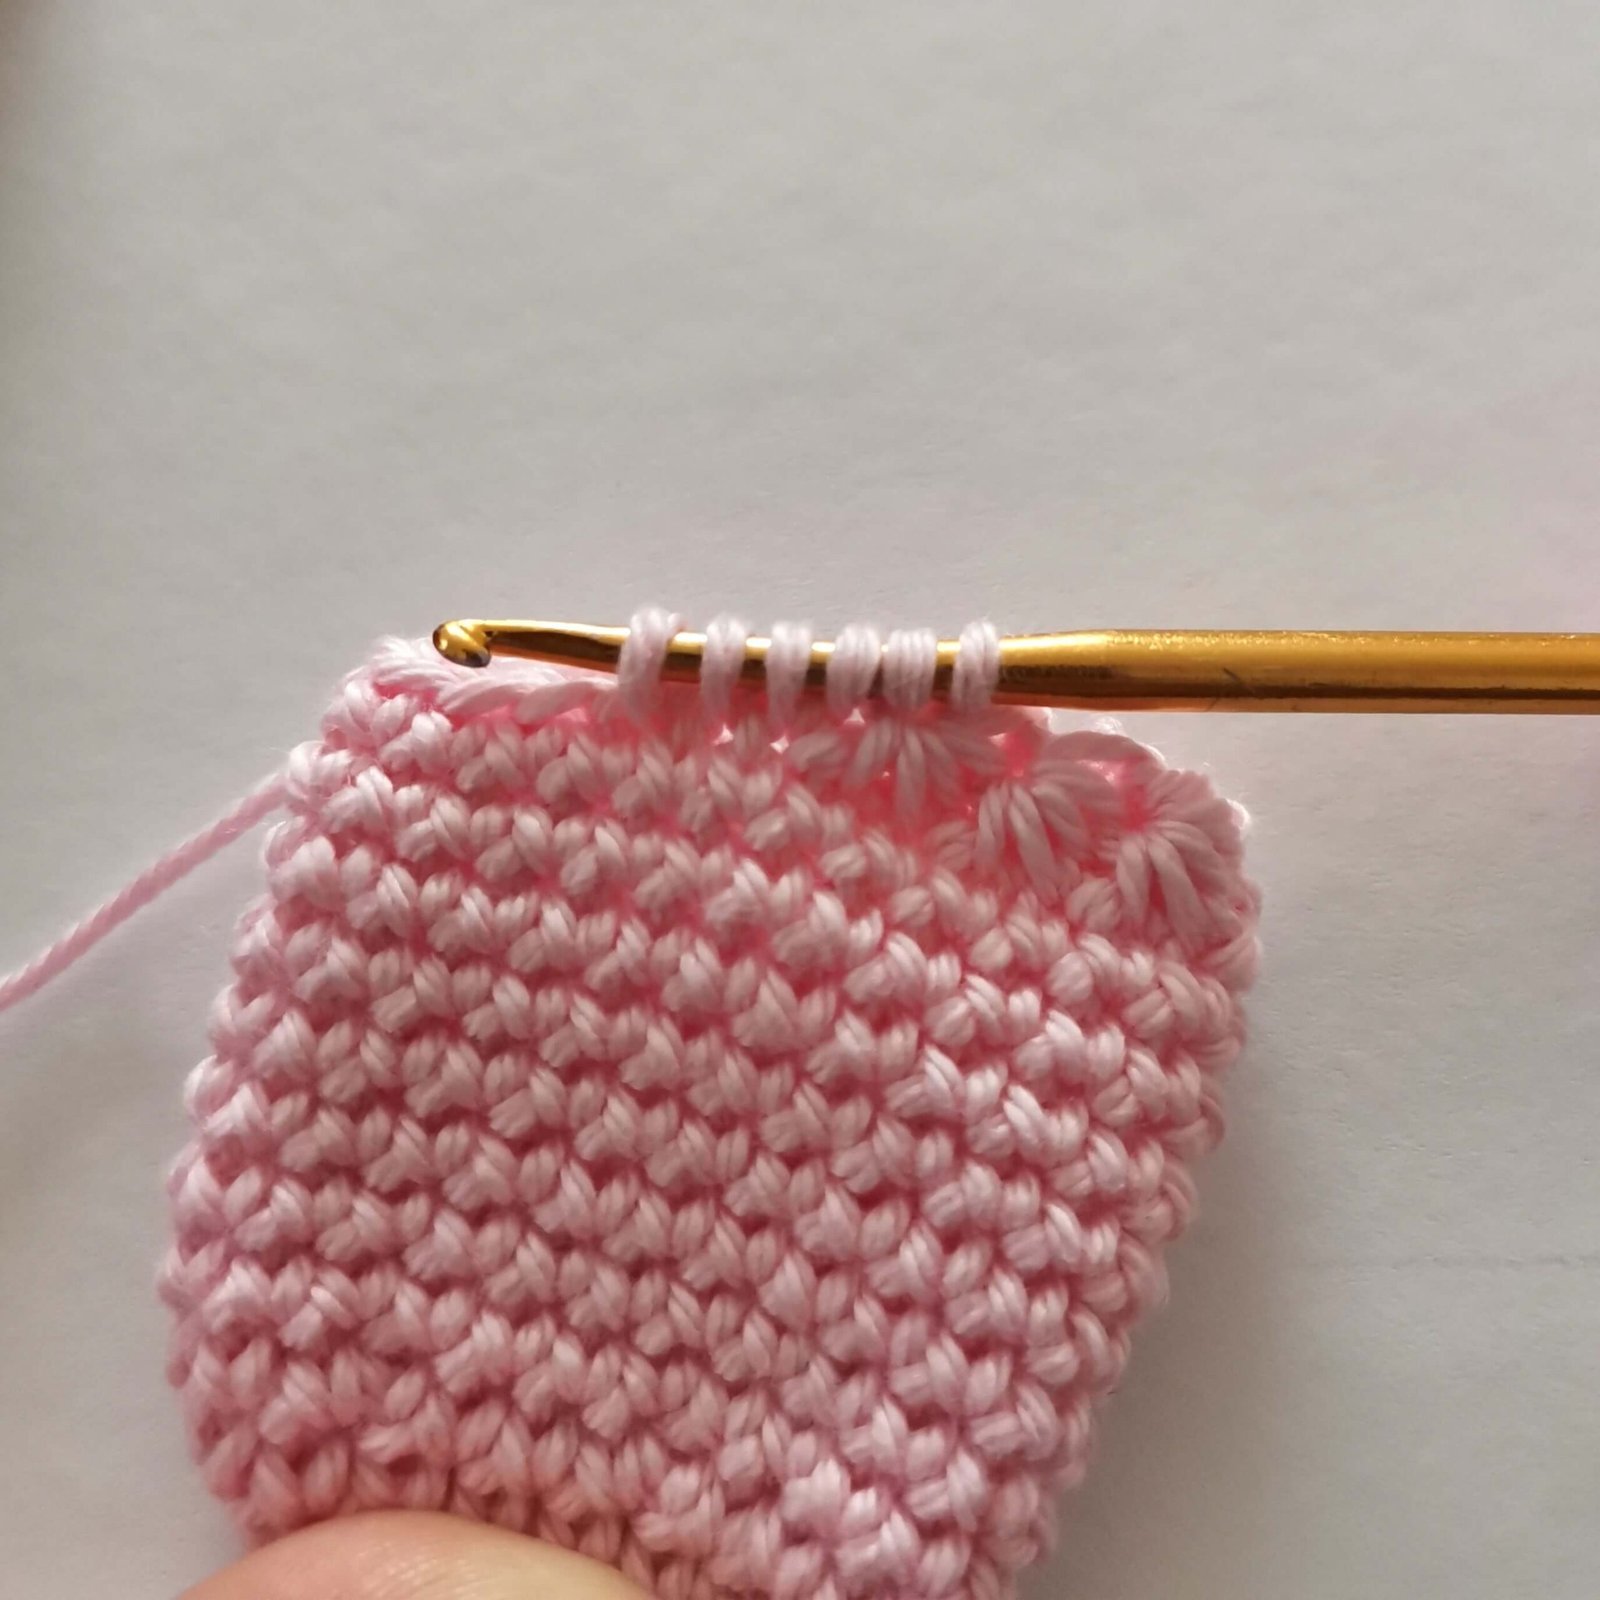
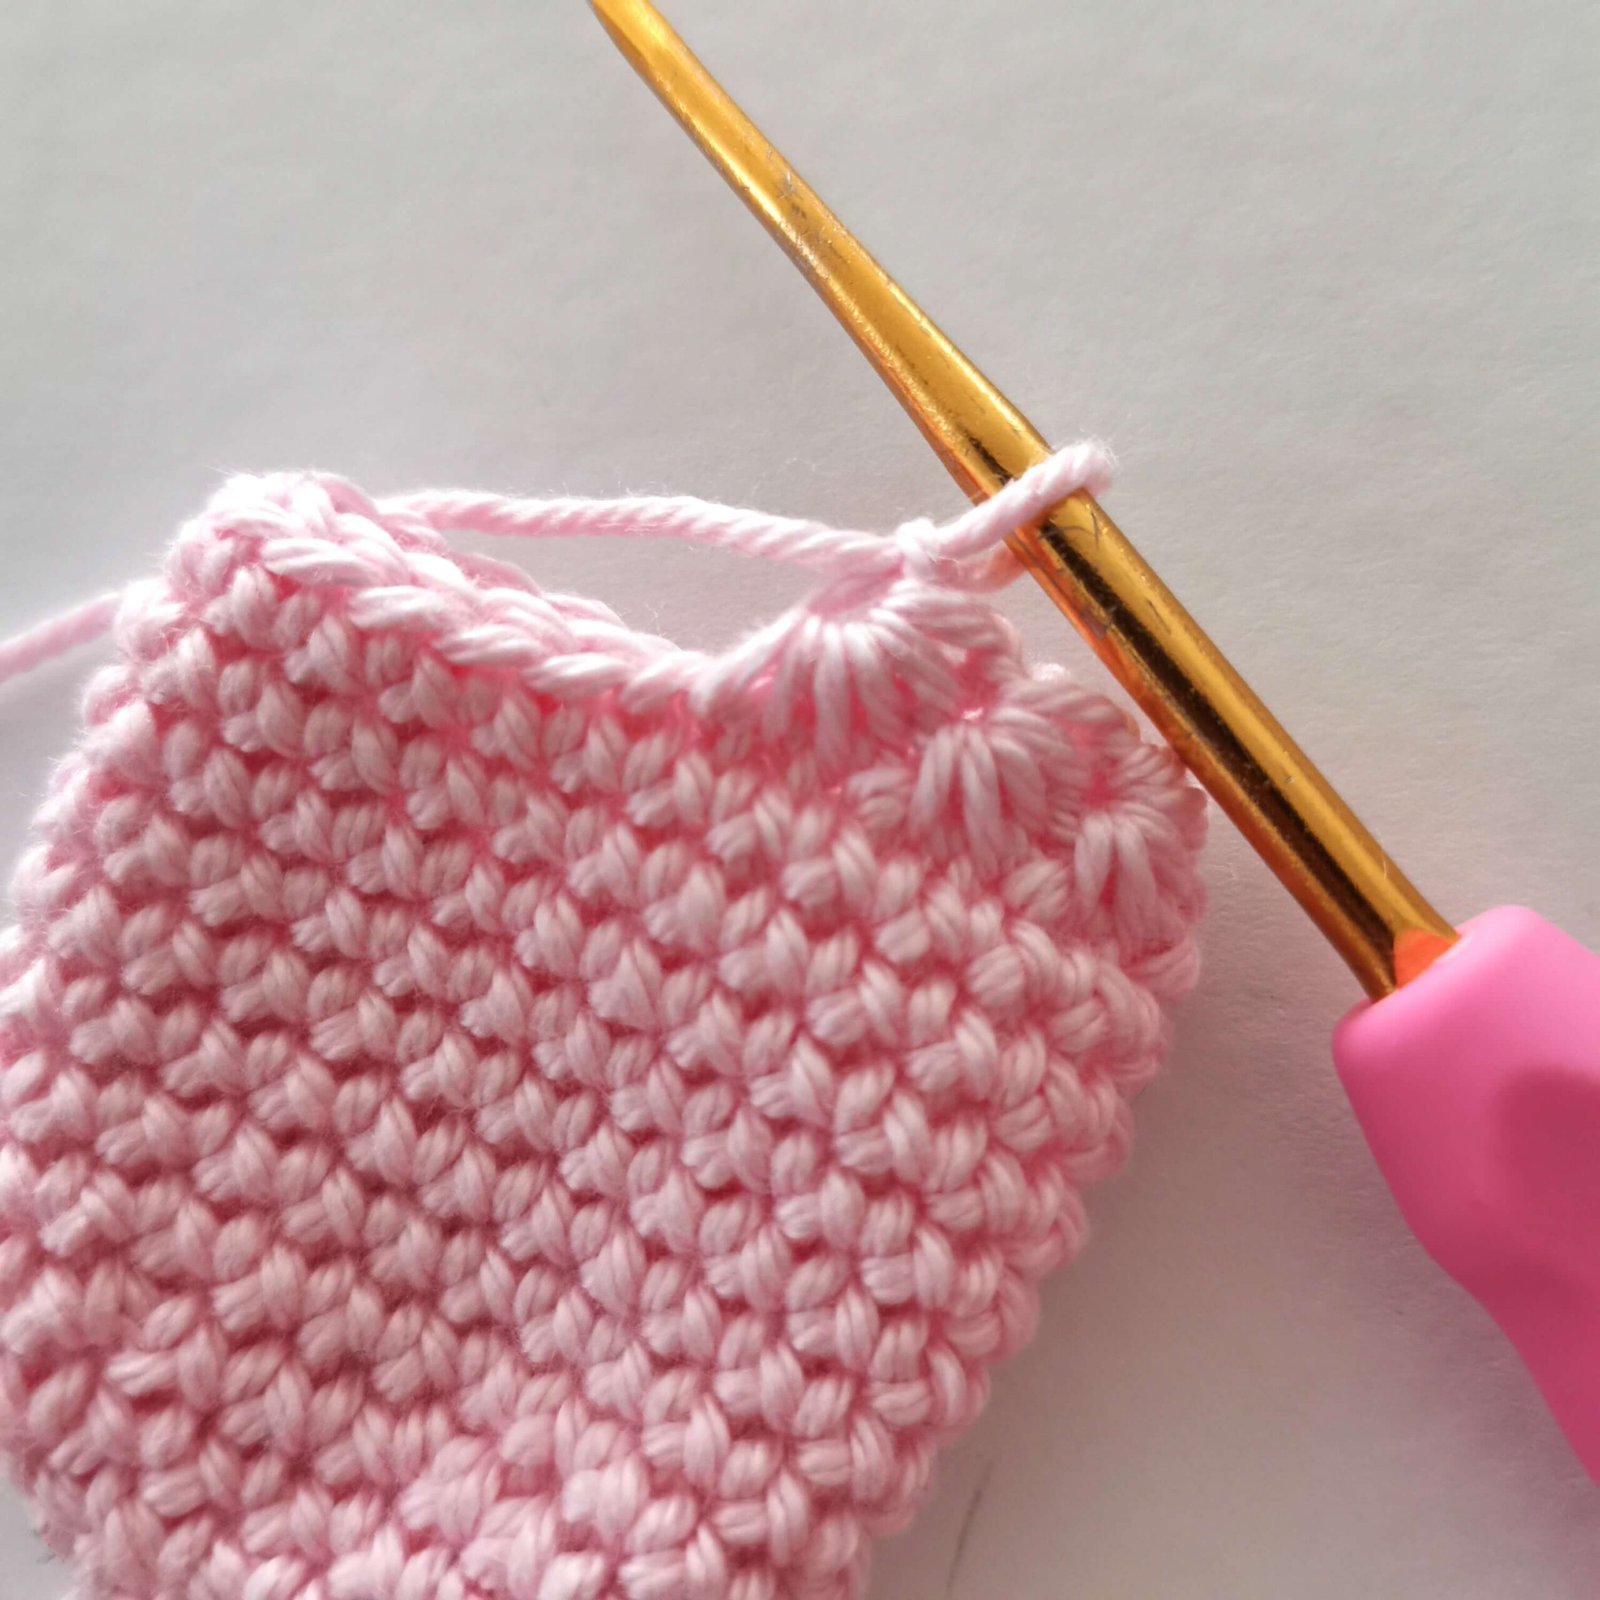
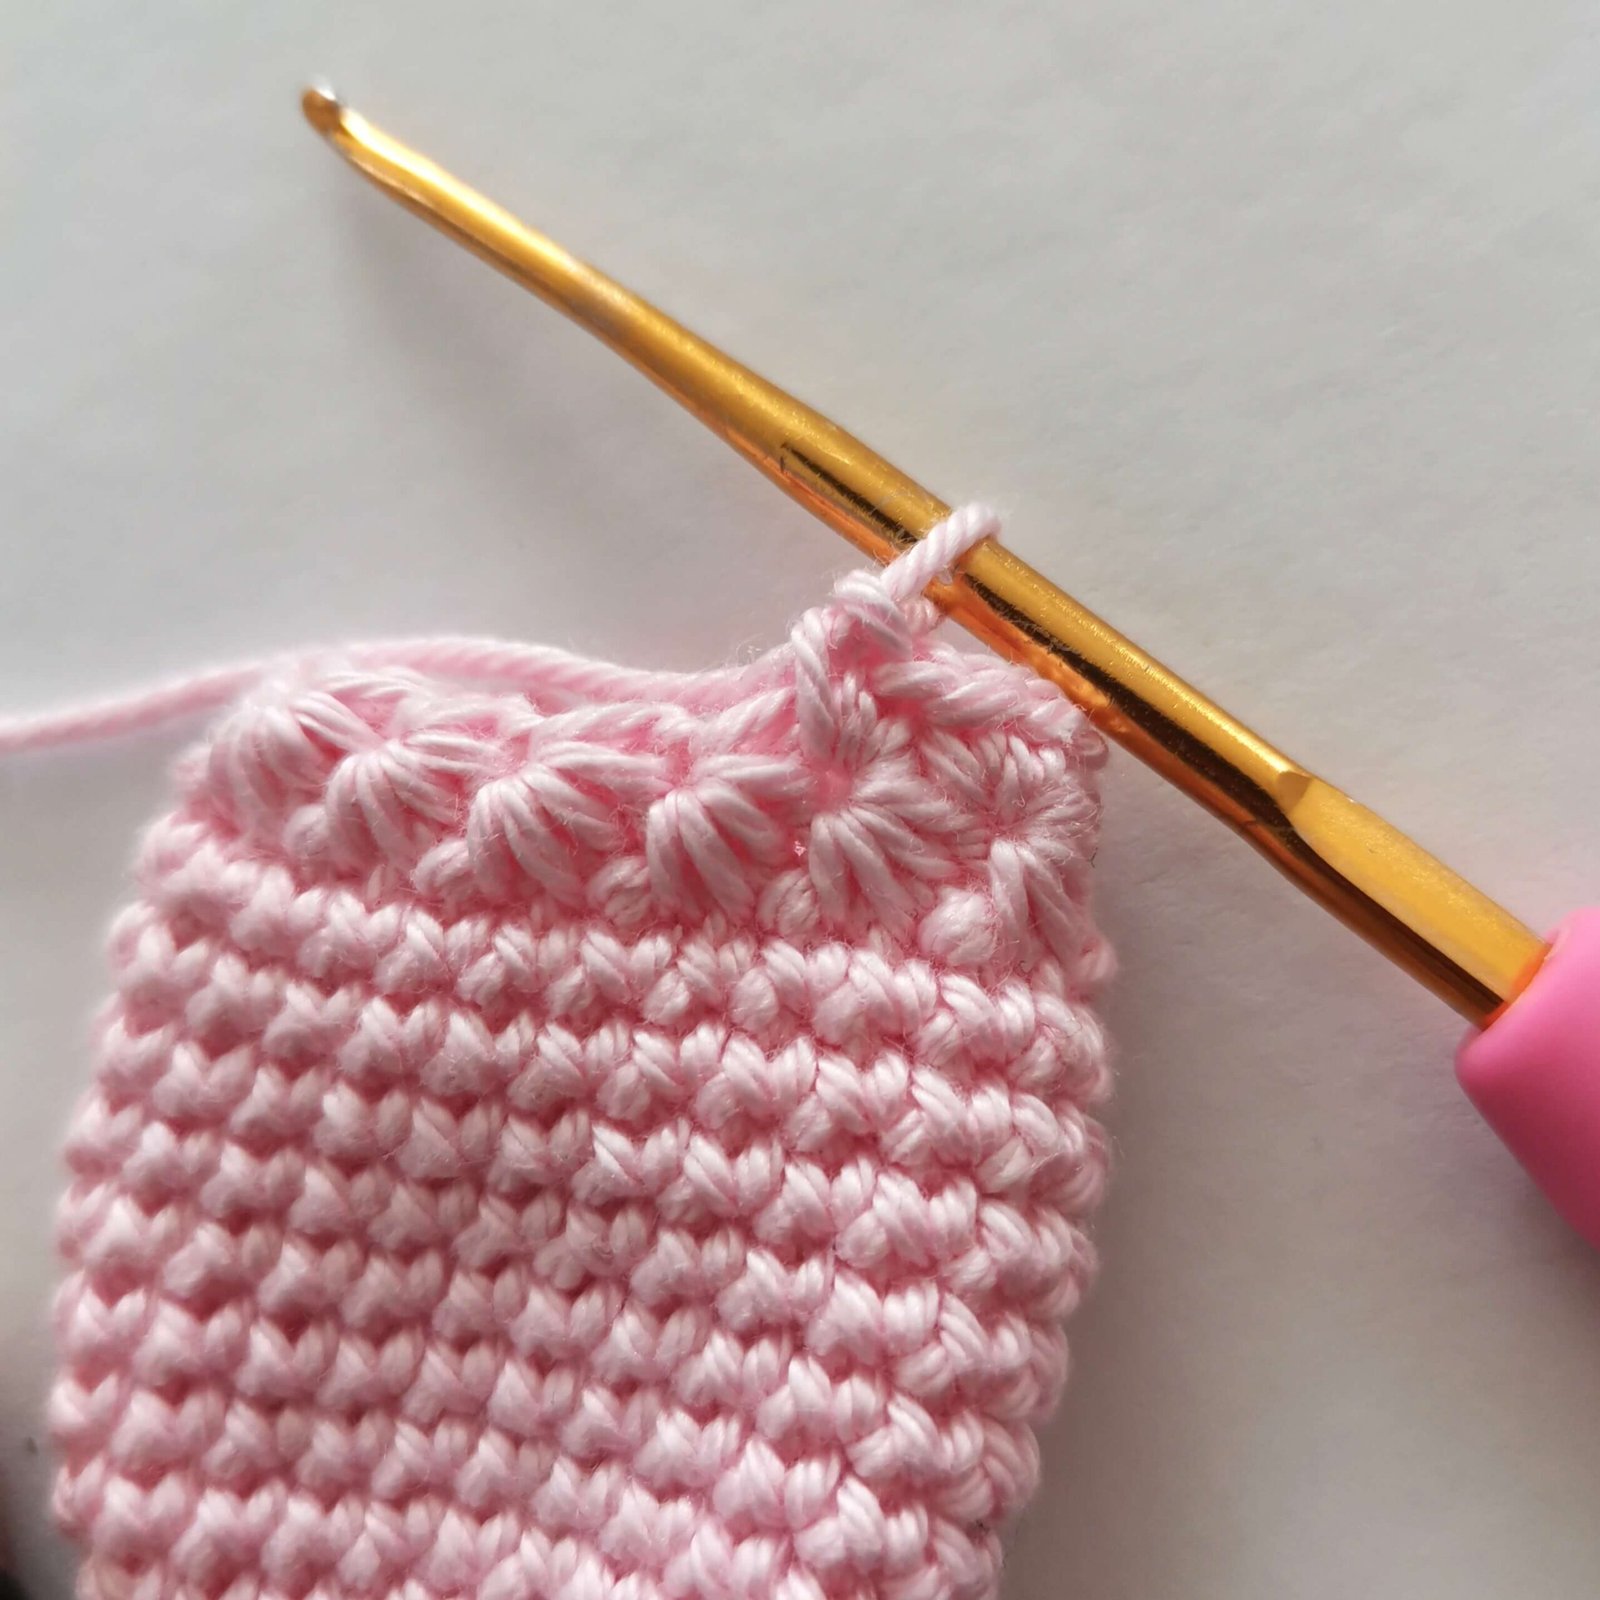
Round 6: ch2, 12 x star stitch, sl st
Round 7: ch1, 2sc in every eye of the star x 12 [24]
Rounds 8-15: 24sc [24] (8 rounds)
Fasten off
Right leg
Ch15, sl st in first to connect
Round 1: 15sc [15]
Round 2: (2sc, inc, 2sc) x 3 [18]
Round 3: (sc, inc, sc) x 6 [24]
Rounds 4-11: 24sc [24] (8 rounds)
For next two rounds make star stitches like on the left leg
Round 12: ch2, 12 x star stitch, sl st
Round 13: ch1, 2sc x 12 [24]
Rounds 14-15: 24sc [24]
Without breaking the yarn connect leggings in next round
Round 16: 8sc (on right leg), 24sc (on left leg), 16sc (right leg) [48]
Rounds 17-22: 48sc [48] (6 rounds)
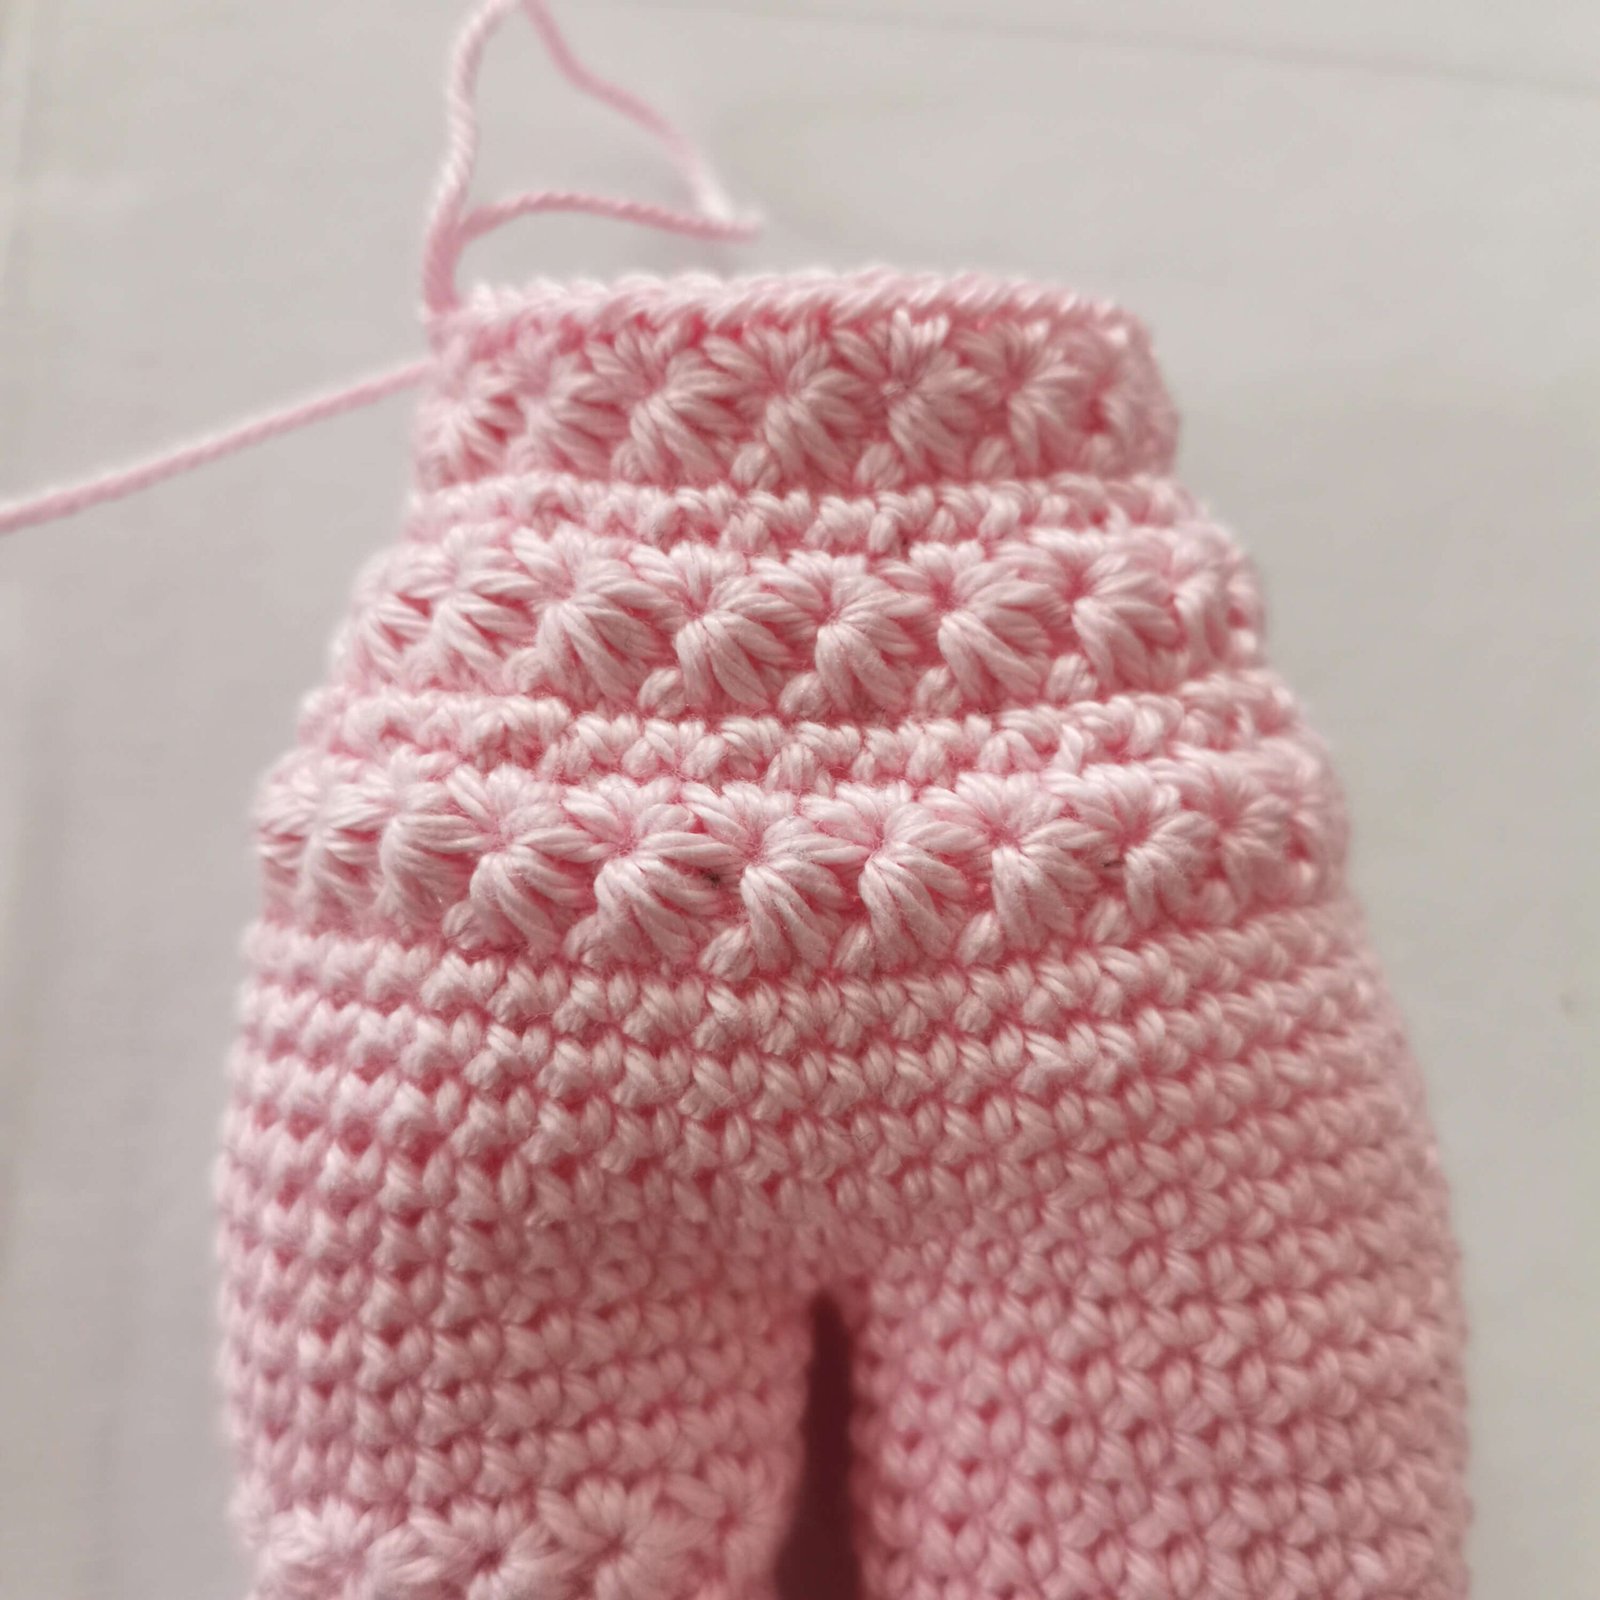
For next rounds make star stitches like on the leggings
Free Easter Crochet Bunny Pattern by EmmaS Dolls
Round 23: ch2, 24 x star stitch, sl st
Round 24: ch1, 2sc x 24 [48]
Round 25: (6sc, dec) x 6 [42]
Round 26: ch2, 21 x star stitch, sl st
Round 27: ch1, 2sc x 21 [42]
Round 28: (5sc, dec) x 6 [36]
Round 29: ch2, 18 x star stich, sl st
Round 30: 2sc x 18
Fasten off
Place the onesie on the bunny.
Head
Keep working from the body opening
Round 1: (sc, inc, sc) x 6 [24]
Round 2: (3sc, inc) x 6 [30]
Round 3: (2sc, inc, 2sc) x 6 [36]
Round 4: (5sc, inc) x 6 [42]
Round 5: (3sc, inc, 3sc) x 6 [48]
Round 6: (7sc, inc) x 6 [54]
Rounds 7-16: 54sc [54] (10 rounds)
Round 17: (8sc, dec, 8sc) x 3 [51]
Round 18: (15sc, dec) x 3 [48]
Round 19: (3sc, dec, 3sc) x 6 [42]
Insert 8mm safety eyes between rounds 10 and 11, 10sc apart
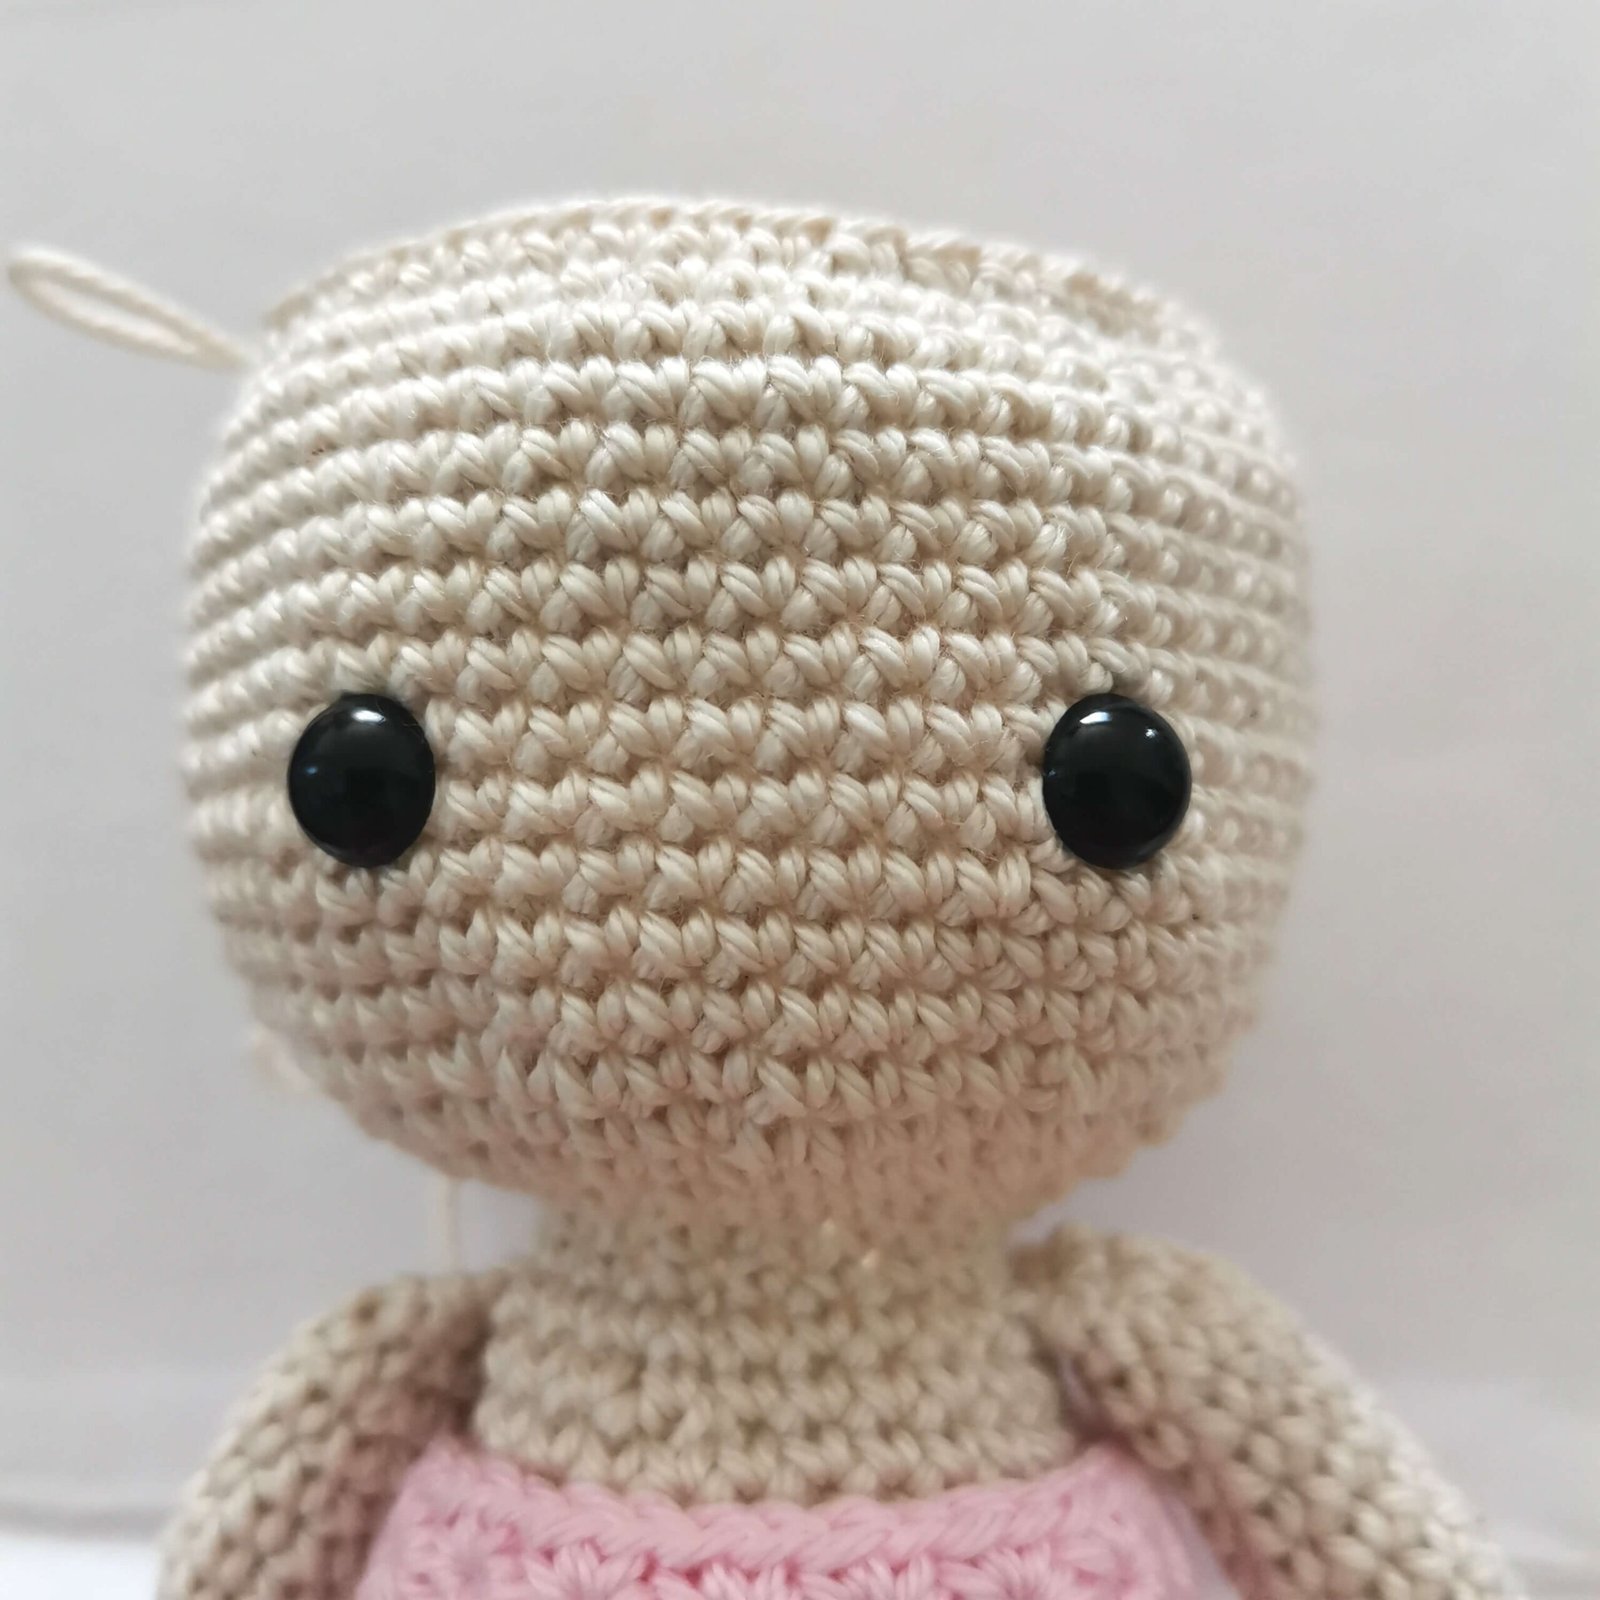
Note: You can embroider details on the head after finishing with crocheting the head or now
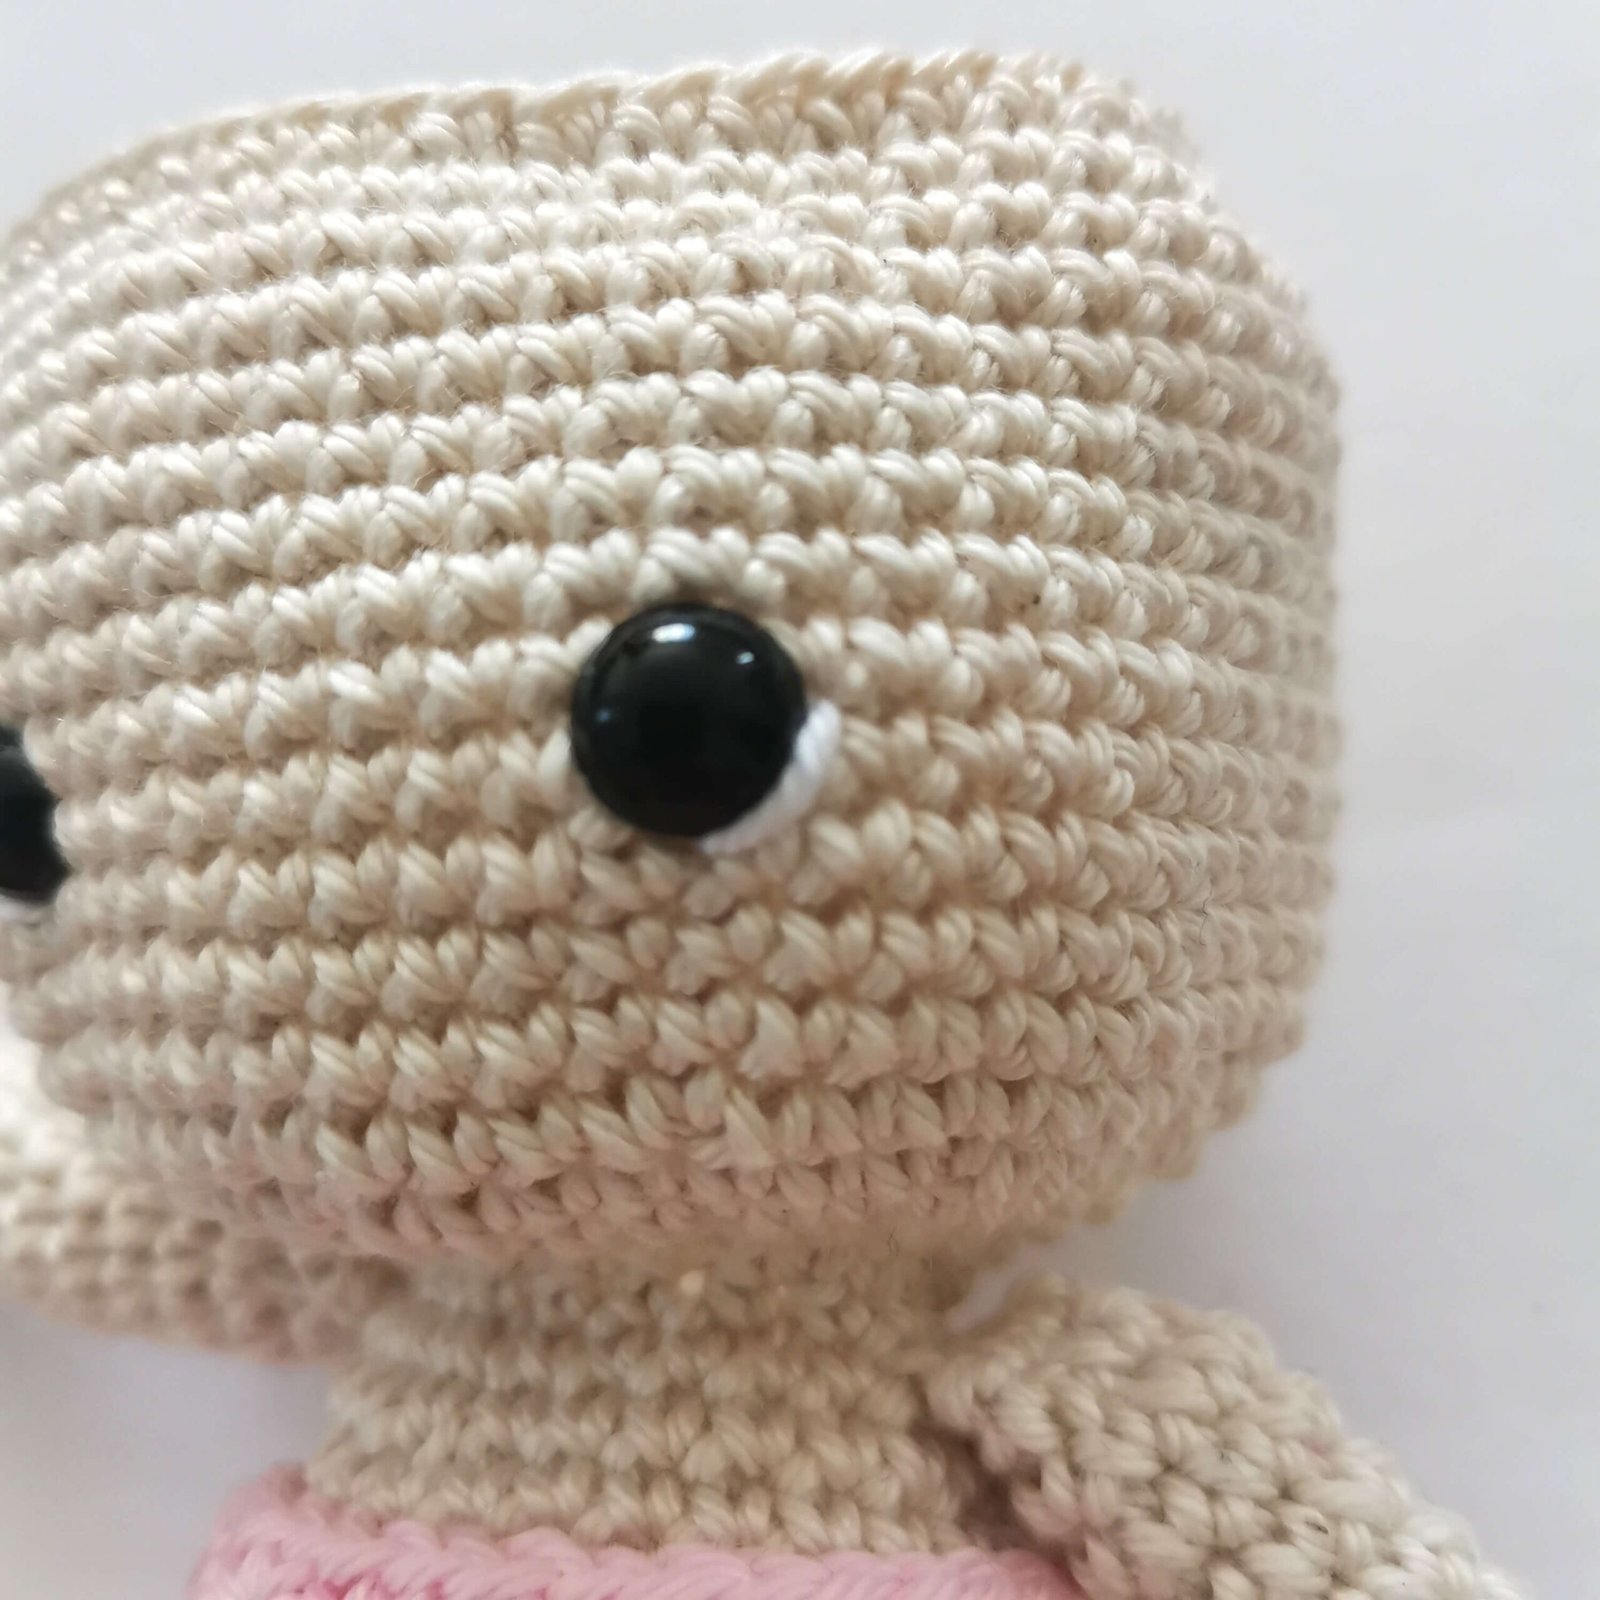
Embroider white line in the corner of the eyes.
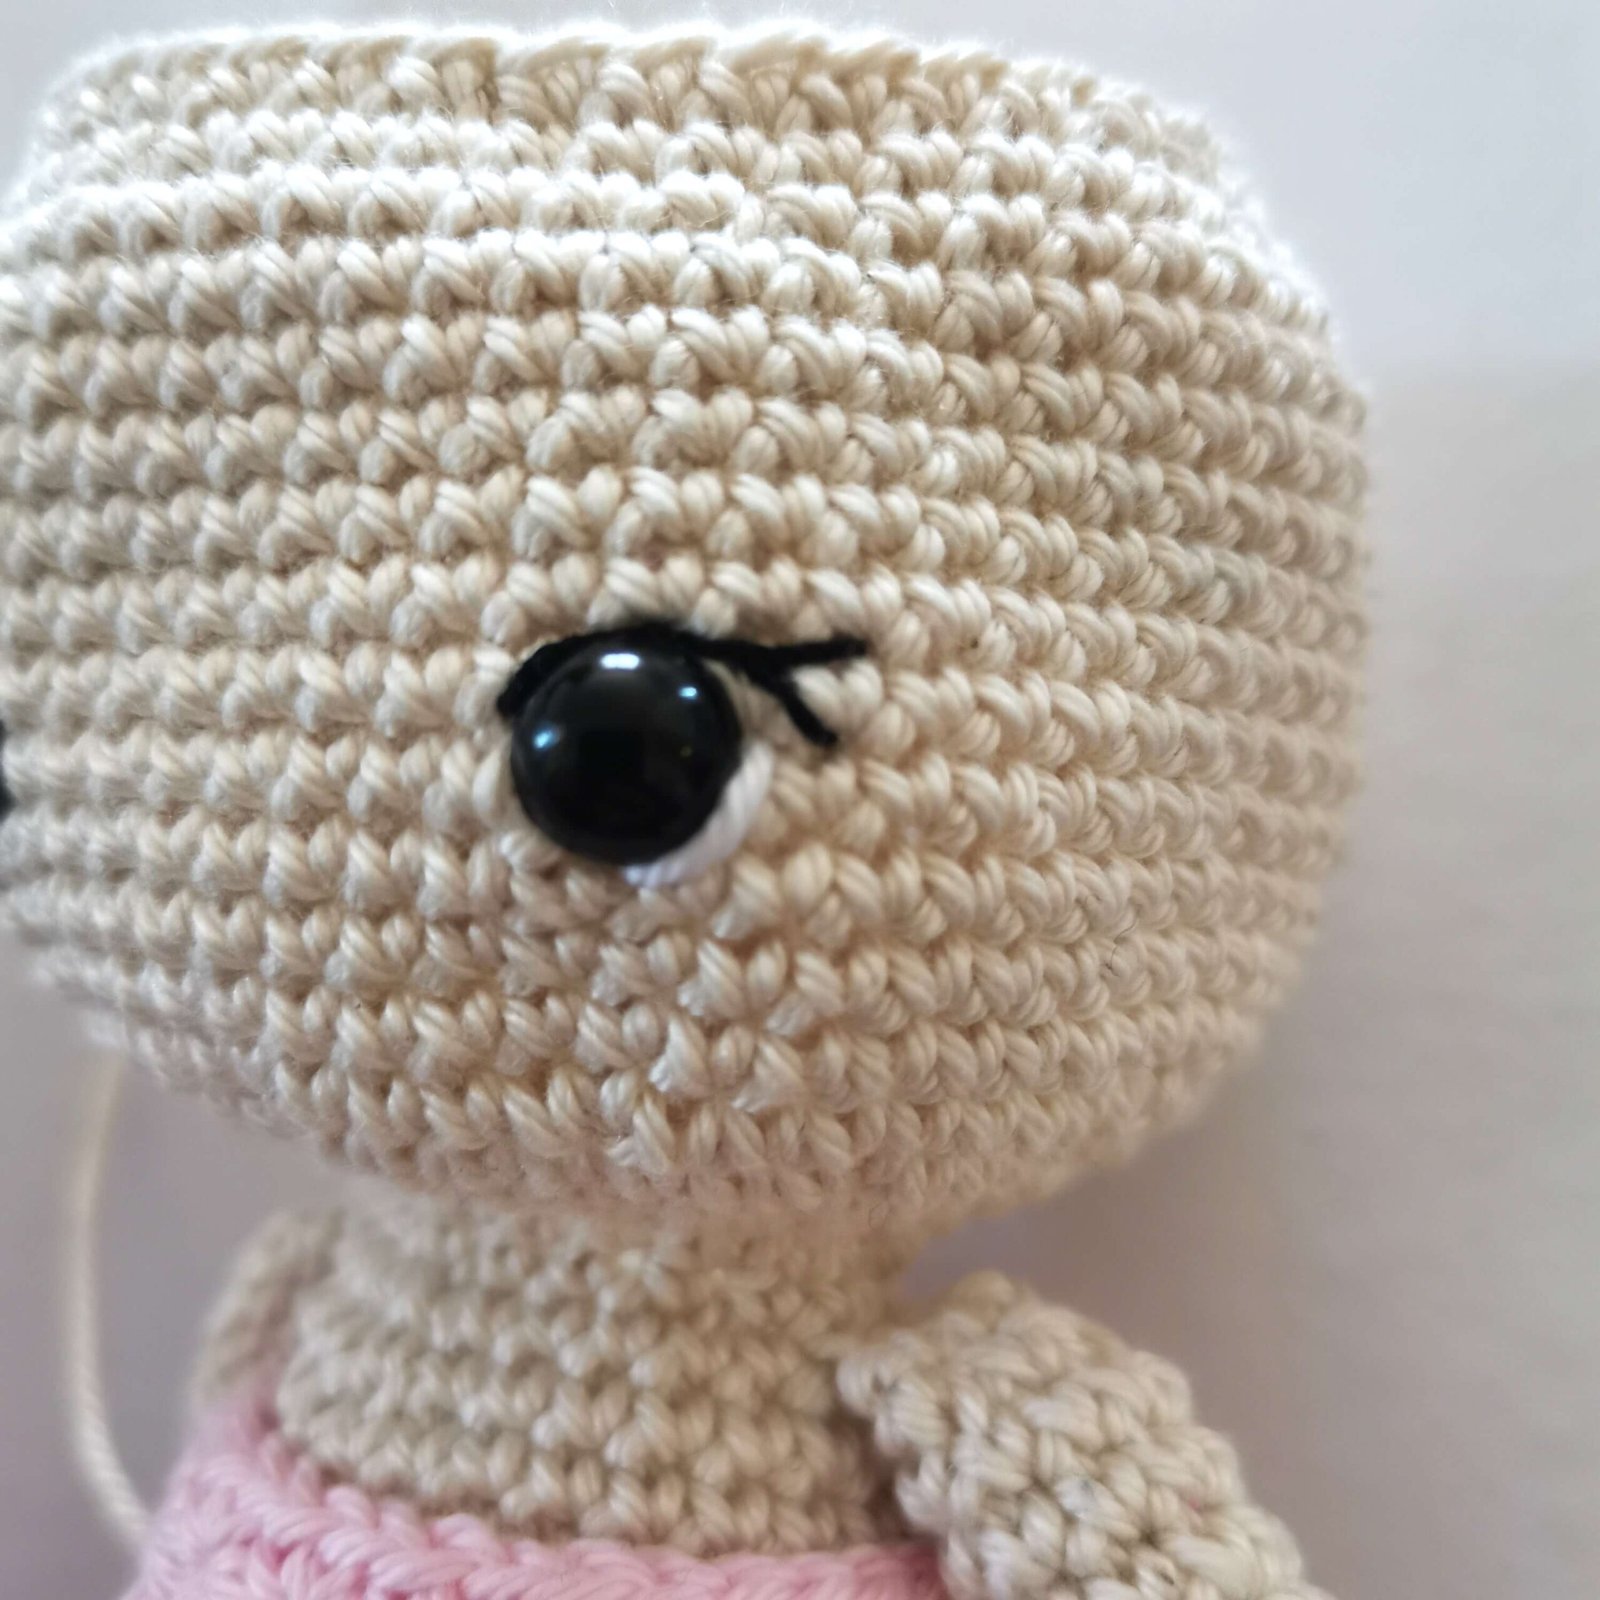
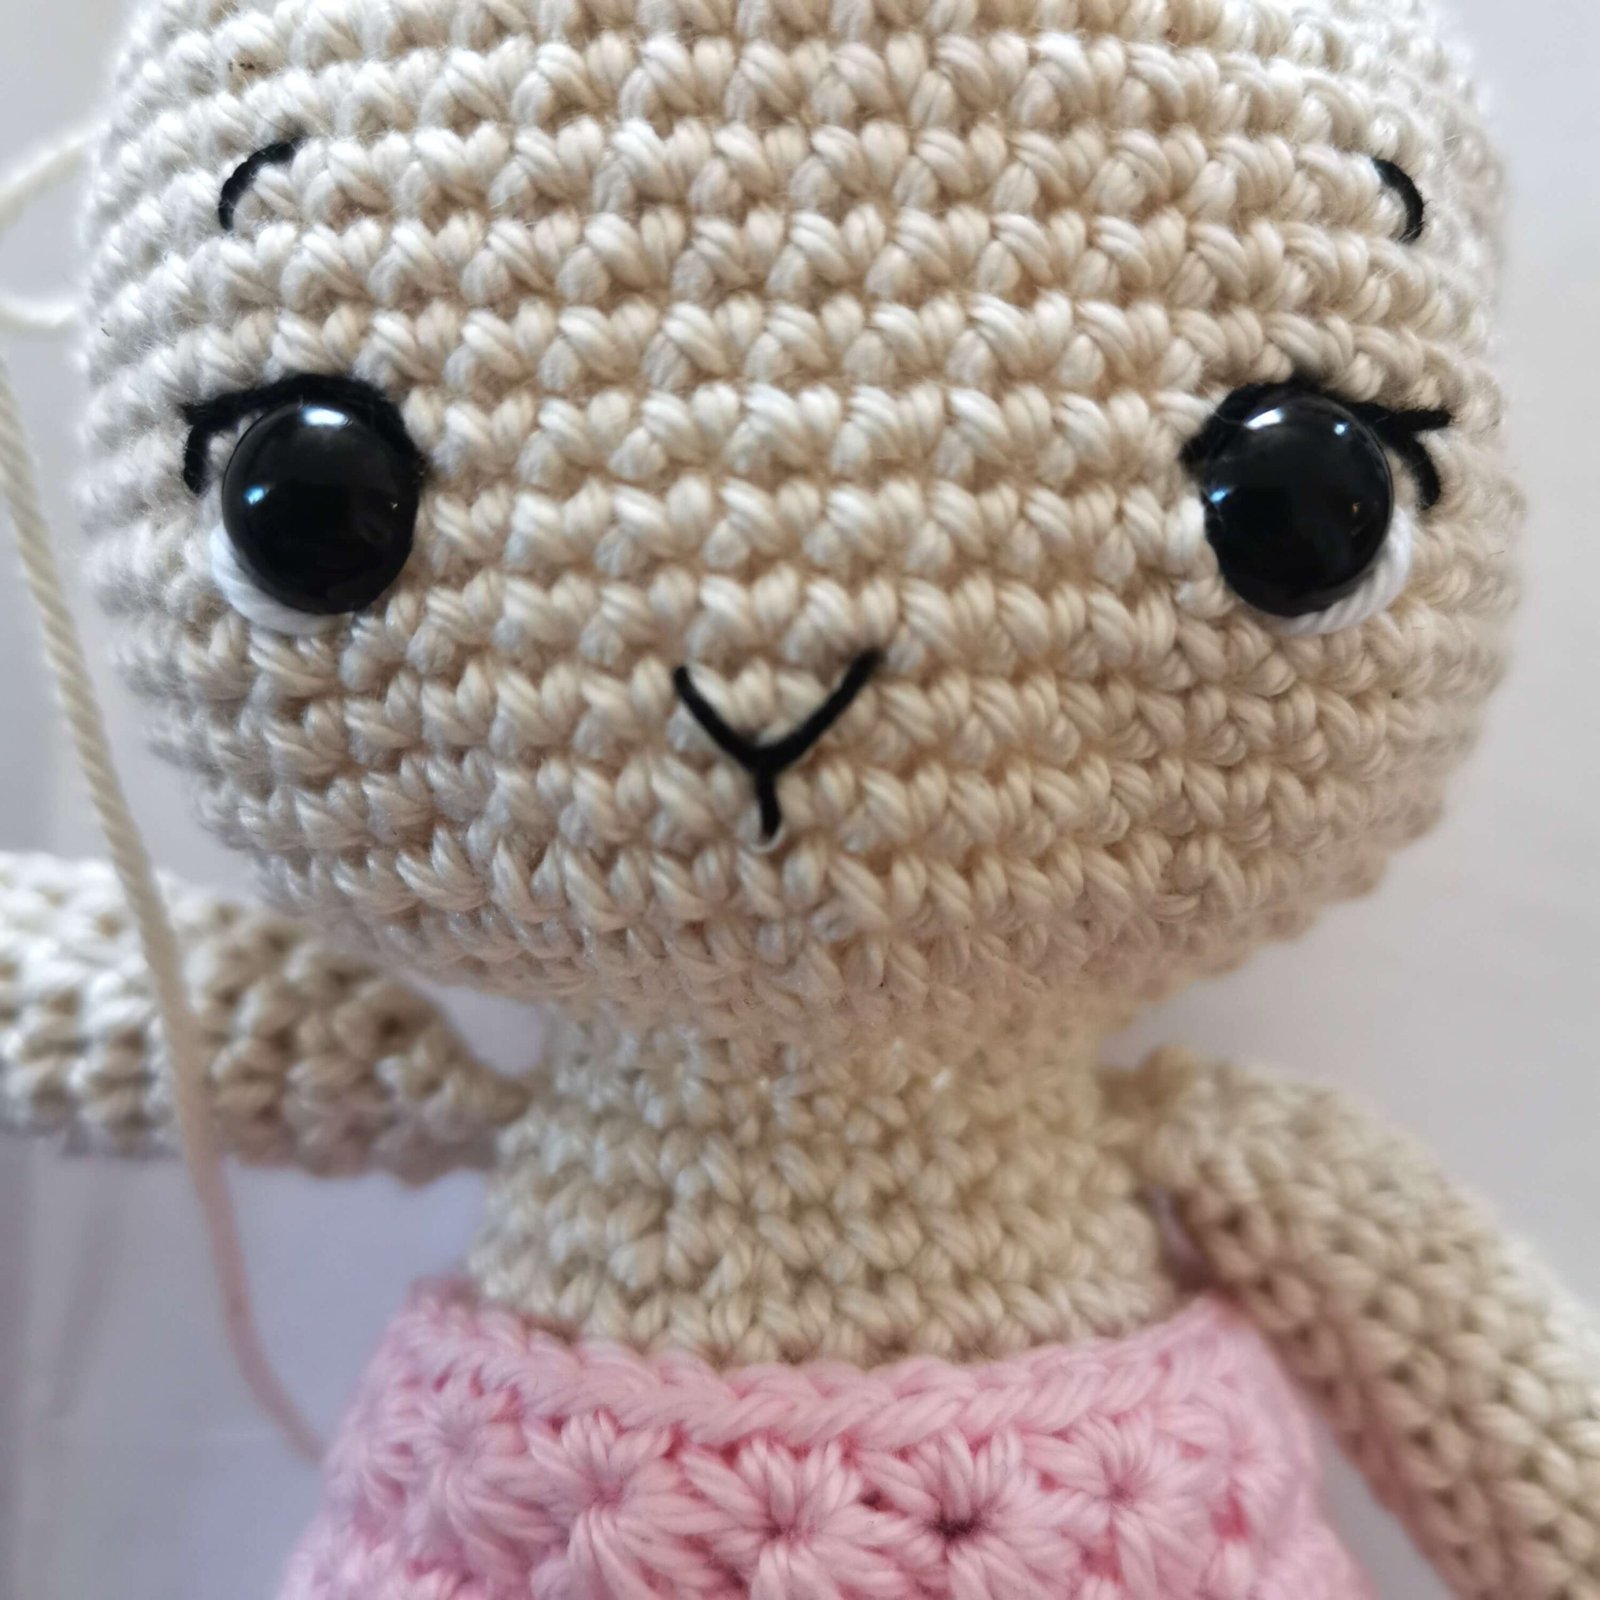
With black yarn embroider eyelid, eyelashes, eyebrows and nose.
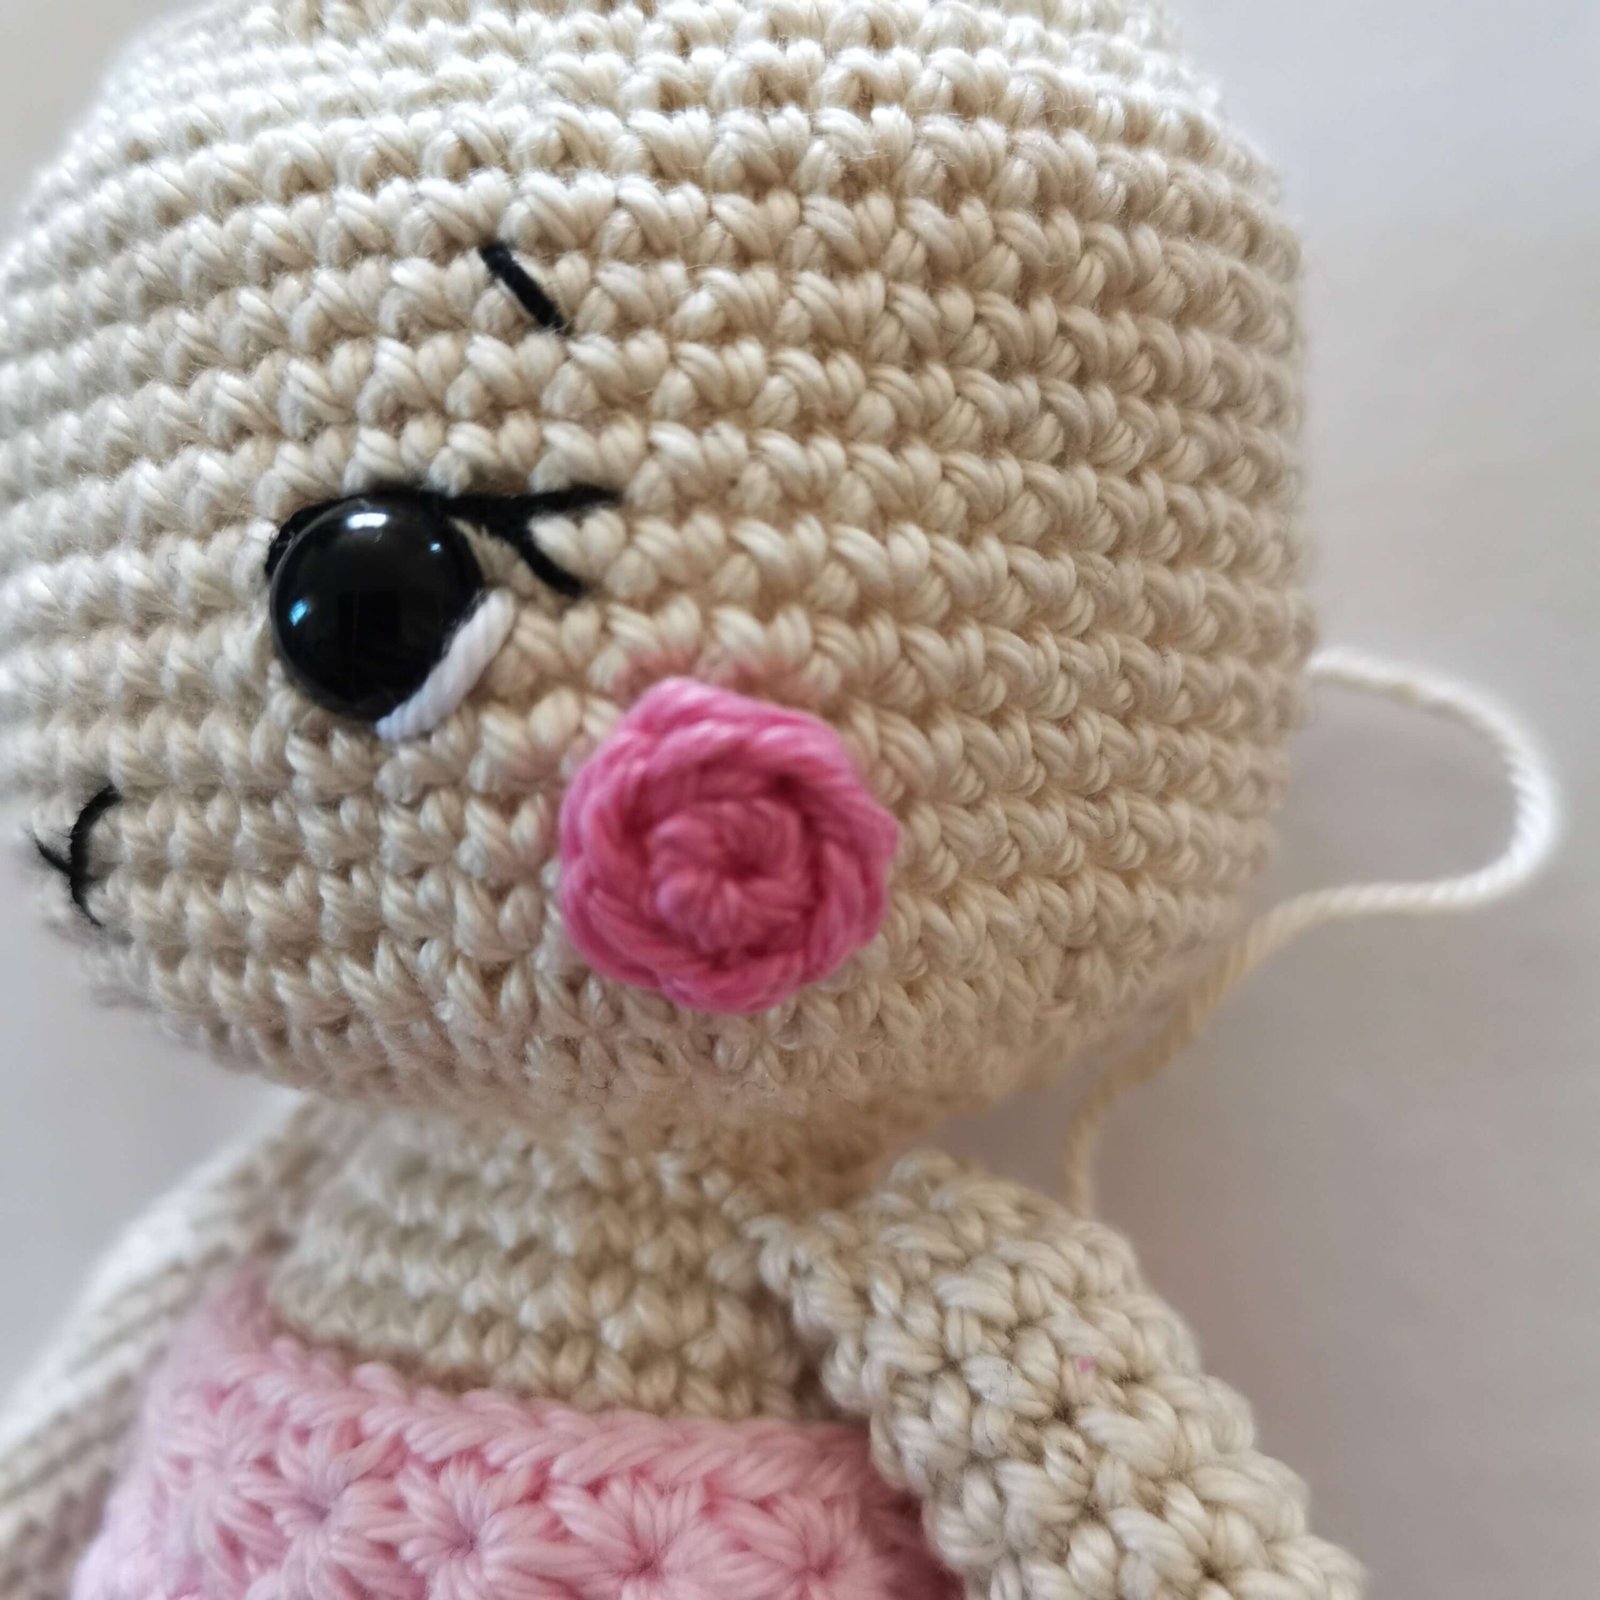
With pink yarn make the cheeks.
Round 1: mr, 6sc, sl st
Fasten off
Sew them onto the head.
Free Easter Crochet Bunny Pattern by EmmaS Dolls
(continue with the head)
Round 20: (5sc, dec) x 6 [36]
Round 21: (2sc, dec, 2sc) x 6 [30]
Round 22: (3sc, dec) x 6 [24]
Stuff the head
Round 23: (sc, dec, sc) x 6 [18]
Round 24: (sc, dec) x 6 [12]
Round 25: 6 x dec [6]
Close and fasten off
Ears (make 2)
Round 1: mr, 6sc [6]
Round 2: (sc, inc) x 3 [9]
Round 3: (2sc, inc) x 3 [12]
Round 4: (3sc, inc) x 3 [15]
Round 5: (4sc, inc) x 3 [18]
Round 6: (5sc, inc) x 3 [21]
Rounds 7-14: 21sc [21] (8 rounds)
Round 15: (5sc, dec) x 3 [18]
Round 16: (sc, dec) x 6 [12]
Join the two sides of the ear together and close with 6sc.
Fold in half and connect with 3sc.
Fasten off, leaving a long tail for sewing
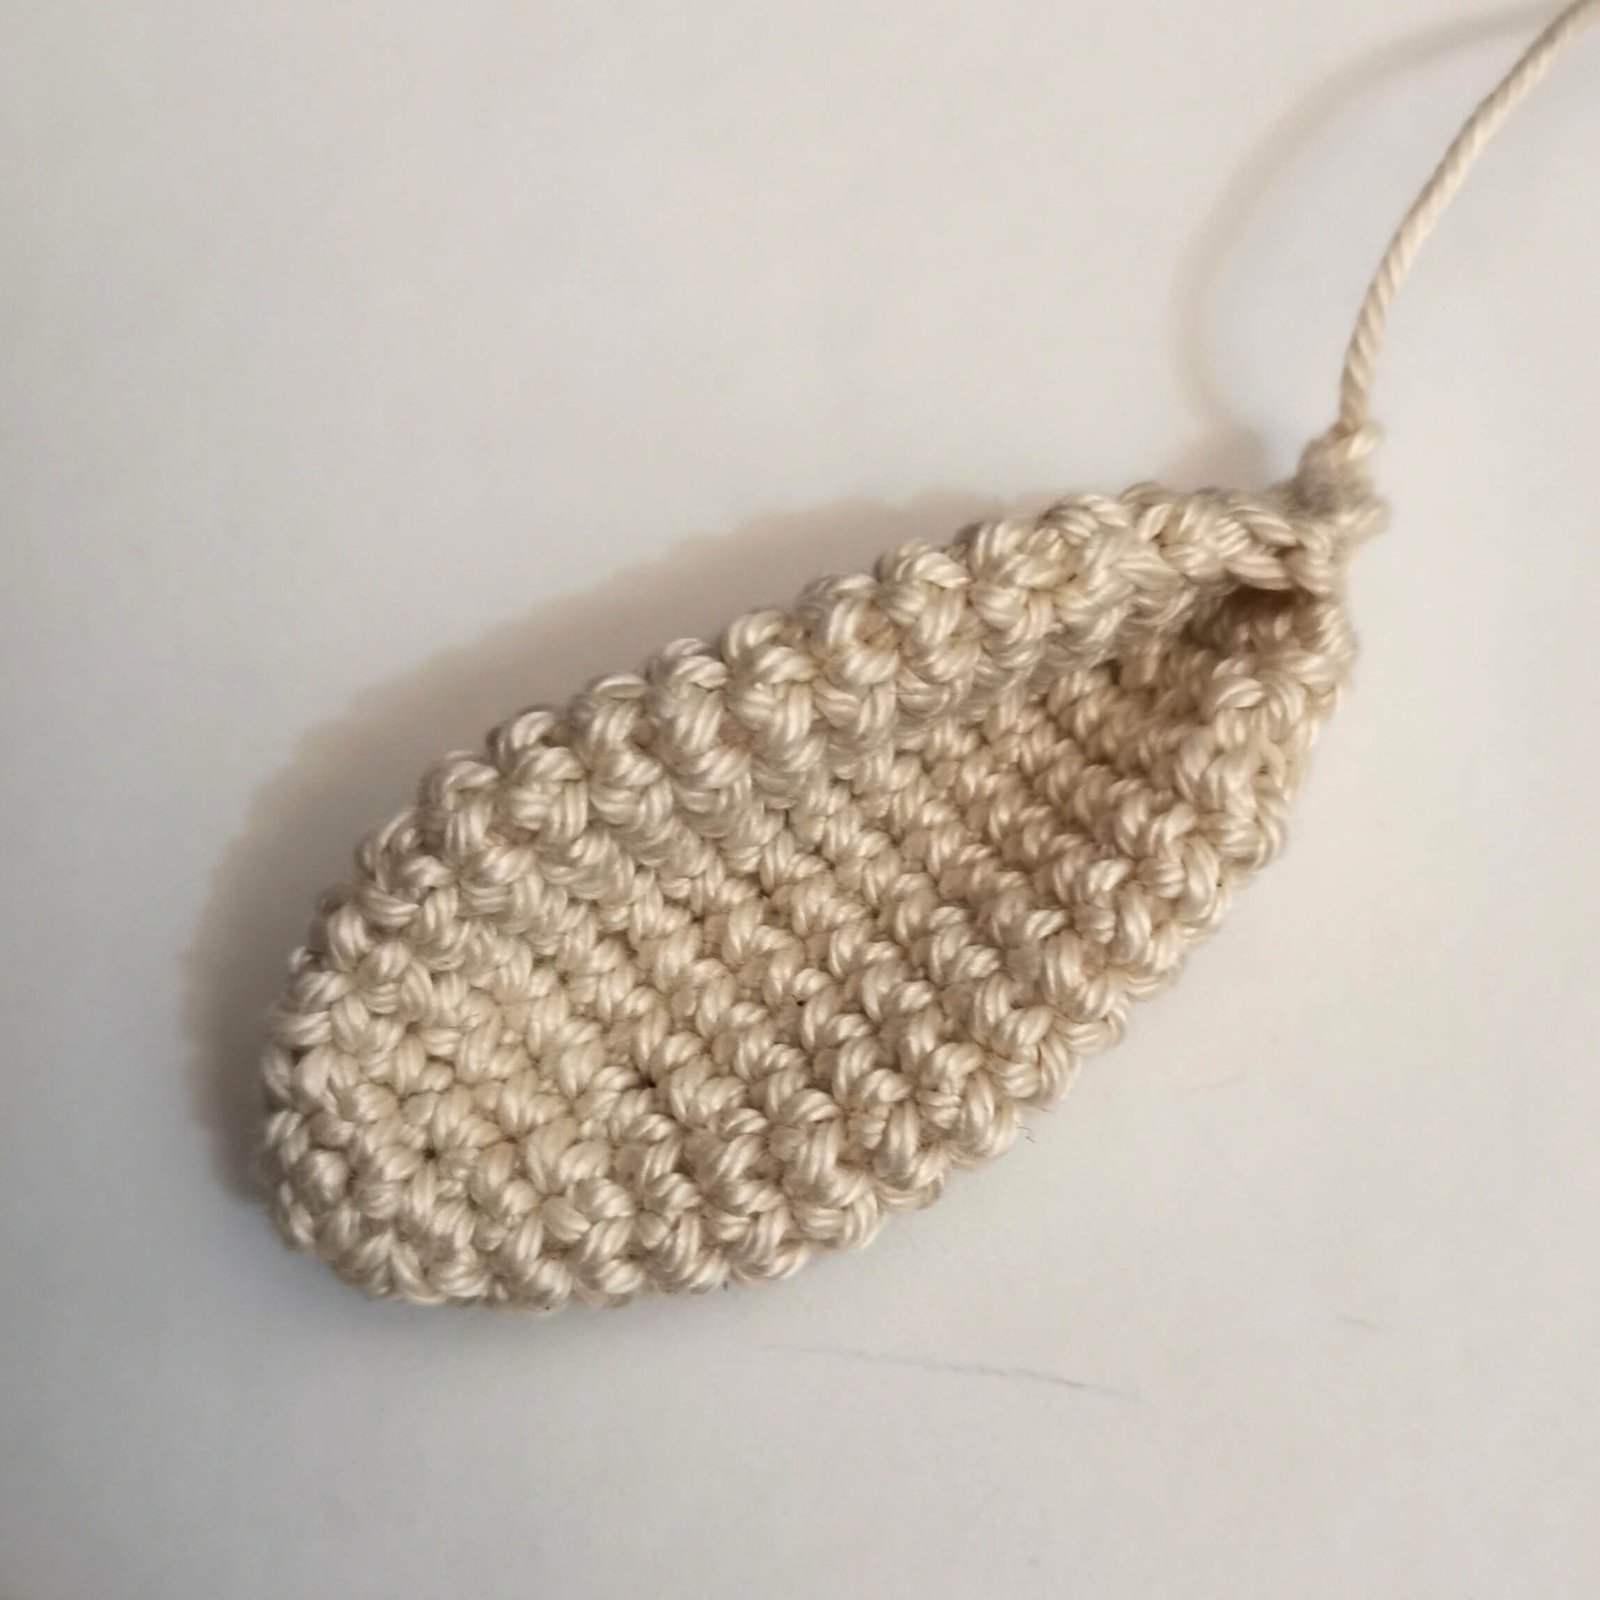
Sew the ears onto the sides of the head on rounds 13-14.
Bonnet
Light pink yarn
Round 1: mr, 6sc [6]
Round 2: 6 x inc [12]
Round 3: (sc, inc) x 6 [18]
Round 4: (sc, inc, sc) x 6 [24]
Round 5: (3sc, inc) x 6 [30]
Round 6: (2sc, inc, 2sc) x 6 [36]
Round 7: (5sc, inc) x 6 [42]
Round 8: (3sc, inc, 3sc) x 6 [48]
Round 9: (7sc, inc) x 6 [54]
For next rounds make star stitches like on the pajama
Round 10: ch2, 27 x star stitch, sl st
Round 11: ch1, 2sc x 27 [54]
Round 12: 54sc [54]
Round 13: ch2, 27 x star stitch, sl st
Round 14: ch1, 2sc x 27 [54]
Round 15: 54sc [54]
Round 16: 9 x (2 x sk st, 6 x dc, 2 x sk st, sl st)
Fasten off
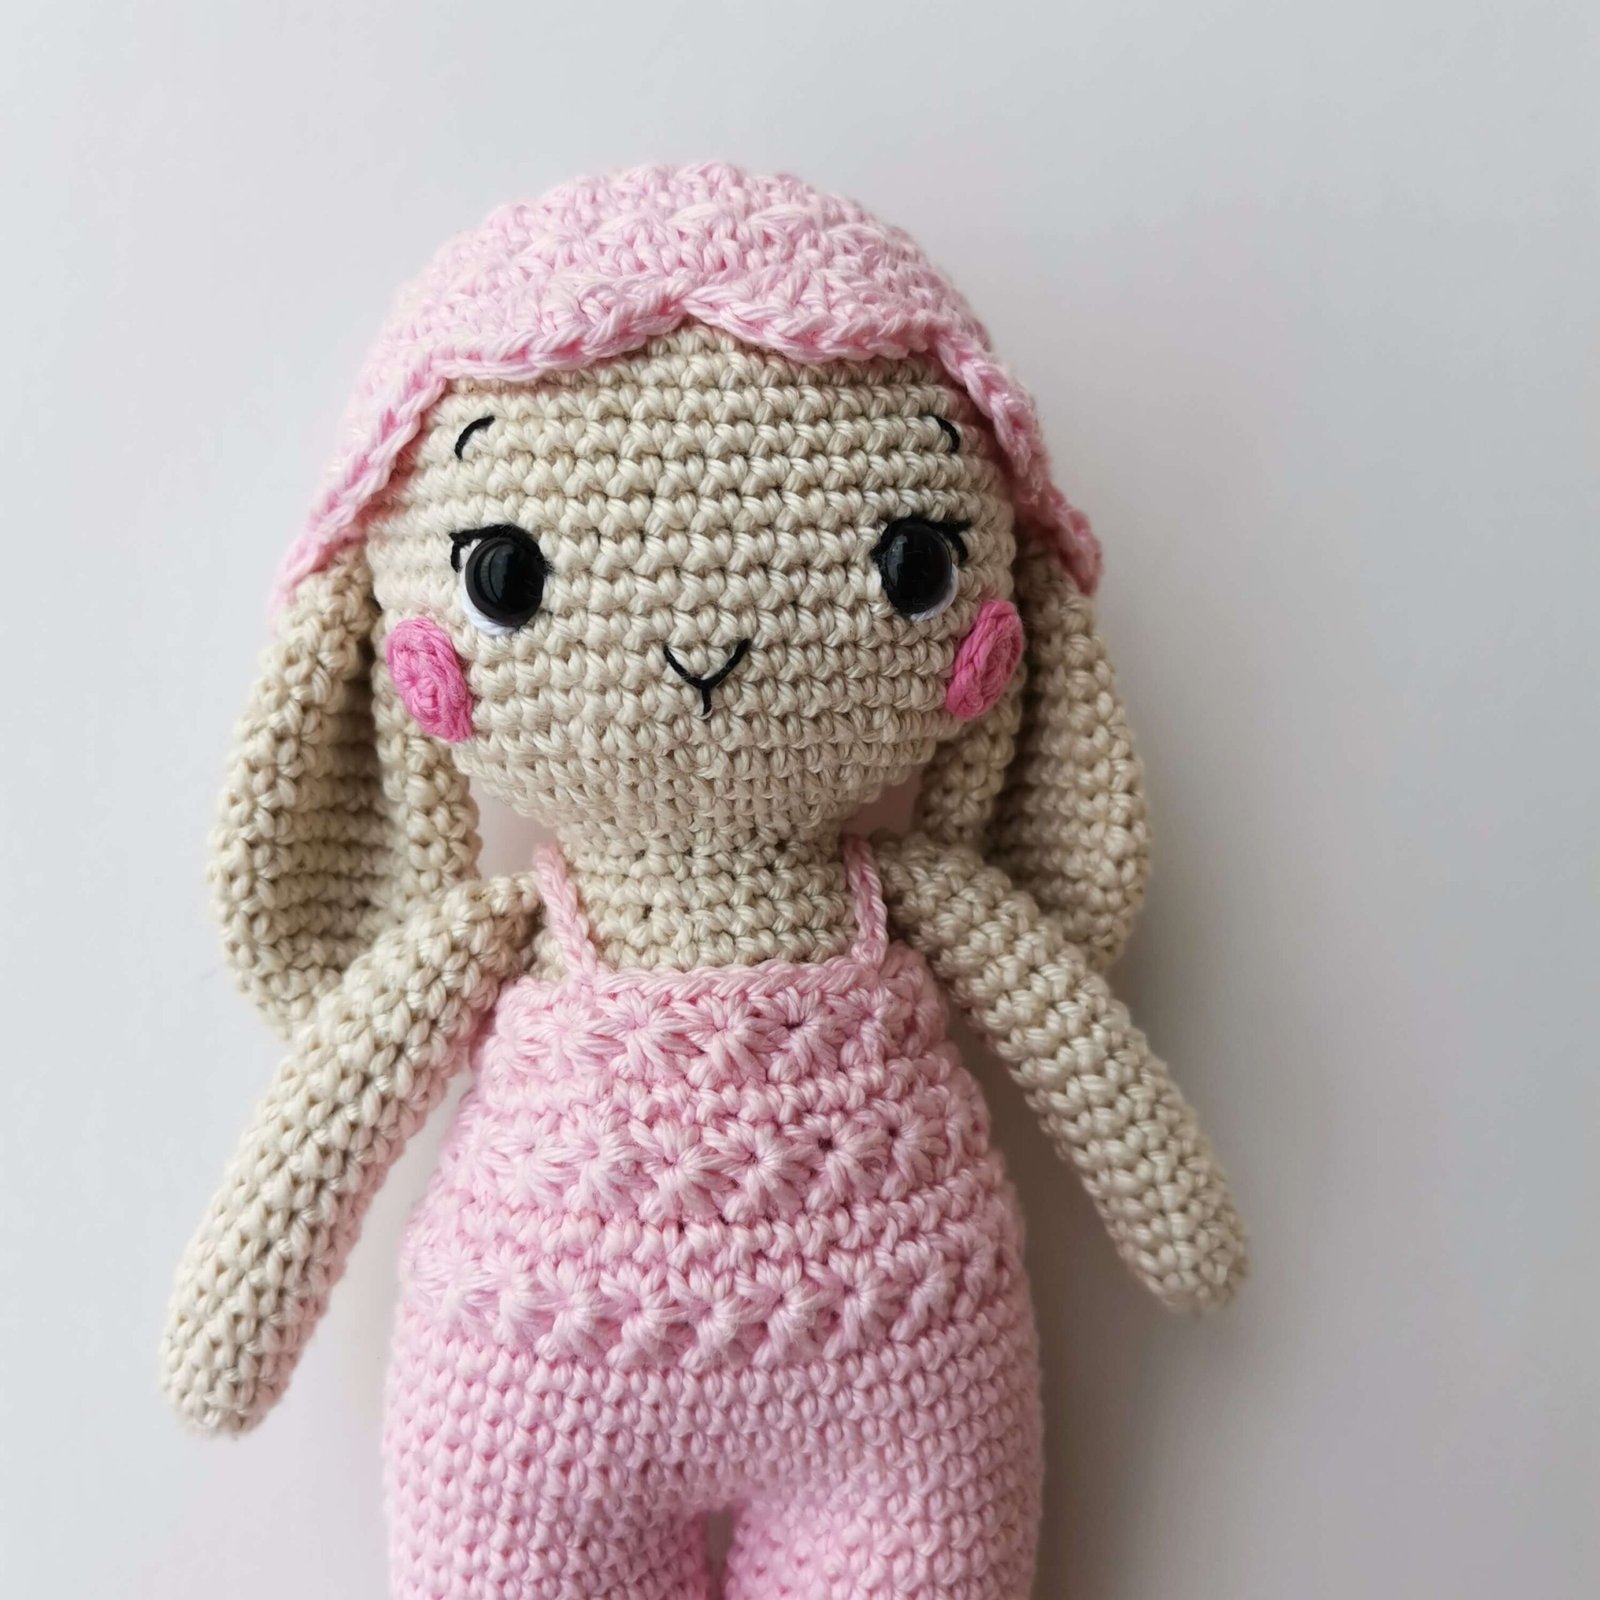
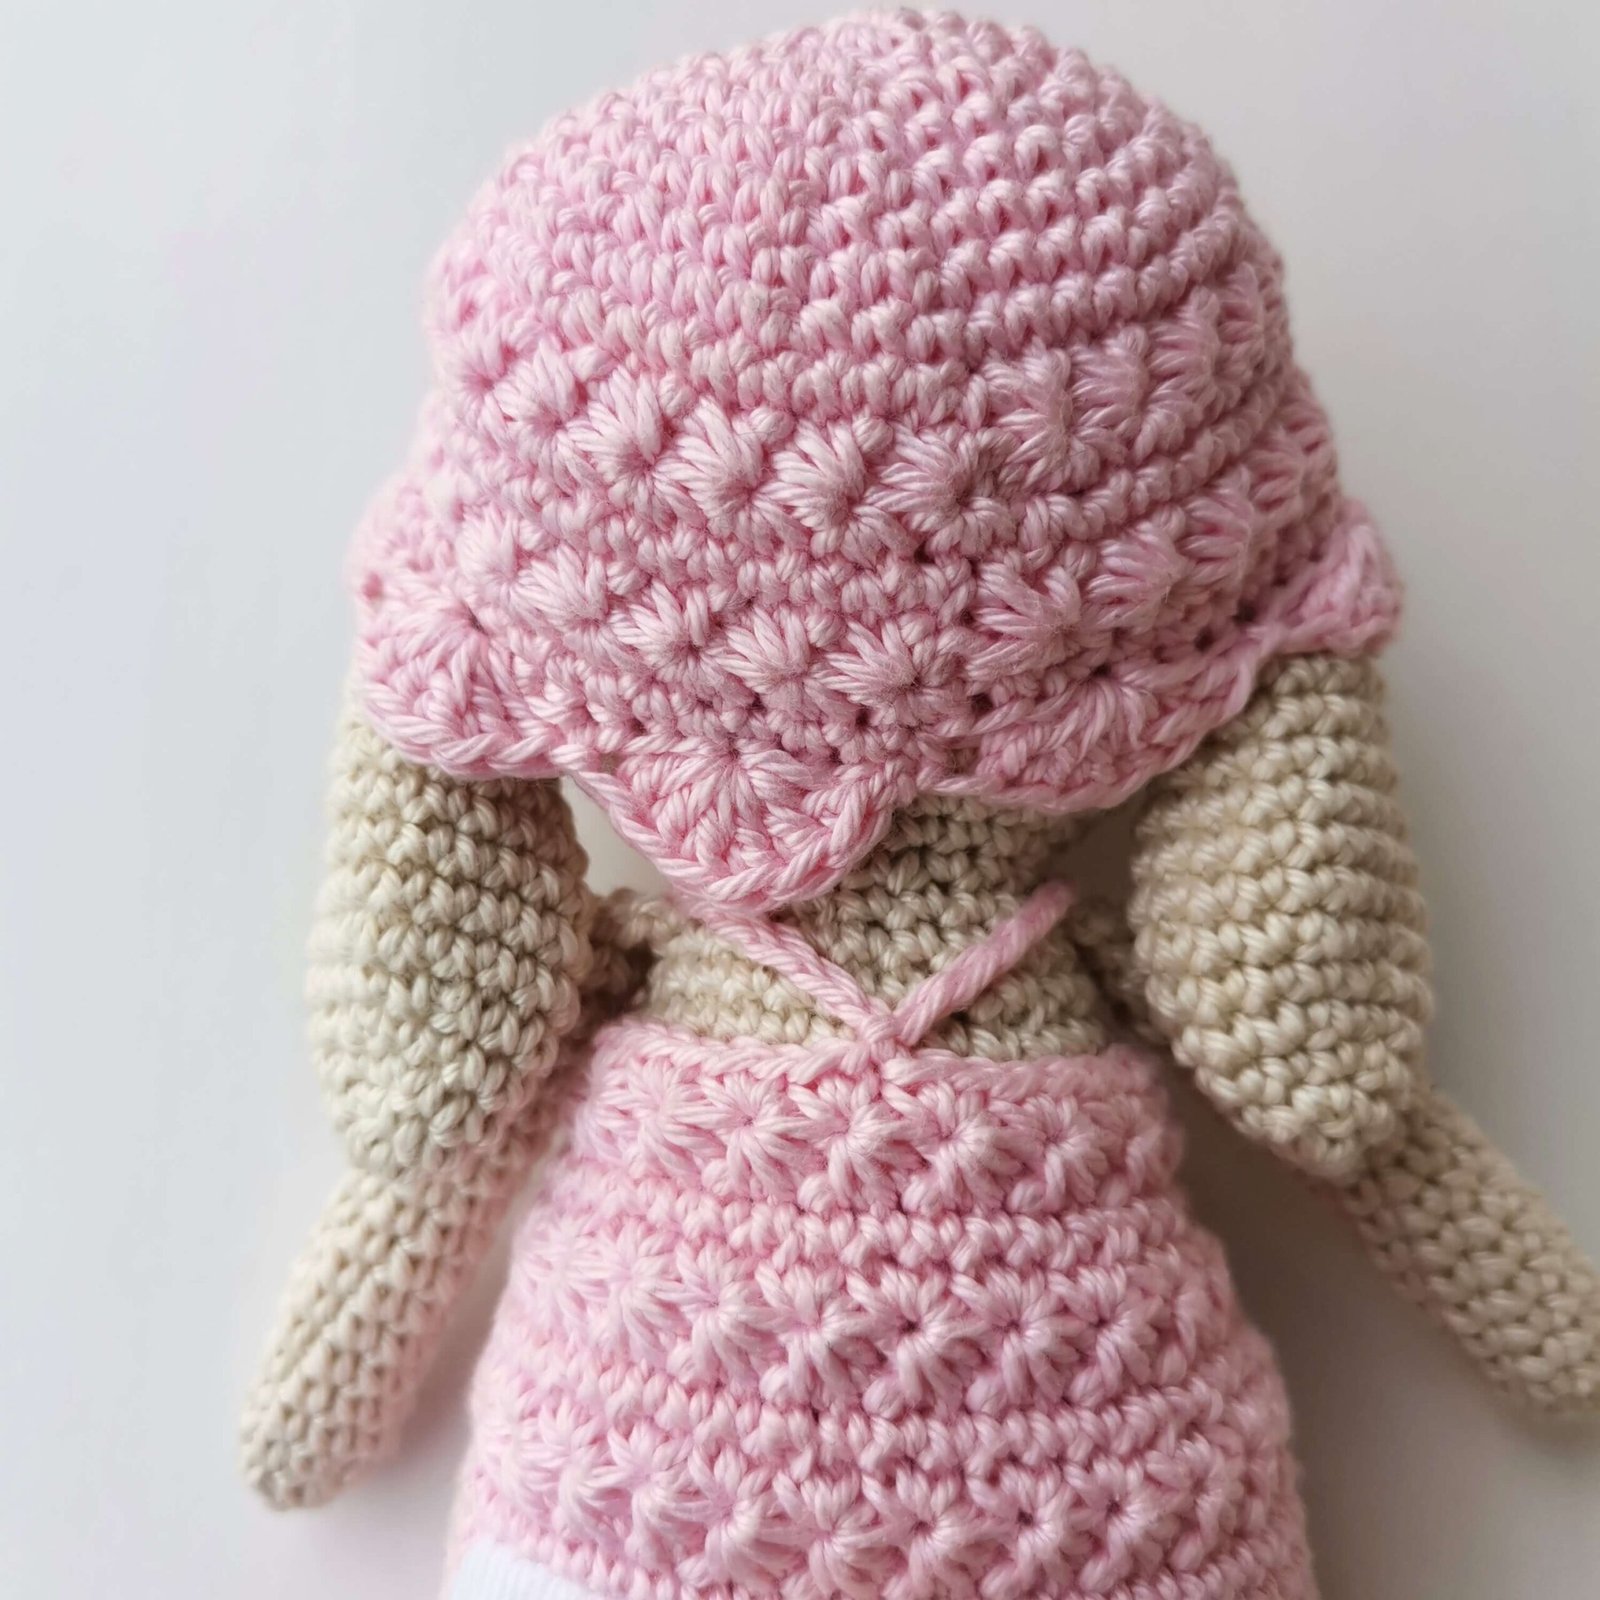
Place the hat on the top of the head and sew it in place.
Attach pink yarn to the front of the onesie, chain to the back, sl st, and chain back to the front to make suspenders.
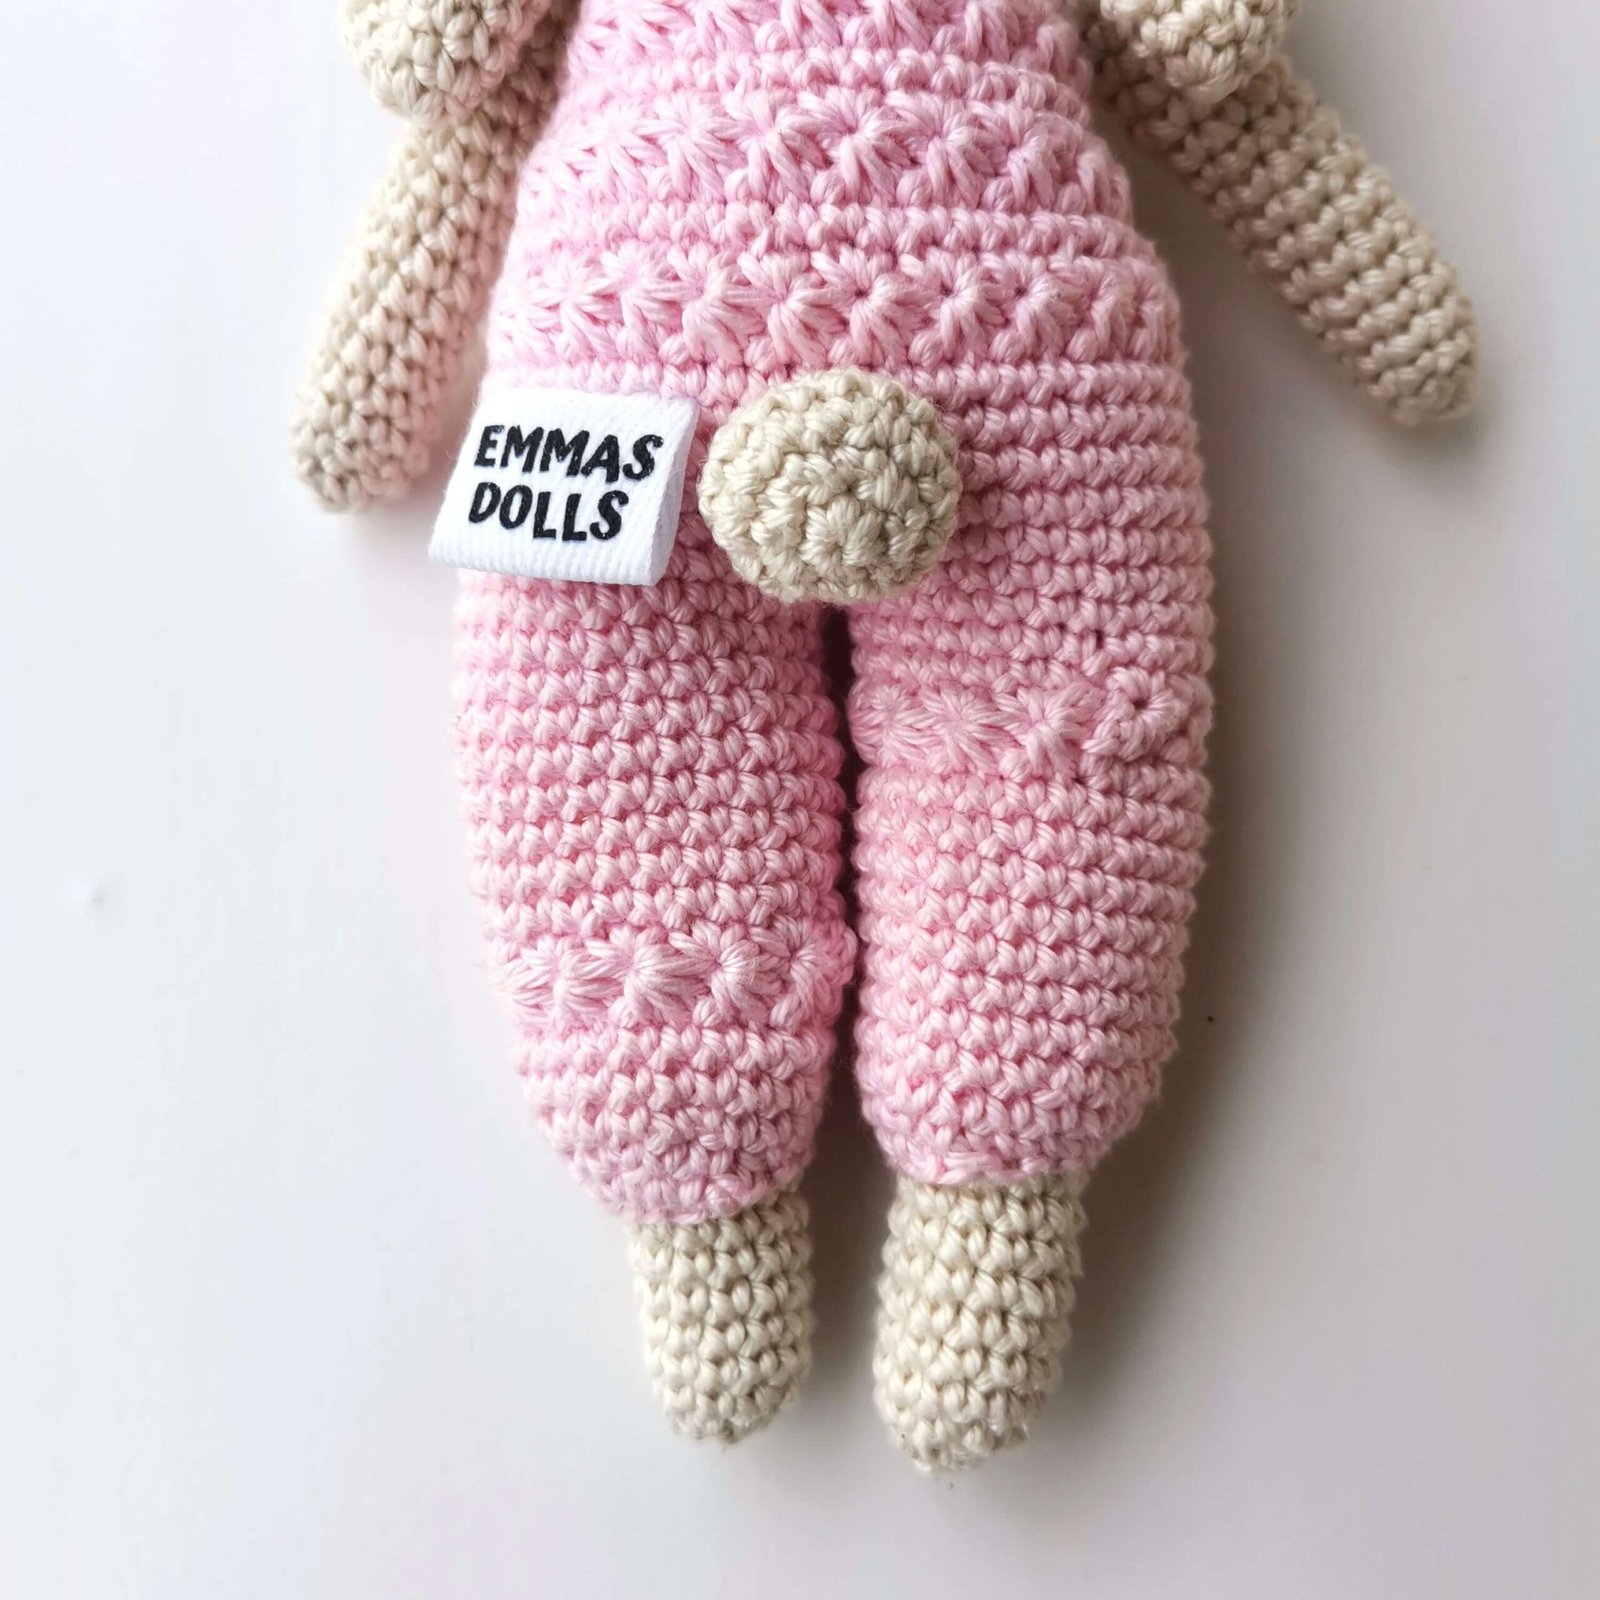
Sew tail on the bottom back.
Free Easter Crochet Bunny Pattern by EmmaS Dolls
Looking for More Free Crochet Bunny Patterns?
If you want to crochet a bunny but are looking for a different style, I have plenty of sweet options available on the blog! If you adore charming outfits, you might fall in love with Bunny Lola, a darling bunny ballerina dressed in her signature fluffy tutu skirt. If you prefer working with ultra-soft yarn, check out the Plush Bunny Pattern—it is super cuddly, quick to make, and completely beginner-friendly! And if you are looking for a rapid, last-minute gift idea, the Bunny Keychain Pattern is an absolute must-try for a fast and adorable craft.
Get the Ad-Free Printable PDF Pattern
Prefer to work offline without any distractions? You can grab a clean, neatly formatted, ad-free PDF version of this pattern in my Etsy and Ravelry shops! Purchasing the printable PDF is a fantastic way to keep your instructions handy in your project bag while directly supporting my work so I can continue creating more free content for you.
Stay Connected and Never Miss a Free Pattern!
Don’t forget to join our creative community! Subscribe to the EmmaS Dolls newsletter to get instant updates on new free pattern releases, step-by-step tutorials, special discounts, and crafty news delivered straight to your inbox. You can also follow along on Instagram, TikTok, and YouTube. Be sure to tag @emmasdollsstudio when you share photos of your finished creations—I absolutely love seeing your finished work and re-sharing it with our community!
Pin it for Later!
Free Easter Crochet Bunny Pattern by EmmaS Dolls
Since this pattern is free, please help me keep it that way by not taking screenshots. Keeping the page open while you work supports my studio! Happy crocheting!✨
Pingback: How to Crochet Star Stitch in the Round: A Beautiful Daisy Stitch Tutorial - EmmaS Dolls
Pingback: Free Mini Crochet Easter Basket and Eggs Pattern - EmmaS Dolls