
✨To support my free patterns, this post includes affiliate links for materials I love. Thank you for your support! 💖
Do you remember the excitement of hearing “I’ll huff, and I’ll puff…” for the first time? There is something truly magical about classic fairy tales, but what if you could take that magic off the page and put it right onto your fingertips? This Three Little Pigs finger puppets crochet pattern is designed to do exactly that—turning a simple story into an interactive, hands-on adventure for your little ones.
The Power of Play: Why Puppets Matter
Storytelling is much more than just a bedtime routine; it is a fundamental building block for early childhood development. Using a Three Little Pigs finger puppets crochet pattern to create physical characters helps children visualize the narrative, making it easier for them to grasp complex concepts like cause and effect, problem-solving, and emotional resilience. When a child “acts out” the wolf blowing down the straw house, they aren’t just playing—they are learning to sequence events and understand different perspectives.
Boosting Speech and Imagination
For toddlers and preschoolers, finger puppets are incredible tools for speech development. Encouraging a child to speak for the pigs or the Big Bad Wolf helps build vocabulary and confidence in a safe, playful environment. Through role-play and “pretend” acting, children practice social skills and fine motor coordination. Whether you are a parent looking for a fun educational toy or a maker searching for a unique gift, these crochet finger puppets offer endless hours of creative expression and developmental growth.
How to Use These Puppets for Storytelling
Using these Three Little Pigs finger puppets is a fantastic way to engage children in active listening. Here are a few ideas on how to make the most of them:
- Voice Acting: Use a deep, gruff voice for the Big Bad Wolf and high-pitched voices for the pigs. Encourage your child to mimic the sounds!
- Interactive Questions: Stop during the story and ask, “What do you think the pig should do next?” This builds critical thinking.
- Retelling the Tale: After you finish, let the child put on the puppets and tell you the story. This is a huge boost for their narrative skills and memory.
- Sensory Add-ons: Use a small pile of real straw, some sticks from the park, and a brick (or a red block) to make the sensory experience even more realistic while using your crochet finger puppets.

Three Little Pigs Finger Puppets Crochet Pattern by EmmaS Dolls
New to the World of Crochet?
If you are just starting your amigurumi journey, don’t worry—I’ve got you covered! Before you dive into this pattern, I highly recommend checking out my guide on Amigurumi for Beginners, where I explain everything you need to know about choosing the right yarn and crochet hooks for your projects. You might also find it helpful to review my breakdown of Crochet Abbreviations to ensure you understand every step of the instructions. If you need a quick refresher on the fundamentals, head over to my How to Crochet Basic Stitches post, where you’ll find detailed written guides and video tutorials to help you master every stitch with confidence.
🌸 Support My Work
This amigurumi pattern is completely free to use! I spend hours designing, testing, and photographing each creation to share it with you.
If you love this pattern and would like to support my small business, please consider leaving a small tip on my Ko-fi page. Your support helps me buy new yarn colors for my upcoming collections and keeps the patterns on this website free for everyone!
Project Details for Three Little Pigs Finger Puppets Crochet Pattern
Before we pick up our hooks, here is a quick overview of what to expect:
- Difficulty Level: Intermediate
- Finished Size: Each puppet measures approximately 2.5 inches (6.5 cm)
- Construction: The project is worked using both continuous rounds (spirals) and rows.
Materials Needed
To create your own set of Three Little Pigs finger puppets, you will need:
- Yarn: I use a 100% cotton yarn from my local store. The best match and my top recommendation for this pattern is Paintbox Yarns Cotton DK.
- Pigs: Pink.
- Wolf: Two shades of brown.
- Details & Clothes: Blue, green, red, yellow, grey, black, and white (for clothes, straw, wood, bricks, and embroidery).
- Hook: I used a 2mm hook. I highly recommend Clover Amour Hooks for the best experience.
- Tools & Supplies:
- Fiberfill, scissors, and a tapestry needle.
- Optional: Stitch markers.
- Find all these essentials here: Crochet Supplies & Accessories.
Crochet Abbreviations (US Terms)
I use standard US crochet terminology. If you are unfamiliar with any of these, don’t forget to check my Crochet Abbreviations guide mentioned above!
| Abbreviation | Description |
| MR | Magic Ring |
| CH | Chain |
| SC | Single Crochet |
| HDC | Half Double Crochet |
| INC | Increase (2 sc in one stitch) |
| DEC | Decrease (sc 2 together) |
| BLO | Back Loop Only |
| FLO | Front Loop Only |
| SL ST | Slip Stitch |
| SK ST | Skip Stitch |
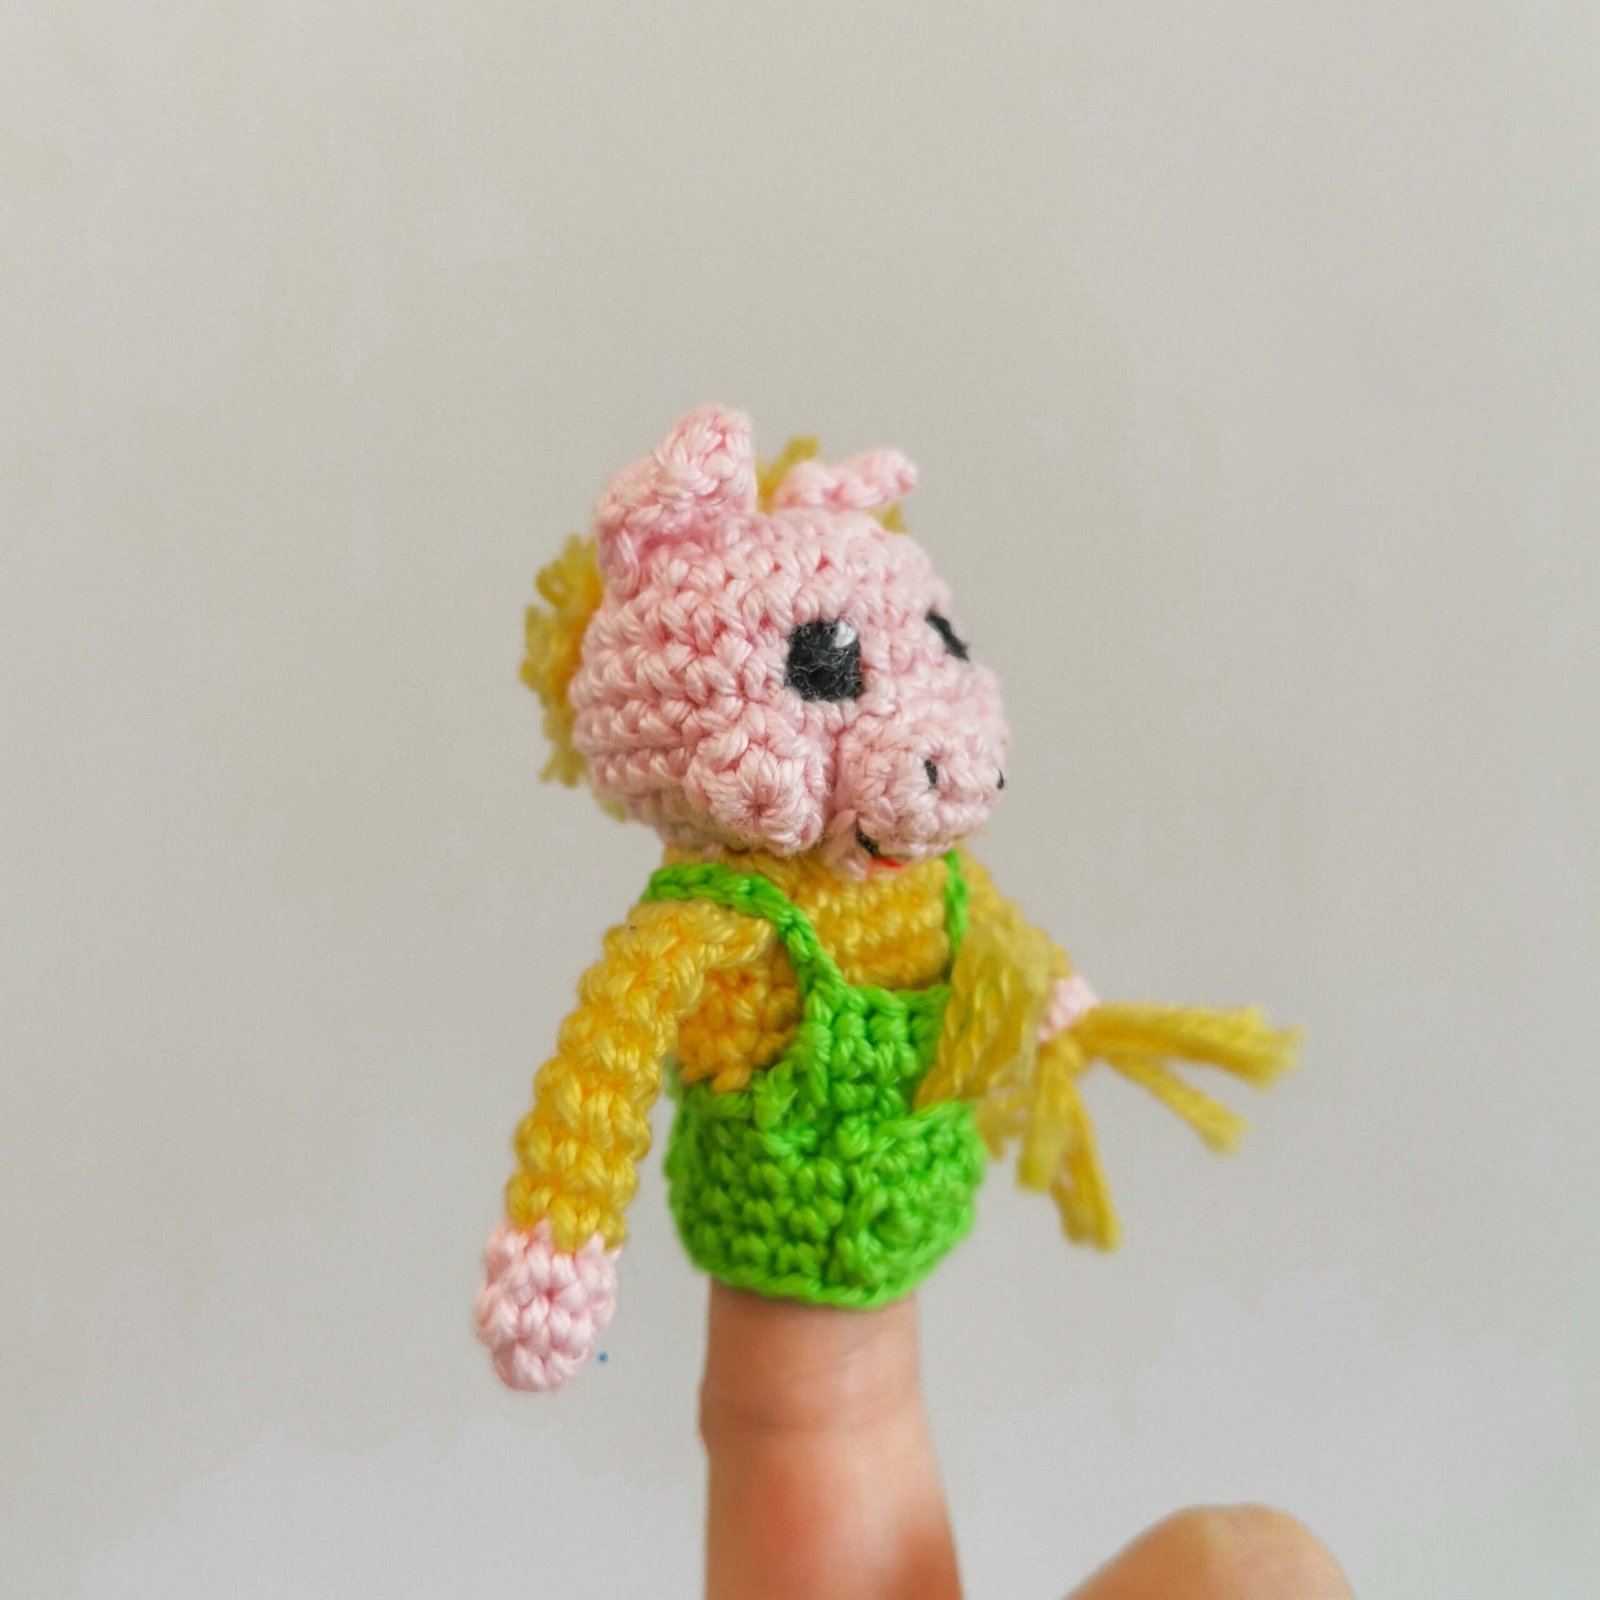
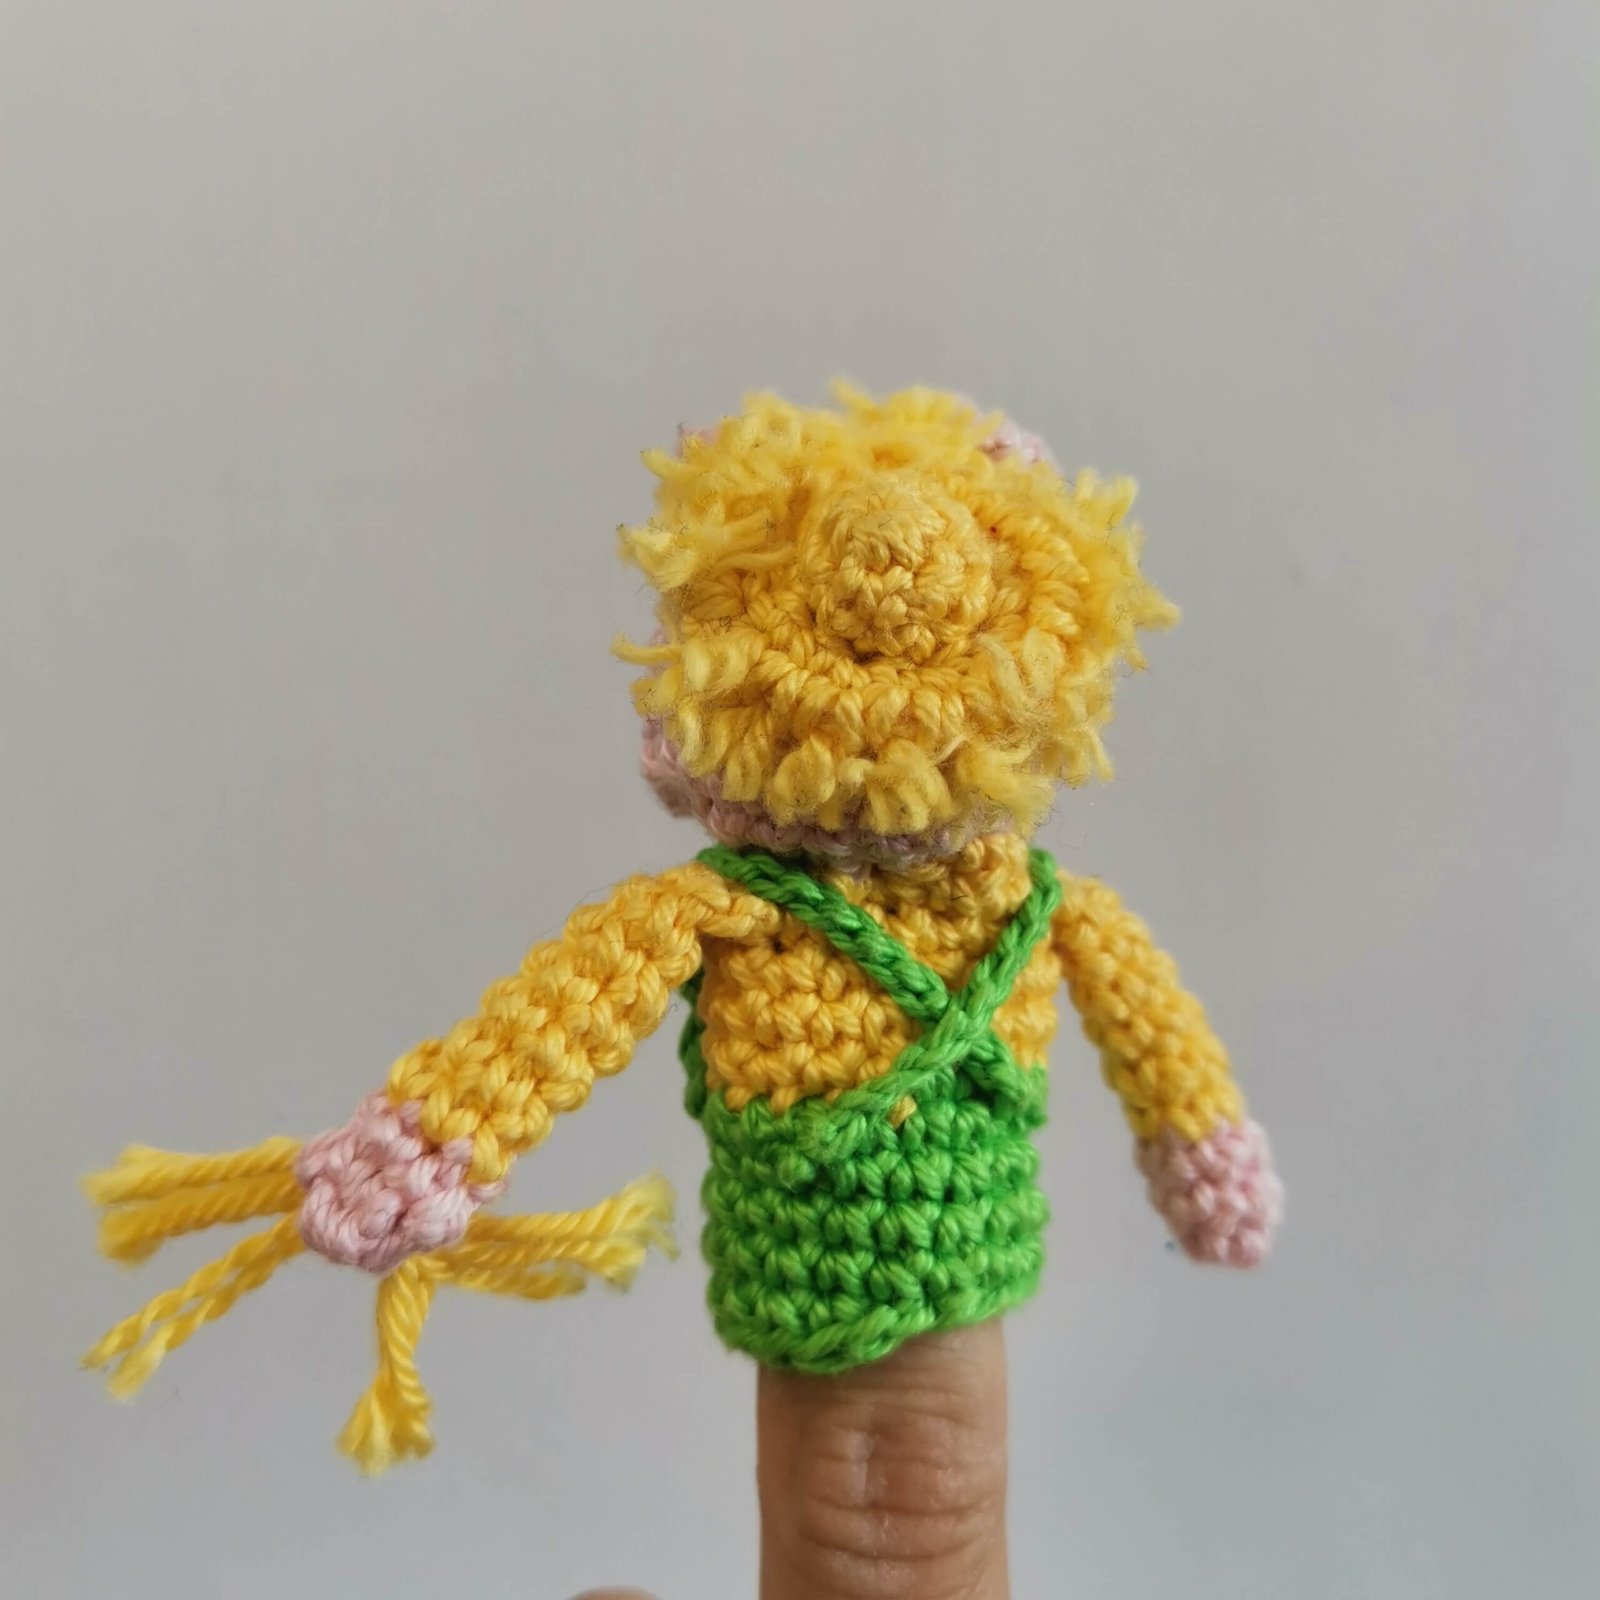
The First Little Pig Pattern (Straw House Builder)
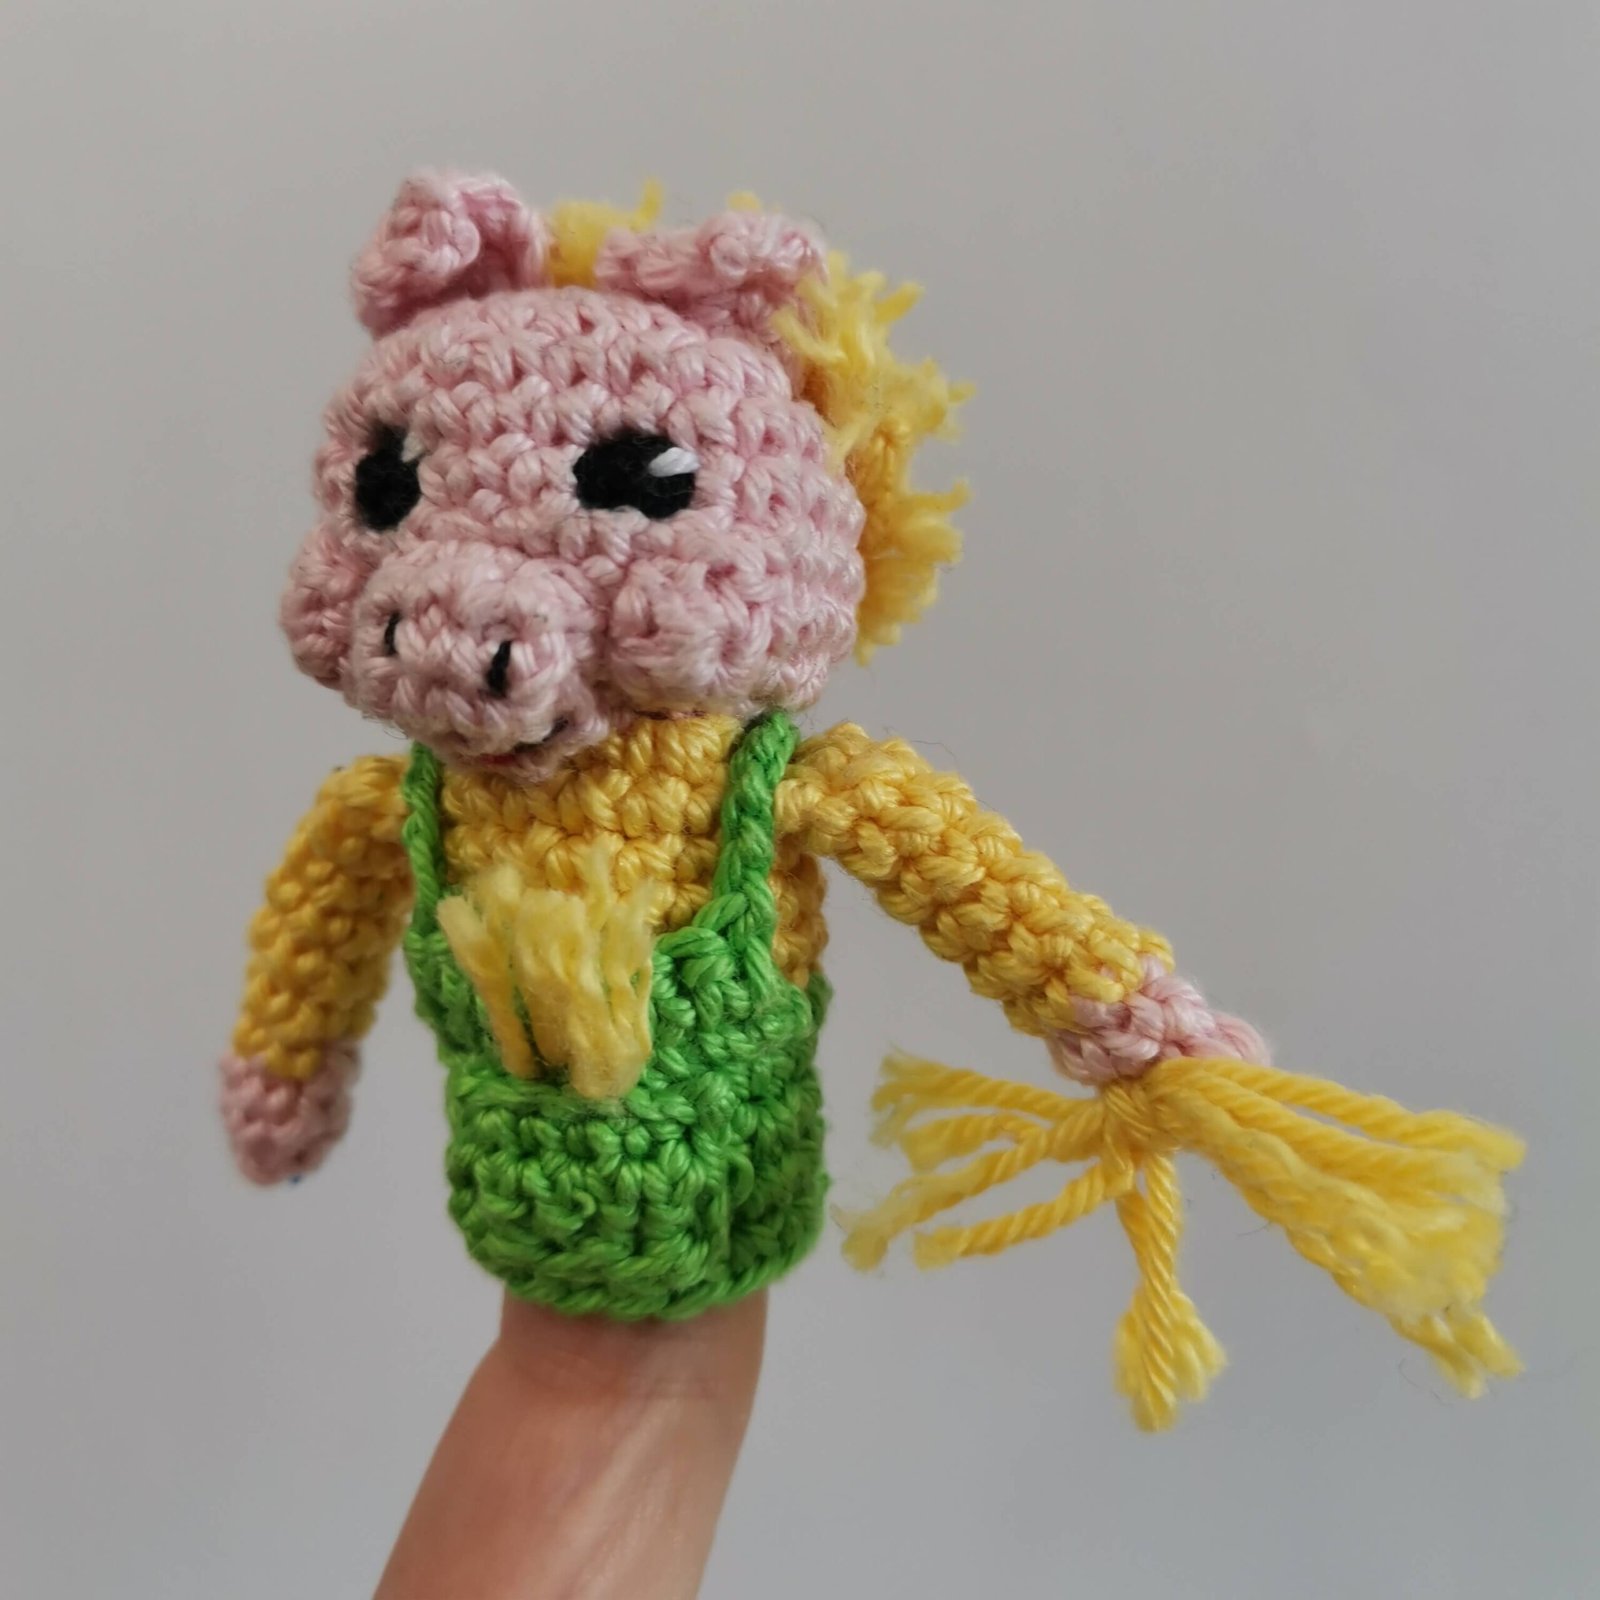
This little piggy is ready to build his house of straw! We will start with the head and add all the cute facial features before finishing the body.
Pro Tip: Since these finger puppets are small, I recommend embroidering the face and sewing the parts as you go, before you finish stuffing. it makes it much easier to hide the yarn tails inside!
Three Little Pigs Finger Puppets Crochet Pattern by EmmaS Dolls
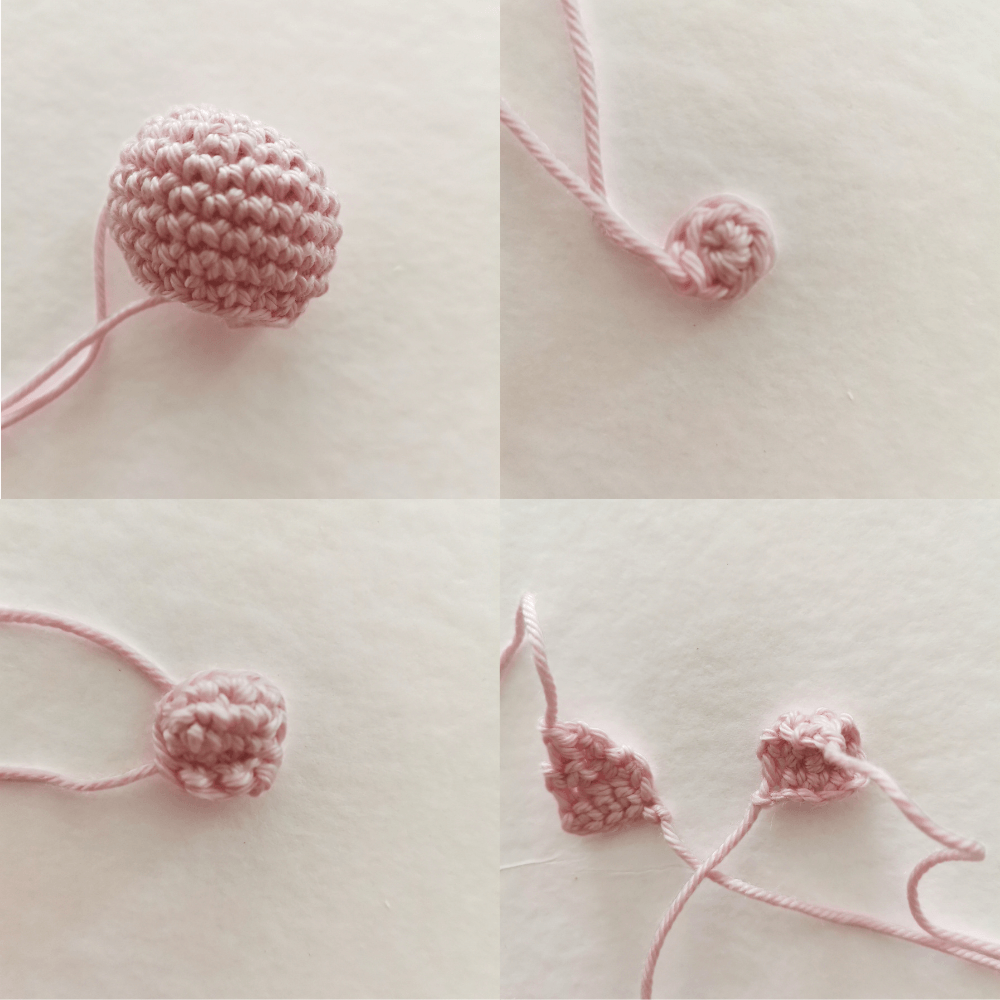
Head & Face Details
Color: Pink
Round 1: mr, 6 sc [6]
Round 2: 6 x inc [12]
Round 3: (sc, inc) x 6 [18]
Round 4: (sc, inc, sc) x 6 [24]
Round 5-8: 24 sc [24] (4 rounds)
Round 9: (sc, dec, sc) x 6 [18]
Without fastening off, stop here to add the facial features. We will continue crocheting the head after that.
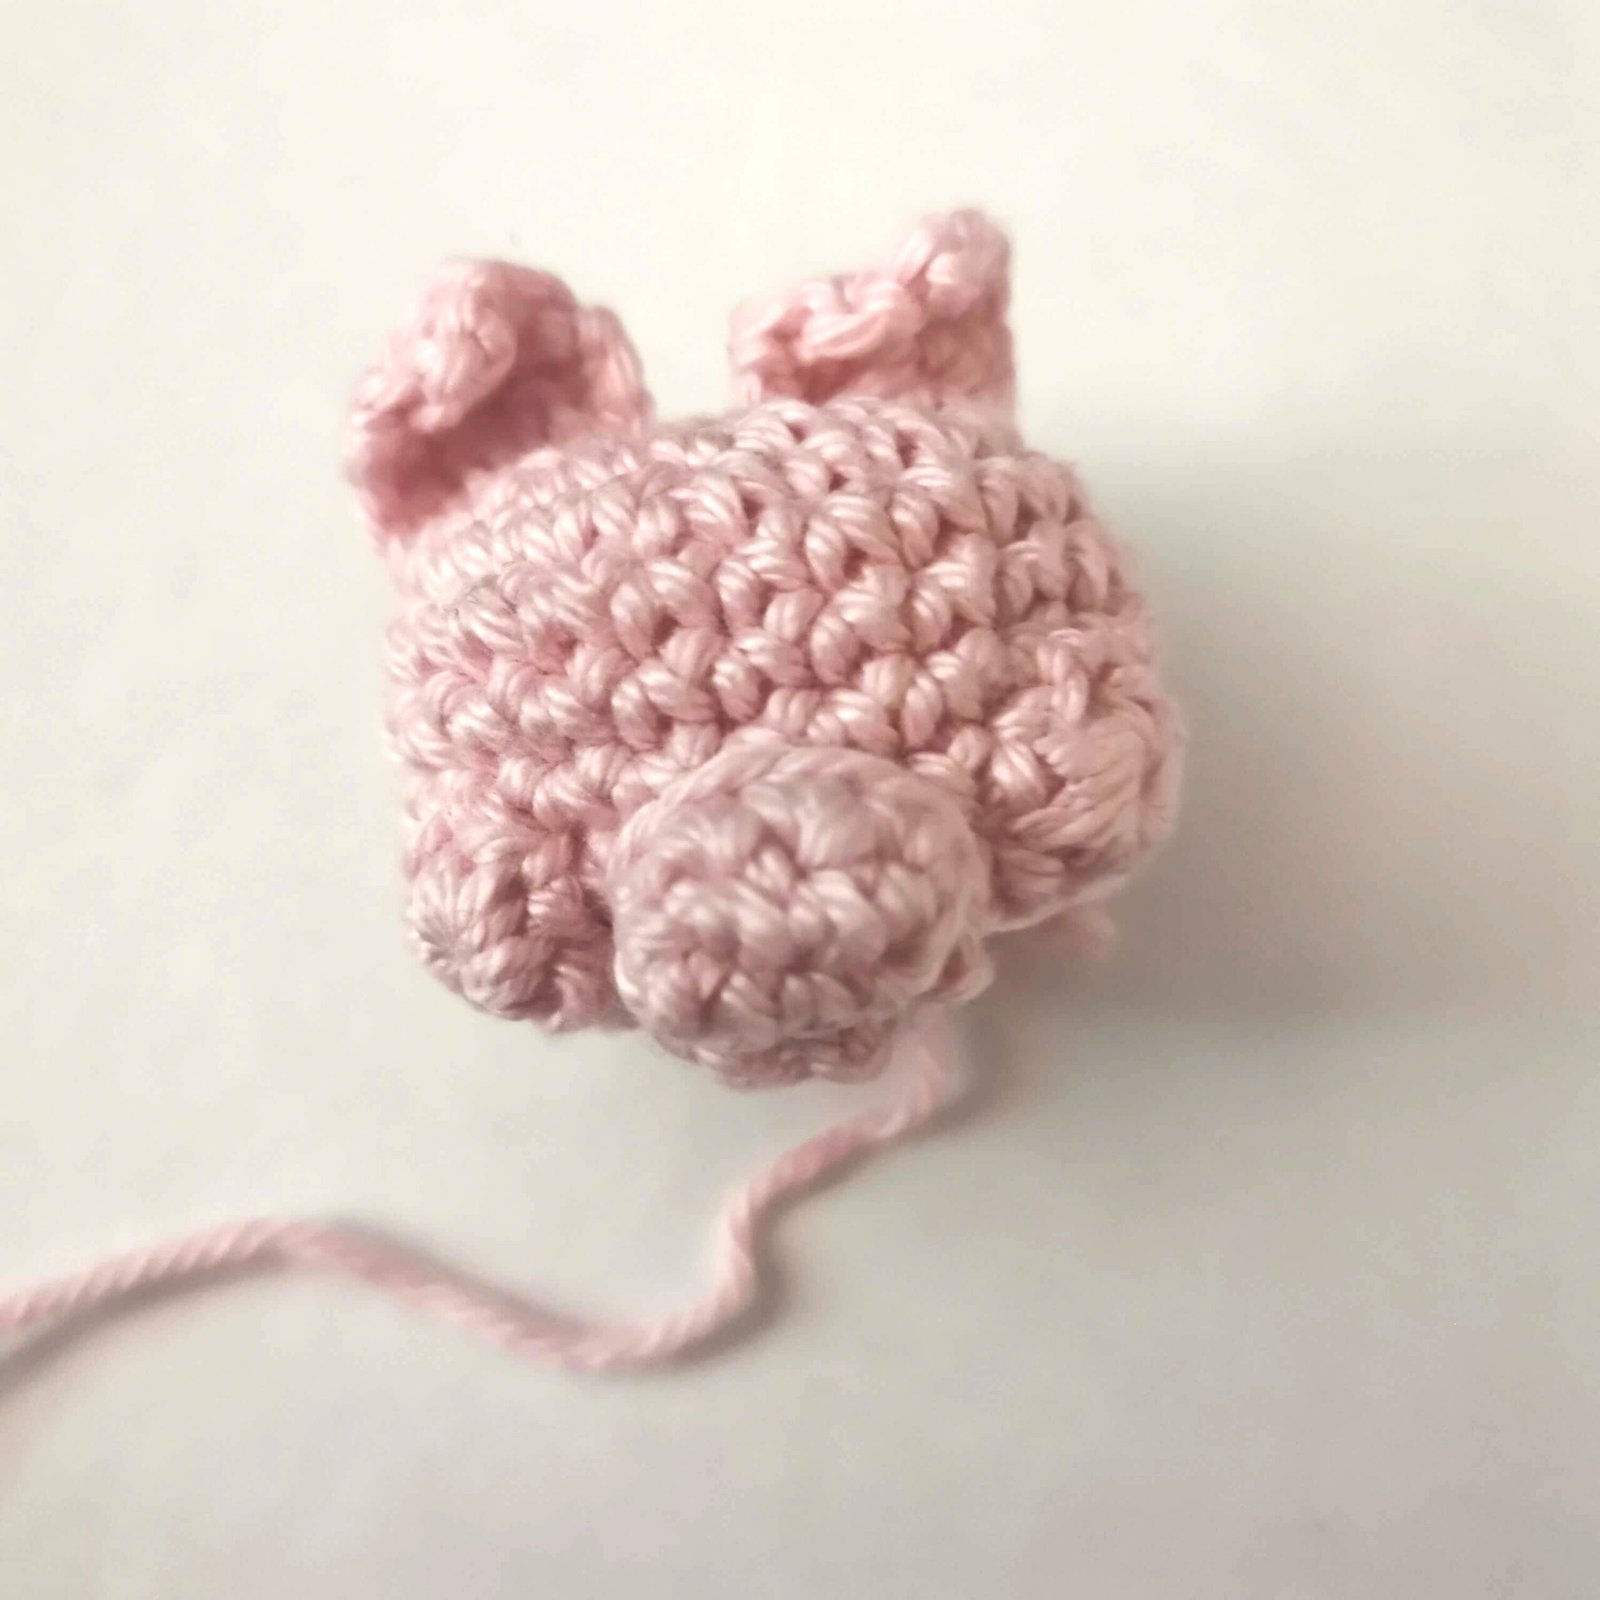
Cheeks (Make 2)
Color: Pink
Round 1: mr, 6 sc, sl st in first.
Fasten off, leaving a long tail for sewing.
Muzzle and Mouth
Color: Pink
Ch 4.
Row 1: (Starting from 2nd ch from hook) 2 sc, 3 sc in next st, sc, inc [8]
Round 2: 8 sc [8]
Row 3: Turn, sk st, 2 sc, sl st.
Fasten off, leaving a long tail for sewing.
Ears (Make 2)
Color: Pink
Ch 5.
Row 1: (Starting from 2nd ch from hook) 4 sc, ch 1, turn.
Row 2: sc, dec, sc, ch 1, turn.
Row 3: sc, dec, ch 1, turn.
Row 4: dec.
Fasten off.
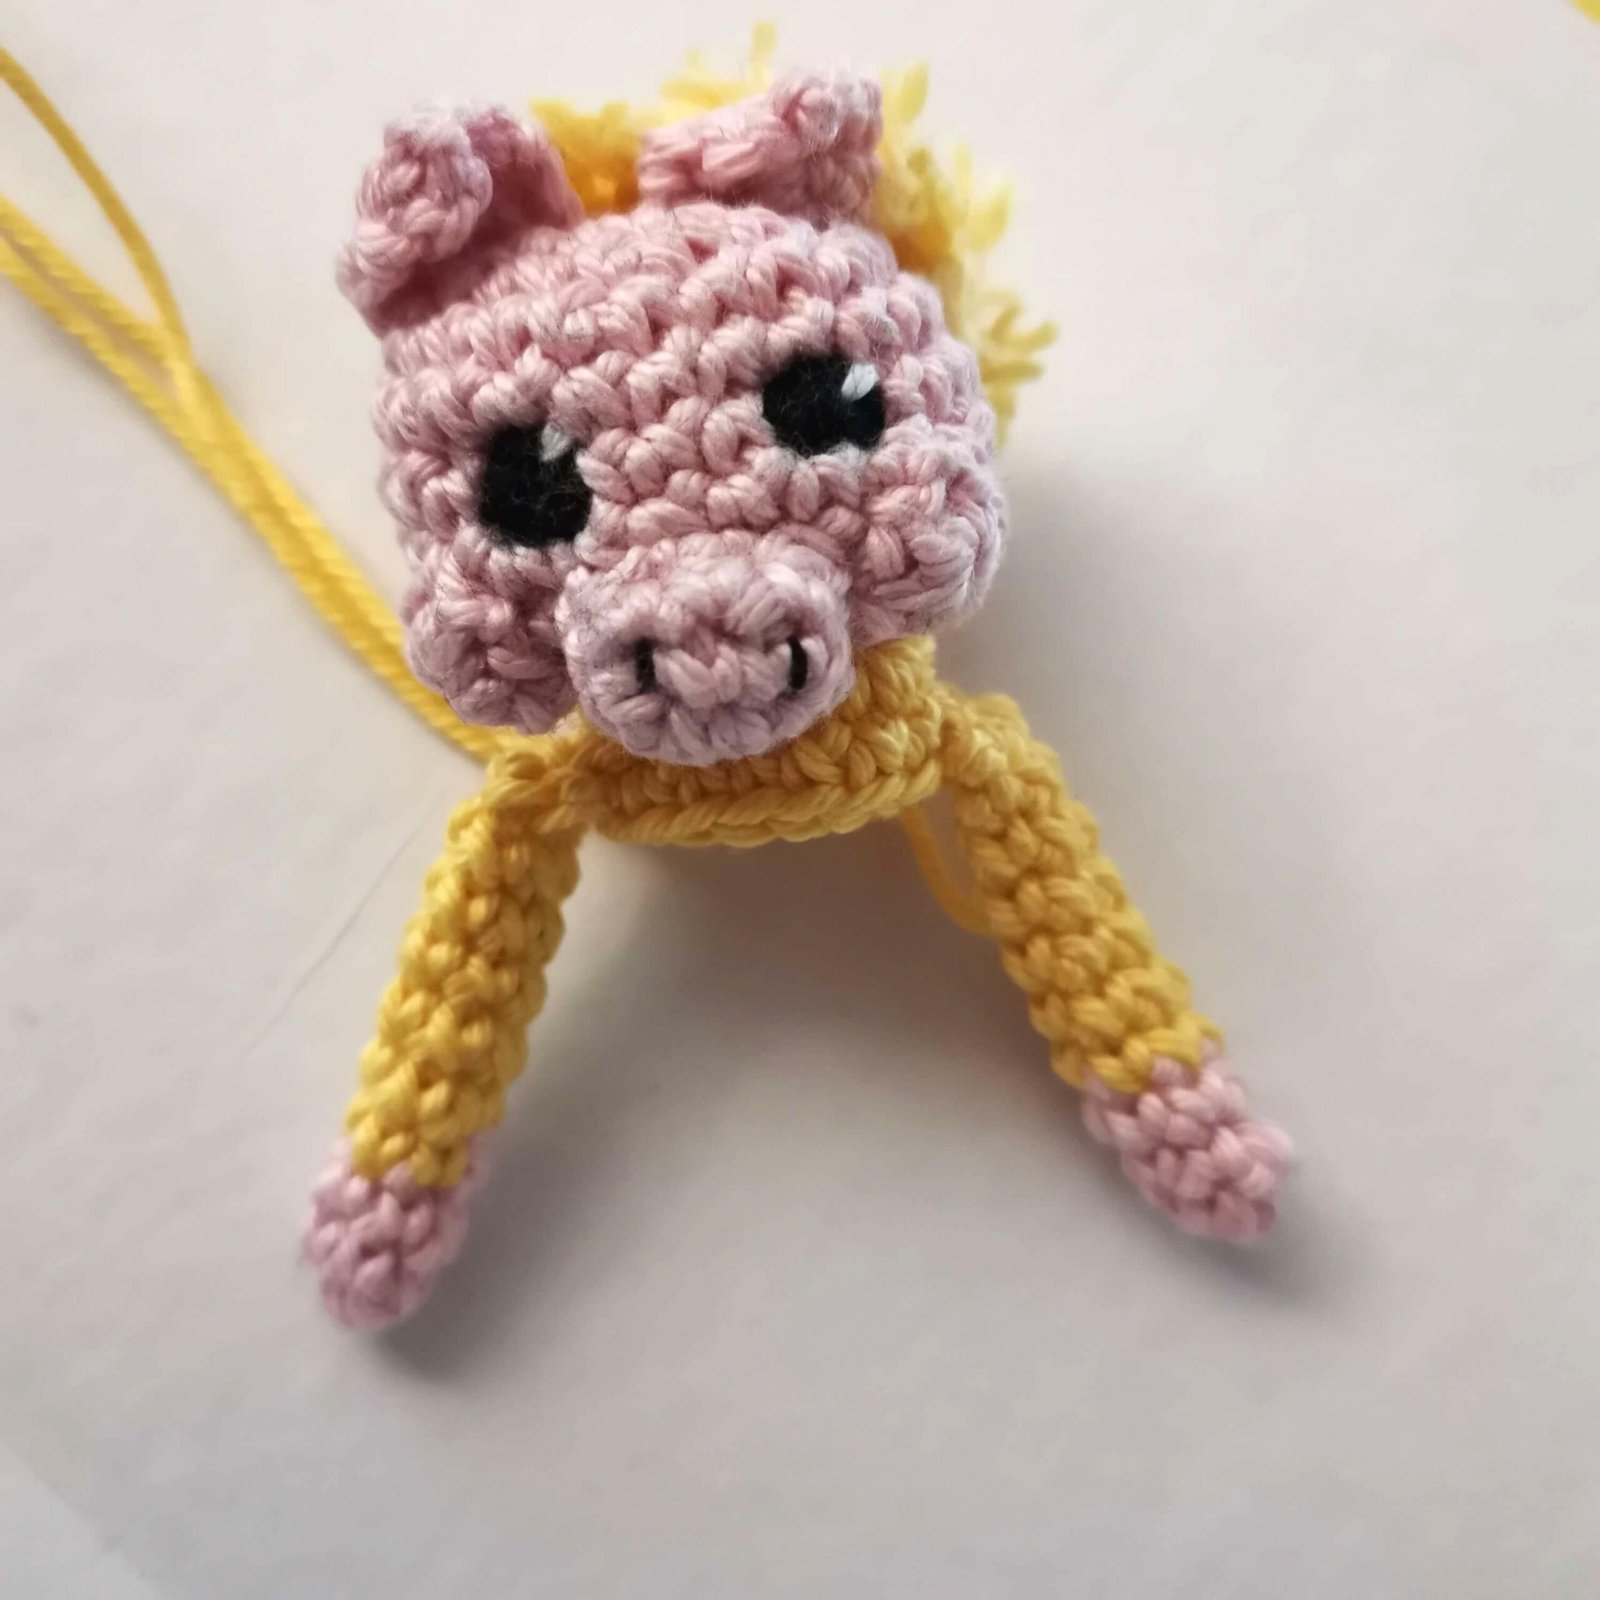
Assembly Note: Sew the muzzle, cheeks, and ears to the head. Embroider the eyes with black yarn and add a small white dash for a “sparkle.” Embroider the nostrils, a black mouth interior, and a tiny red tongue.
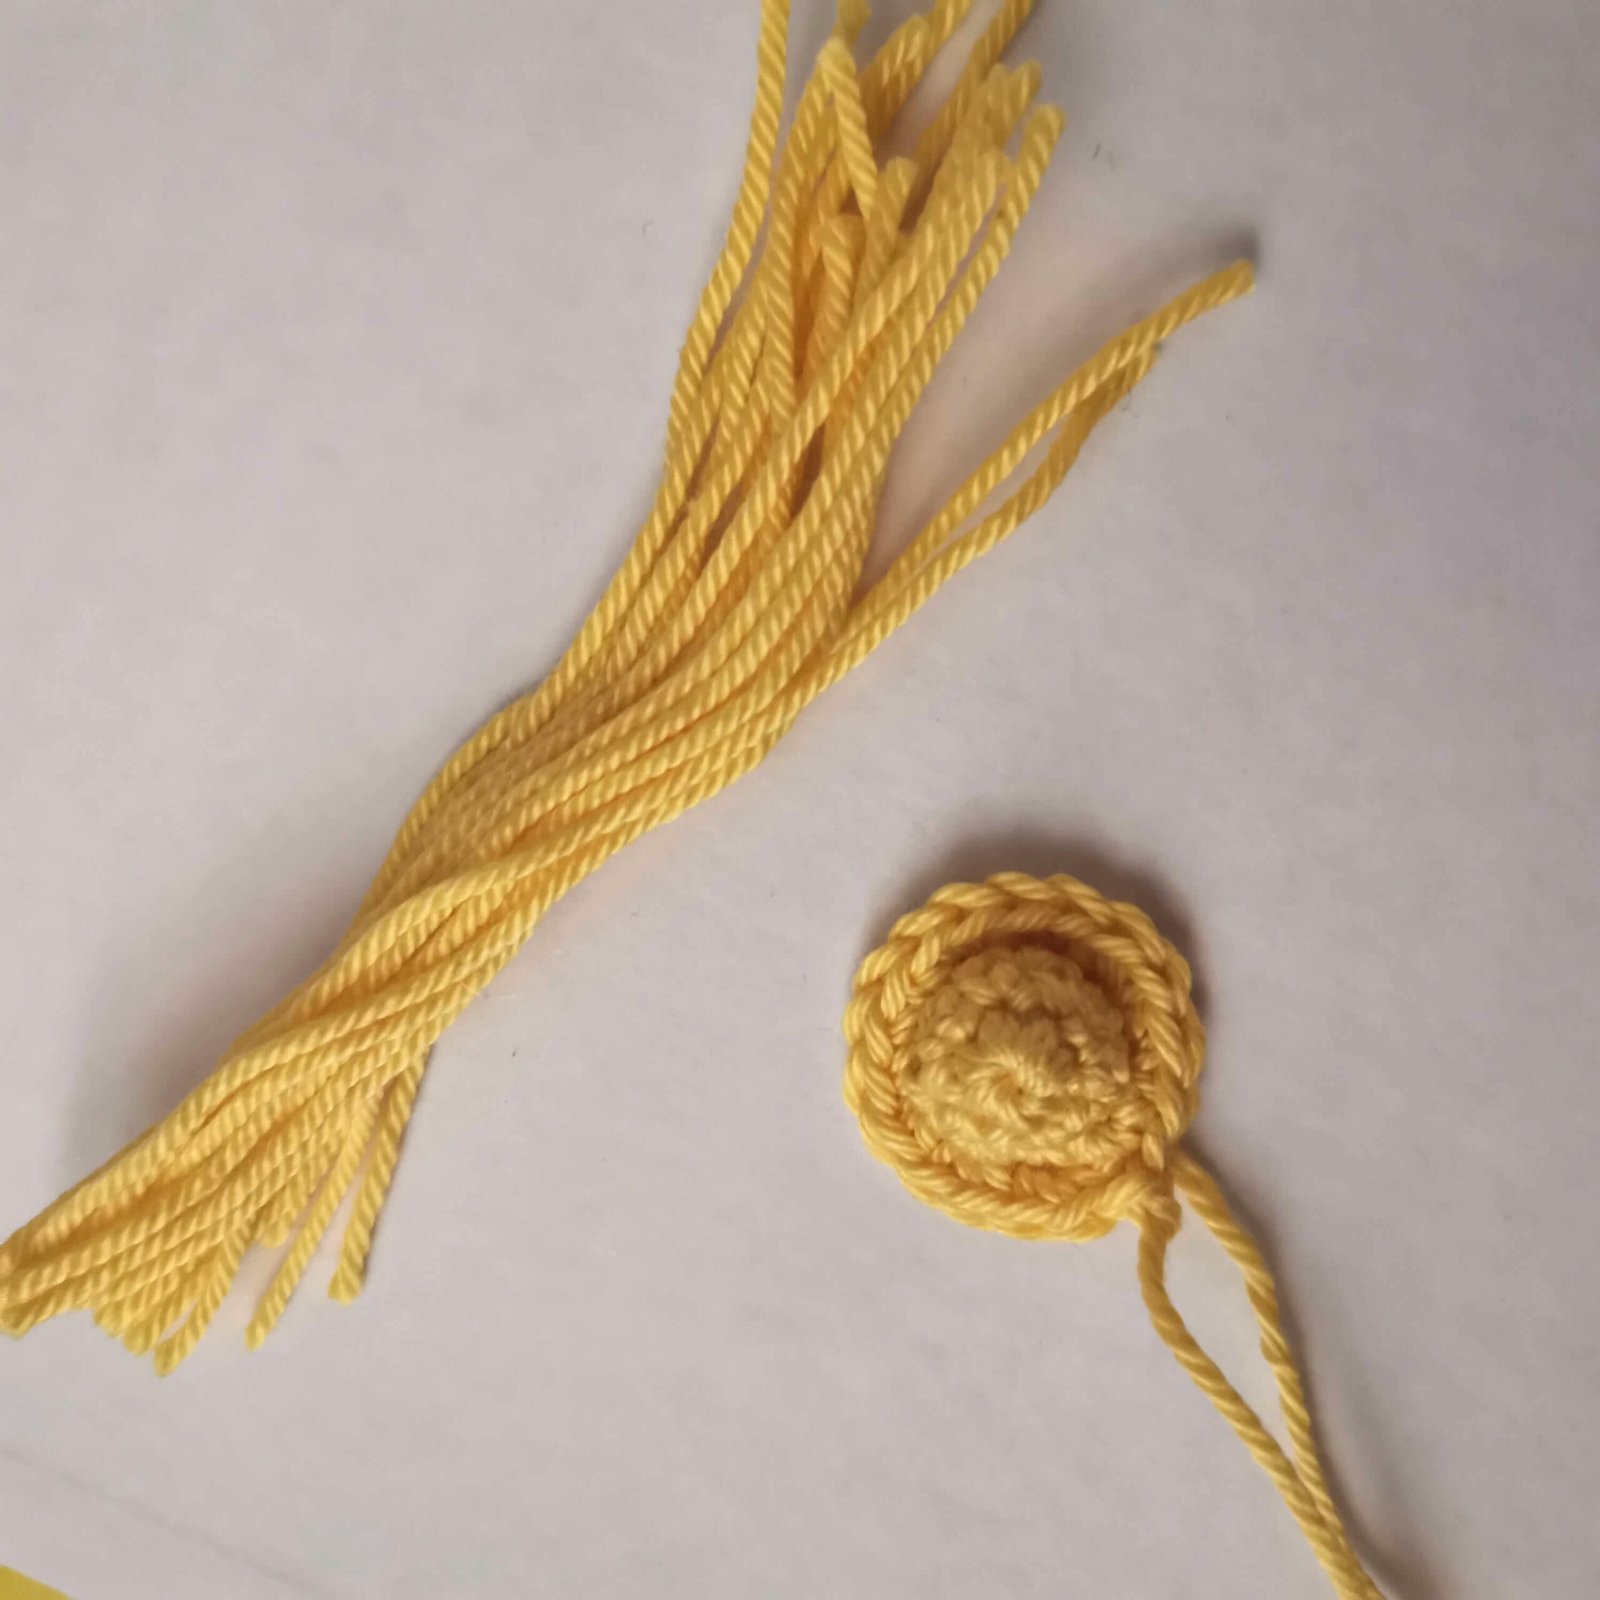
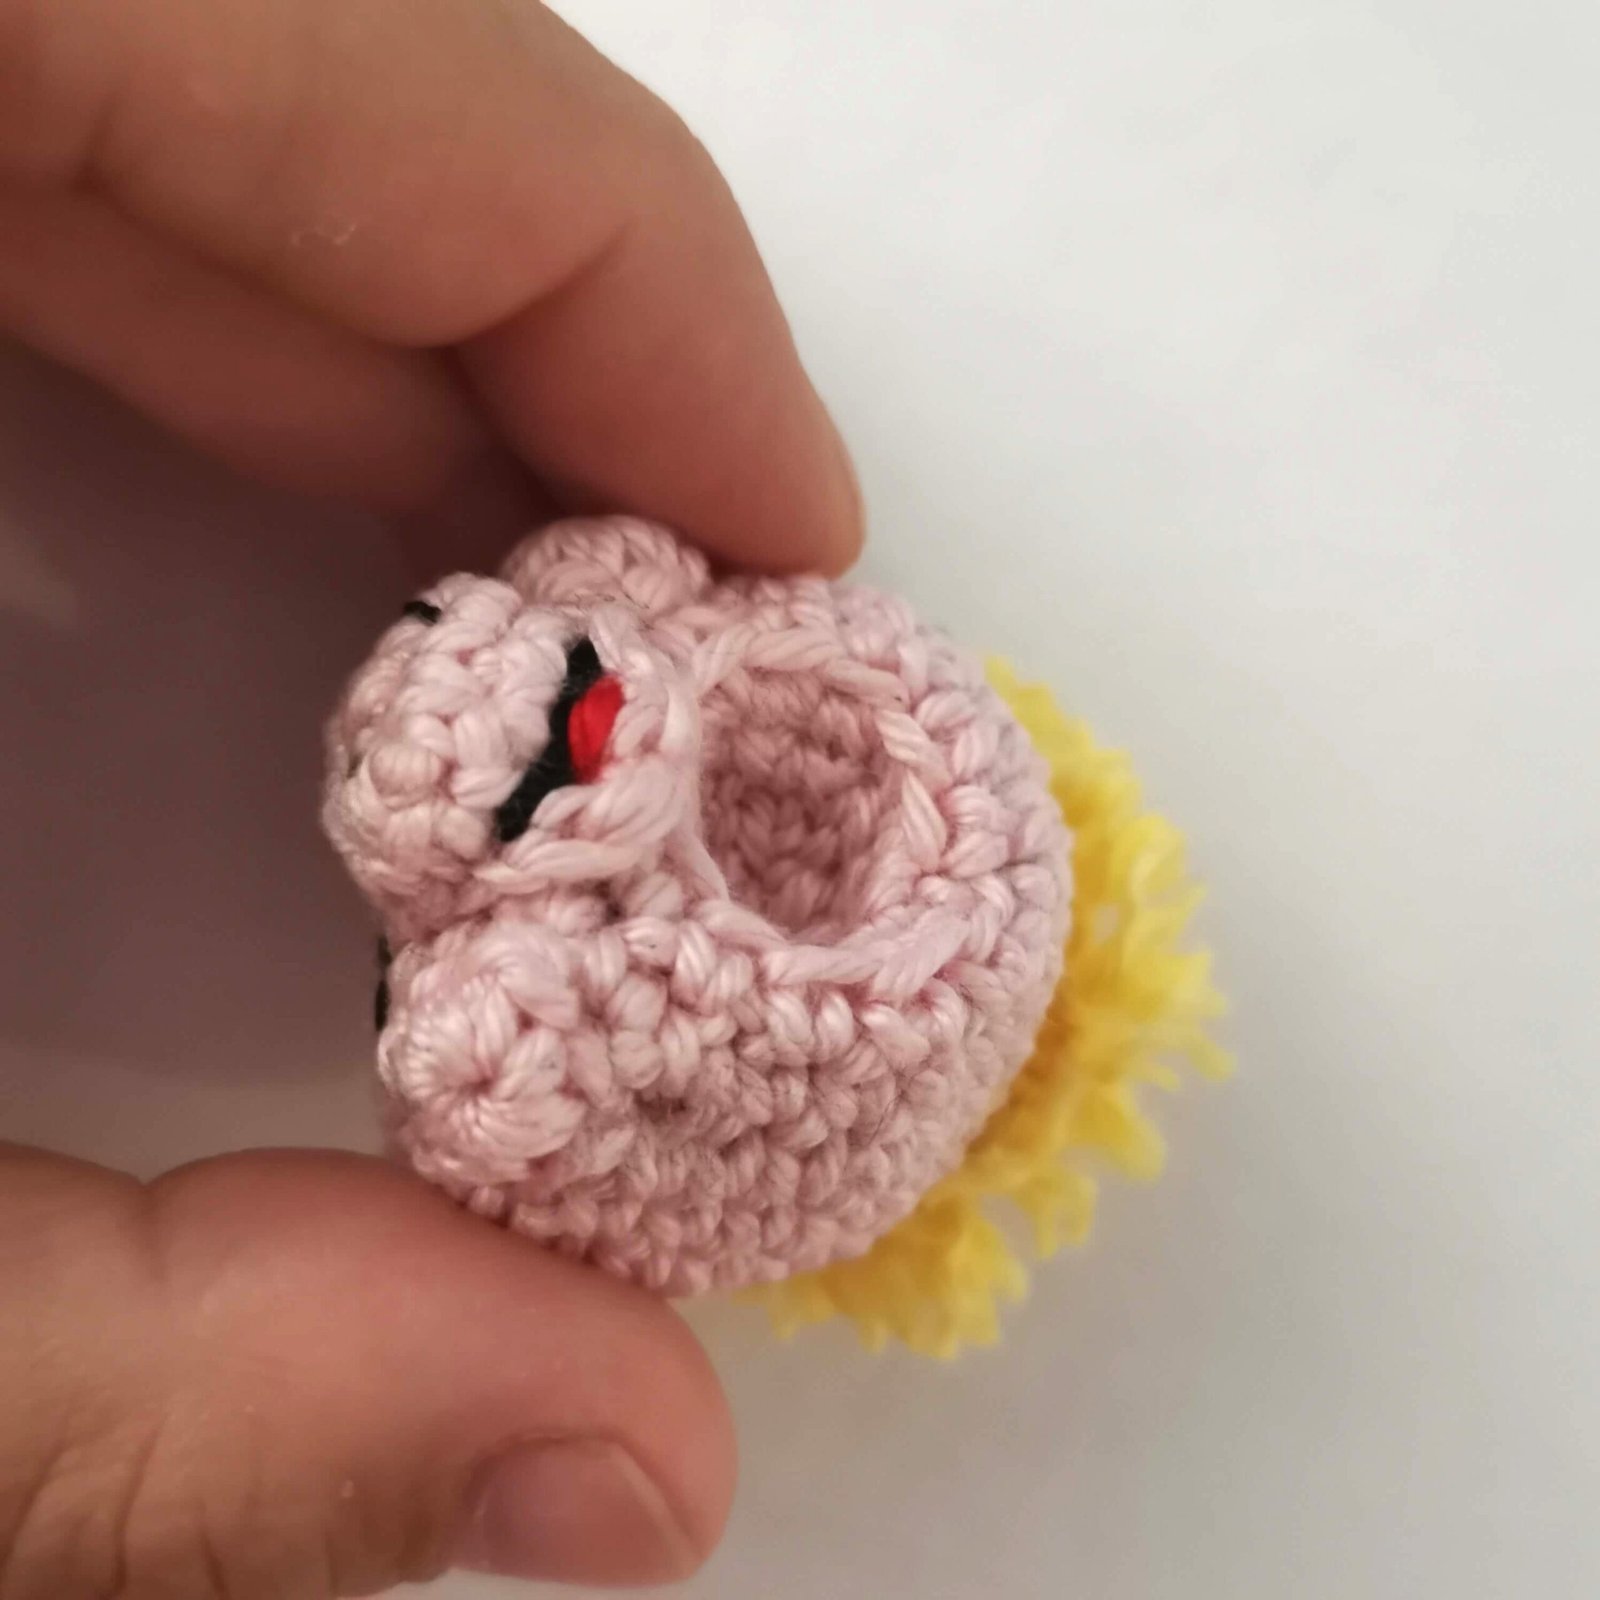
The Straw Hat
Color: Yellow
Round 1: mr, 6 sc [6]
Round 2: (sc, inc) x 3 [9]
Round 3: 9 sc [9]
Round 4: FLO 9 x inc [18]
Fasten off.
Straw effect: Attach scraps of yellow yarn to the brim to imitate straw. Stuff lightly and sew to the top of the head.
Finishing the Head
Now, stuff the head and continue:
Round 10: (sc, dec) x 6 [12]
Round 11: BLO 12 sc [12]
Round 12: 12 sc [12]
Round 13: 6 x dec [6]
Fasten off and close.
Pull the yarn tail through to the top to create a slight indentation at the base of the head.
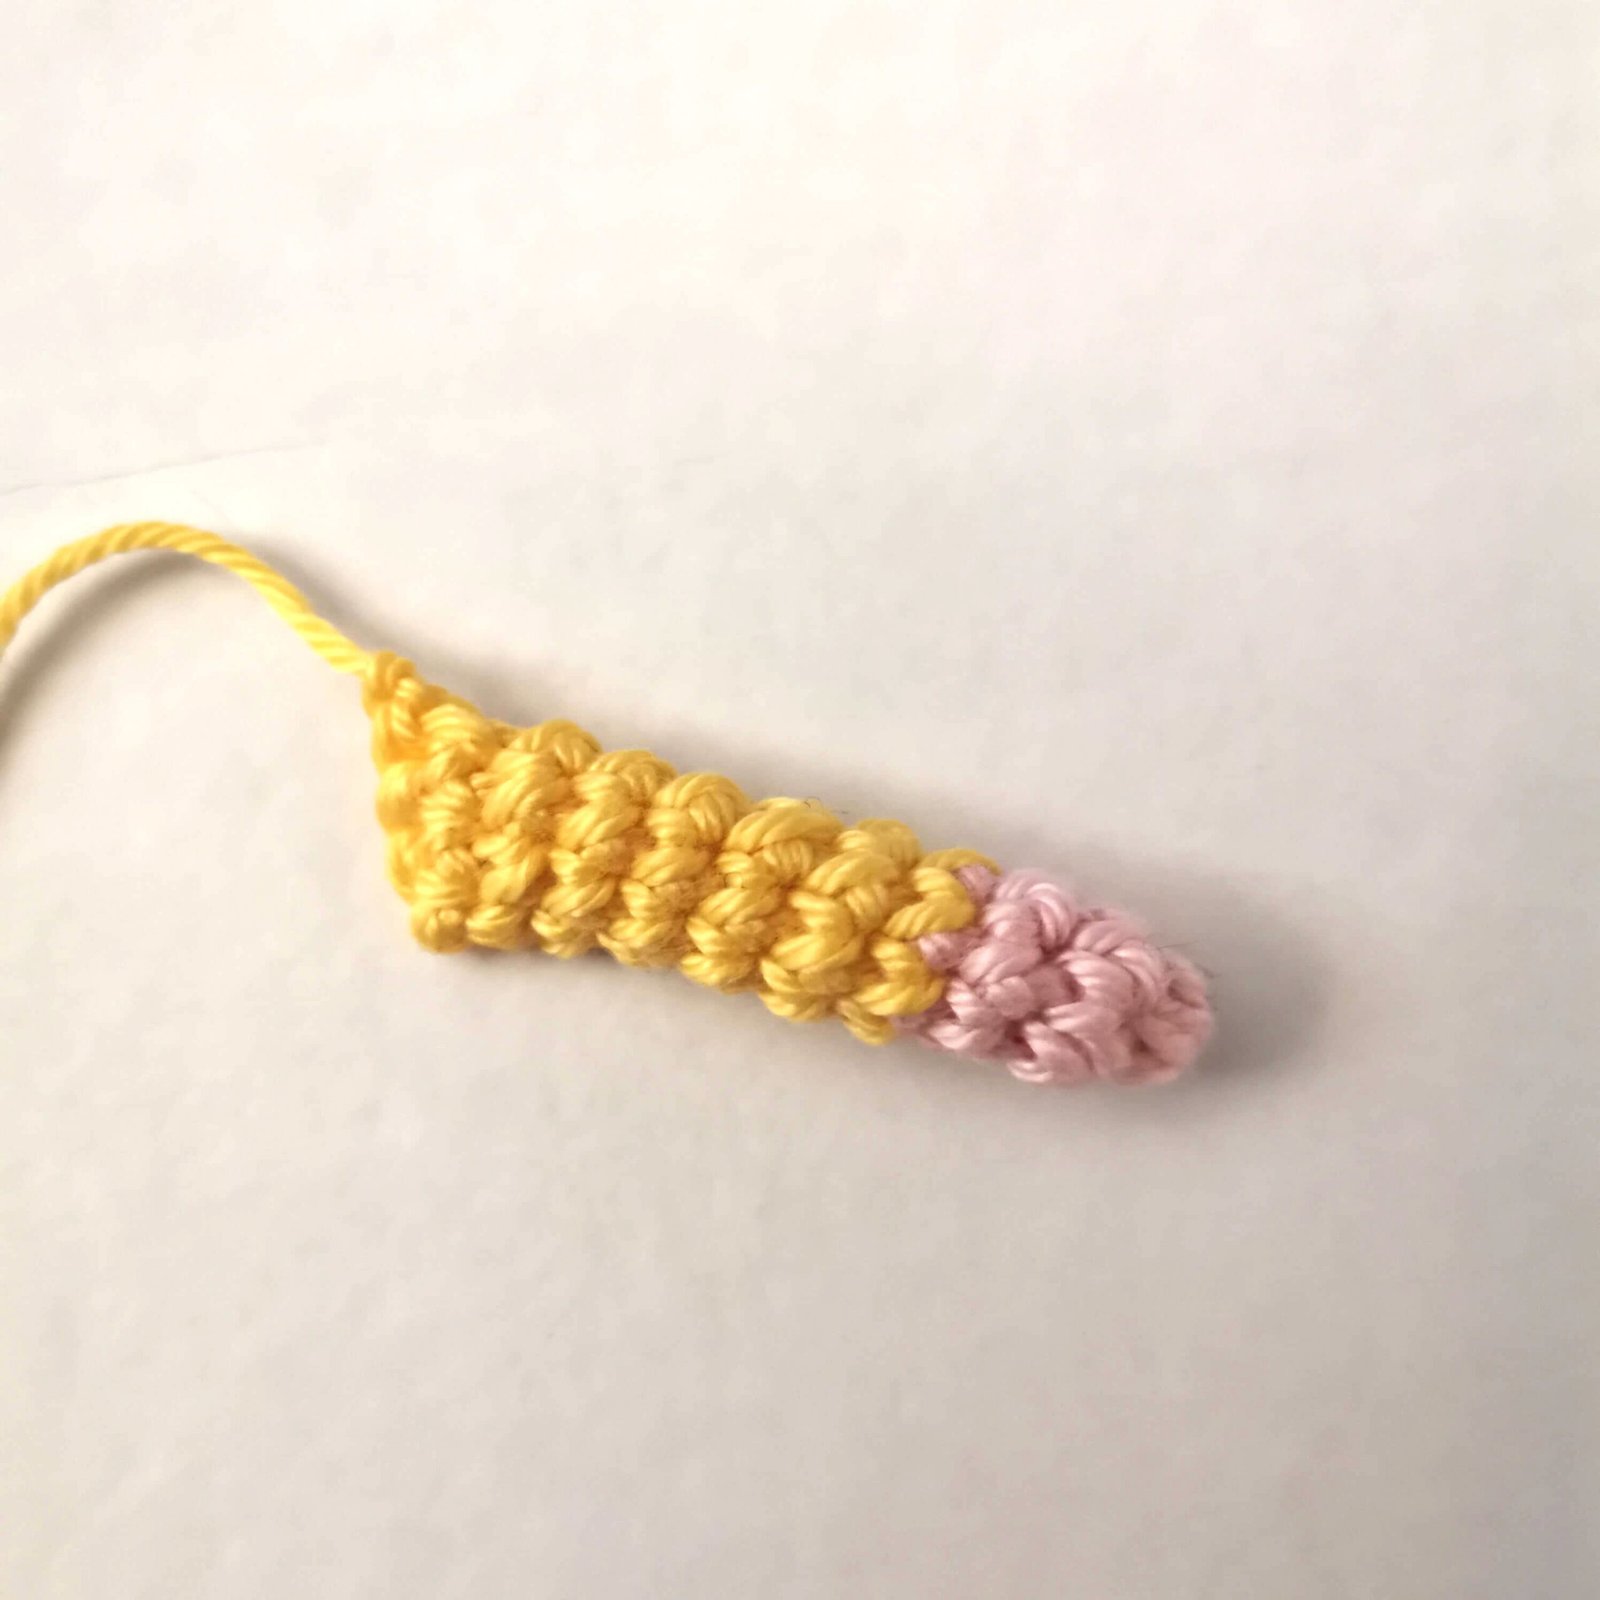
Arms (Make 2)
Color: Pink & Yellow
Round 1: mr, 6 sc [6]
Round 2-3: 6 sc [6]
Switch to Yellow
Round 4-9: 6 sc [6] (6 rounds)
Join the sides and close with 3 sc.
Fasten off.
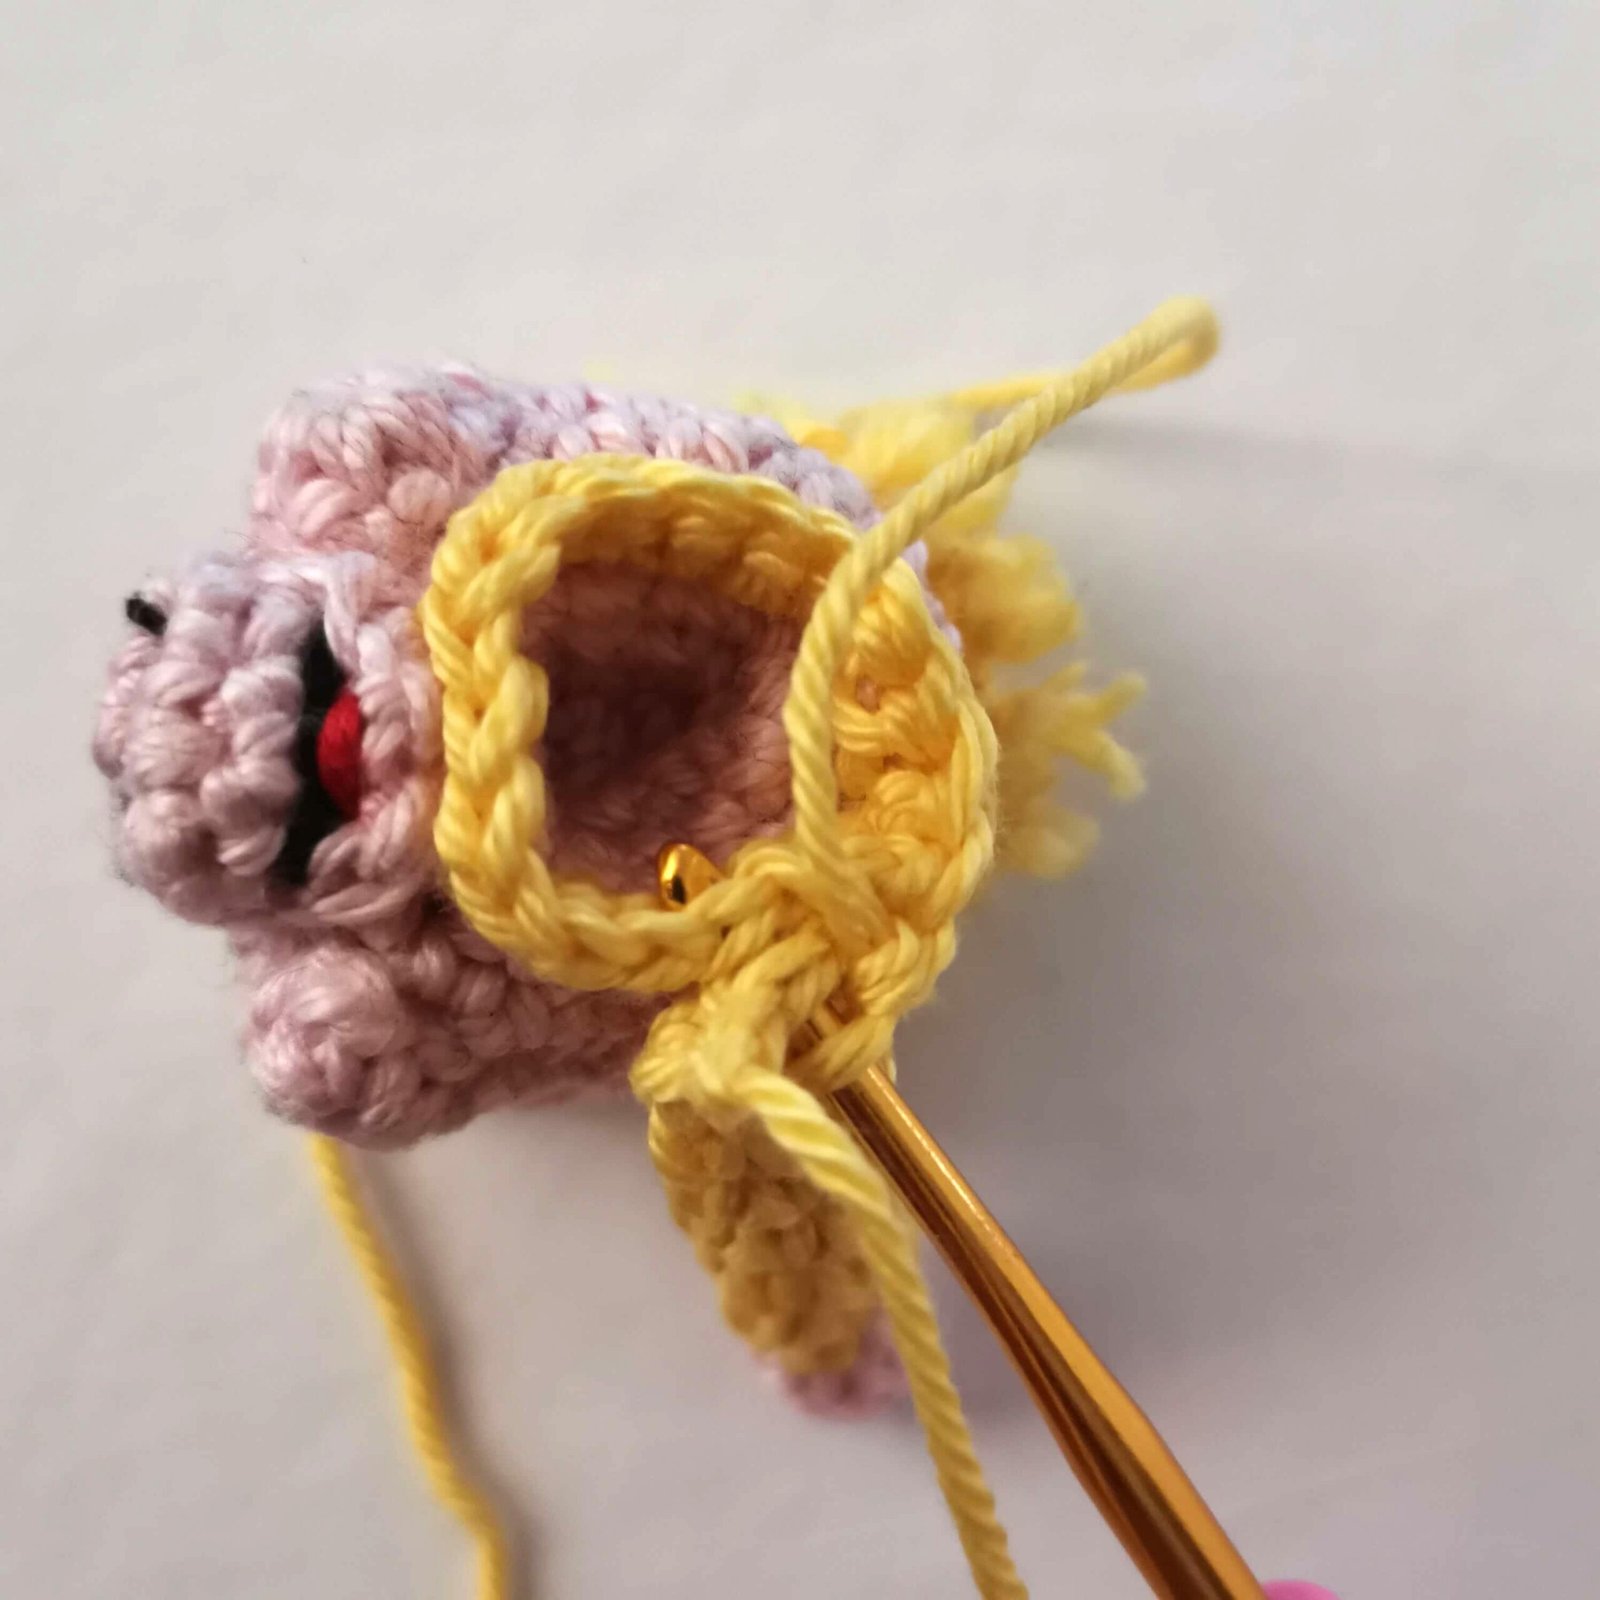
Body
We will work the body starting from the FLO of Round 11 of the head.
Color: Yellow

Three Little Pigs Finger Puppets Crochet Pattern by EmmaS Dolls
Round 11: FLO (sc, inc) x 6 [18]
Round 12: 3 sc, 3 sc (through both the arm and body to attach the right arm), 6 sc, 3 sc (through left arm and body), 3 sc [18]
Note: Ensure the arms are centered on the sides. If not, shift your starting stitch.
Round 13-15: 18 sc [18]
Switch to Green
Round 16: 18 sc [18]
Round 17: 2 sc, BLO sc, 4 sc, BLO 7 sc, 2 sc, BLO sc, sc [18]
Note: The BLO 7 sc should be centered on the front.
Round 18-20: 18 sc [18]
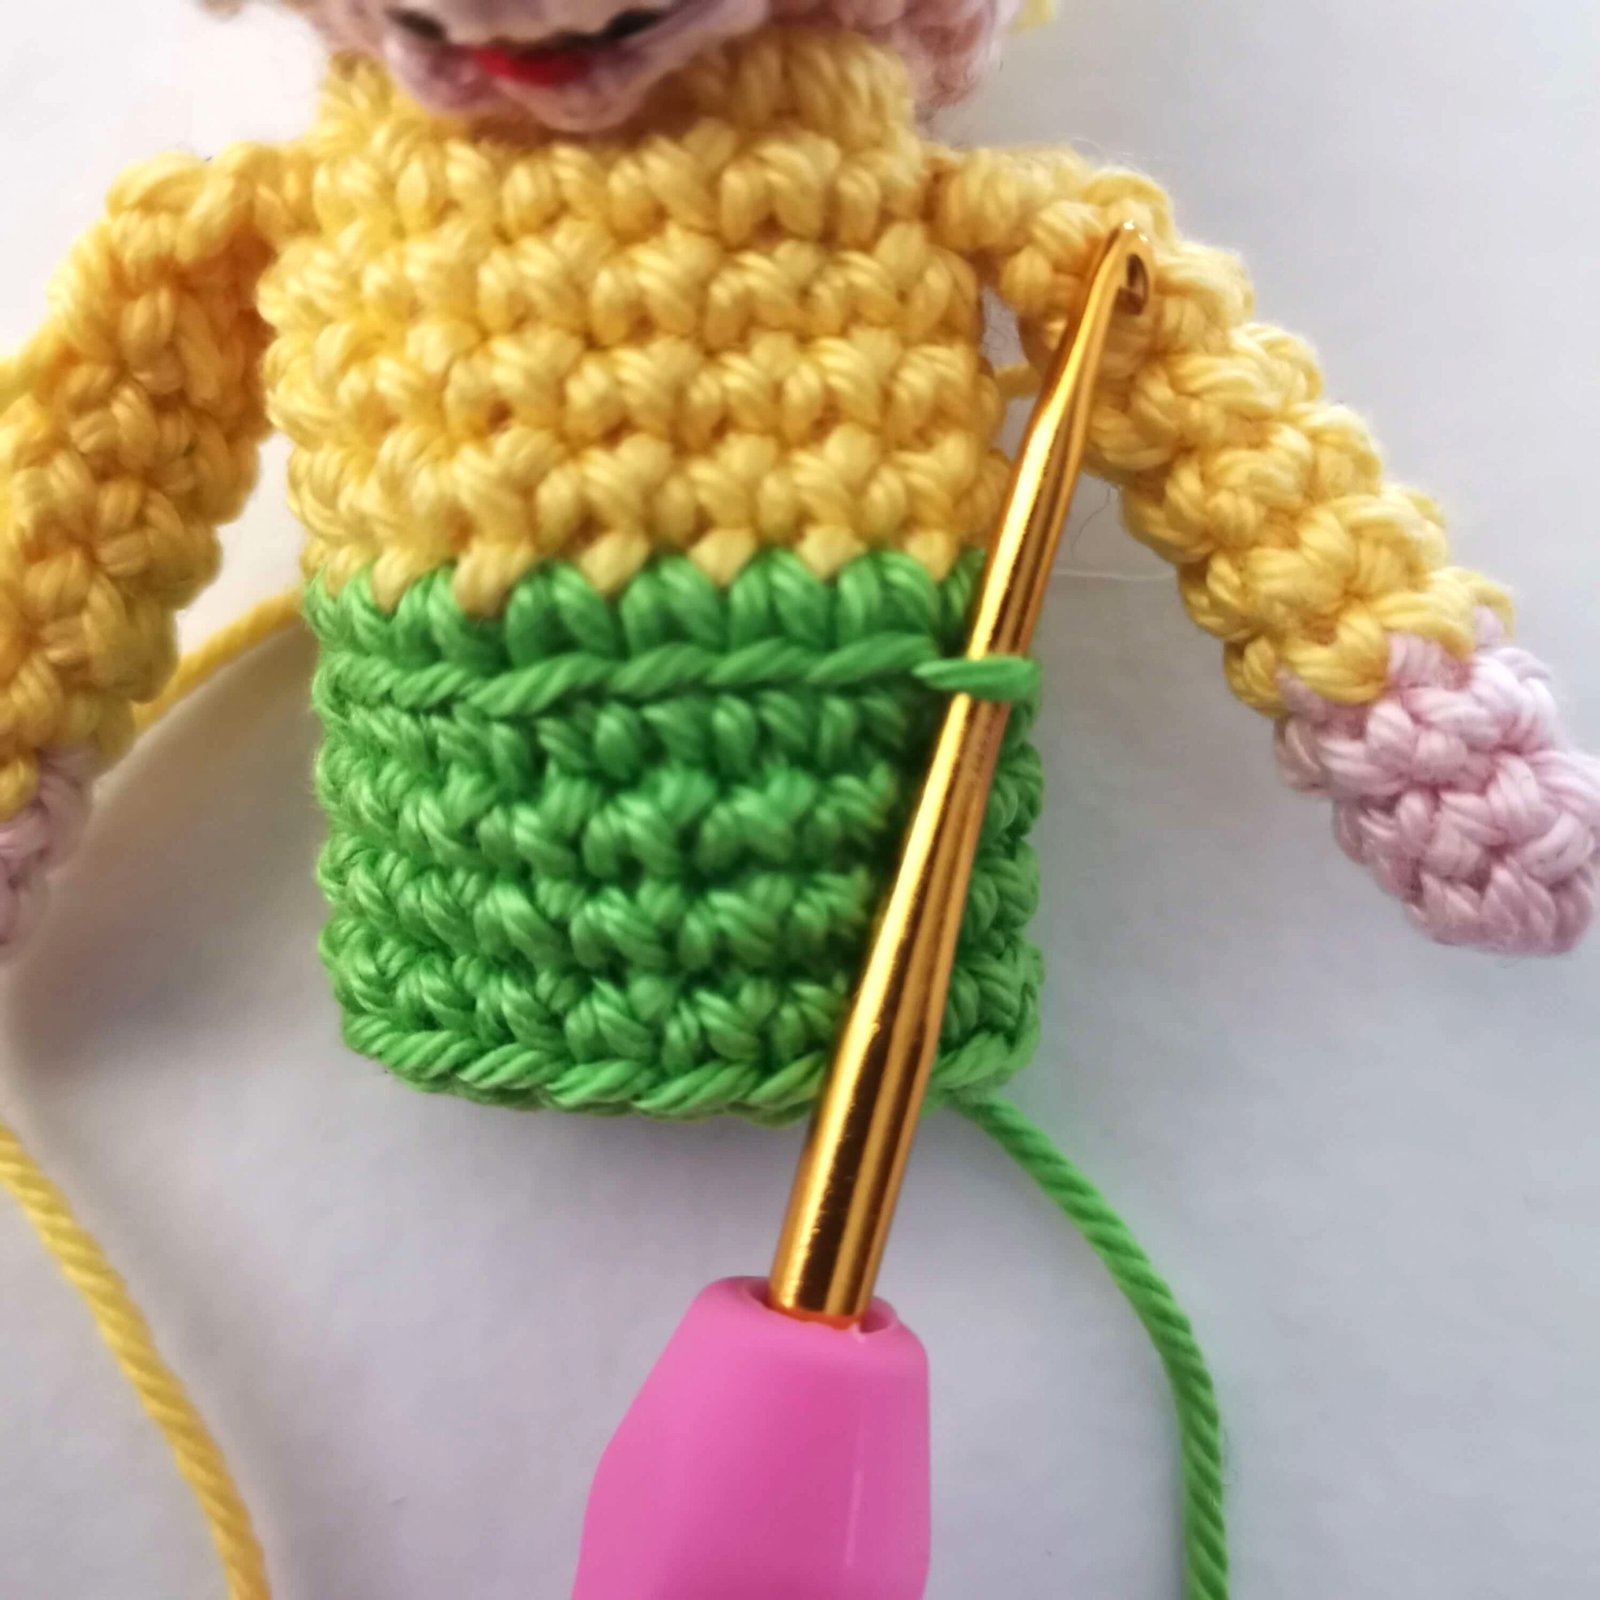
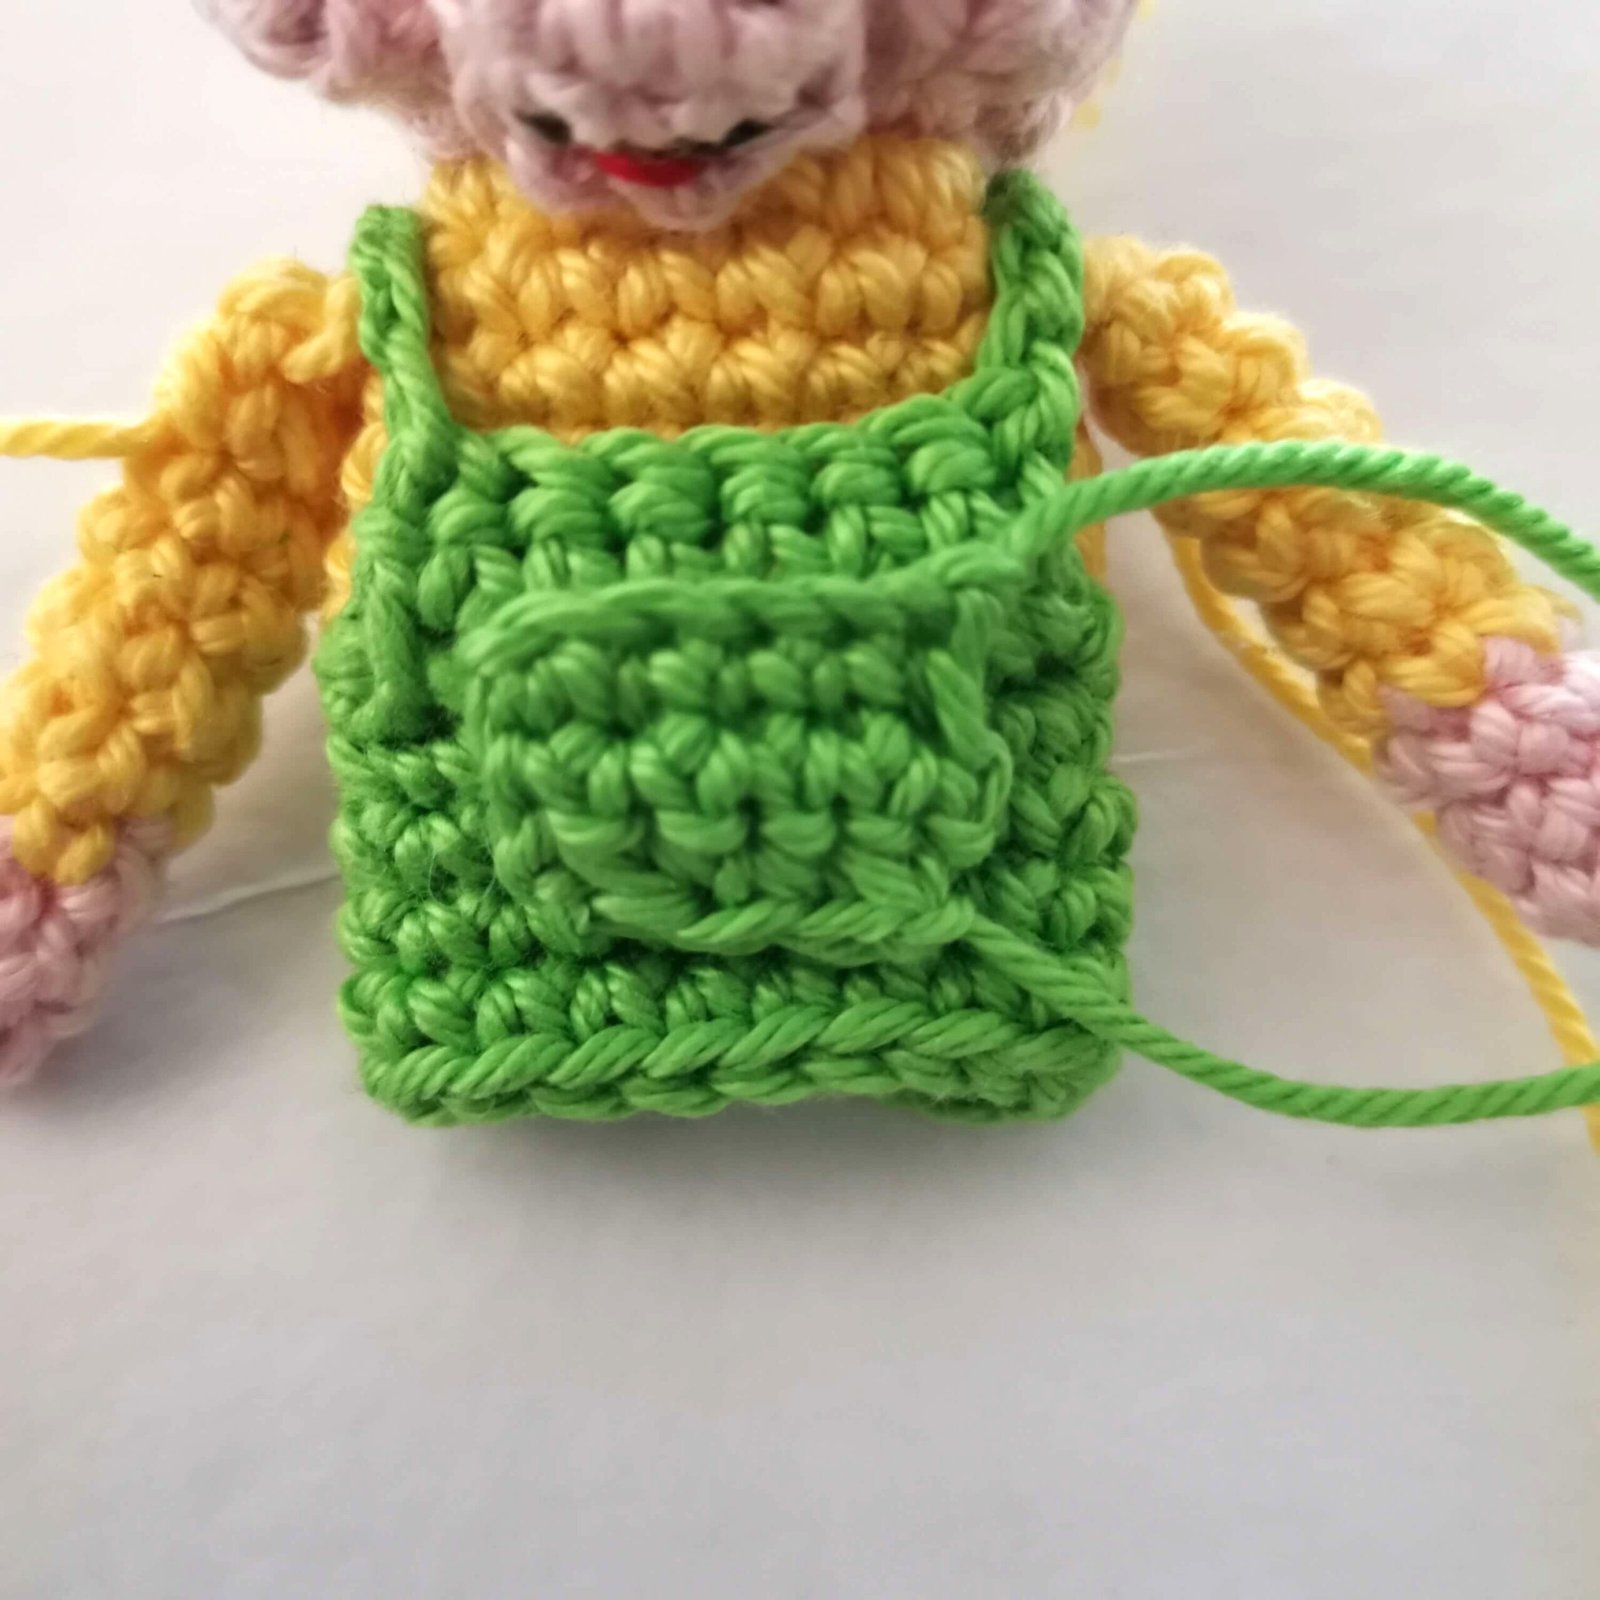
Overalls & Pocket
Bib: Attach green yarn to the front of Round 16.
Row 1: 7 sc, ch 1, turn.
Row 2: 7 sc. Ch 13 (strap), sl st to the BLO stitch on the back.
Repeat for the other side.
Pocket:
(Green yarn)
Ch 6.
Row 1: 5 sc, ch 1, turn.
Row 2: 5 sc, ch 1, turn.
Row 3: dec, sc, dec.
Sew to the front.
Add a few strands of yellow “straw” into the pocket and one of the hands!
Three Little Pigs Finger Puppets Crochet Pattern by EmmaS Dolls
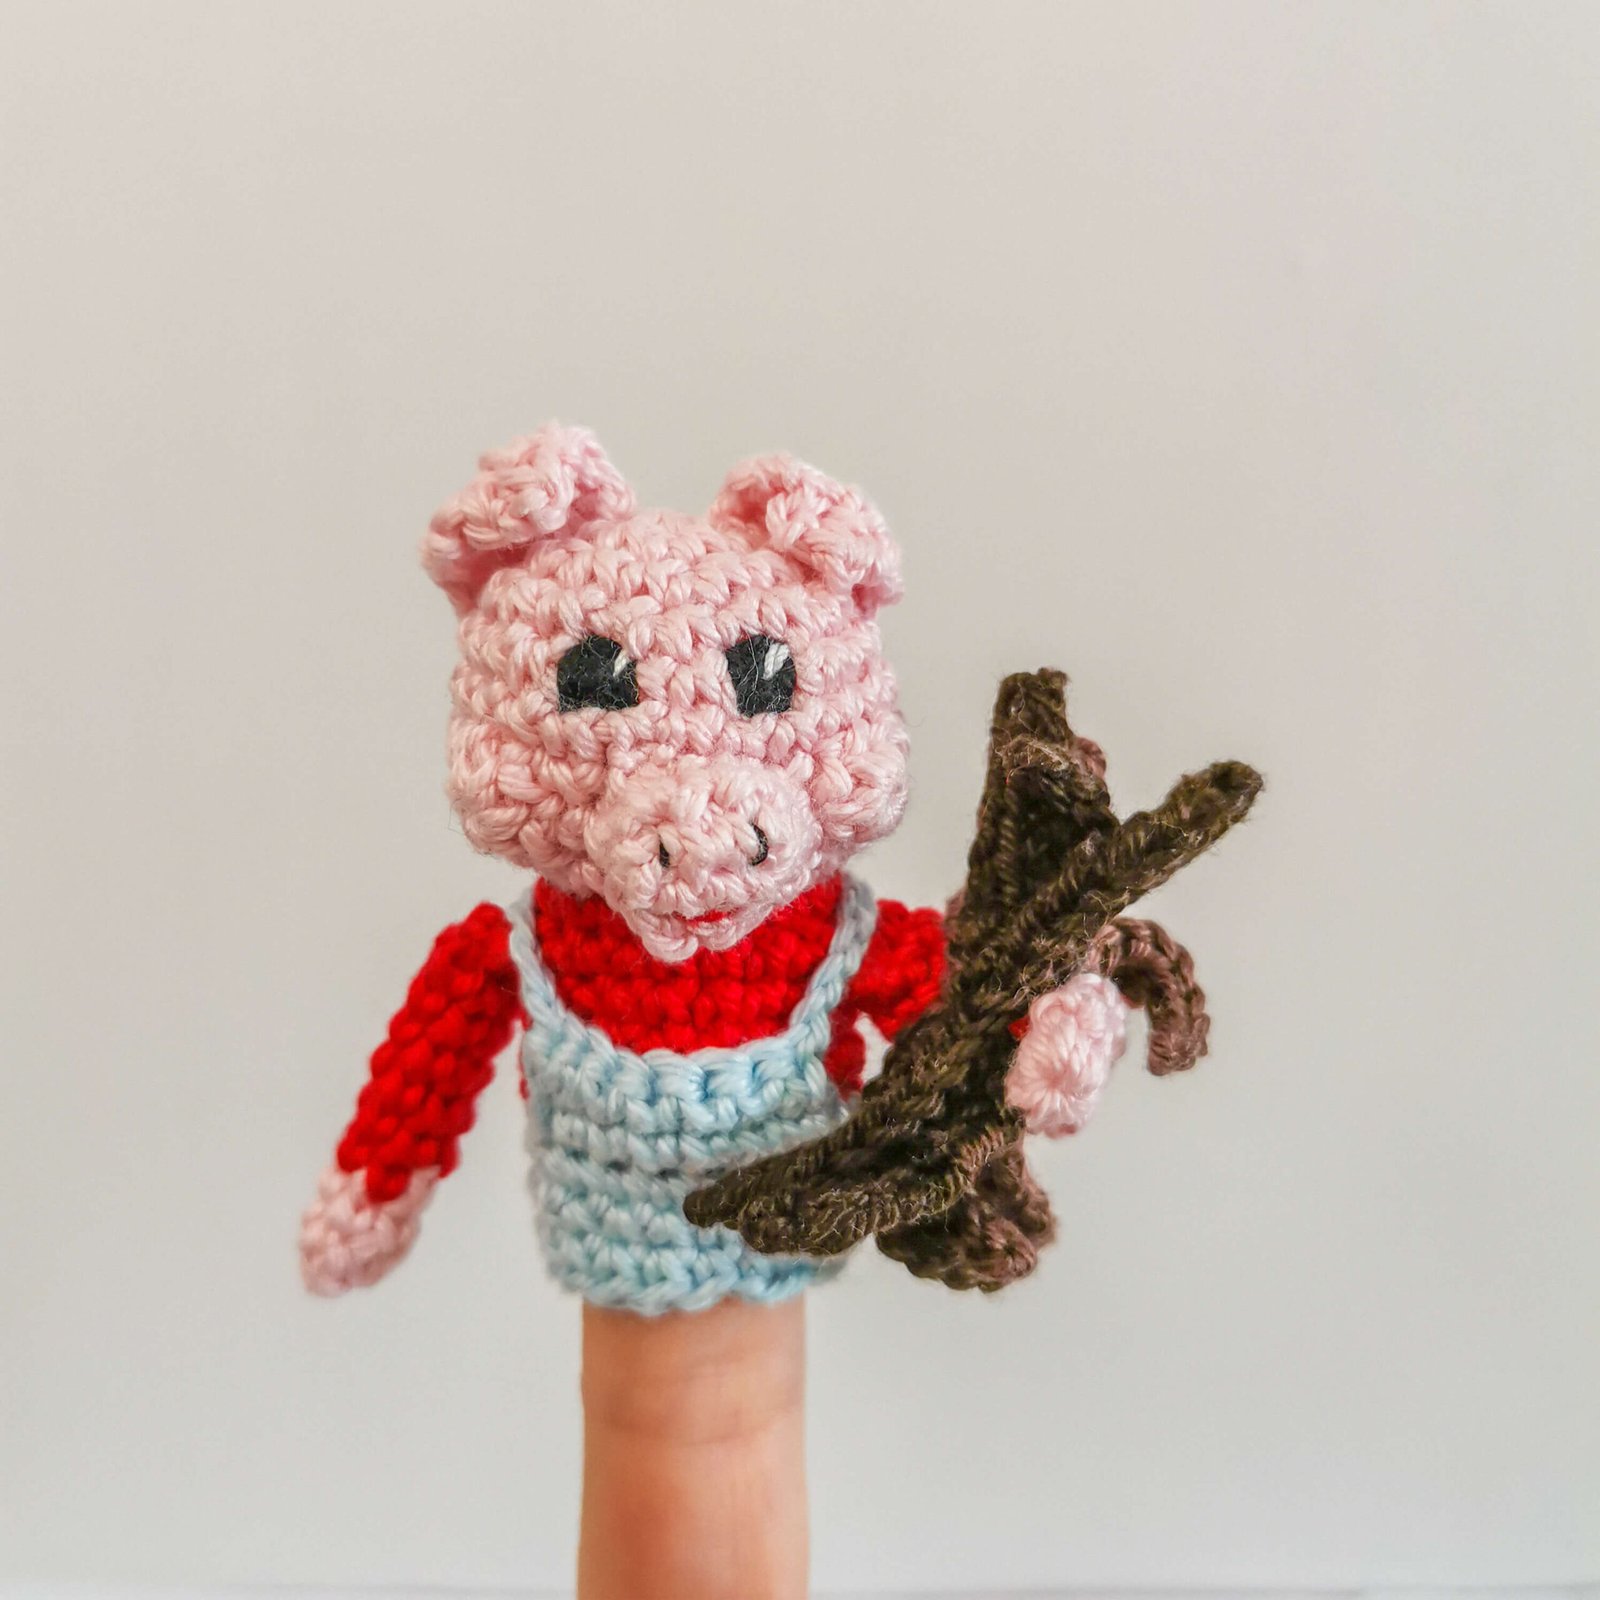
The Second Little Pig Pattern (Wood House Builder)
This hardworking piggy decided to build his home out of sticks! He is designed just like the first pig but with a different color palette for his outfit.
Three Little Pigs Finger Puppets Crochet Pattern by EmmaS Dolls
Second Pig Details
To make the second pig, follow the instructions for the First Little Pig with the following changes:
- No Hat or Pocket: This pig goes without the straw hat and the front pocket on his pants.
- T-Shirt Color: Switch the yellow yarn to Red.
- Pants Color: Switch the green yarn to Blue.
The Wooden Branches In his hand, this pig carries branches to build his house. You can create them in two ways:
- Option 1: Crochet an i-cord about 2 inches (5 cm) long using brown yarn.
- Option 2: Make a simple chain (ch) about 2 inches (5 cm) long, then work slip stitches (sl st) back down the chain for a bit of thickness.
Fasten off and sew the “branch” securely to the pig’s hand.
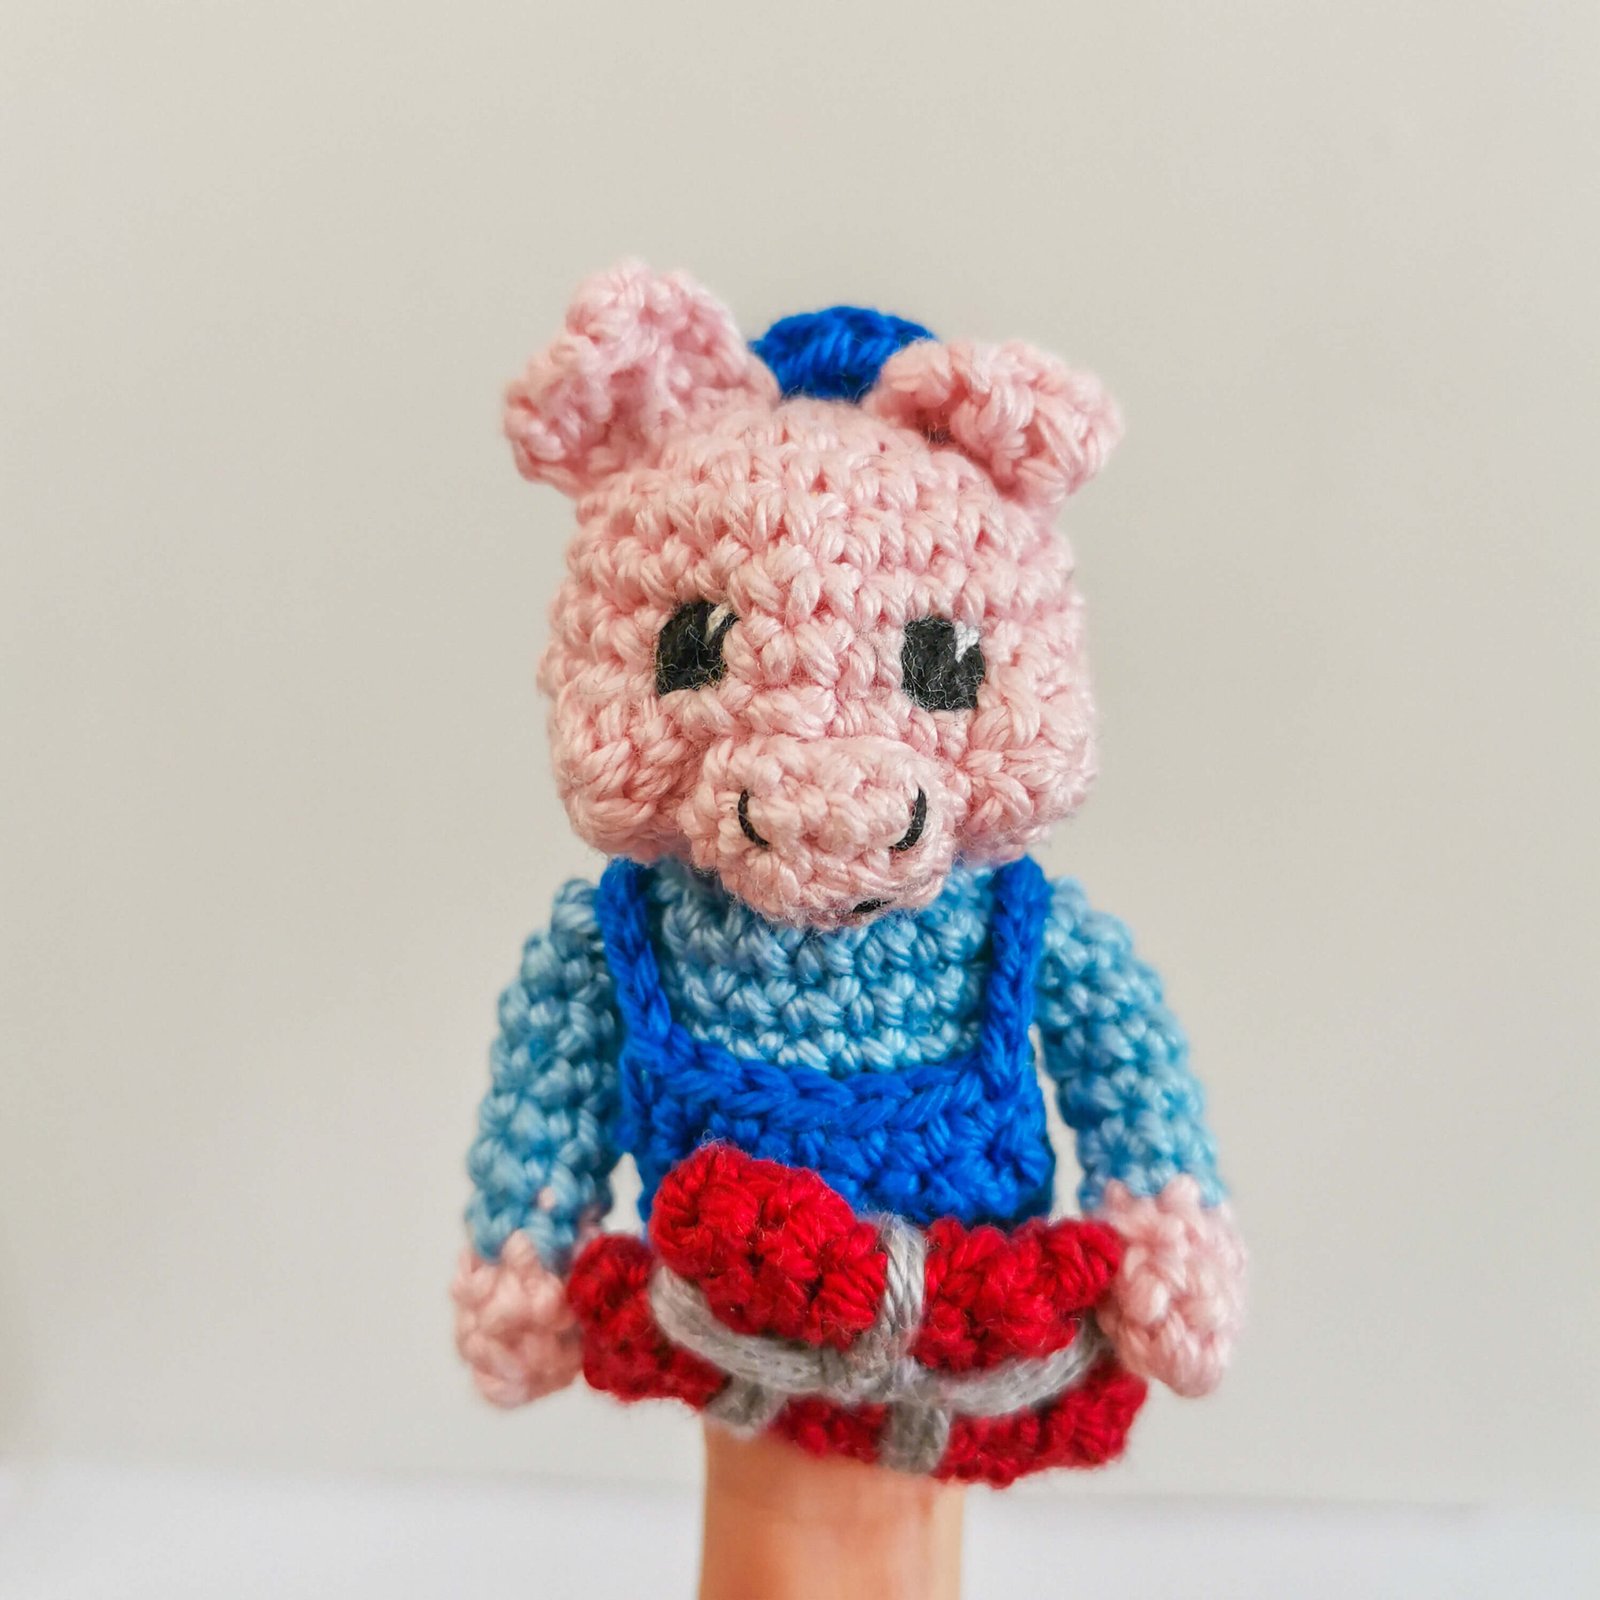
The Third Little Pig Pattern (Brick House Builder)
The smartest of the bunch! This piggy knows that bricks are the way to go when a wolf is around. He wears a professional builder’s cap and carries his sturdy bricks.
Three Little Pigs Finger Puppets Crochet Pattern by EmmaS Dolls
Third Pig Details
To make the third pig, follow the instructions for the First Little Pig with these modifications:
- No Pocket: This pig does not have a pocket on his pants.
- T-Shirt Color: Switch the yellow yarn to Light Blue.
- Pants Color: Switch the green yarn to Dark Blue.
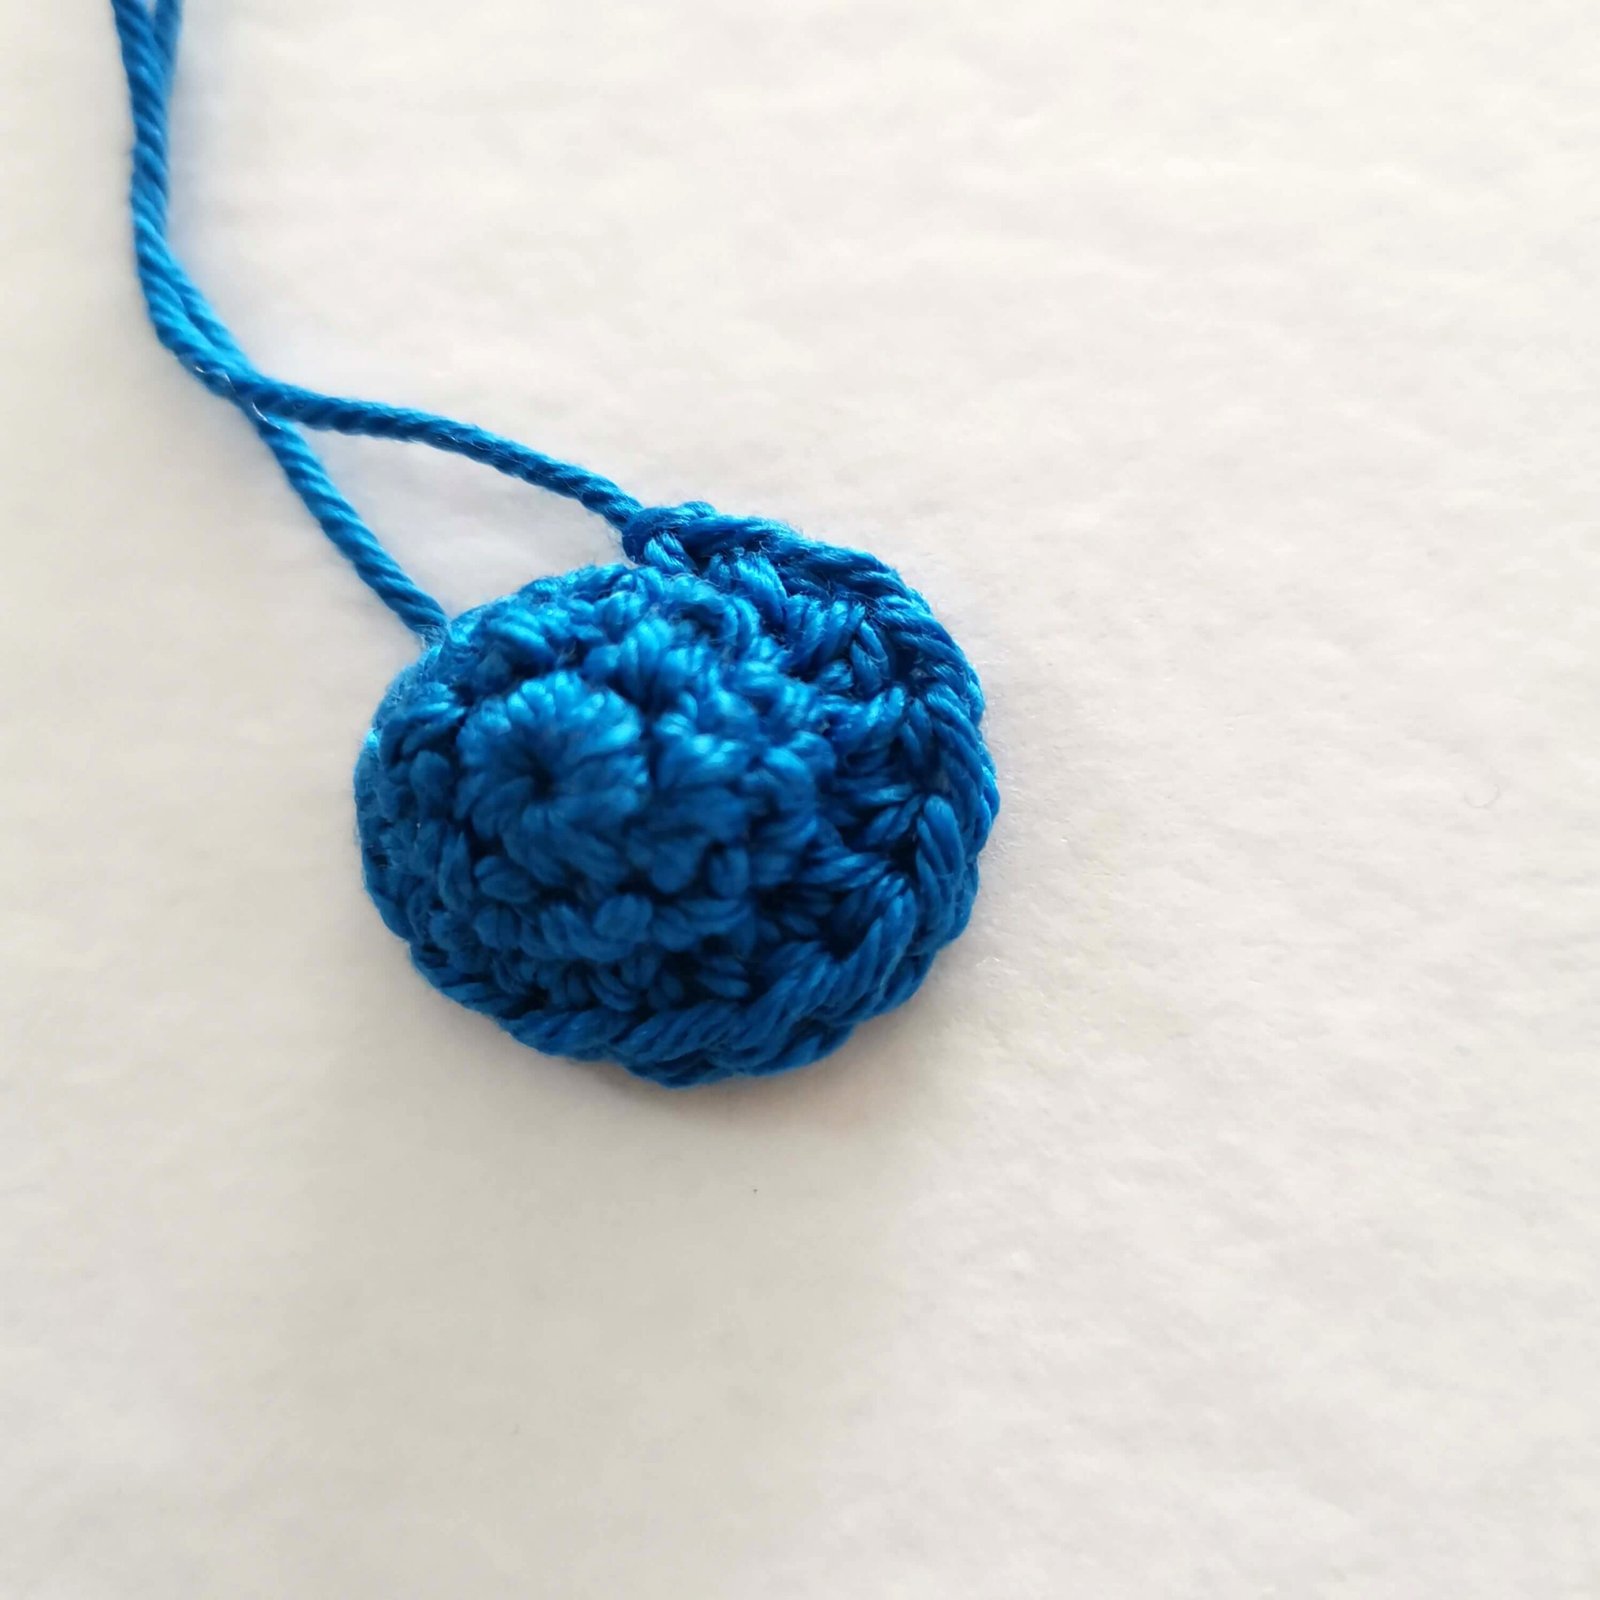
The Builder’s Hat
Color: Dark Blue
Round 1: mr, 6 sc [6]
Round 2: 6 x inc [12]
Round 3: 12 sc [12]
Round 4: FLO sc, 3 x inc hdc, sc
Fasten off, leaving a long tail for sewing.
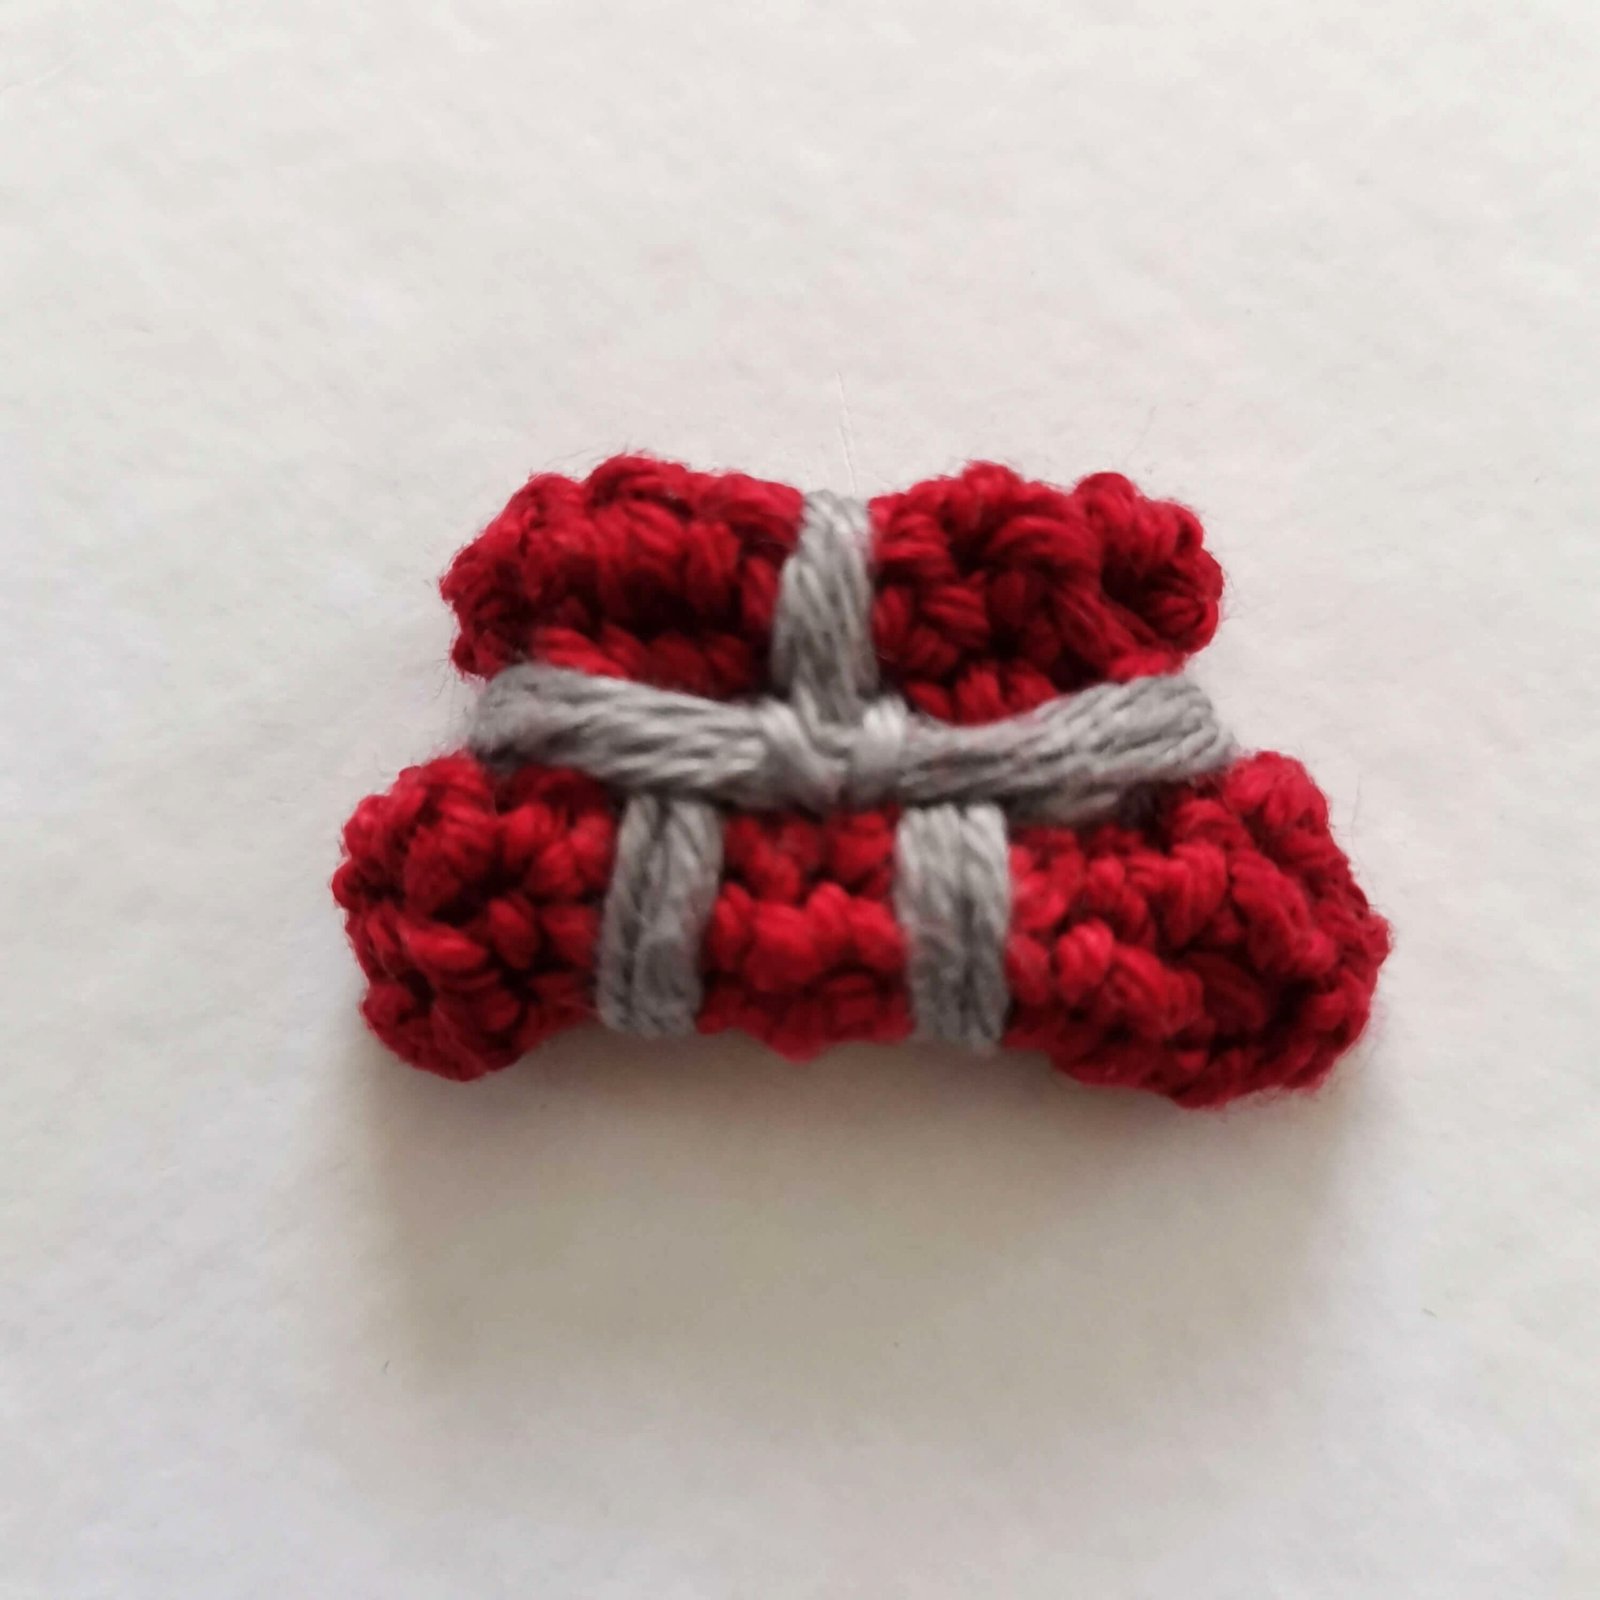
The Bricks
Color: Red (make two)
Ch 10.
Row 1: 9 sc, ch 1, turn.
Row 2: 9 sc, turn.
Row 3: sk st, sl st, ch 1, 6 sc, ch 1, turn.
Row 4: 6 sc.
Fasten off.
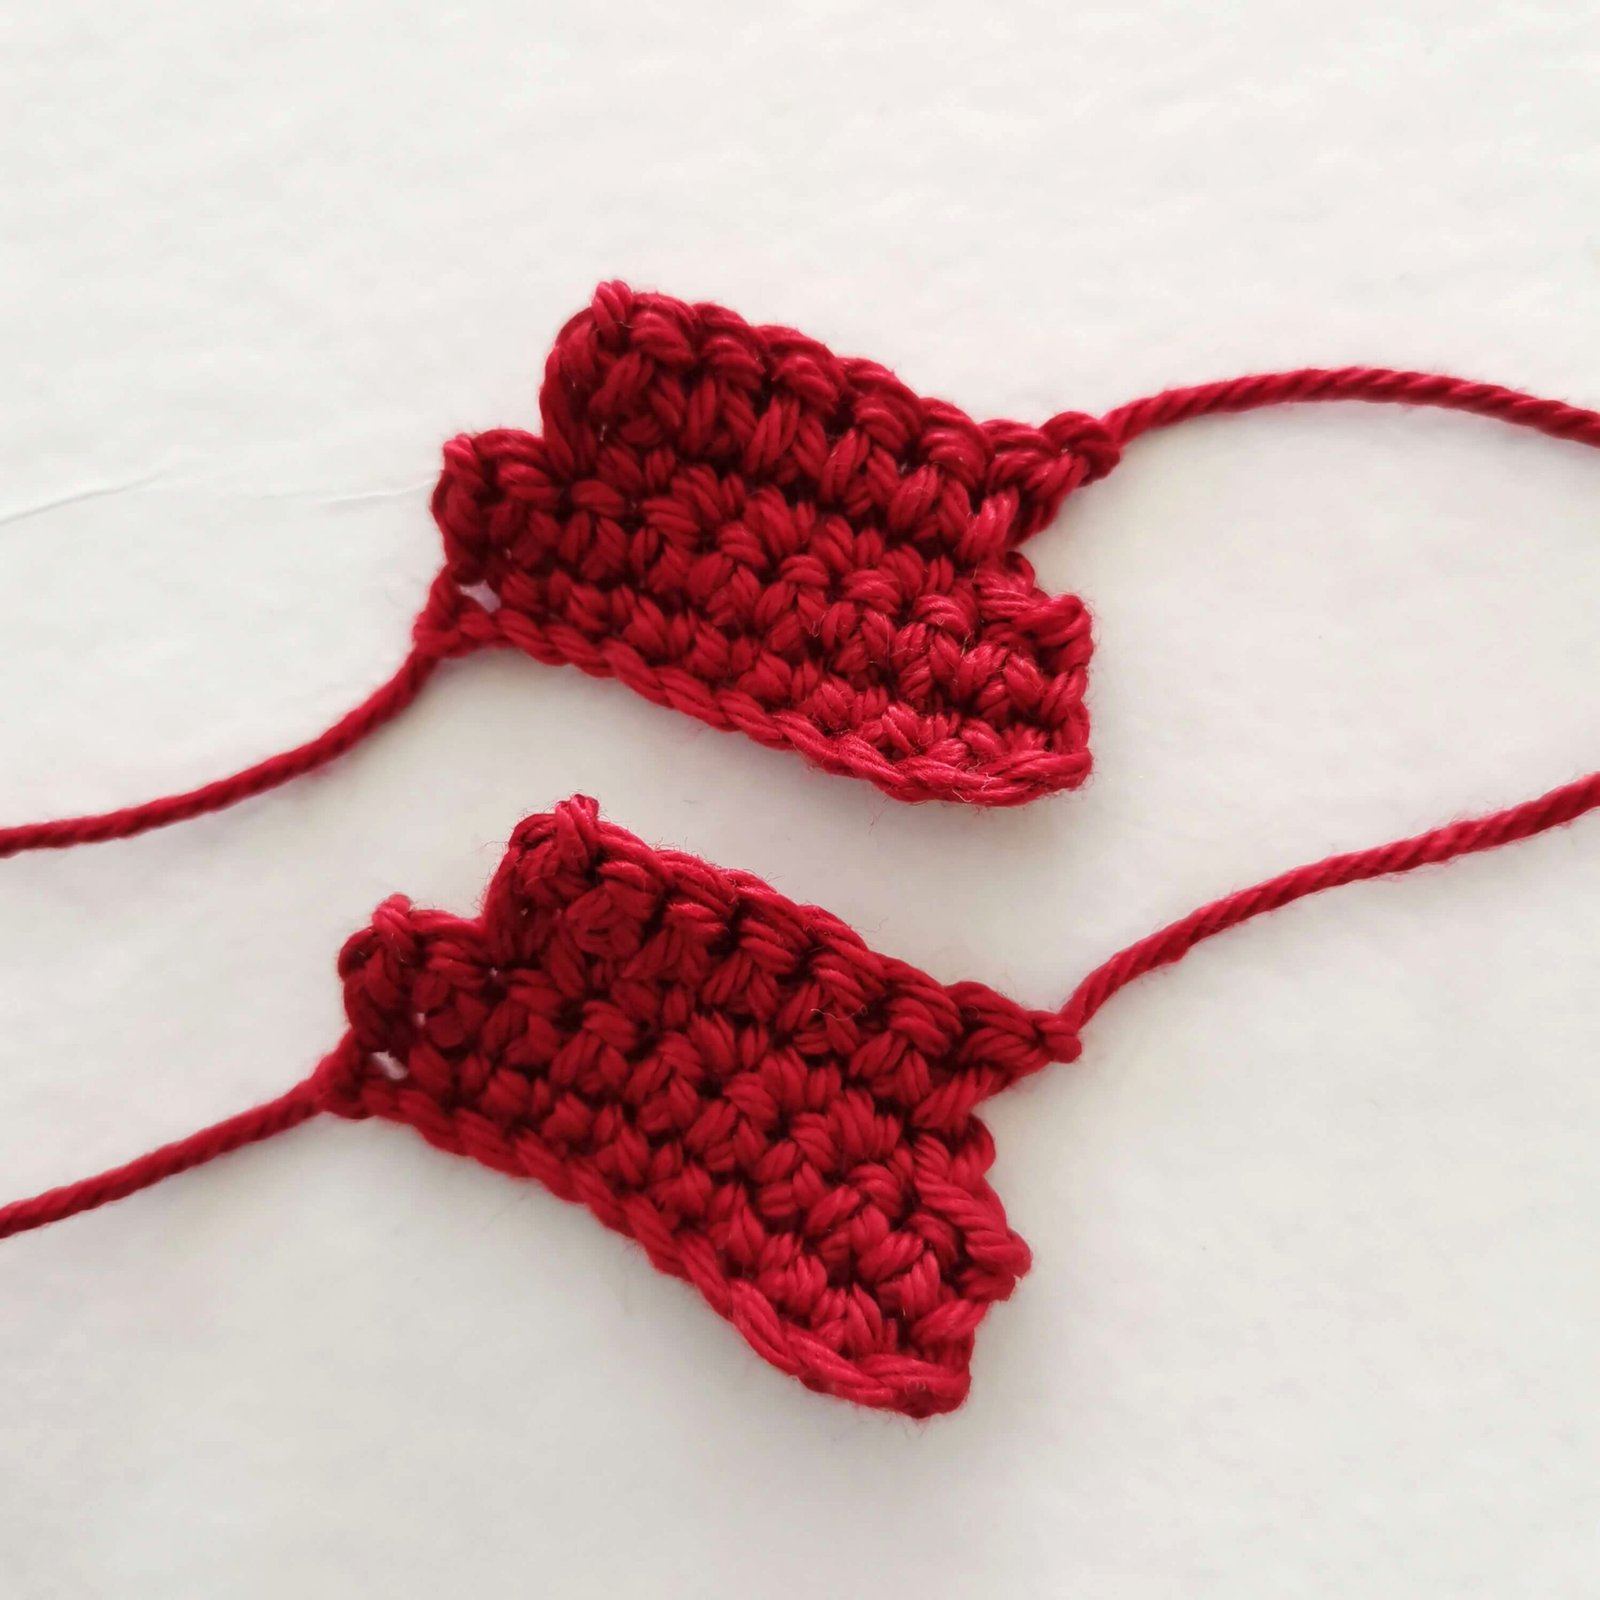
Assembly: Place one brick on top of the other and connect them together. Using grey yarn, embroider the spaces between the bricks to create a realistic masonry look. Sew the finished bricks to the pig’s hand.
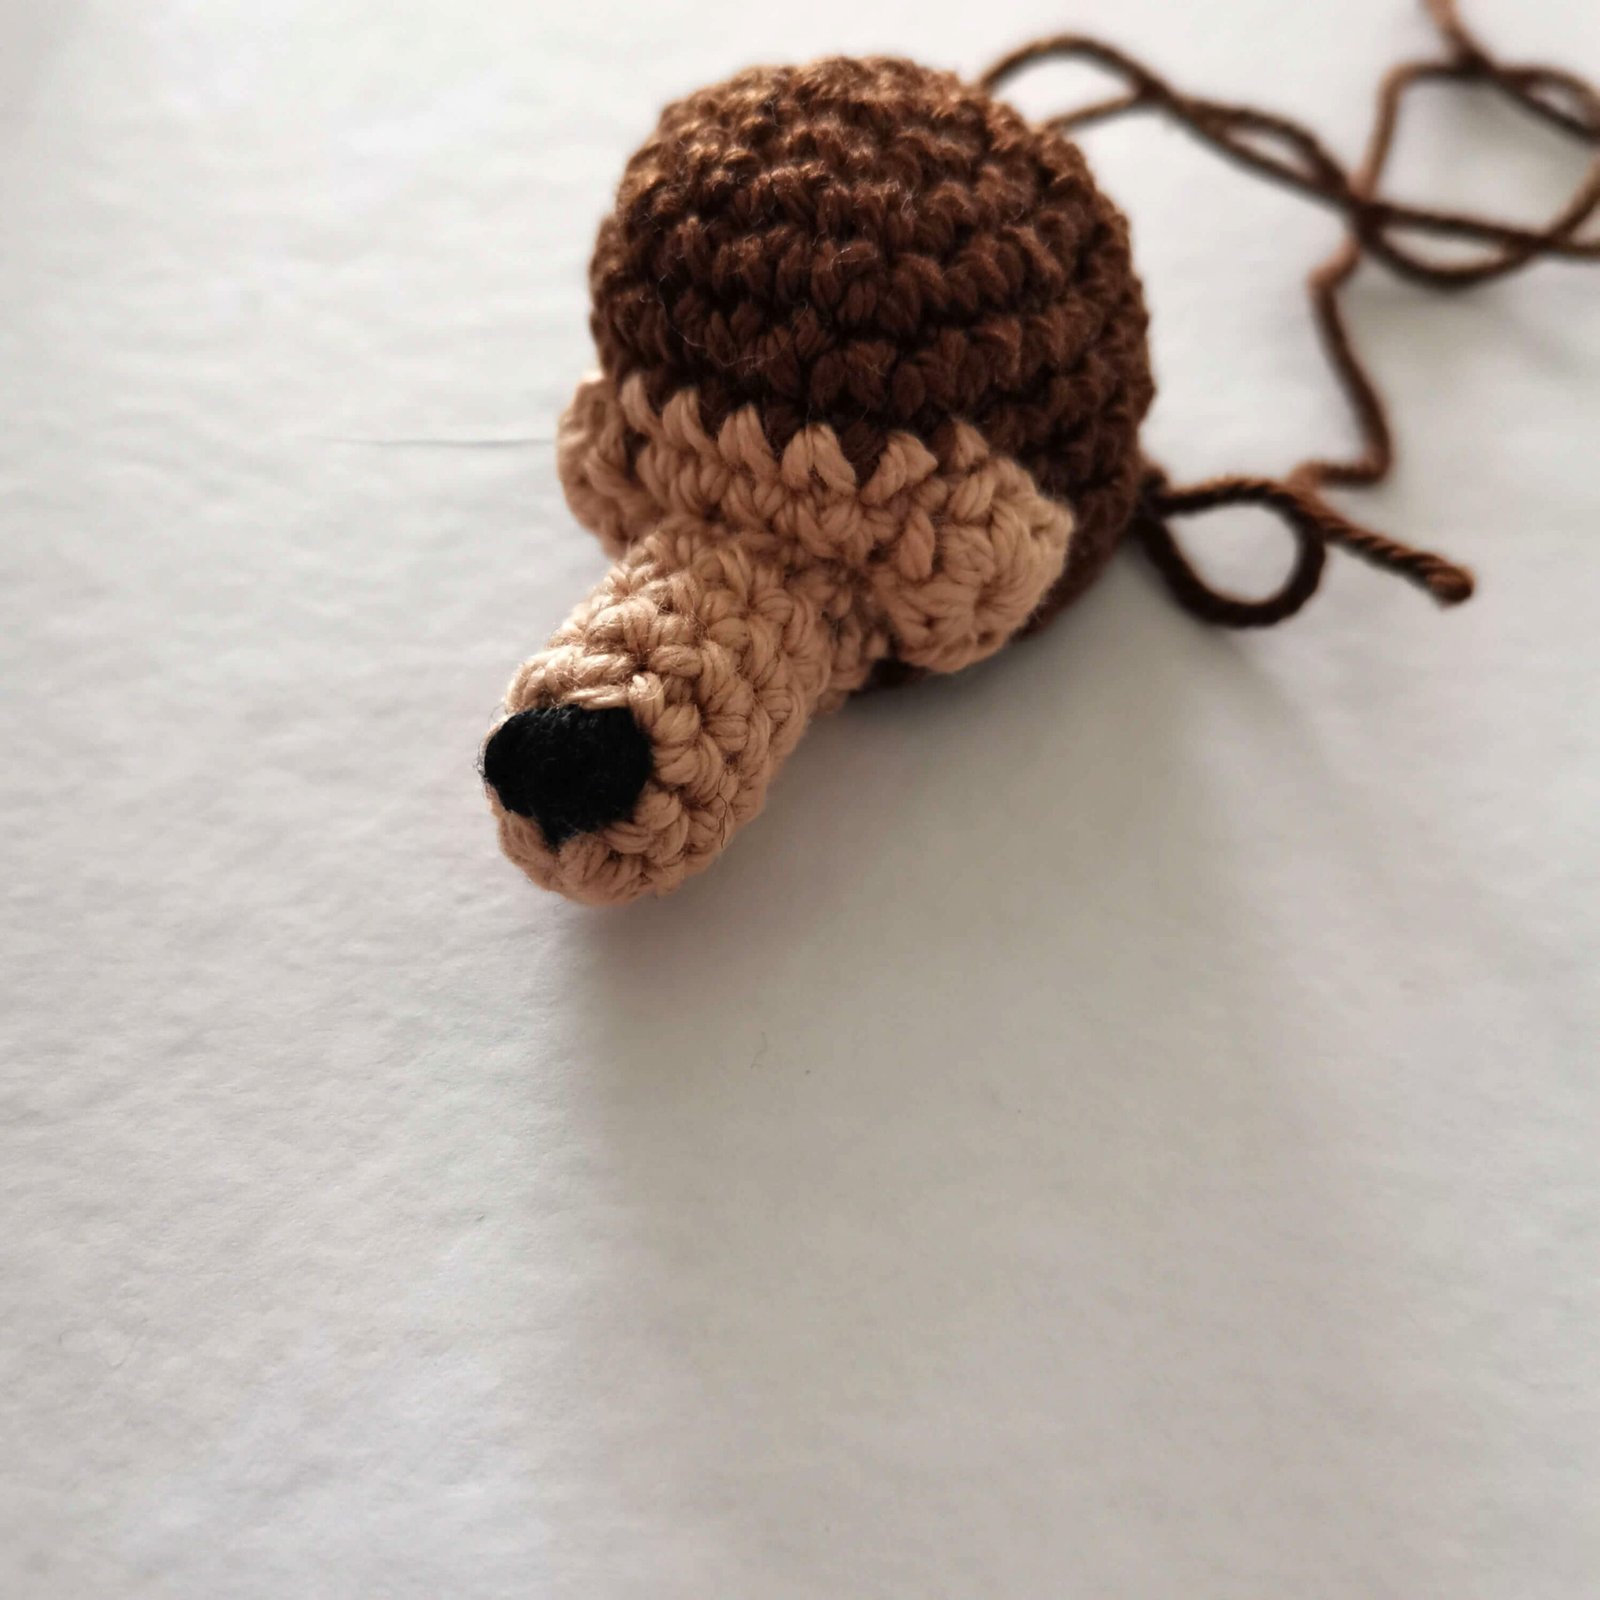
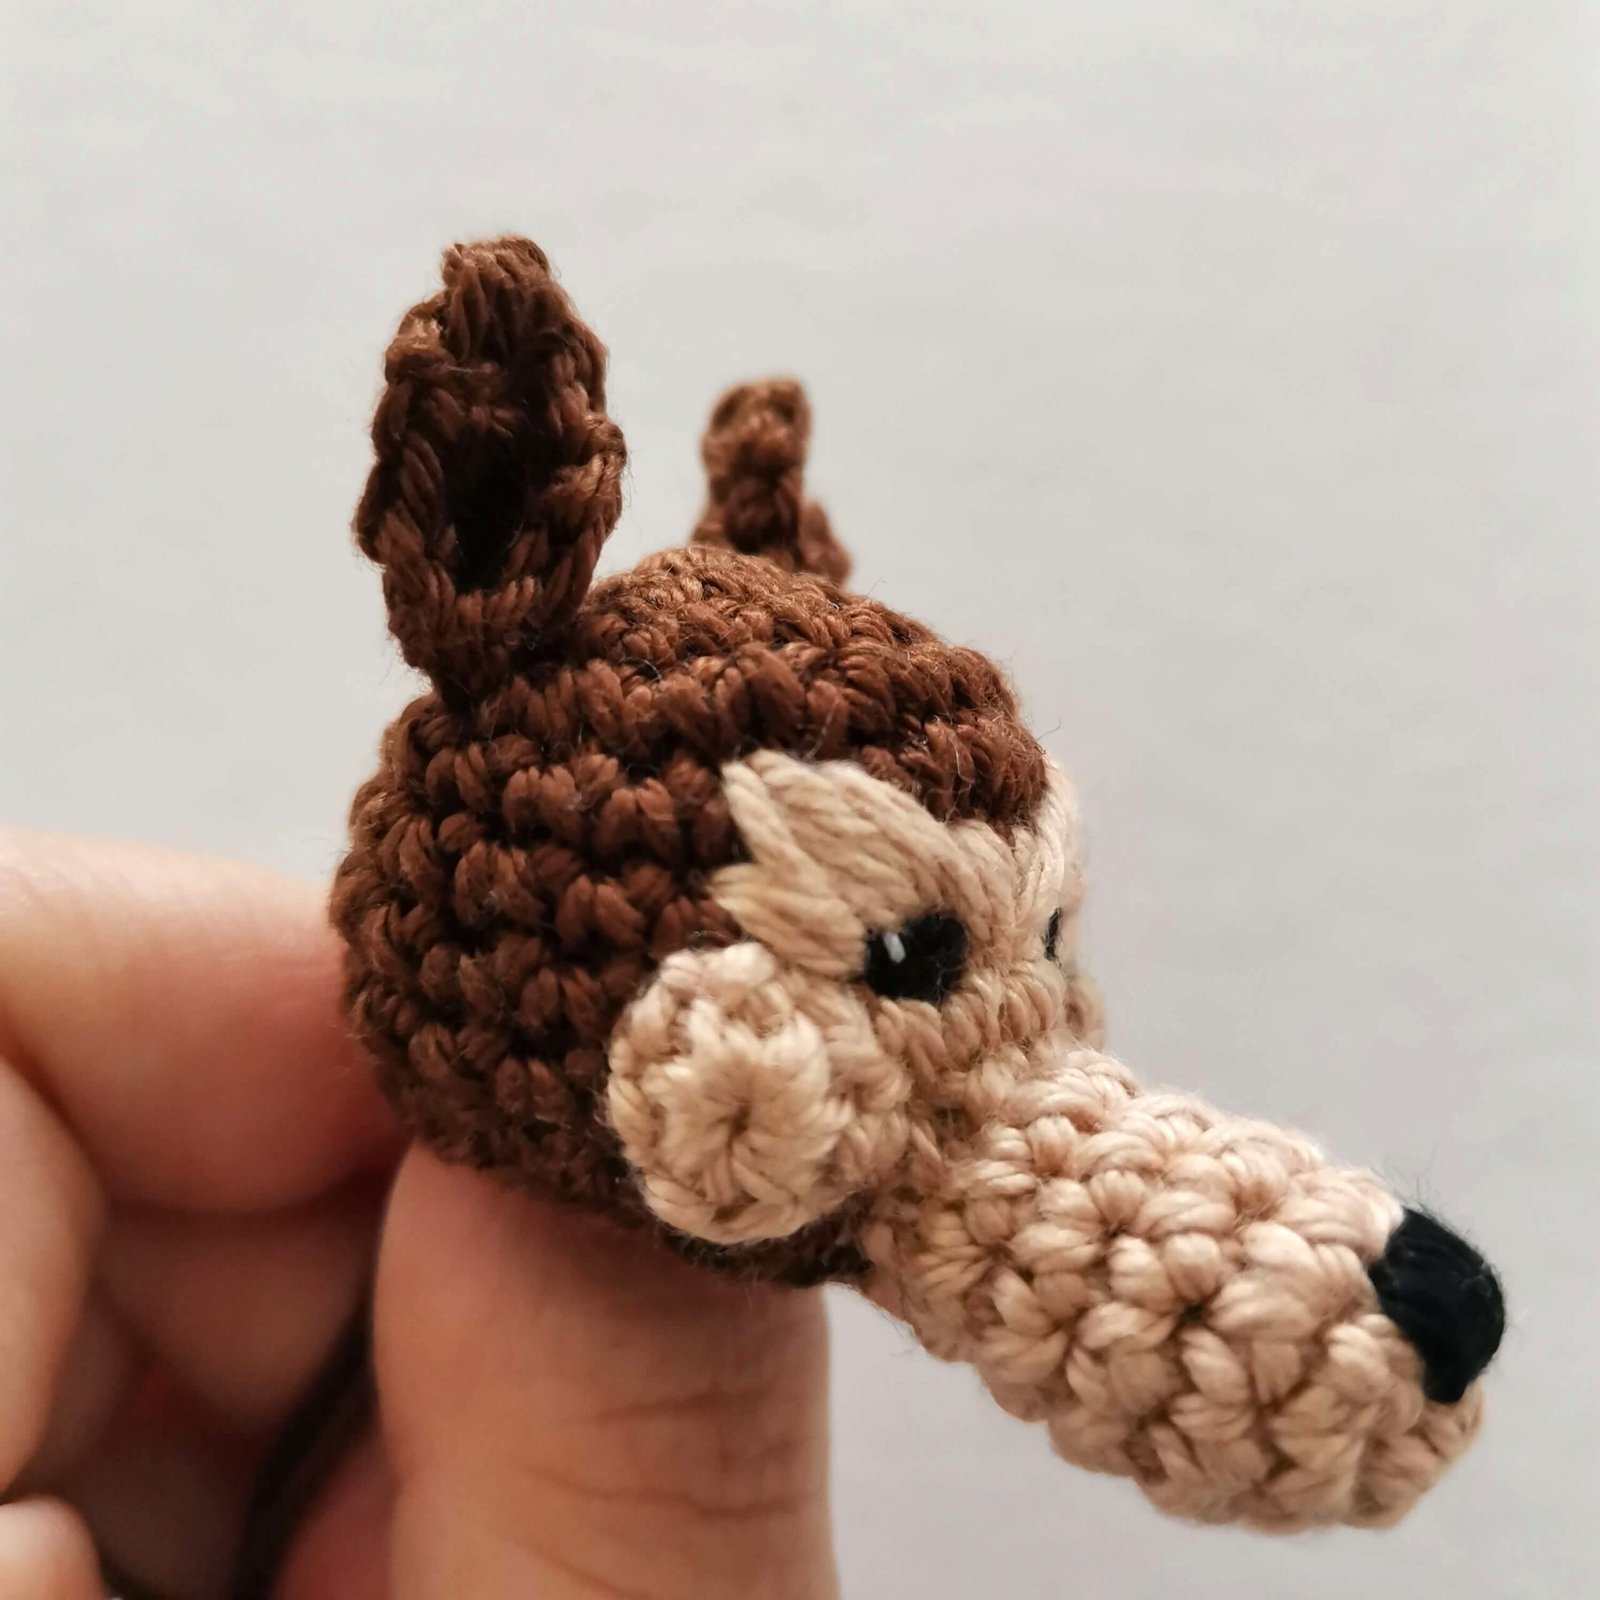
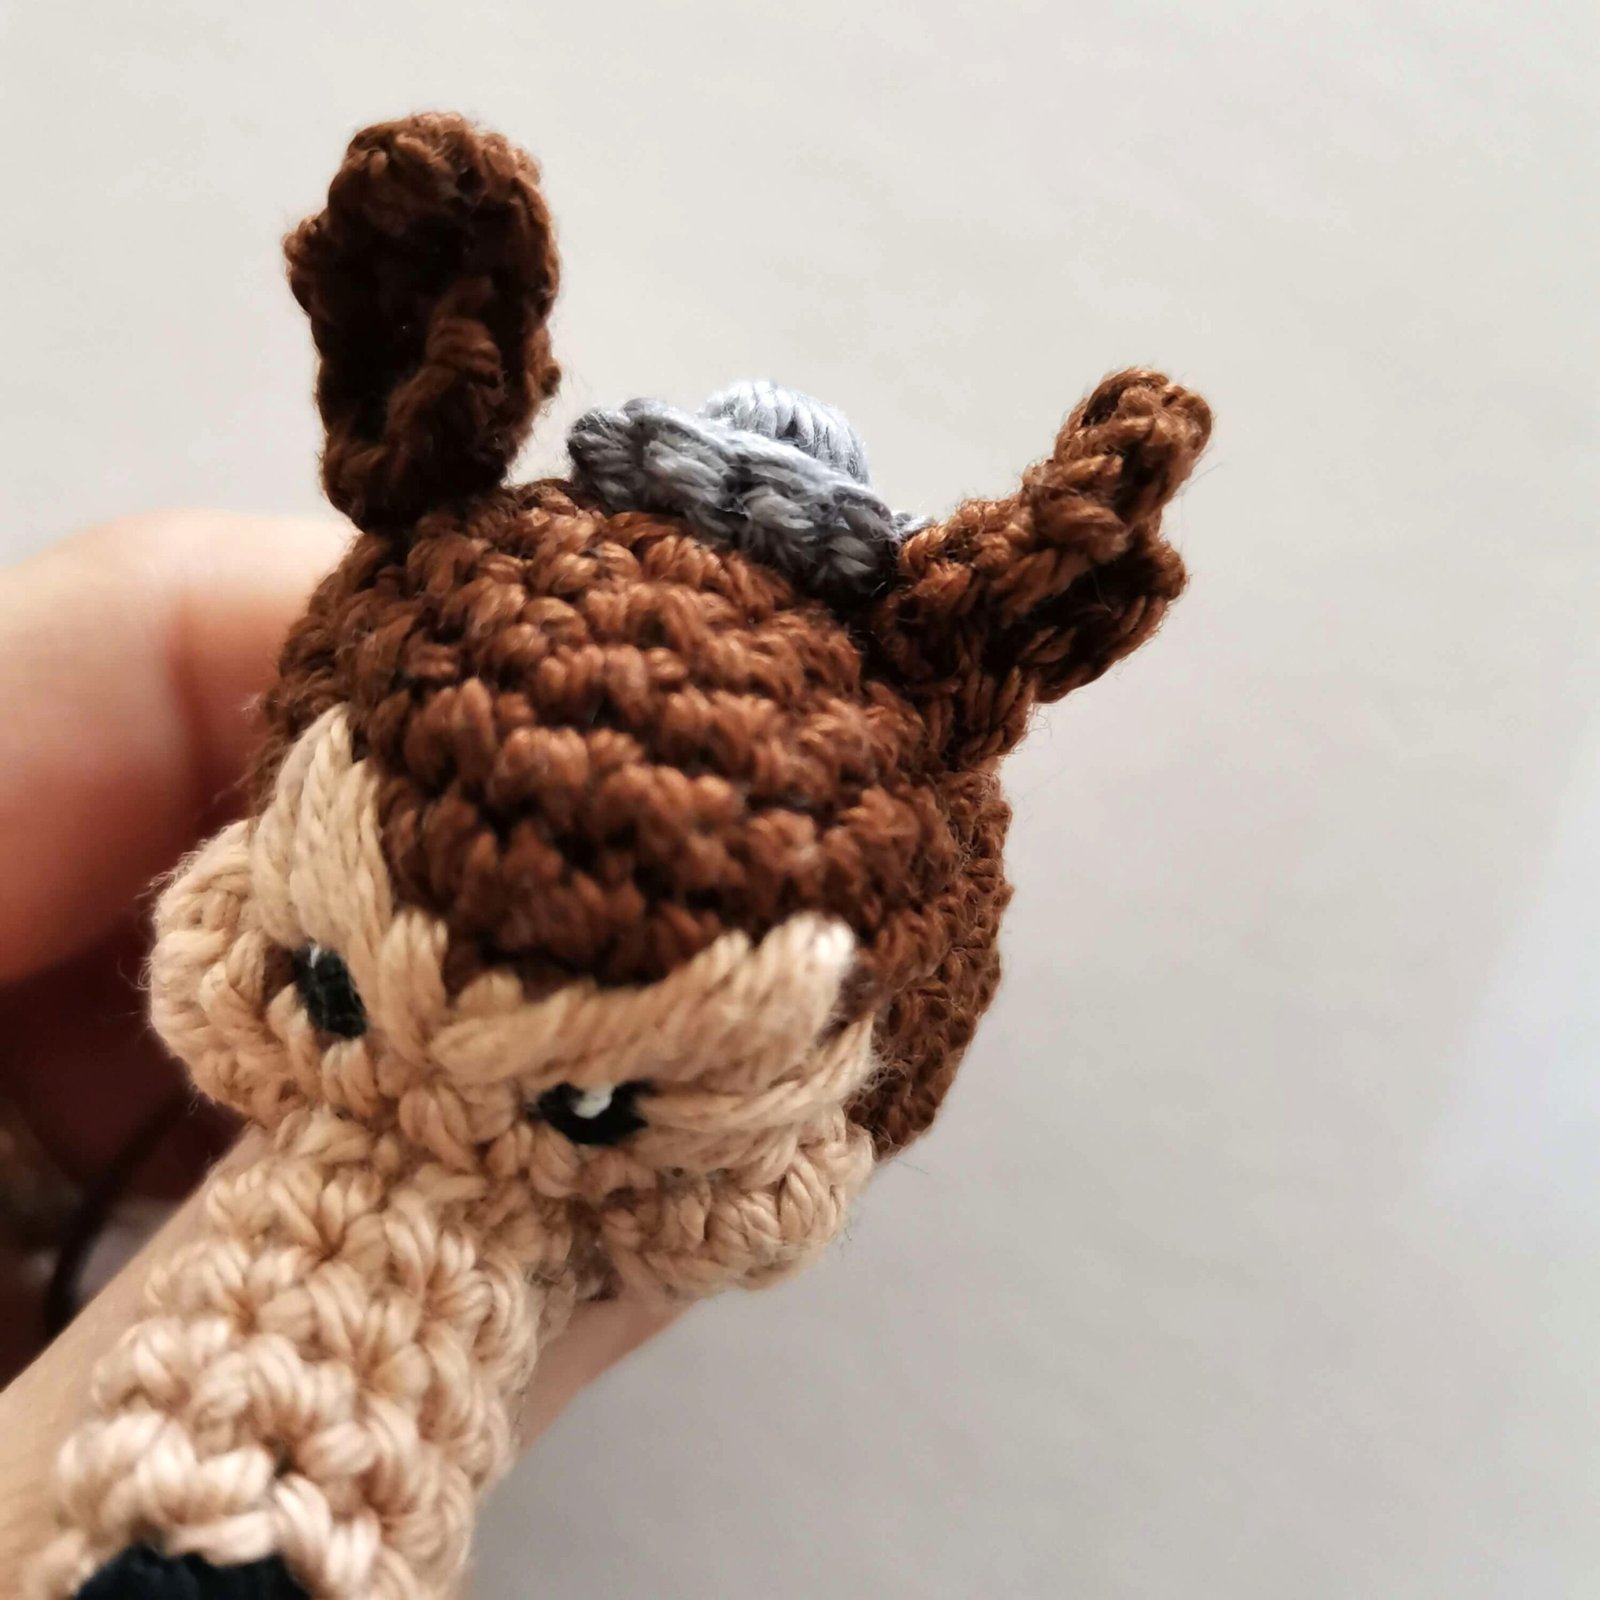
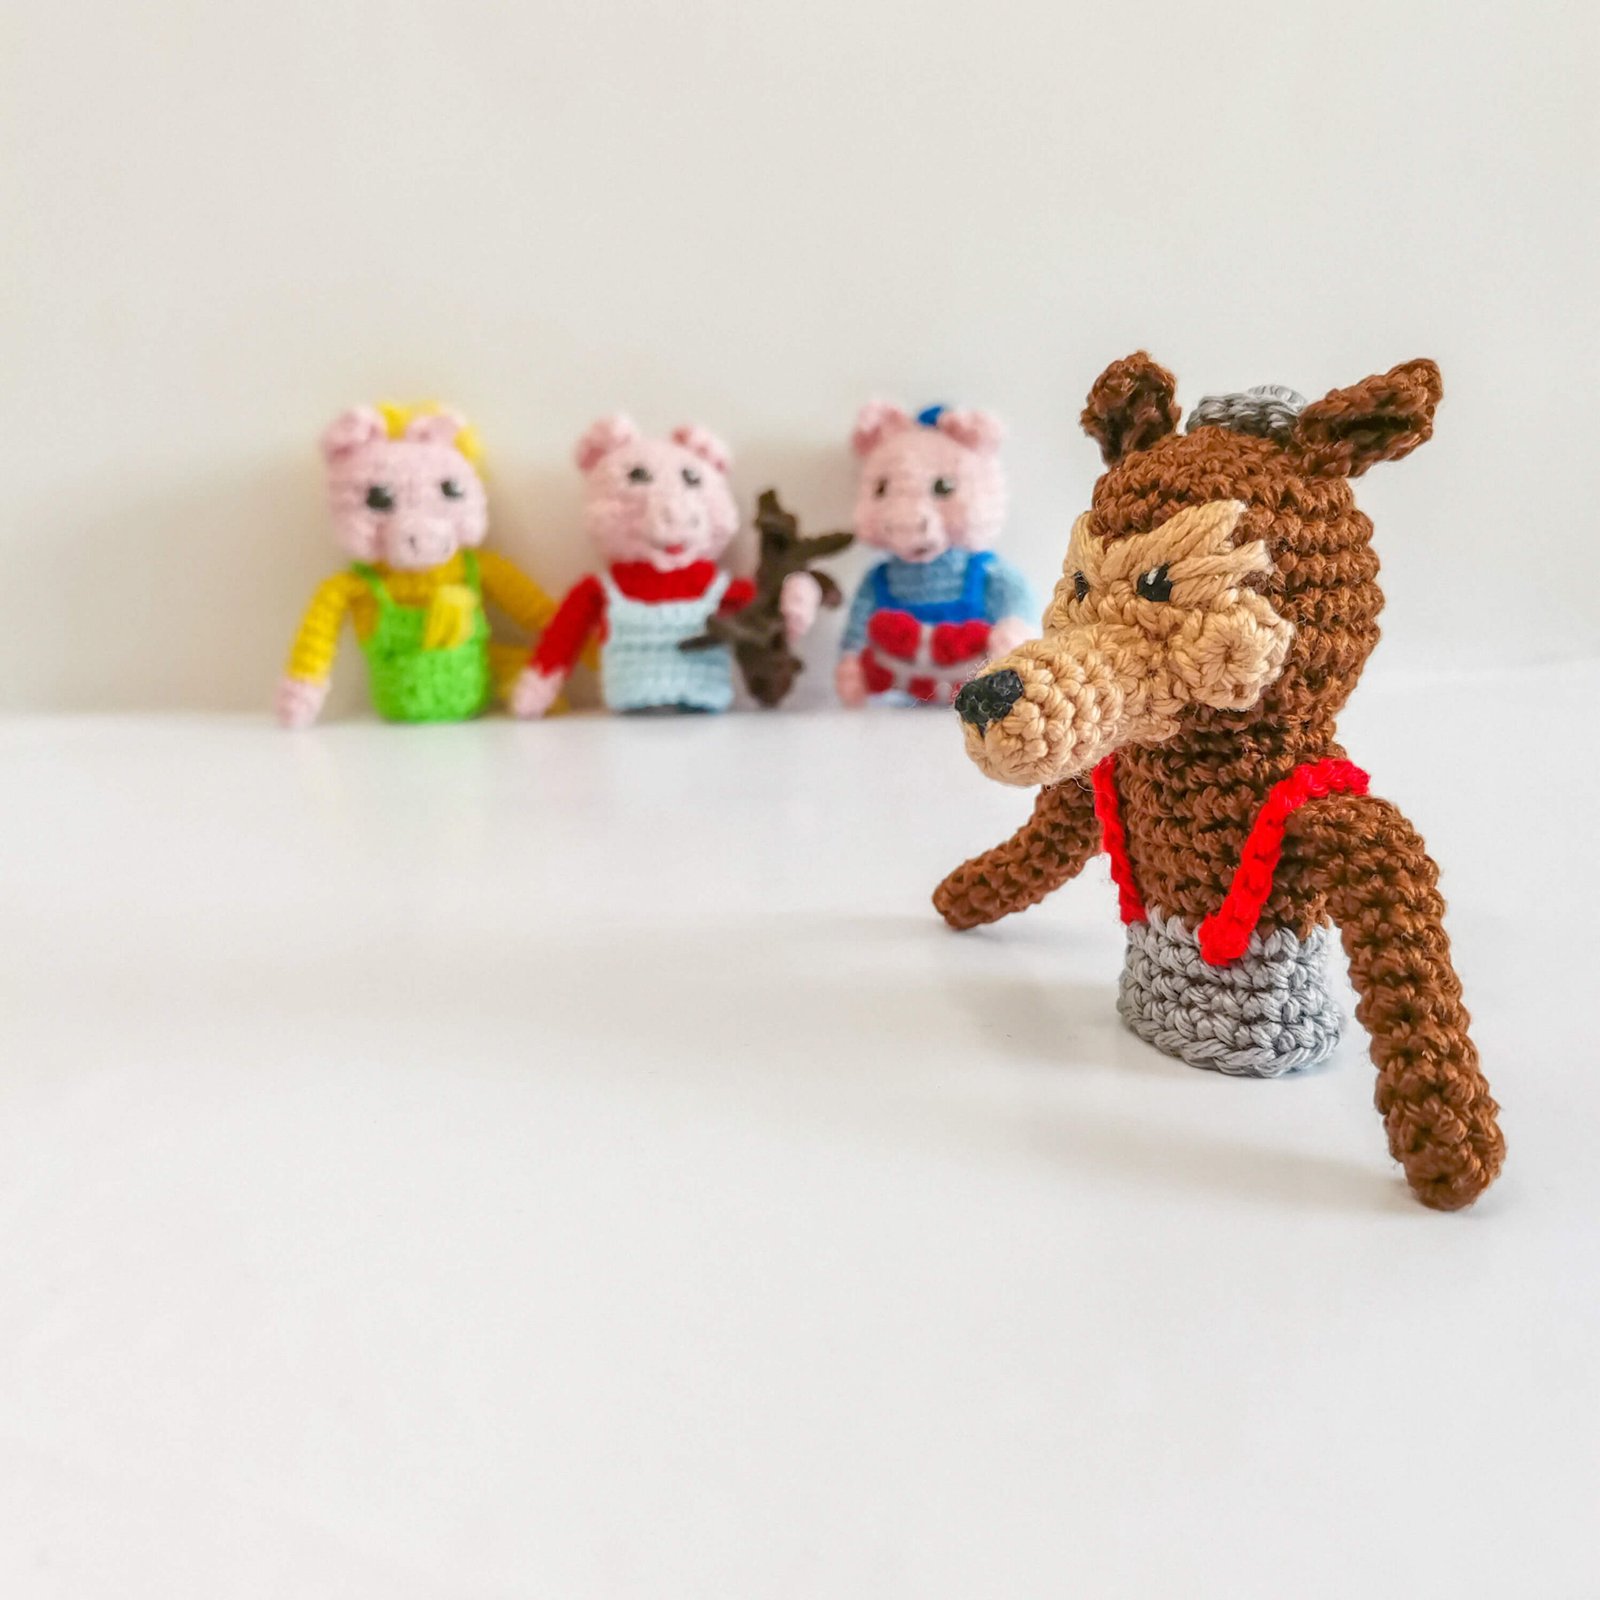
The Big Bad Wolf Finger Puppet Pattern
No story is complete without a villain! This Big Bad Wolf might look a bit grumpy, but he is the perfect addition to your puppet theater. He features a classic two-tone face and a stylish little hat.

Three Little Pigs Finger Puppets Crochet Pattern by EmmaS Dolls
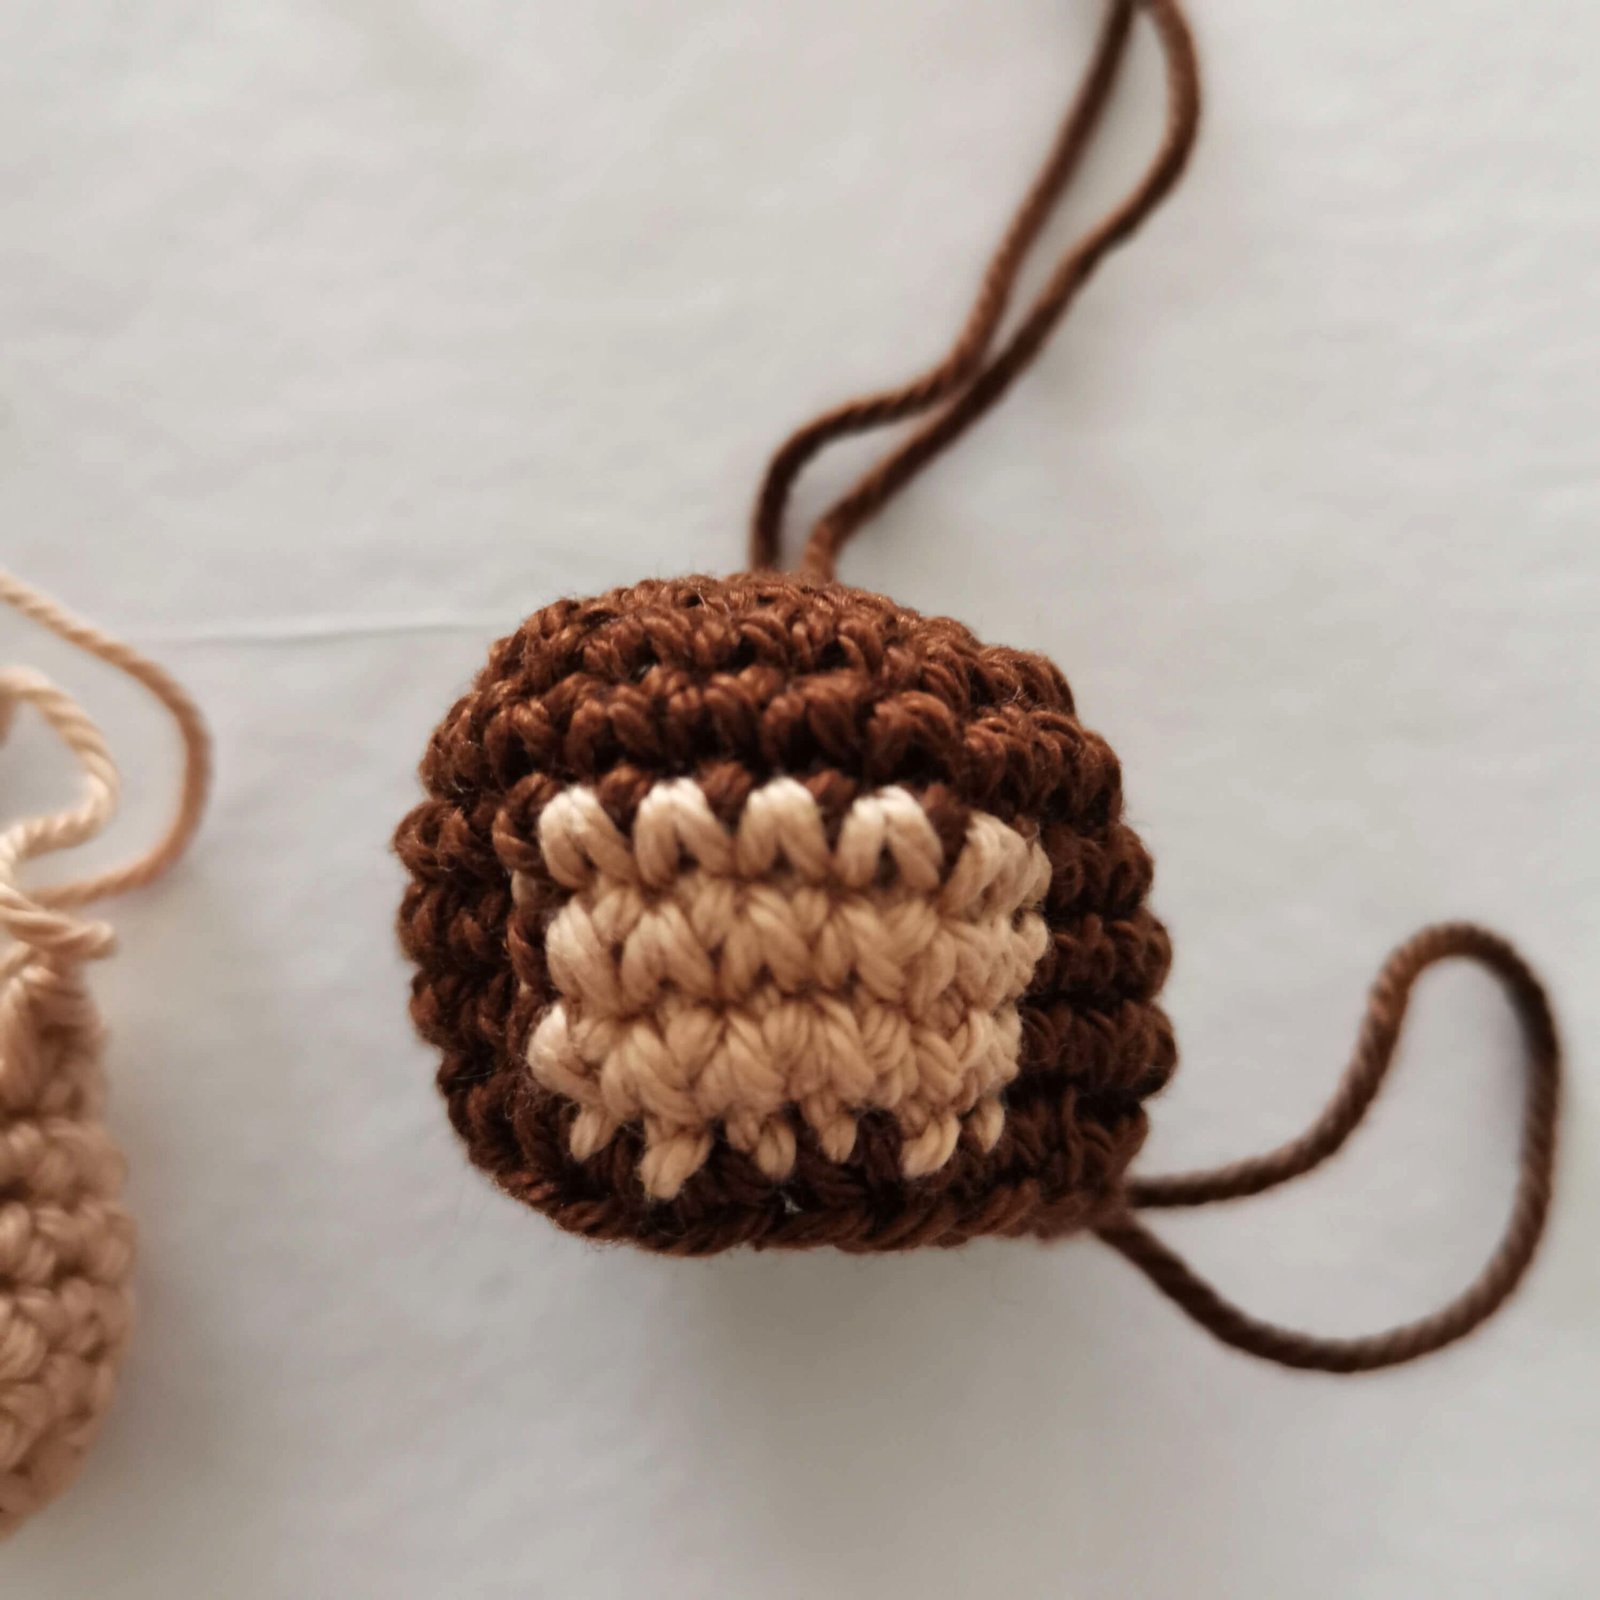
Head
Starting with Brown yarn.
Round 1: mr, 6 sc [6]
Round 2: 6 x inc [12]
Round 3: (sc, inc) x 6 [18]
Round 4: (sc, inc, sc) x 6 [24]
Round 5: 24 sc [24]
Round 6-8: Brown 9 sc, switch to Light Brown 6 sc, switch back to Brown 9 sc [24]
Round 9: (sc, dec, sc) x 6 [18]
Without fastening off, stop here to add the facial features. We will continue crocheting the head after that.
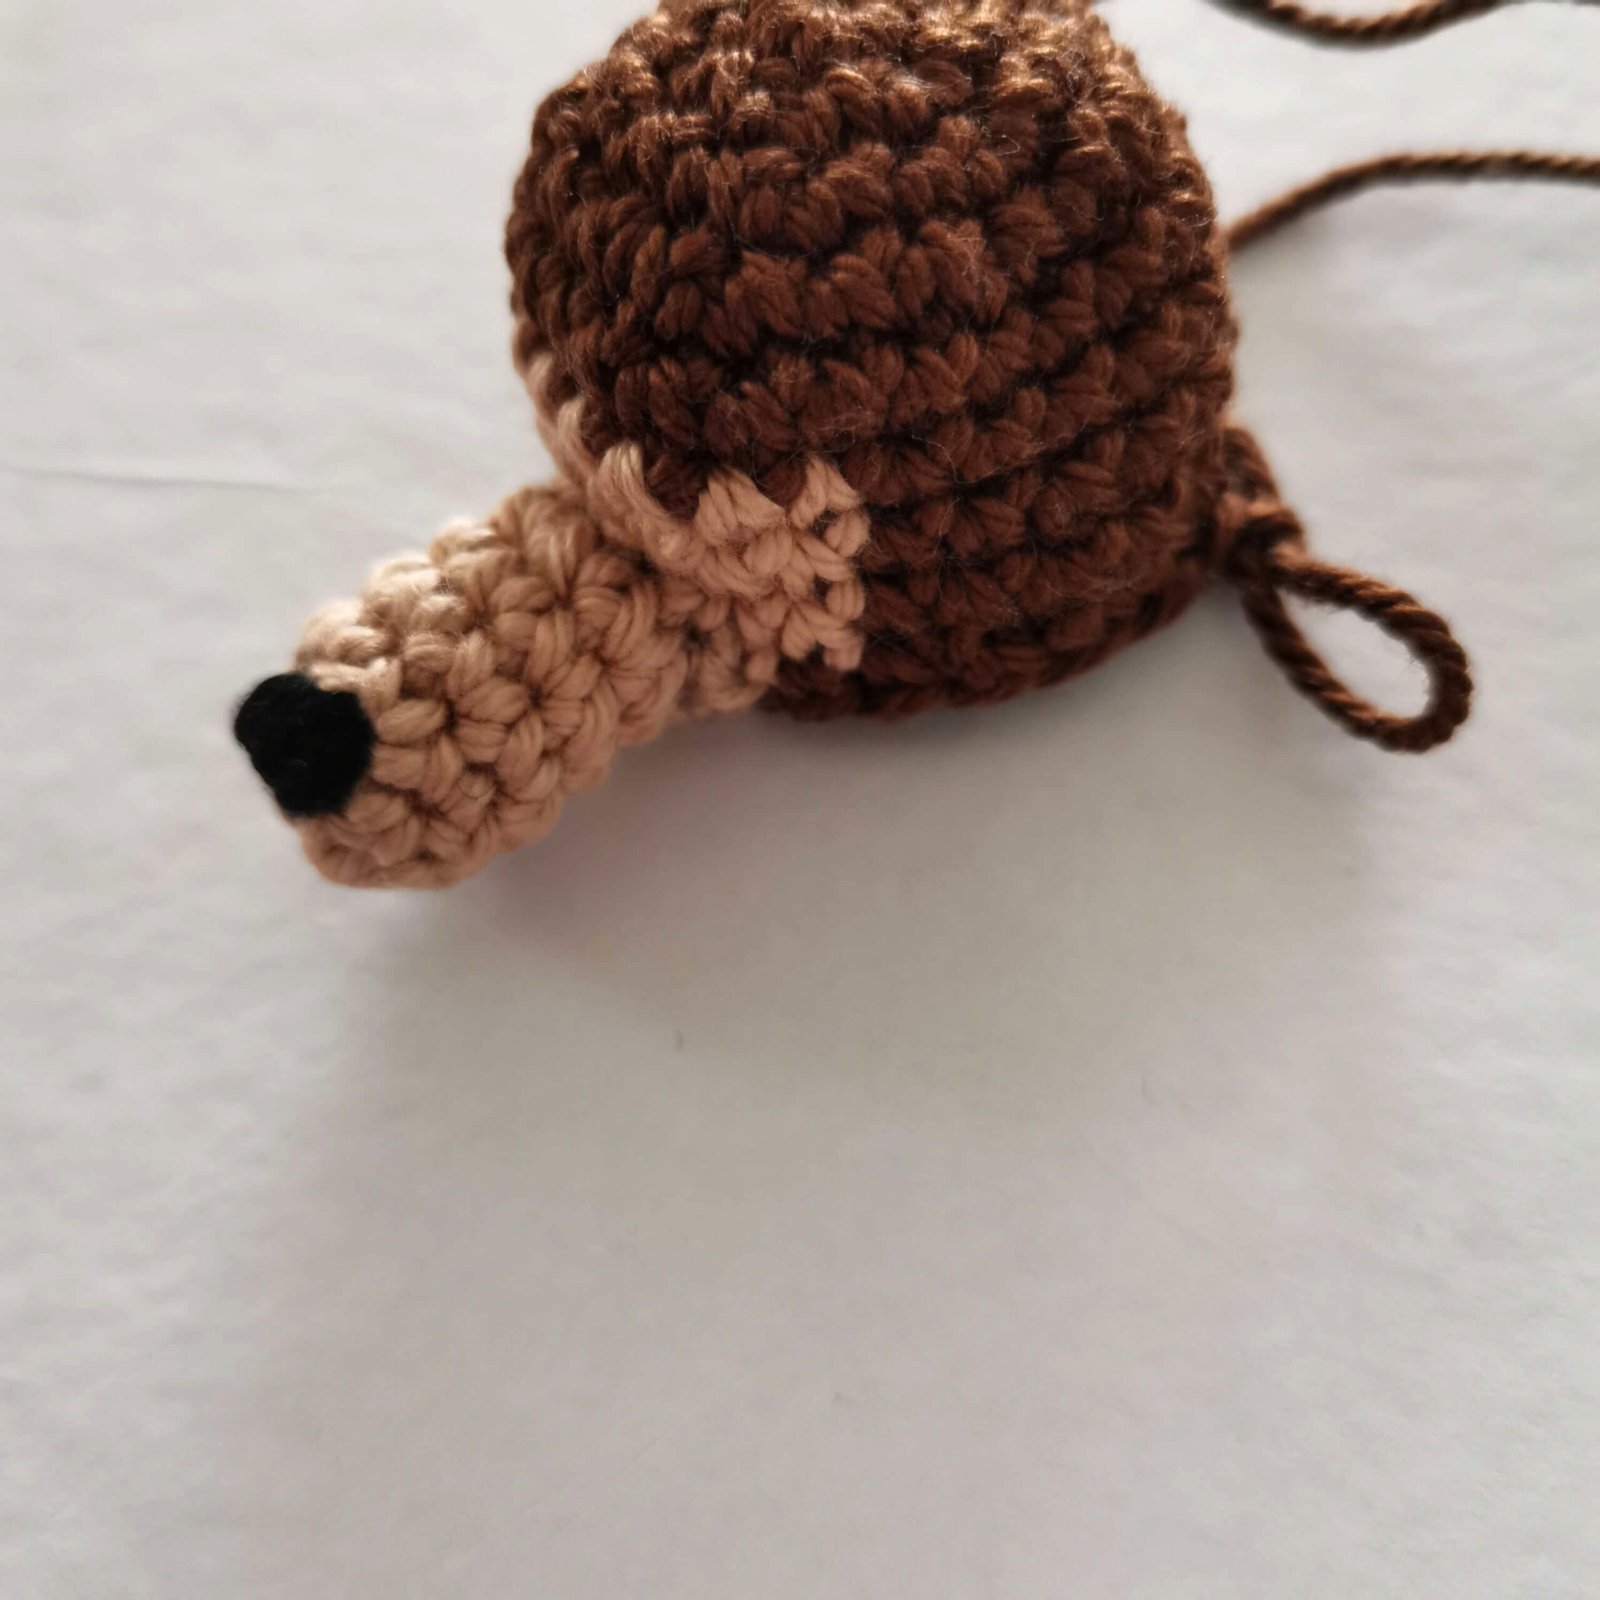
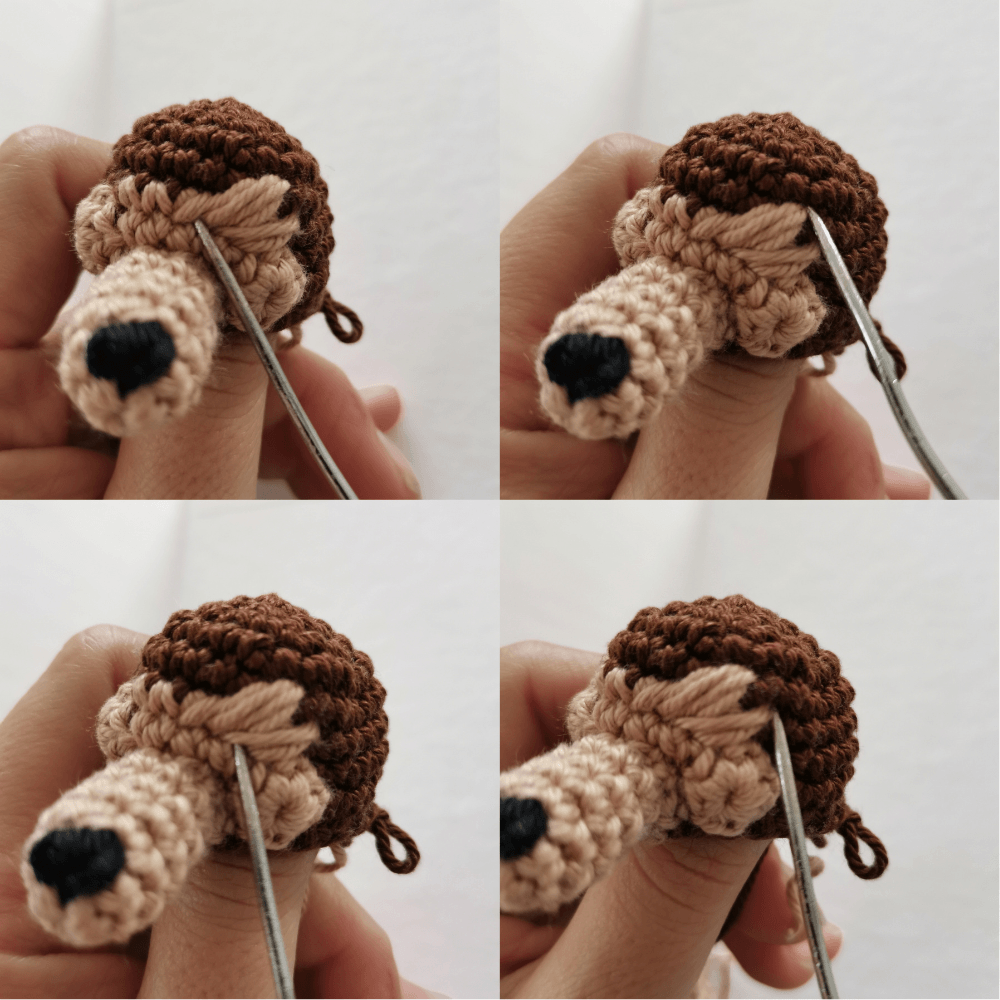
Muzzle
Color: Light Brown
Round 1: mr, 6 sc [6]
Round 2: (sc, inc) x 3 [9]
Round 3-6: 9 sc [9]
Fasten off, leaving a long tail for sewing.
Embroider the nostrils.
Stuff the muzzle and sew it to the center bottom of the Light Brown part of the head.
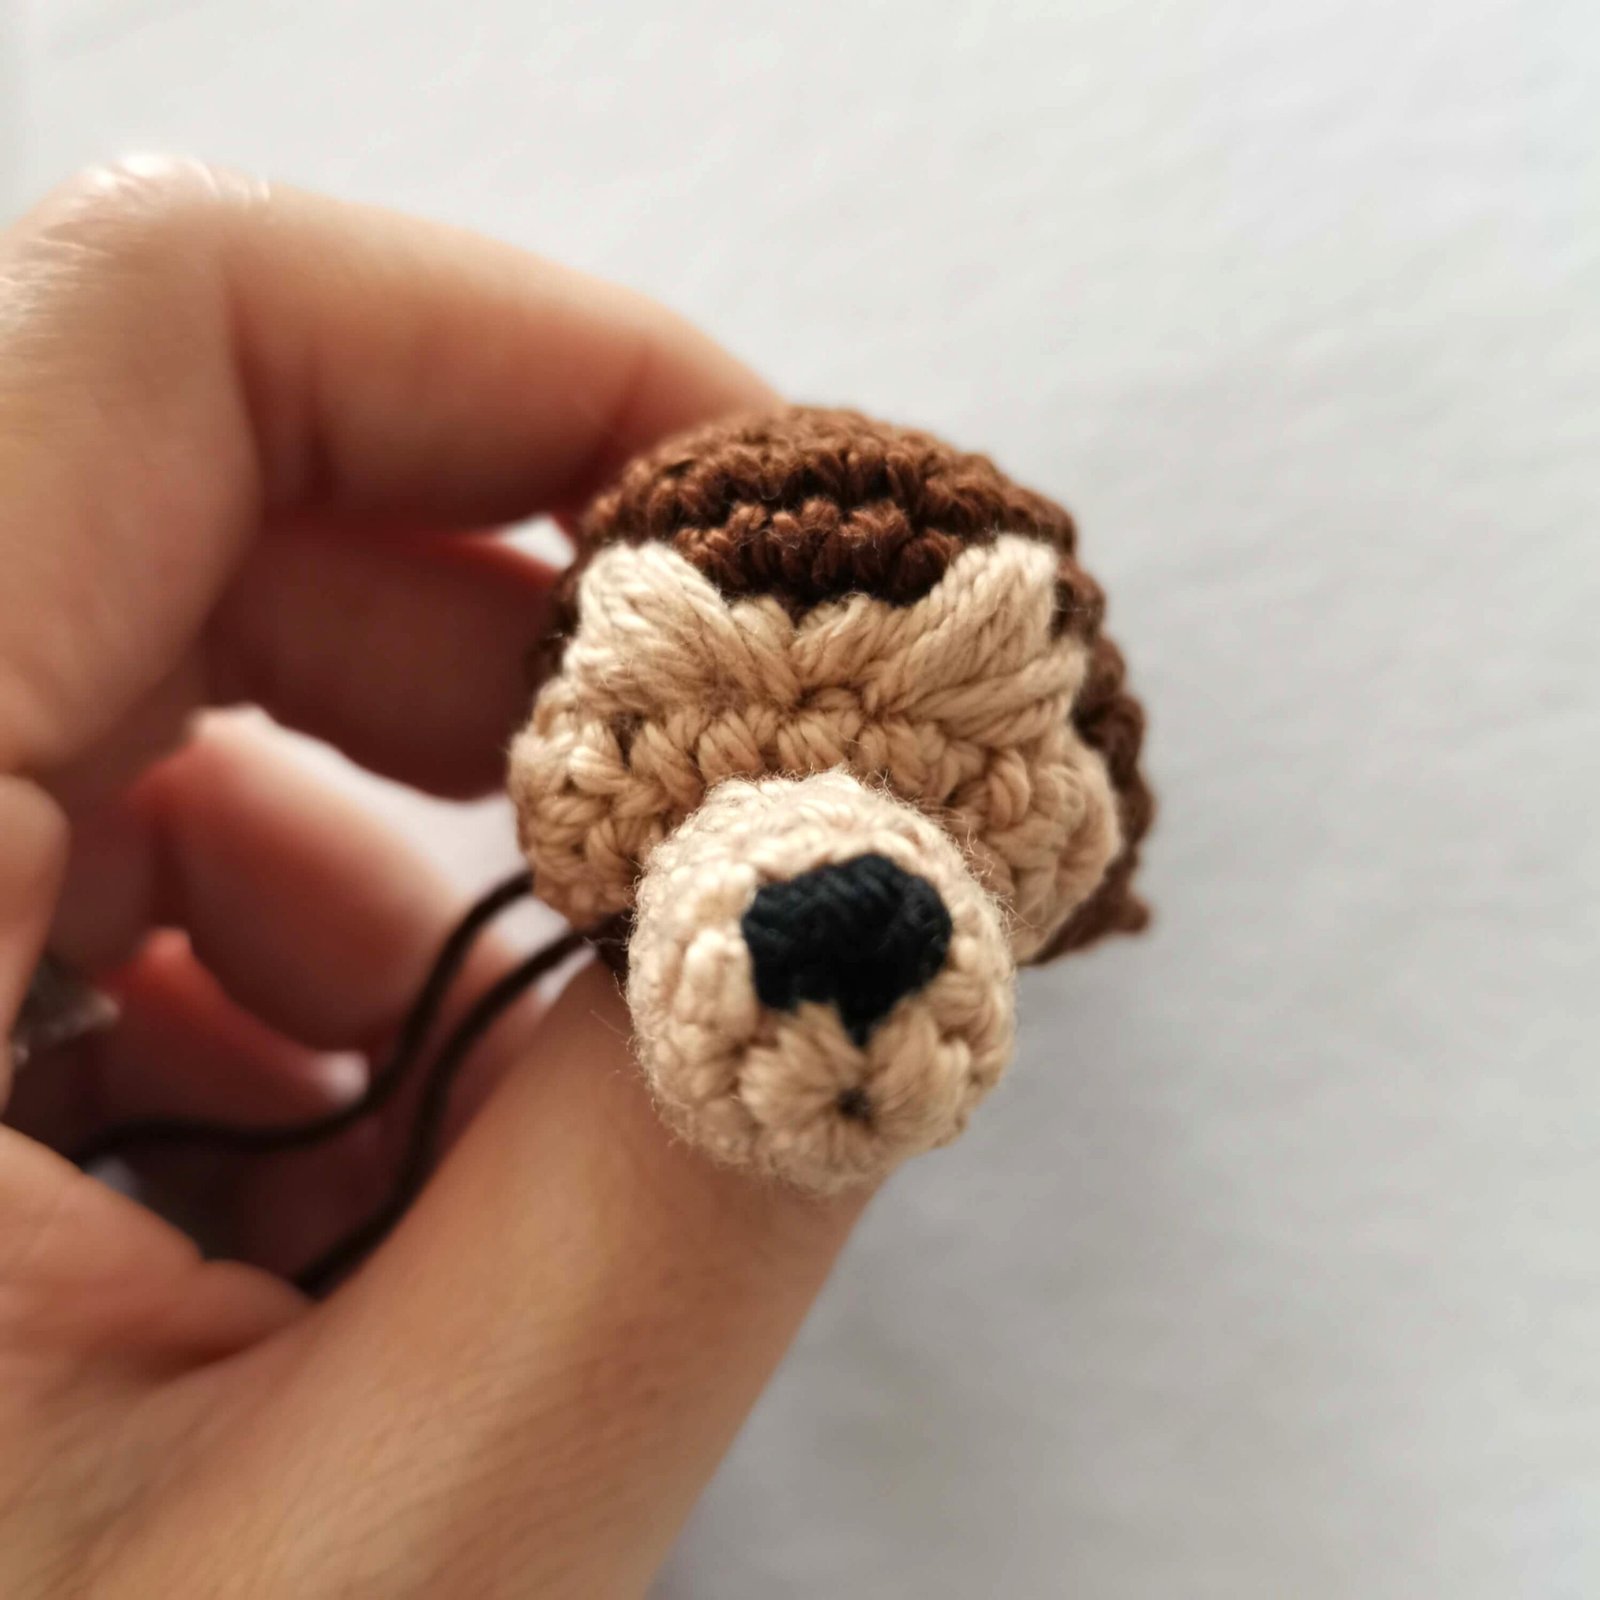
Cheeks (Make 2)
Color: Light Brown
Round 1: mr, 6 sc, sl st in first.
Fasten off, leaving a long tail for sewing.
Sew to the head, lateral to the muzzle.
Note: Embroider the area around the eyes and add the eyes as shown in the pictures.
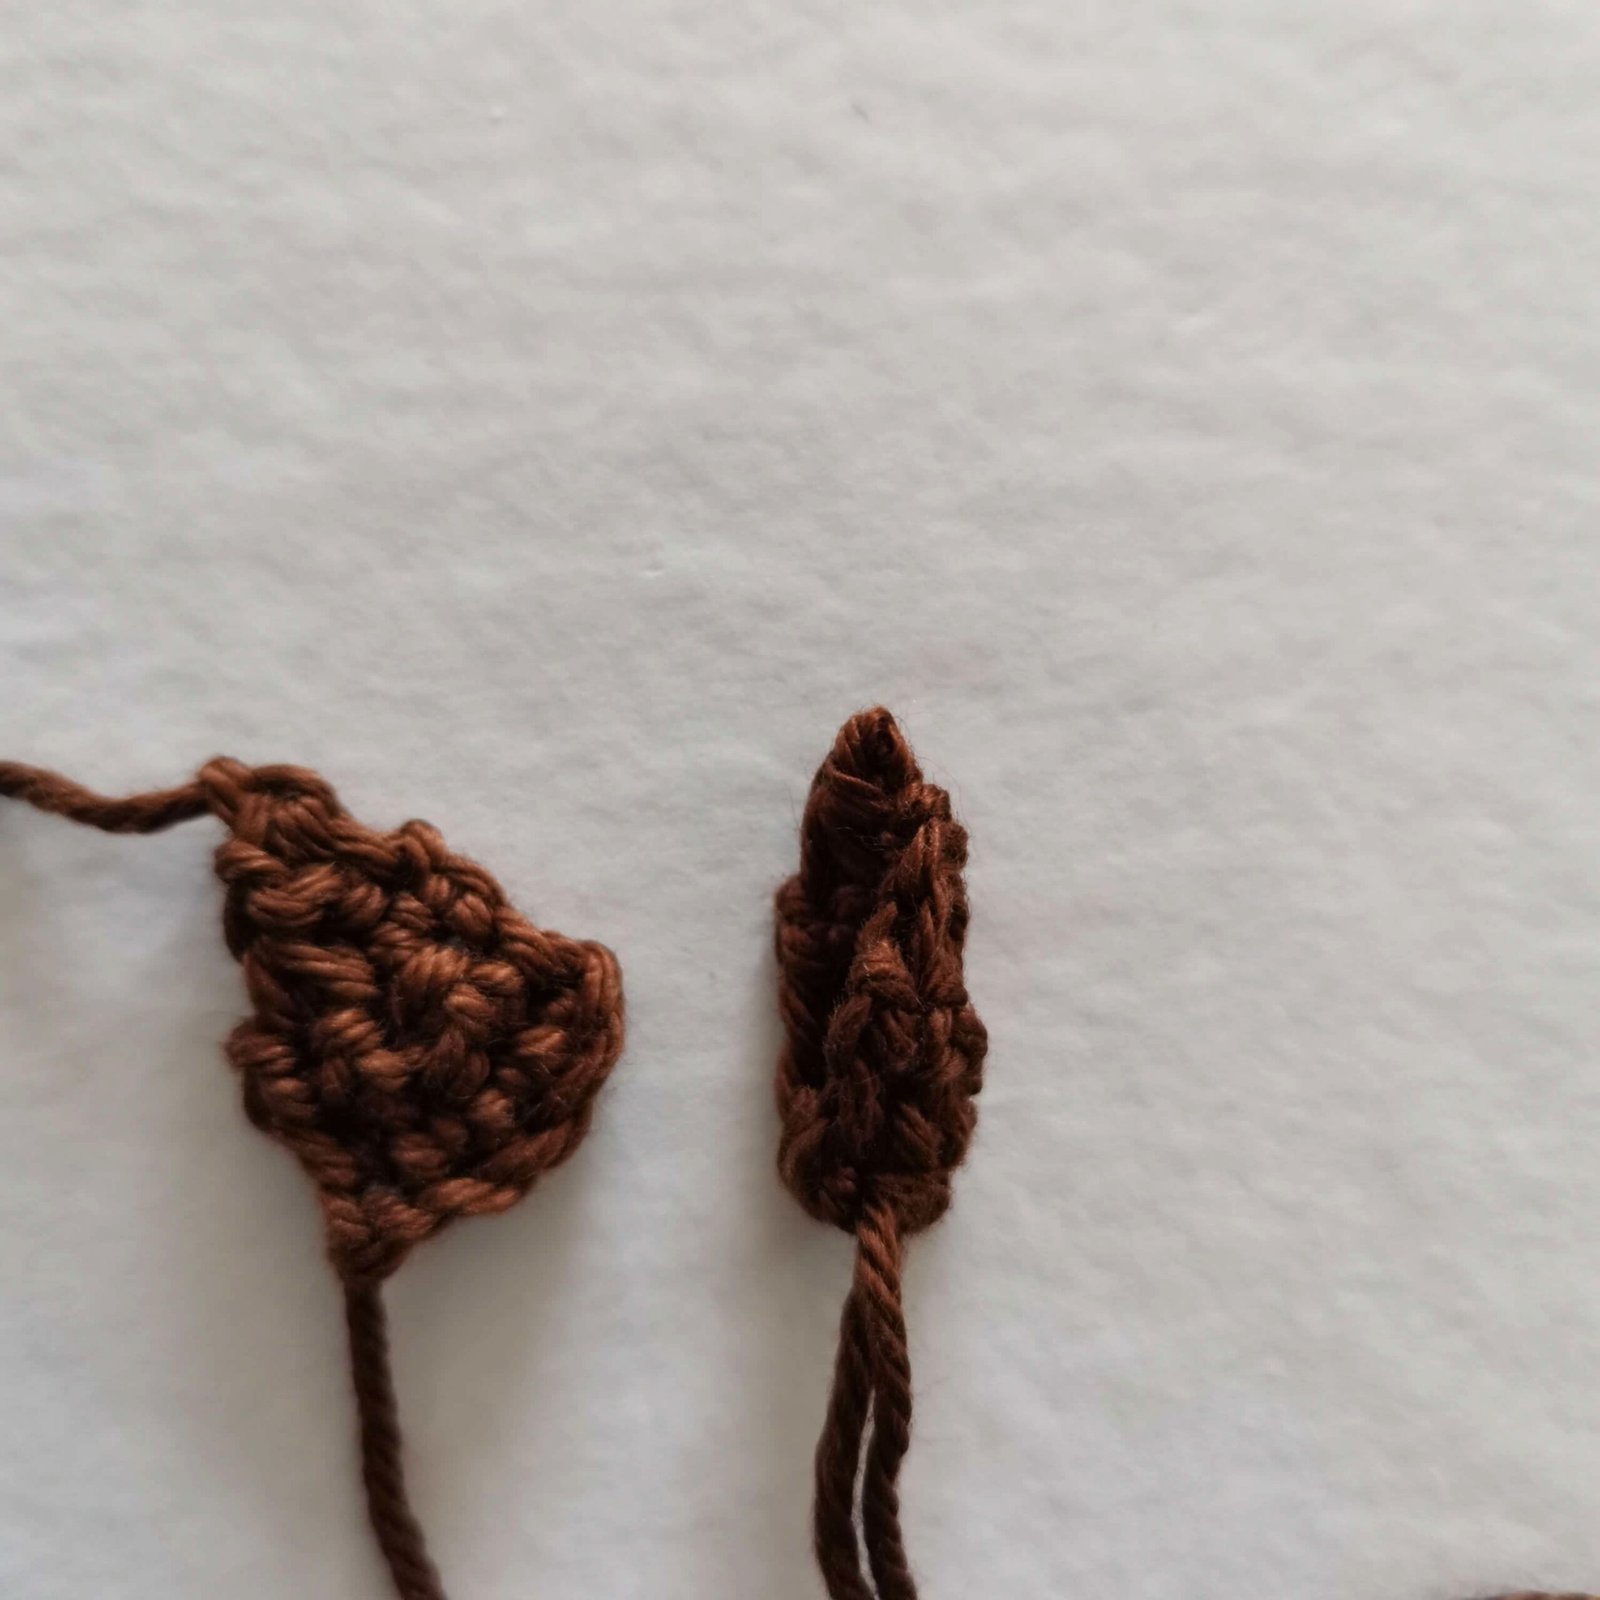
Ears (Make 2)
Color: Brown Ch 5.
Row 1: 4 sc, ch 1, turn.
Row 2: sc, dec, sc, ch 1, turn.
Row 3: dec, sc, ch 1, turn.
Row 4: dec.
Fasten off.
Fold in half and sew to the top of the head.
Three Little Pigs Finger Puppets Crochet Pattern by EmmaS Dolls
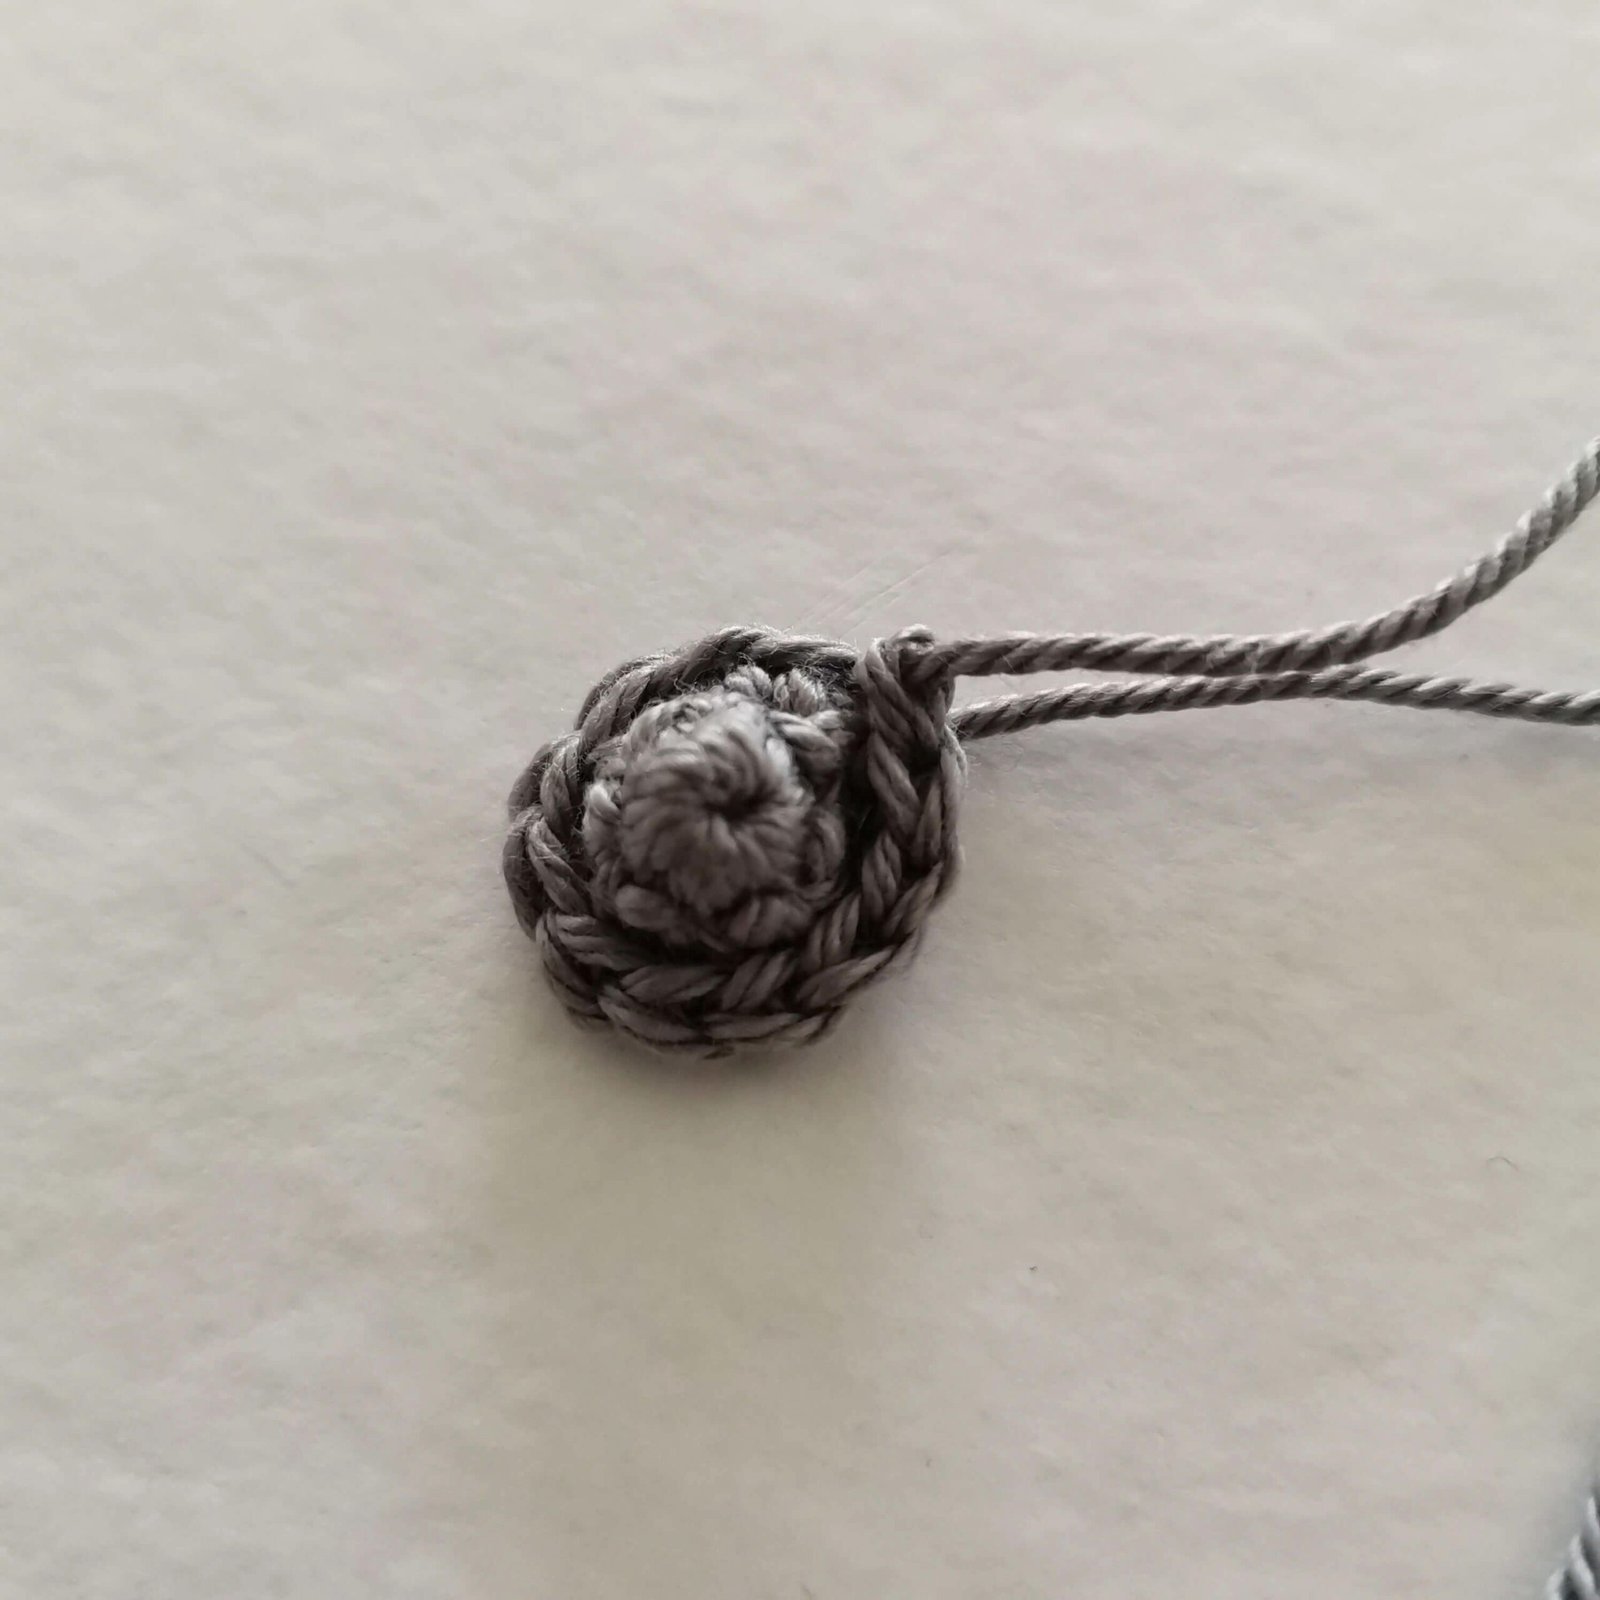
Wolf’s Hat
Color: Grey
Round 1: mr, 6 sc [6]
Round 2: 6 sc [6]
Round 3: FLO 6 x inc [12]
Fasten off, leaving a long tail for sewing.
Stuff and sew to the head.
Three Little Pigs Finger Puppets Crochet Pattern by EmmaS Dolls
Finishing the Head
Continue with Brown yarn:
Round 10: (sc, dec) x 6 [12]
Round 11: BLO 12 sc [12]
Round 12: 12 sc [12]
Round 13: 6 x dec [6]
Fasten off and close.
Pull the yarn tail towards the top of the head to make a small indentation at the base.
Arms (Make 2)
Color: Brown
Round 1: mr, 6 sc [6]
Round 2-10: 6 sc [6] (9 rounds)
Join the sides and close with 3 sc.
Fasten off.
Body
Start on the FLO of Round 11 of the head.
Color: Brown
Round 1: (sc, inc) x 6 [18]
Round 2: (sc, inc, sc) x 6 [24]
Round 3: 5 sc, 3 sc (through both arm and body to connect), 9 sc, 3 sc (connect left arm), 4 sc [24]
Note: Check that the arms are centered. Adjust the position by one stitch if needed.
Round 4: (6 sc, dec) x 3 [21]
Round 5: 21 sc [21]
Round 6: (5 sc, dec) x 3 [18]
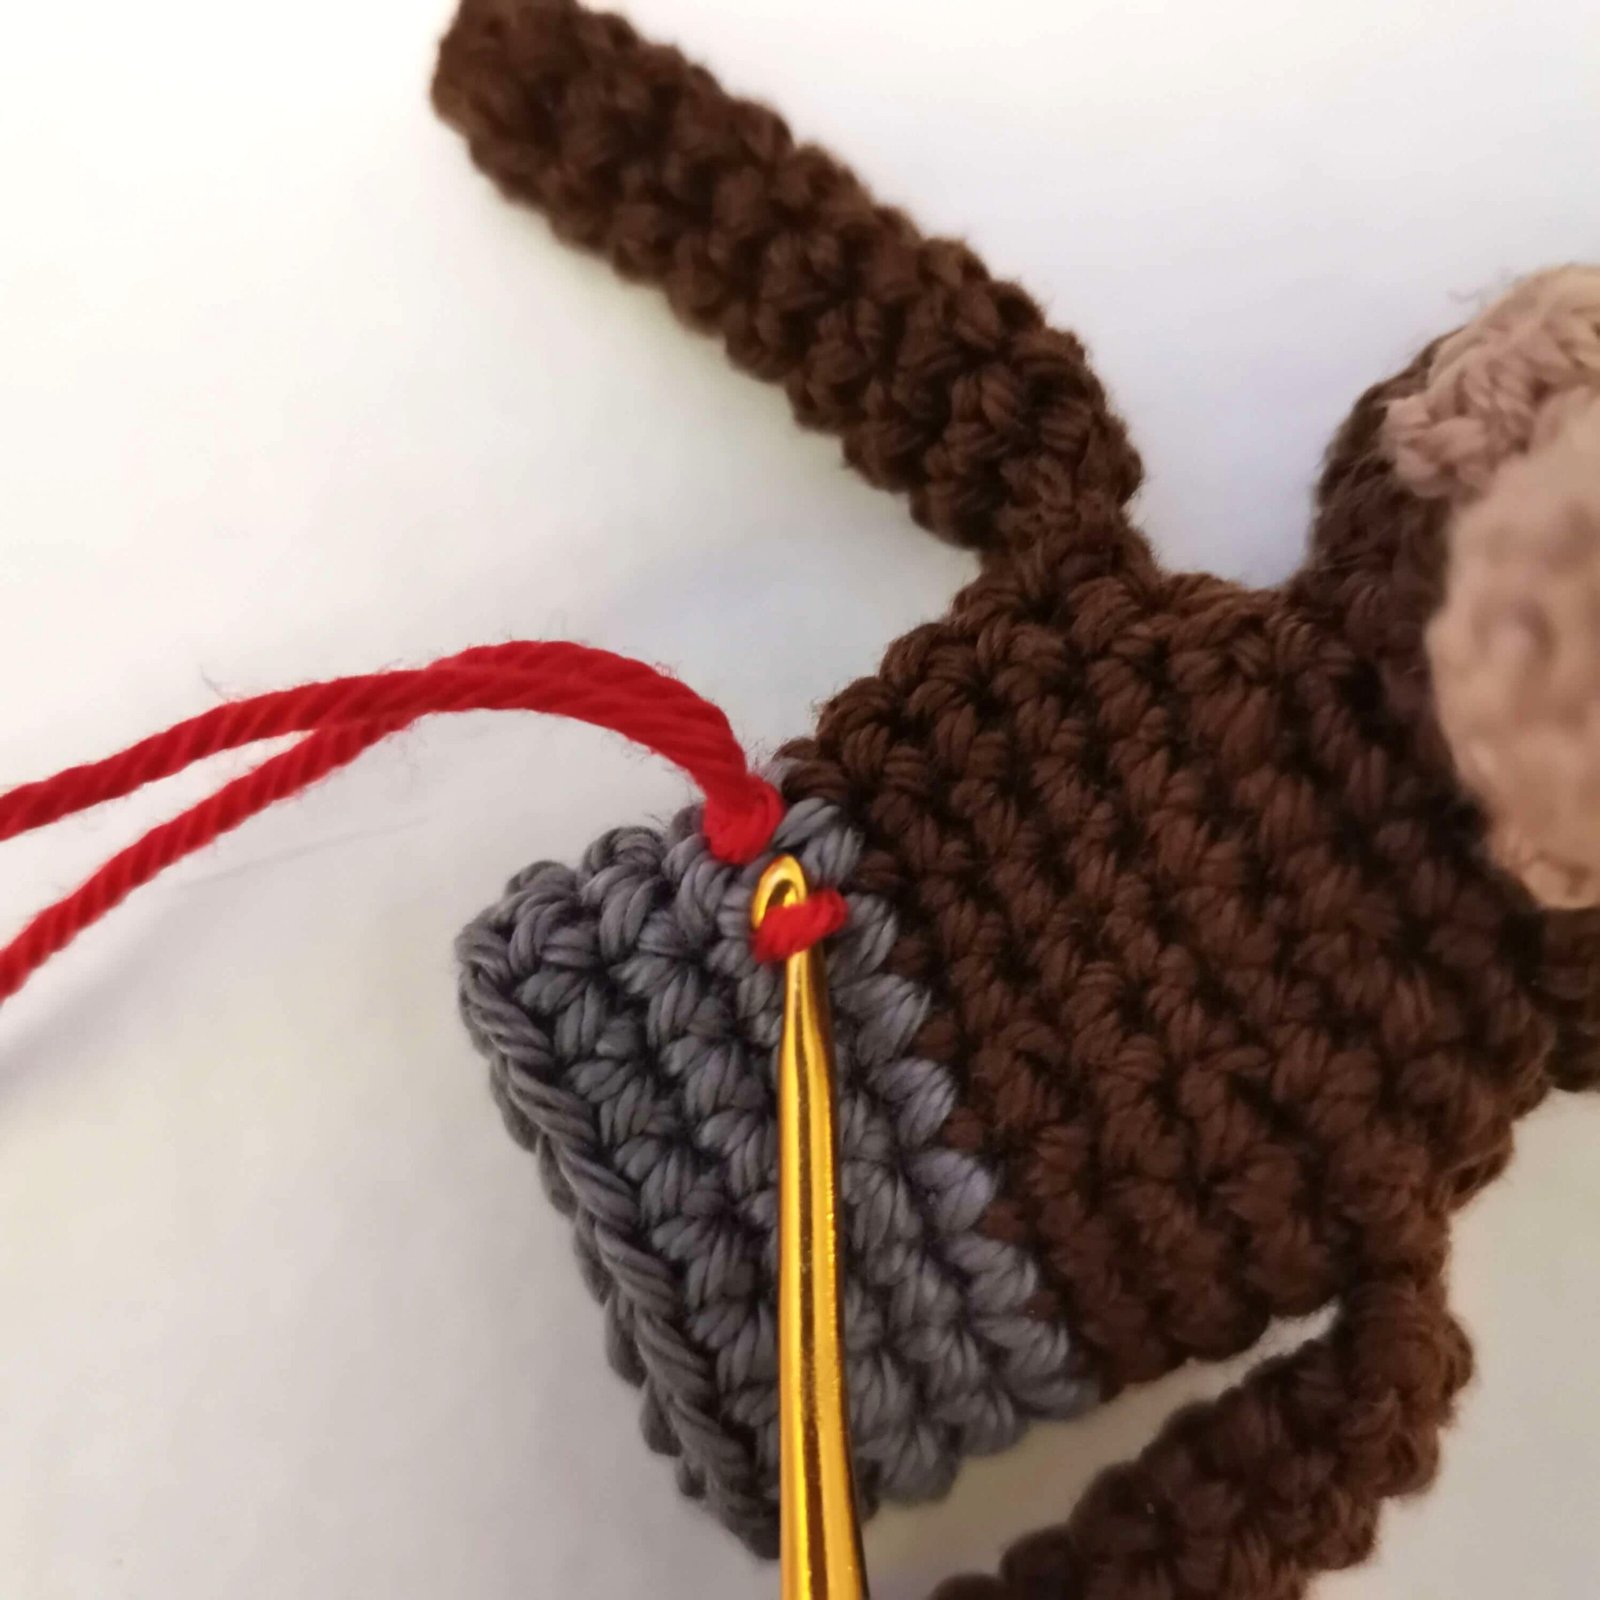
Switch to Grey for the pants
Round 7-10: 18 sc [18]
Fasten off.
Suspenders: Attach Red yarn to the front of the pants. Ch 16, sl st to the back of the pants, then ch 16 and sl st back to the front to create the X-shape.
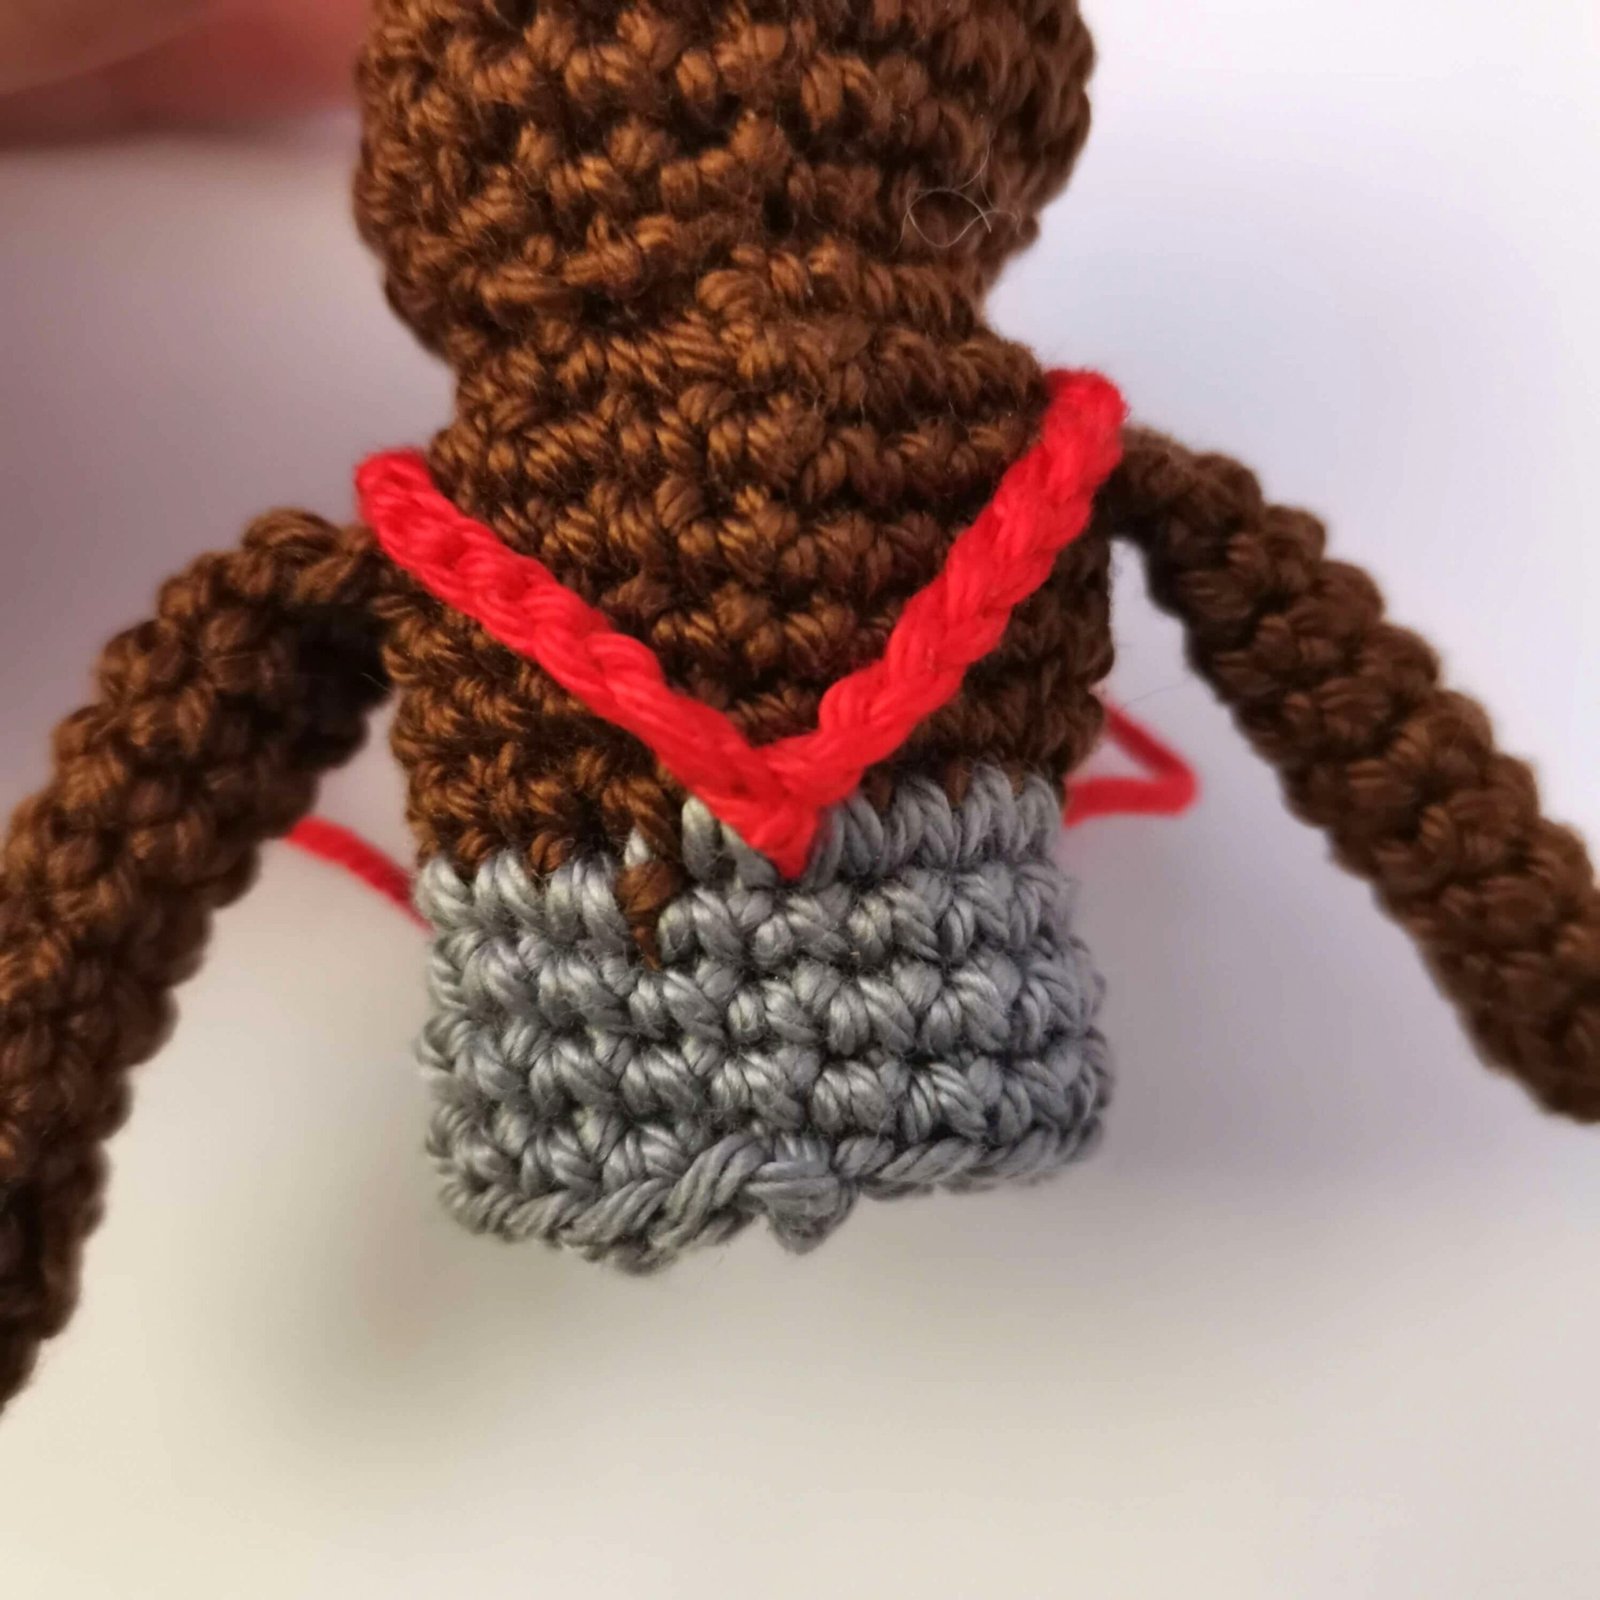
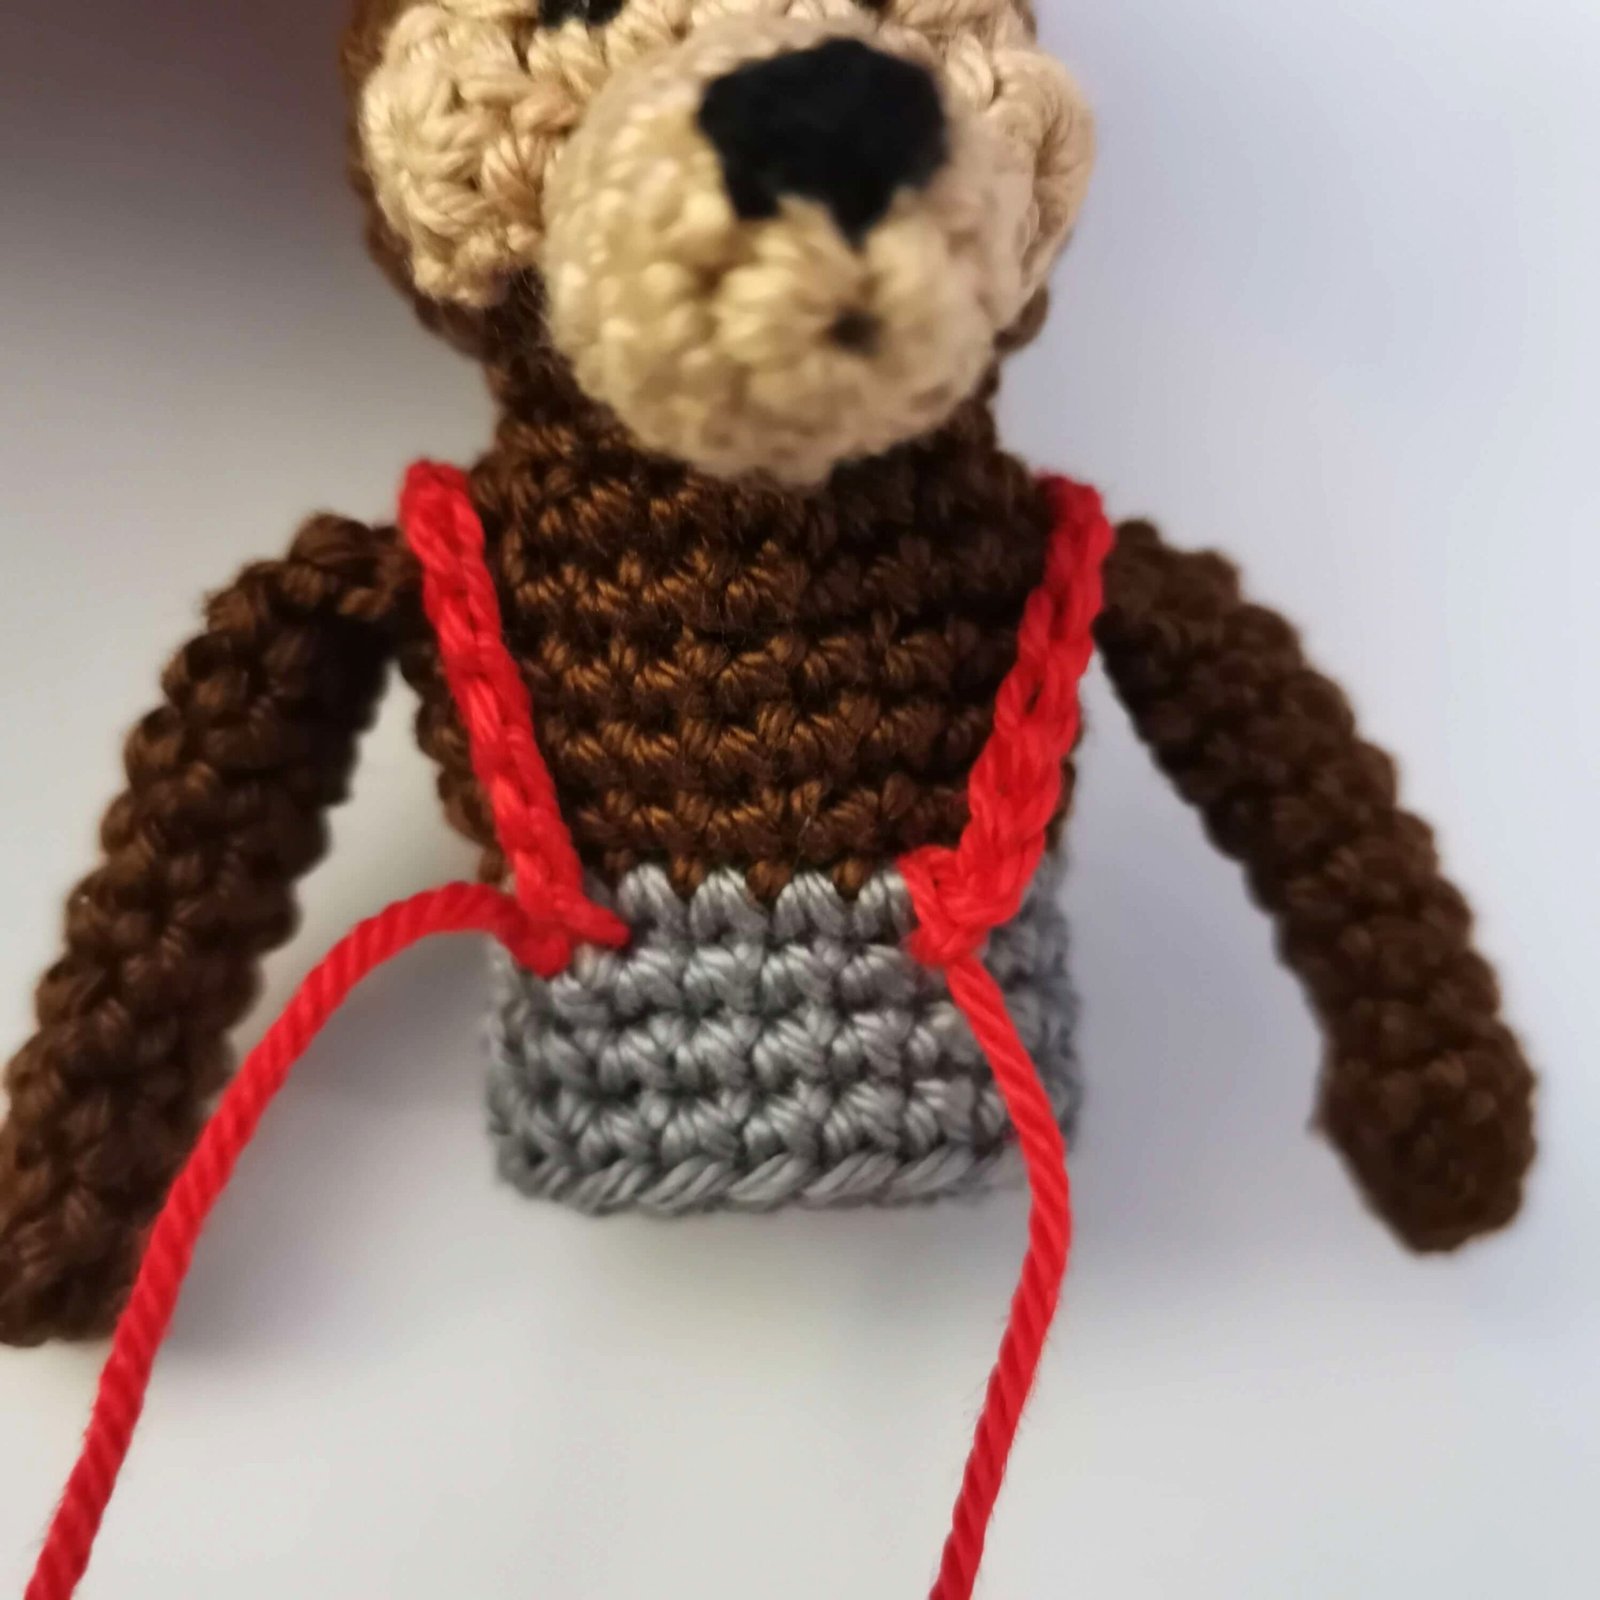
And the wolf is done!
Three Little Pigs Finger Puppets Crochet Pattern by EmmaS Dolls
To see a fun time-lapse of the making process, watch the videos below.
Explore More Free Patterns
If you enjoyed making this storytime set, don’t stop here! There are plenty of other free crochet patterns waiting for you on my blog. If you are looking for more fun projects, check out my Octopus Rattle Pattern which is perfect for baby gifts, or dive into the prehistoric world with my latest Crochet Dinosaur Pattern. Each one is designed with love and includes easy-to-follow instructions.
Get the Ad-Free PDF Version
I love sharing these patterns for free to help everyone enjoy the craft. However, if you prefer working offline, want to avoid ads, or simply wish to support my work, a professionally formatted, printable PDF version of this pattern is available for purchase. You can find it in my Etsy and Ravelry shops. Your support helps me keep creating and sharing new designs with our wonderful community!
Stay in the Loop – Join the Newsletter!
Never miss a new release! I am constantly working on new free patterns, step-by-step video tutorials, and amigurumi tips. By joining my newsletter, you’ll be the first to know when a new character drops or when I post a new tutorial on my YouTube channel, emmasdollsstudio. Let’s keep crocheting together and bringing more stories to life!
Let’s Connect!
I would absolutely love to see your finished puppets! You can find me on Instagram, Facebook, and TikTok under the name emmasdollsstudio. Be sure to tag me in your photos or use the hashtag #emmasdolls so I can see and share your wonderful work with our crochet community!
Pin it for Later!
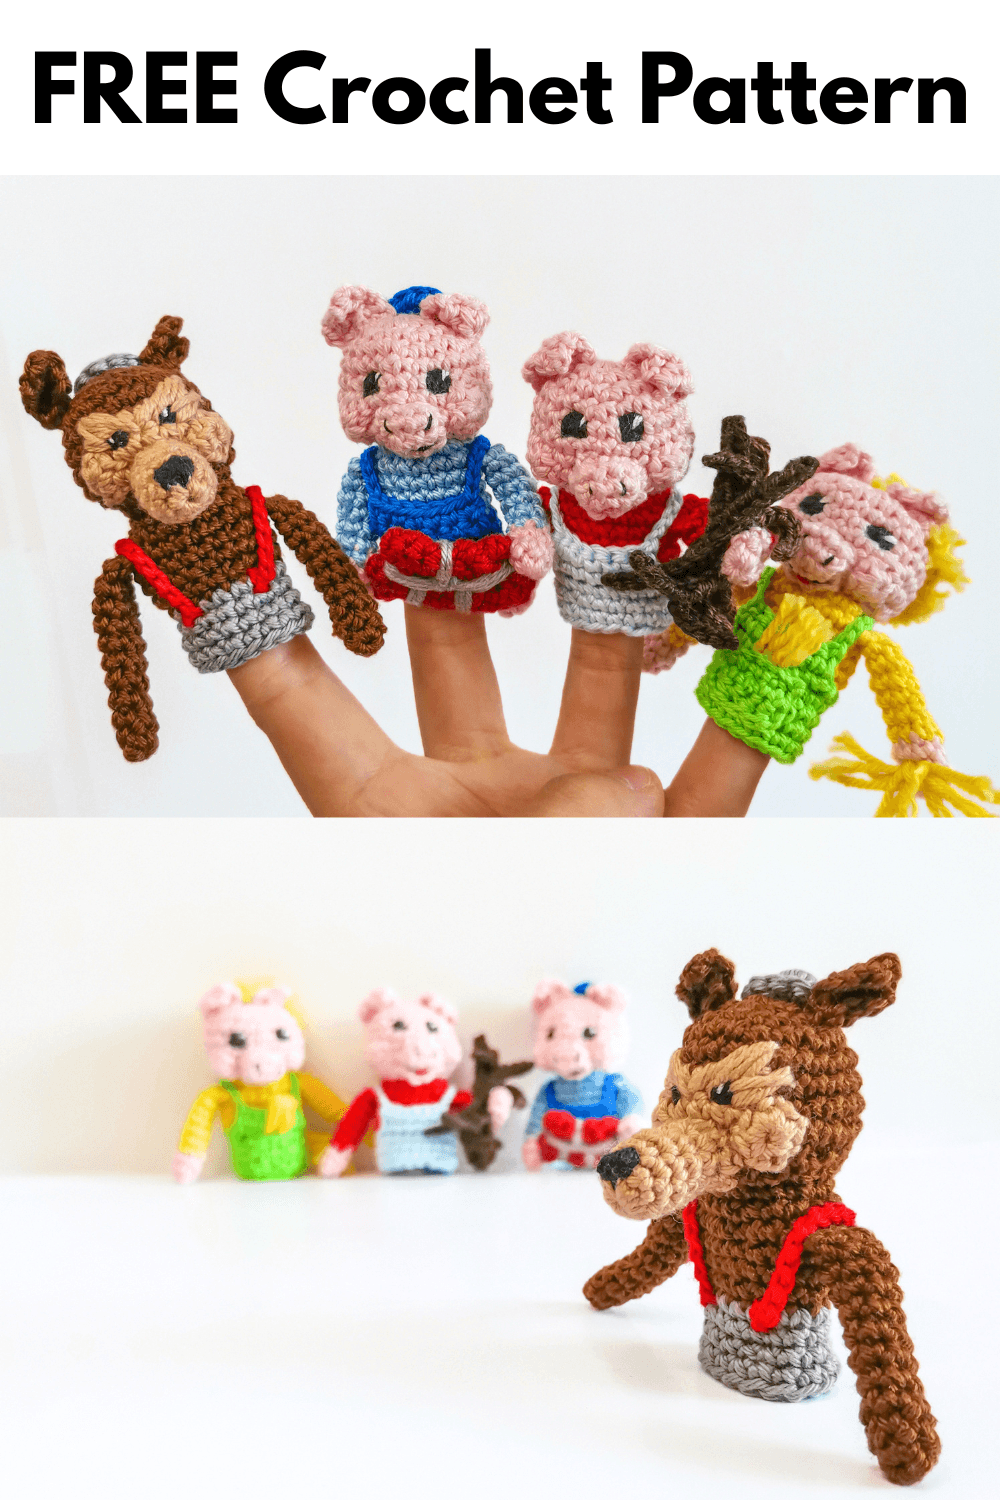
Three Little Pigs Finger Puppets Crochet Pattern by EmmaS Dolls
Since this pattern is free, please help me keep it that way by not taking screenshots. Keeping the page open while you work supports my studio! Happy crocheting!✨
Pingback: Free Rocker Monster Crochet Pattern: Meet Punkie! - EmmaS Dolls