✨To support my free patterns, this post includes affiliate links for materials I love. Thank you for your support! 💖
If you are looking for a quick, charming, and practical baby shower gift, this free whale crochet rattle pattern is the perfect project for you! Ocean-themed nursery items are always a favorite, and this cute little whale ring rattle combines soft textured crochet stitches with a smooth wooden teething ring that babies will love to hold.
Creating handmade toys for little ones is always special, and this pattern is designed to be beginner-friendly while still looking polished and professional. Whether you are crafting for your own baby, making a thoughtful present, or adding a new bestseller to your handmade shop, this free whale crochet rattle pattern comes together quickly using simple stitches and basic materials.
In this step-by-step tutorial, you will find complete instructions to crochet the whale body, fins, textured ring cover, and delicate embroidered details. Grab your yarn, hook, and a wooden ring, and let’s get started on making this sweet amigurumi sea creature!
If you are completely new to amigurumi, don’t worry at all! Before diving into the pattern, take a look at the tutorials right here on the blog to build your confidence. You can check out our guide on crochet abbreviations, learn the essentials with how to crochet basic stitches, and follow our perfect amigurumi guide post series for all the tips and techniques you need to make your stitches and assembly look flawless.
🌸 Choose how you want to craft:
- 🌐 Read it free on this blog (supported by ads).
- 📄 Prefer a printable PDF? Get the clean, ad-free PDF version on my Ko-fi shop for symbolic price💖
Materials list:
- Yarn: I use a 100% cotton yarn from my local store. The best match and my top recommendation for this pattern is Paintbox Yarns Cotton DK.
- Hook: I used a 2mm hook. I highly recommend Clover Amour Hooks for the best experience.
- Tools & Supplies:
- Fiberfill, 8 mm safety eyes, scissors, wooden teething ring (e.g., 60 mm or 70 mm) and a tapestry needle.
- Optional: Stitch markers and a rattle insert for a baby sensory toy.
- Find all these essentials here: Crochet Supplies & Accessories.
Crochet abbreviations:
| Abbreviation | Stitch / Technique |
| MR | magic ring |
| CH | chain |
| SC | single crochet |
| HDC | half double crochet |
| INC | increase |
| DEC | decrease |
| SL ST | slip stitch |
| SK ST | skip stitch |
| BLO | back loop only |
| FLO | front loop only |
Size & Difficulty:
- Difficulty level: Beginner / Intermediate
- Finished size: approx. 4.7 x 4 inches (12 x 10 cm)
Free Whale Crochet Rattle Pattern
Whale
Light blue yarn
Round 1: mr, 6 sc [6]
Round 2: 6 x inc [12]
Round 3: (sc, inc) x 6 [18]
Round 4: (sc, inc, sc) x 6 [24]
Round 5: (3 sc, inc) x 6 [30]
Round 6: (2 sc, inc, 2 sc) x 6 [36]
Round 7: (5 sc, inc) x 6 [42]
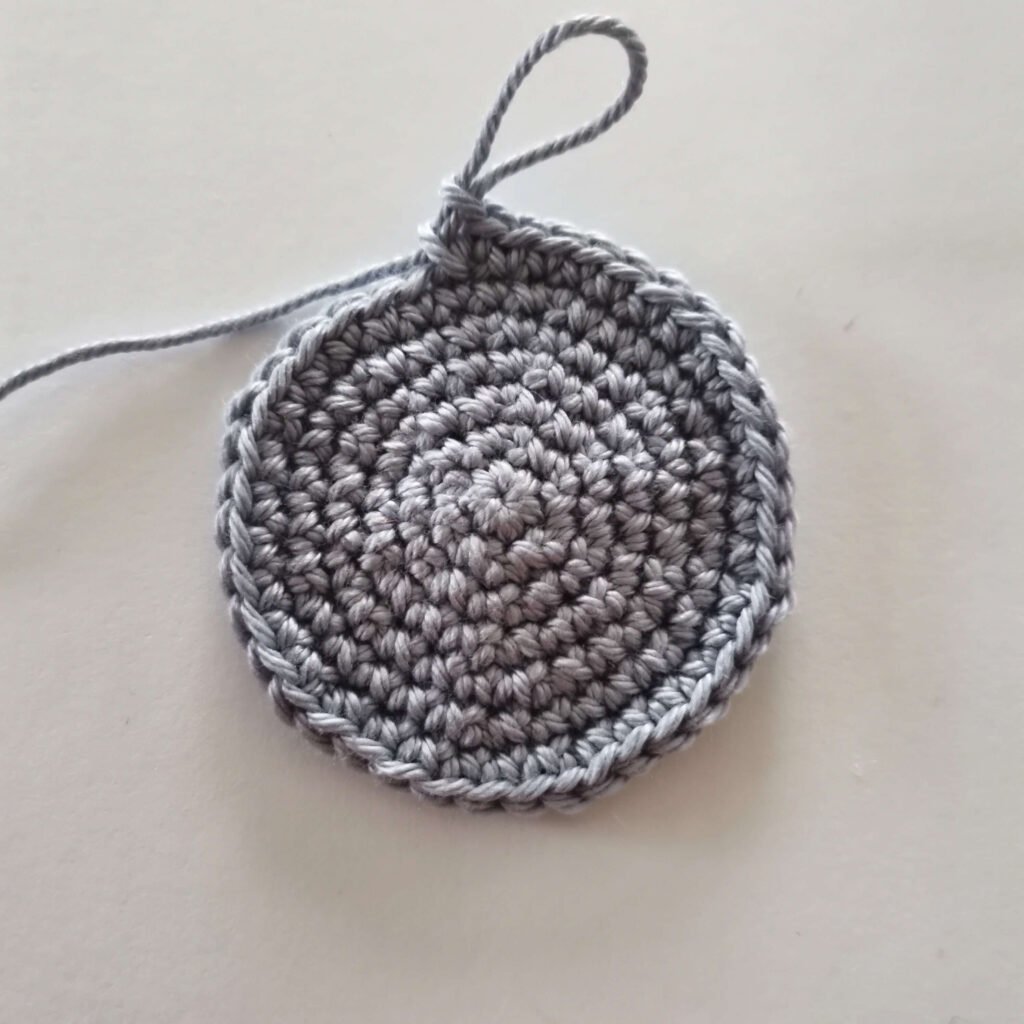
Rounds 8–11: 42 sc [42] (4 rounds)
Round 12: 42 sc – mark stitches 7 and 28 [42]
Rounds 13–14: 42 sc [42]
Round 15: (5 sc, dec) x 6 [36]
Round 16: 36 sc [36]
Round 17: (2 sc, dec, 2 sc) x 6 [30]
Round 18: 30 sc [30]
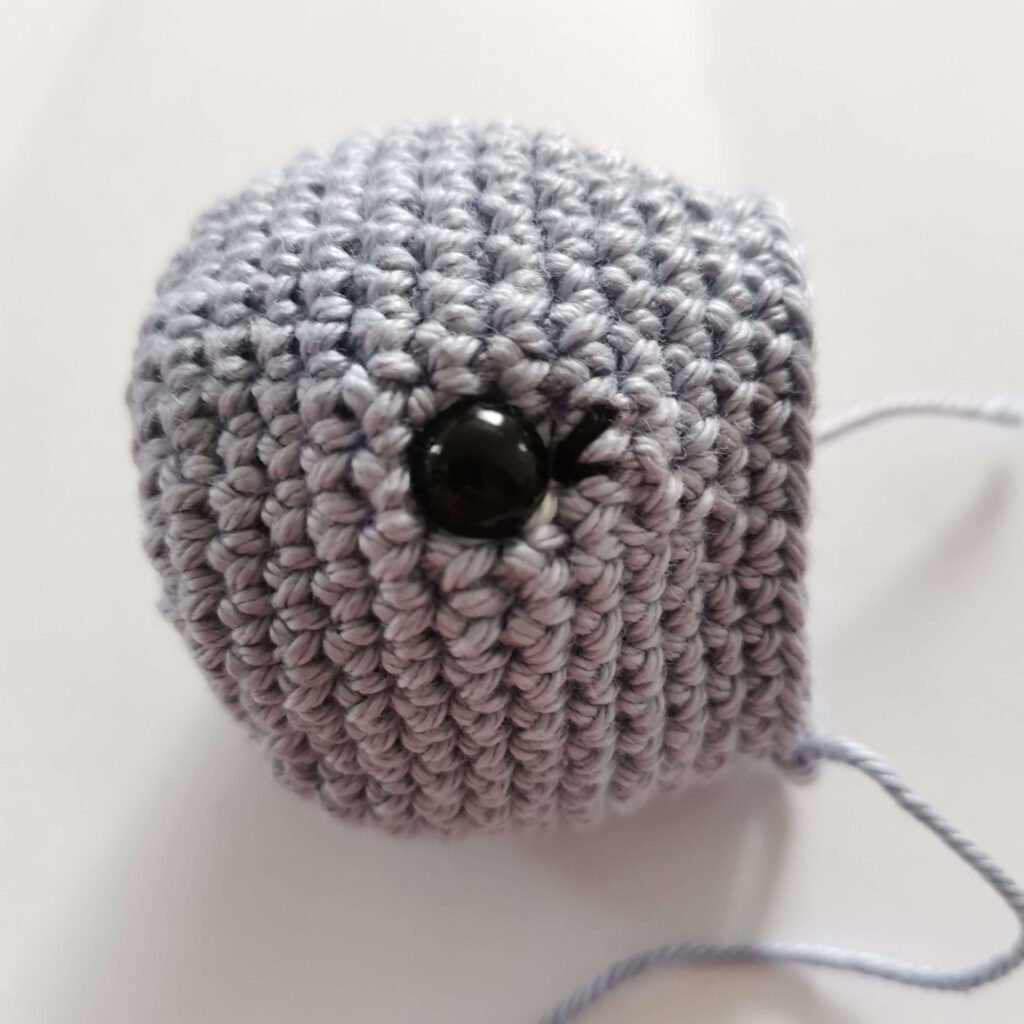
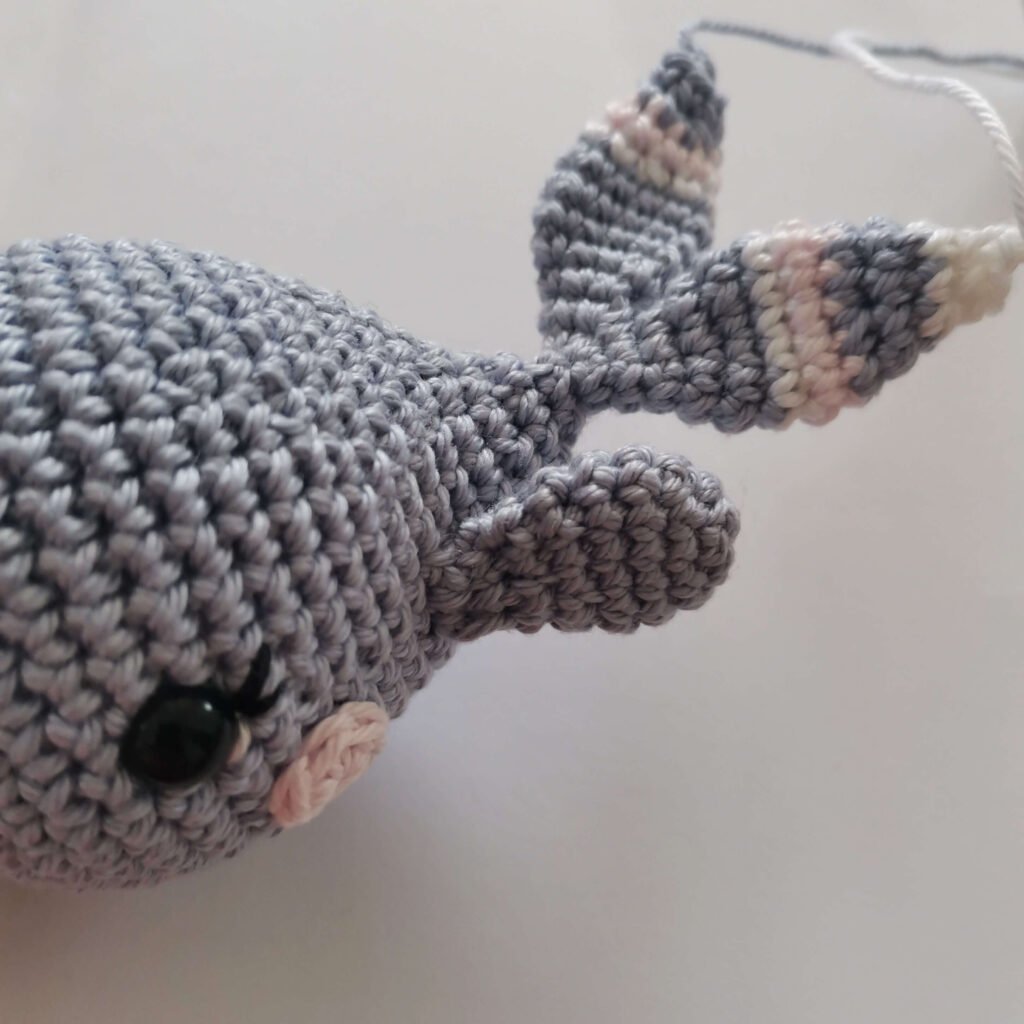
- Place safety eyes next to stitches 7 and 28 of Round 12, between rounds 12 and 13.
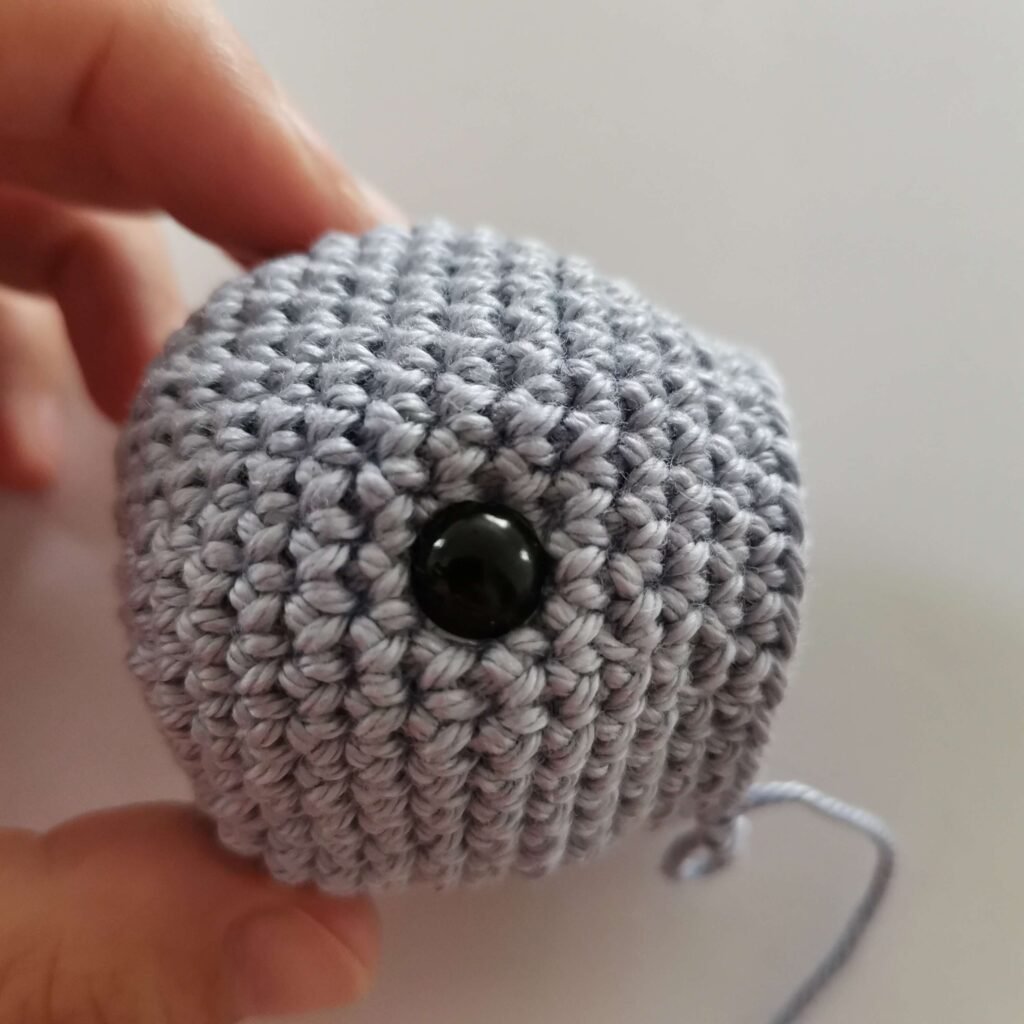
- Embroider a white line in the corners of the eyes.
- Embroider eyelashes with black yarn.
Cheeks
Light pink yarn
Round 1: mr, 6 sc, sl st [6]
Fasten off, leaving a long tail for sewing.
Sew the cheeks as shown in the pictures.
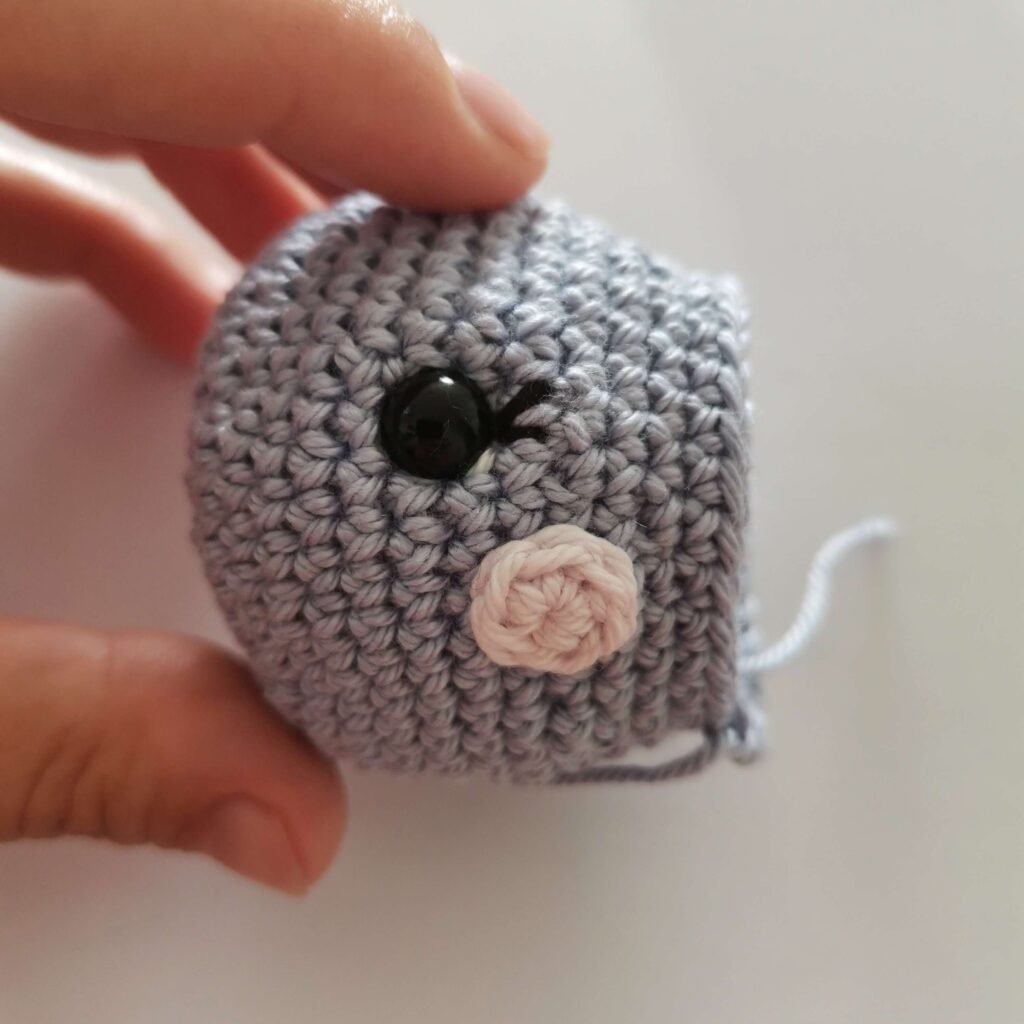
Place the rattle inside the whale and keep working on the whale body.
Round 19: 7 sc, dec, 4 sc, dec, 4 sc, dec, 9 sc [27]
Round 20: 7 sc, dec, 3 sc, dec, 3 sc, dec, 8 sc [24]
Round 21: 7 sc, dec, 2 sc, dec, 2 sc, dec, 7 sc [21]
Round 22: 7 sc, dec, sc, dec, sc, dec, 6 sc [18]
Stuff.
Round 23: (2 sc, dec, 2 sc) x 3 [15]
Round 24: (3 sc, dec) x 3 [12]
Round 25: (sc, dec, sc) x 3 [9]
Stuff.
Round 26: (sc, dec) x 3 [6]
Round 27: 6 x inc [12]
Note: now you will start working on the whale’s tail. Rounds marked with “a” are for the first side of the tail, and rounds marked with “b” are for the second side.
Round 28a: 5 sc, skip next 6 stitches, sc [6]
Round 29a: (sc, inc) x 3 [9]
Round 30a: (sc, inc, sc) x 3 [12]
Round 31a: 12 sc [12]
Switch to white yarn
Round 32a: 12 sc [12]
Switch to light pink yarn
Round 33a: 12 sc [12]
Switch to light blue yarn
Round 34a: (2 sc, dec) x 3 [9]
Round 35a: 9 sc [9]
Switch to white yarn
Round 36a: (sc, dec) x 3 [6]
Round 37a: 6 sc [6]
Fasten off and close the remaining opening.
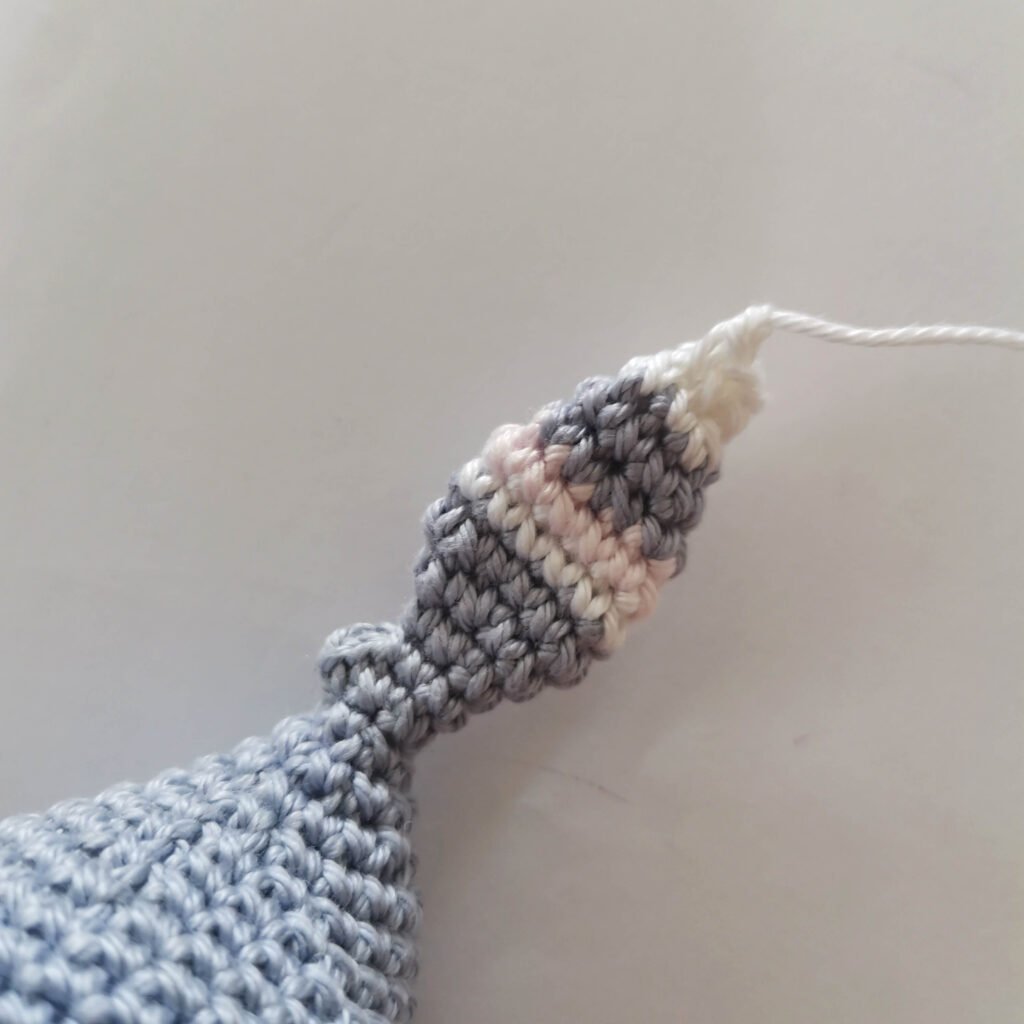
Attach light blue yarn to the 6th stitch of Round 27 (the first of the remaining 6 stitches).
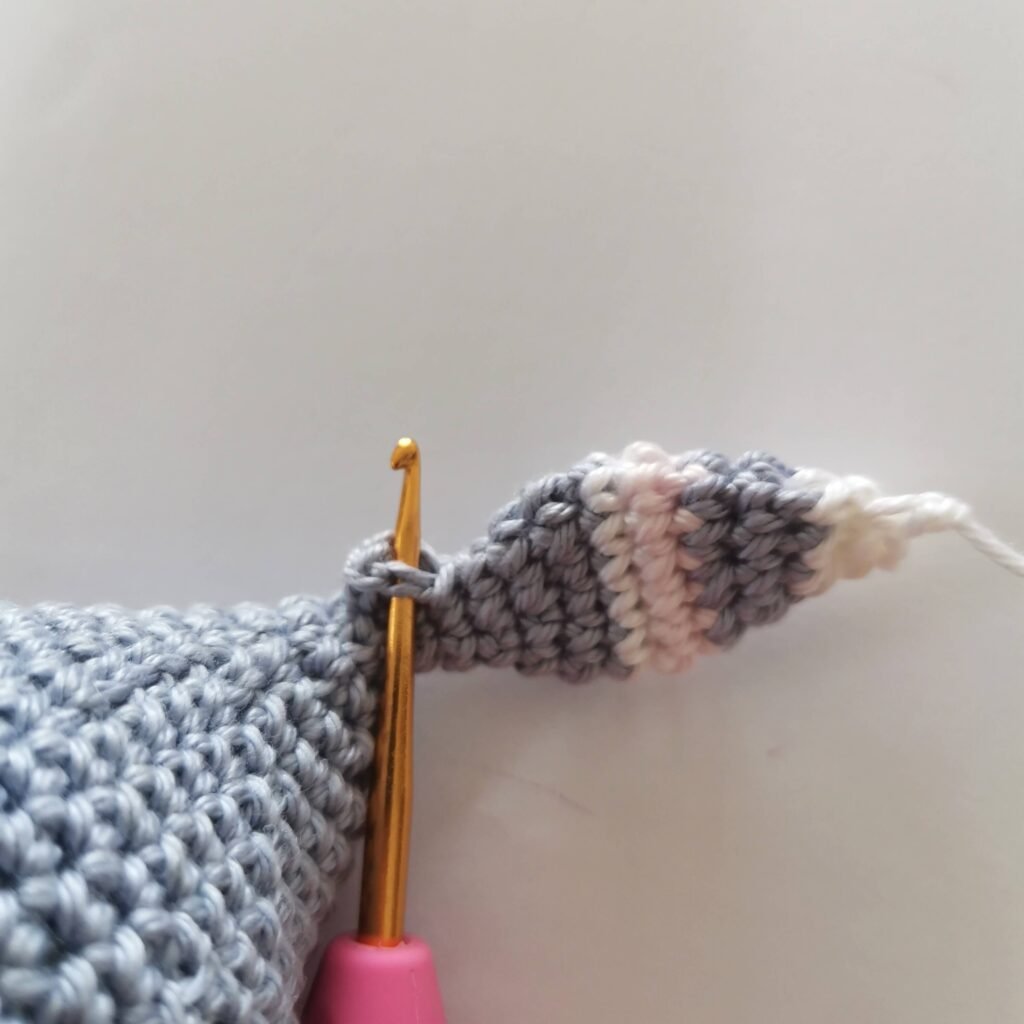
Round 28b: 6 sc [6]
Round 29b: (sc, inc) x 3 [9]
Round 30b: (sc, inc, sc) x 3 [12]
Rounds 31b–33b: 12 sc [12]
Switch to white yarn
Round 34b: (2 sc, dec) x 3 [9]
Switch to light pink yarn
Round 35b: 9 sc [9]
Switch to light blue yarn
Round 36b: (sc, dec) x 3 [6]
Round 37b: 6 sc [6]
Fasten off and close the remaining opening.
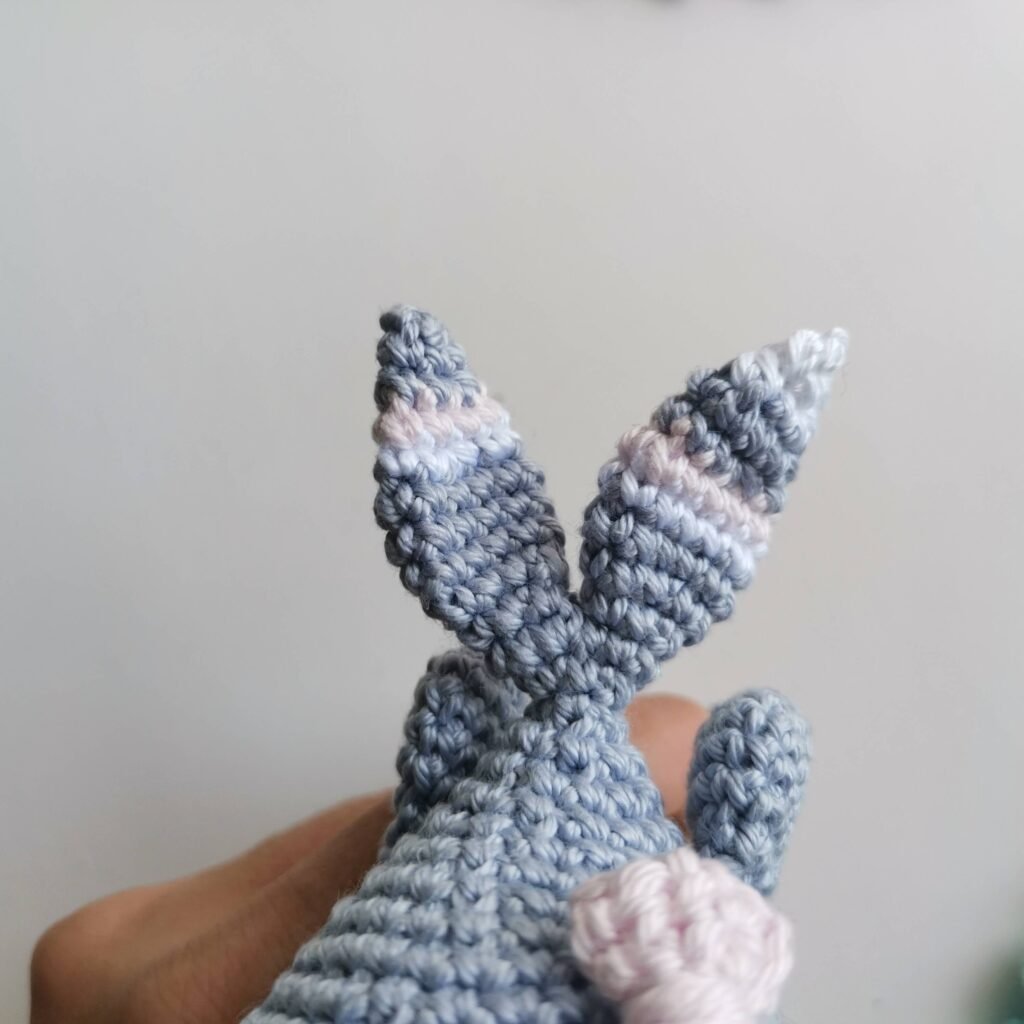
Fins (make 2)
Light blue yarn
Round 1: mr, 6 sc [6]
Round 2: 6 x inc [12]
Rounds 3–5: 12 sc [12]
Round 6: (2 sc, dec) x 3 [9]
Round 7: (sc, dec) x 3 [6]
Flatten sides and close with 3 sc.
Fasten off, leaving a long tail for sewing.
Sew the fins to the whale at Round 20.
Ring Cover
Light pink yarn
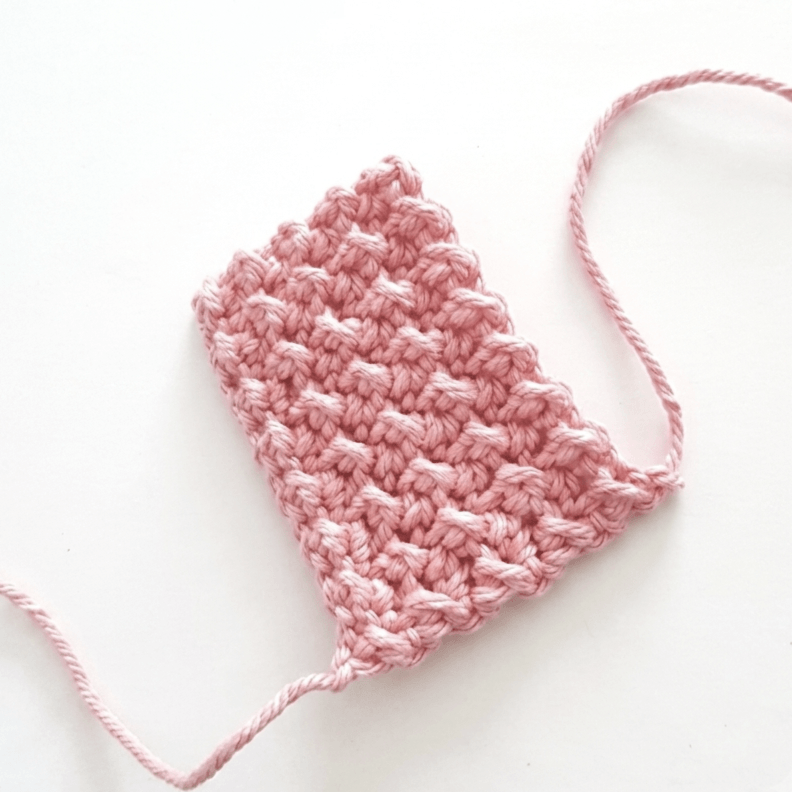
Ch 16
Row 1: (hdc, sl st) x 7, hdc, ch 1, turn [15]
Row 2: (sl st, hdc) x 7, sl st, ch 1, turn [15]
Row 3: (hdc, sl st) x 7, hdc, ch 1, turn [15]
Row 4: (sl st, hdc) x 7, sl st, ch 1, turn [15]
Row 5: (hdc, sl st) x 7, hdc, ch 1, turn [15]
Row 6: (sl st, hdc) x 7, sl st, ch 1, turn [15]
Row 7: (hdc, sl st) x 7, hdc, ch 1, turn [15]
Row 8: (sl st, hdc) x 7, sl st, ch 1, turn [15]
Row 9: (hdc, sl st) x 7, hdc [15]
Fasten off, leaving a long tail for sewing.
Sew this part to the bottom of the whale. Wrap it around the wooden ring, join the sides, and sew together.
Bow
Light pink yarn
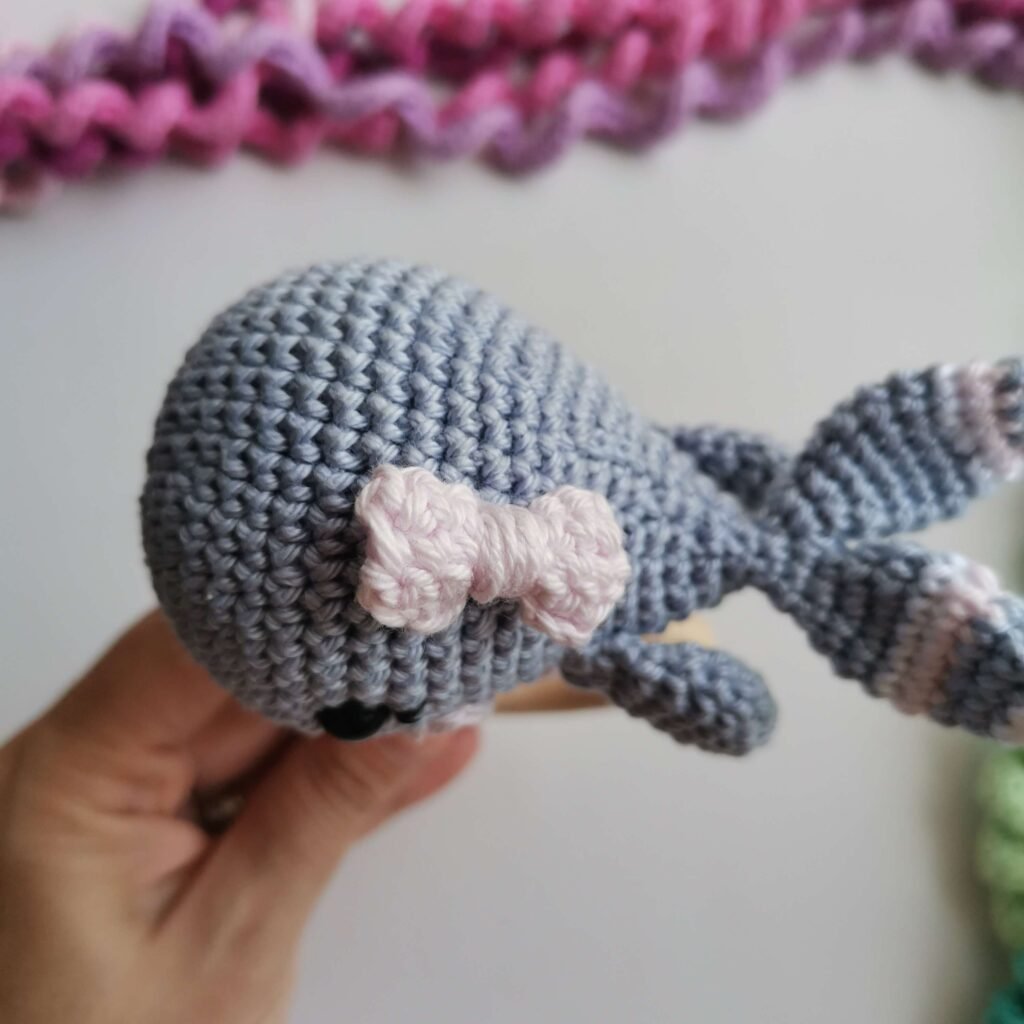
Ch 7
Rows 1–3: 6 sc, ch 1, turn [6]
Row 4: 6 sc [6]
Fasten off.
Wrap the yarn around the middle to form a bow and sew it to the whale.
More Free Baby Rattle Patterns You’ll Love
If you enjoyed crafting this cute ocean friend, be sure to check out the rest of our baby collection! For more quick, fun, and delightful gift ideas, take a look at the Baby Octopus Rattle pattern and the sweet Heart Cherry Rattle pattern. Both projects are designed with the same soft texture, baby-safe construction, and simple steps that make making handmade nursery toys so rewarding.
Get the Ad-Free Printable PDF Pattern
Prefer working offline or like having a clean, beautifully formatted document saved on your device? You can easily grab the printable PDF version of this pattern in our Etsy and Ravelry shops! Purchasing the PDF allows you to print the instructions without ads or pop-ups, keep step-by-step progress notes on paper, and support the creation of future free content on our blog.
Join the EmmaS Dolls Community
Never miss a new release! Be sure to subscribe to our email newsletter to get instant updates whenever a new design drops. We have many more free amigurumi patterns, detailed video tutorials, behind-the-scenes previews, and special maker discounts coming soon, delivered straight to your inbox.
Pin it for Later!
Important Safety Note: While crochet toys are wonderful for little ones, safety is our top priority. When making toys for babies or toddlers:
- Eyes: I highly recommend embroidering the eyes with black yarn instead of using plastic safety eyes, which can become a choking hazard.
- Small Parts: Ensure all limbs and accessories (like bows or hats) are sewn extra securely with multiple passes of yarn.
- Supervision: Never leave a baby unattended with any handmade toy. Regularly check the toy for any loose threads or wear and tear.
Since this pattern is free, please help me keep it that way by not taking screenshots. Keeping the page open while you work supports my studio! Happy crocheting!✨