✨To support my free patterns, this post includes affiliate links for materials I love. Thank you for your support! 💖
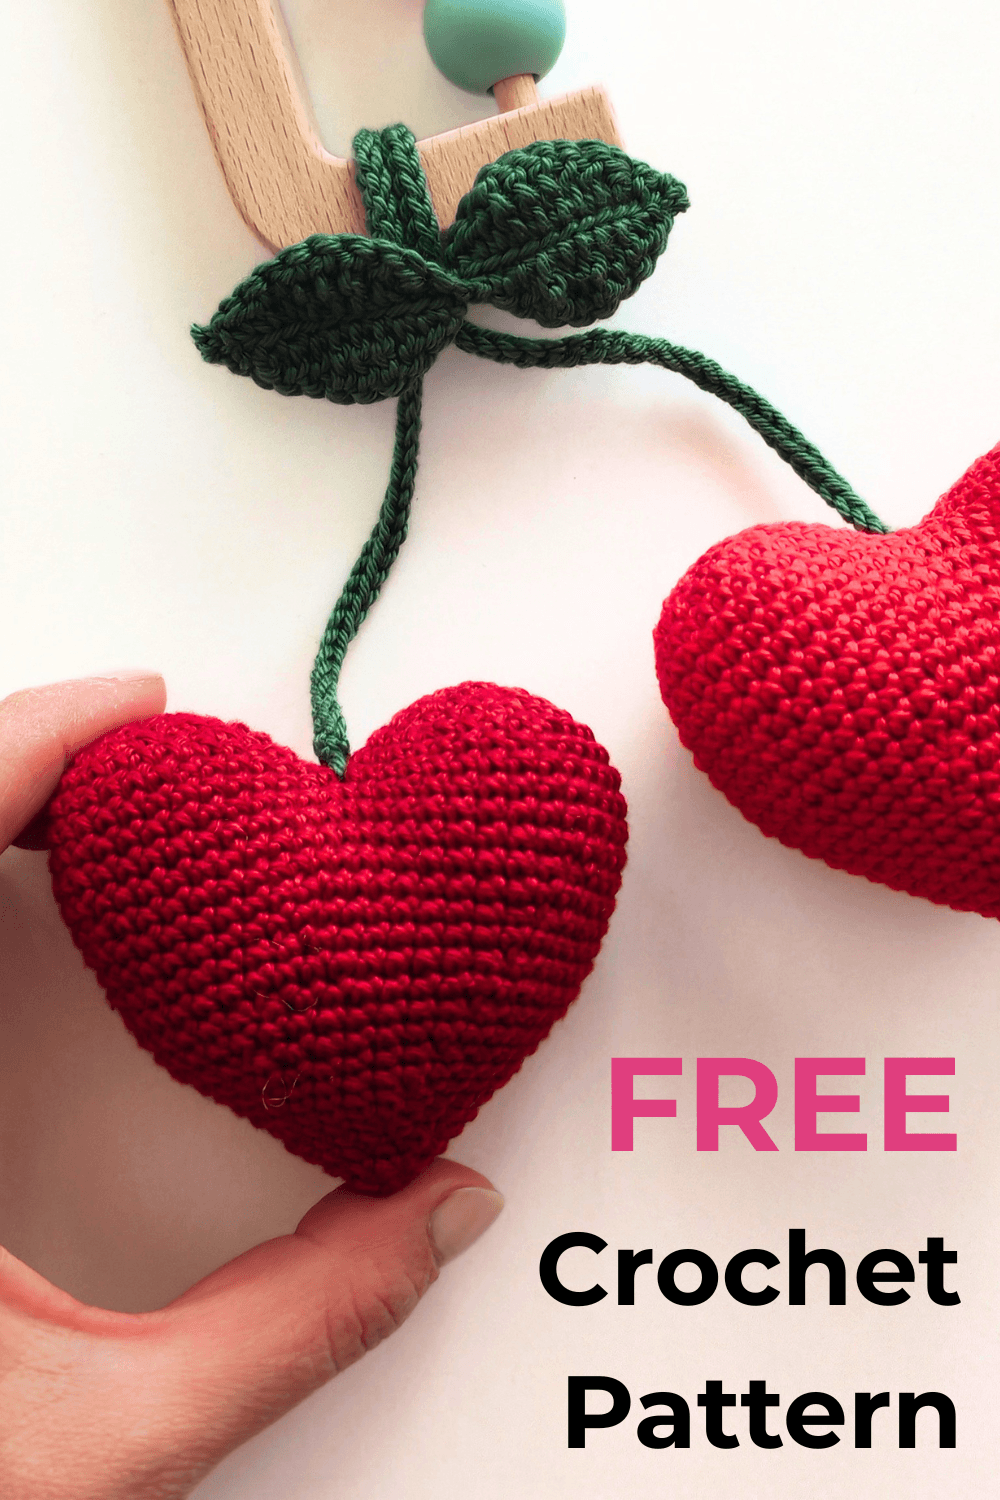
Looking for a quick, sweet, and versatile handmade project? This free crochet heart cherry pattern is the perfect “stash buster” for using up those leftover red and green yarn scraps! Whether you want to create a safe and stylish sensory baby rattle, a trendy bag charm, or a cute keychain, this beginner-friendly design has you covered.
What makes this amigurumi pattern so wonderful is its multi-use design. In this post, you will find instructions for two different sizes: a larger version that fits perfectly on a wooden teething ring for babies, and a mini version that makes an adorable accessory for your keys or backpack. It is a fast, satisfying make that adds a touch of handmade sweetness to anything.
If you are completely new to making toys, don’t worry! Before diving into the project, I highly recommend checking out my amigurumi for beginners guide, which will help you choose the right yarn and hooks for the best results. You can also explore the helpful crochet abbreviations chart to easily follow along, and visit the how to crochet basic stitches post, which is packed with video tutorials to guide you through every single step.
Ready to start? Let’s look at what you will need for this project!
🌸 Choose how you want to craft:
- 🌐 Read it free on this blog (supported by ads).
- 📄 Prefer a printable PDF? Get the clean, ad-free PDF version on my Ko-fi shop for symbolic price 💖
Materials List
- Yarn: I use a 100% cotton yarn from my local store. The best match and my top recommendation for this pattern is Paintbox Yarns Cotton DK.
- Hook: I used a 2mm hook. I highly recommend Clover Amour Hooks for the best experience.
- Tools & Supplies:
- Fiberfill, scissors, and a tapestry needle.
- Optional: Stitch markers and wooden ring (for a baby rattle or teether, if making a baby gift).
- Find all these essentials here: Crochet Supplies & Accessories.
Crochet Abbreviations for Free Crochet Heart Cherry Pattern
| Abbreviation | Meaning |
| MR | Magic ring |
| CH | Chain |
| SC | Single crochet |
| HDC | Half double crochet |
| DC | Double crochet |
| TR (TC) | Treble crochet |
| INC | Increase |
| DEC | Decrease |
| BLO | Back loop only |
| FLO | Front loop only |
| SL ST | Slip stitch |
| SK ST | Skip stitch |
💡 Note: I highly recommend using the “yarn under” single crochet technique for this project to get tighter, neater stitches and prevent the stuffing from showing through.
Pattern
Large Heart Instructions
Make 2.
Round 1: mr, 6sc [6]
Round 2: 6 x inc [12]
Round 3: (sc, inc) x 6 [18]
Round 4: (sc, inc, sc) x 6 [24]
Round 5: (3sc, inc) x 6 [30]
Part 1: Finish the last round and fasten off, leaving a short tail.
Part 2: Finish the last round but do not fasten off. You will continue working with this piece to join it to Part 1.
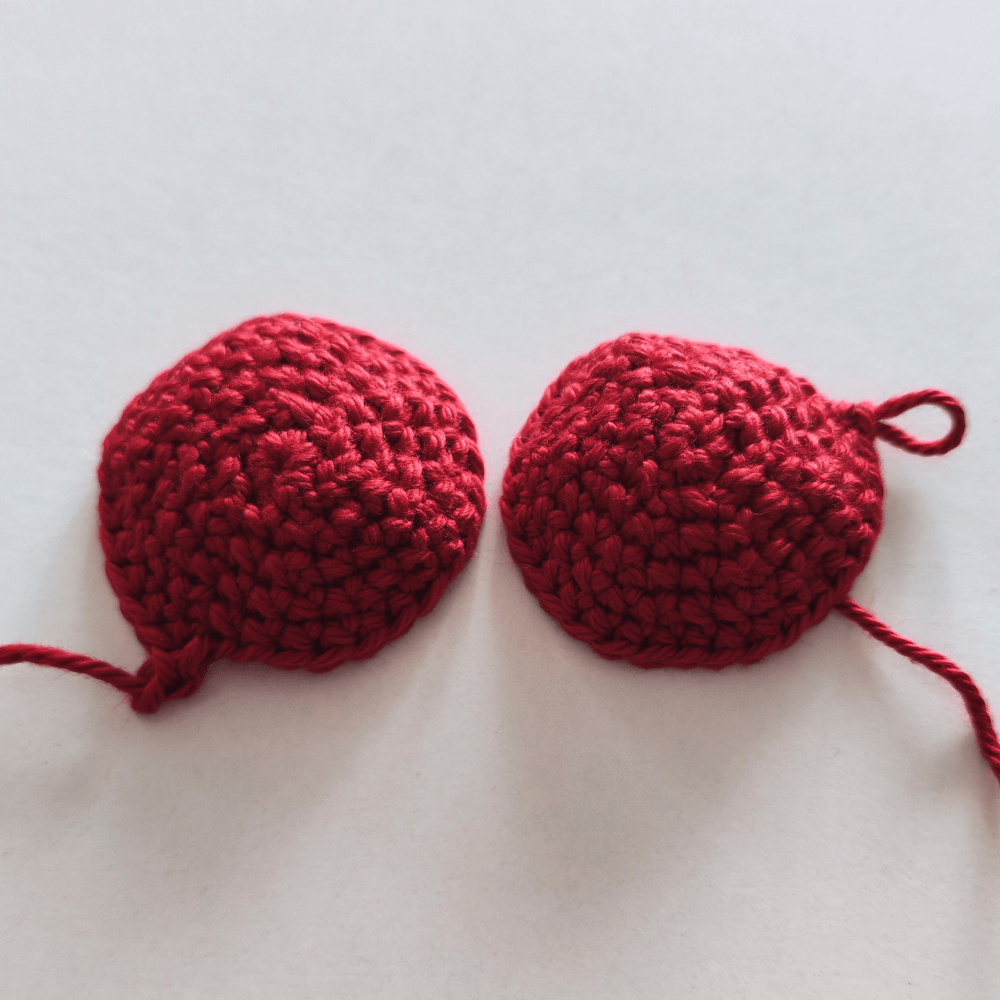
Round 6 (Joining): Work 10 sc on Part 2 (the piece with the yarn still attached).
- Join to Part 1 and work 30 sc all the way around it.
- Go back to Part 2 and work the remaining 20 sc. [60]
💡 Tip: You can use the yarn tail from Part 1 to sew up any small gap that may appear at the joining point.
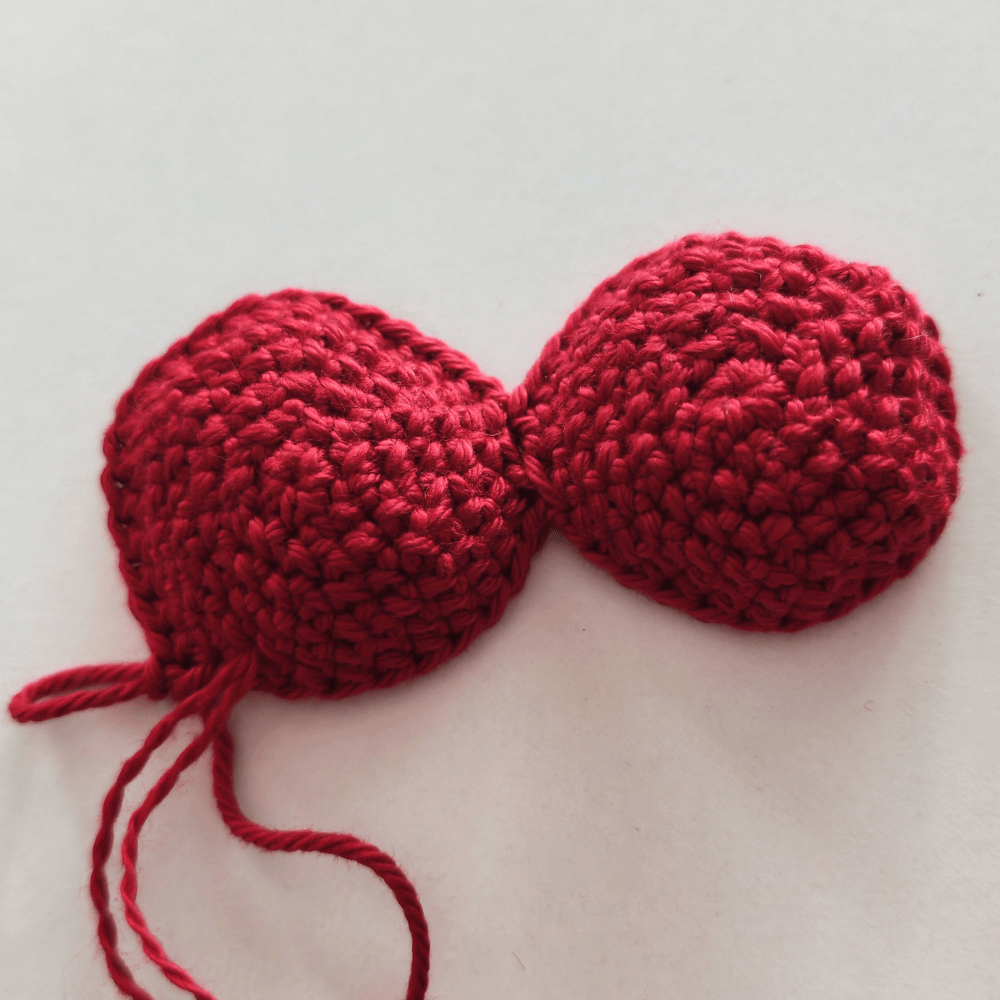
Round 7-9: 60sc [60]
Round 10: (9sc, dec, 9sc) x 3 [57]
Round 11: (17sc, dec) x 3 [54]
Round 12: (8sc, dec, 8sc) x 3 [51]
Round 13: (15sc, dec) x 3 [48]
Round 14: (7sc, dec, 7sc) x 3 [45]
Round 15: (13sc, dec) x 3 [42]
Round 16: (6sc, dec, 6sc) x 3 [39]
Round 17: (11sc, dec) x 3 [36]
Round 18: (5sc, dec, 5sc) x 3 [33]
Round 19: (9sc, dec) x 3 [30]
Round 20: (4sc, dec, 4sc) x 3 [27]
Round 21: (7sc, dec) x 3 [24]
Round 22: (3sc, dec, 3sc) x 3 [21]
Round 23: (5sc, dec) x 3 [18]
Round 24: (2sc, dec, 2sc) x 3 [15]
Round 25: (3sc, dec) x 3 [12]
Round 26: 6 x dec [6]
Fasten off and close.
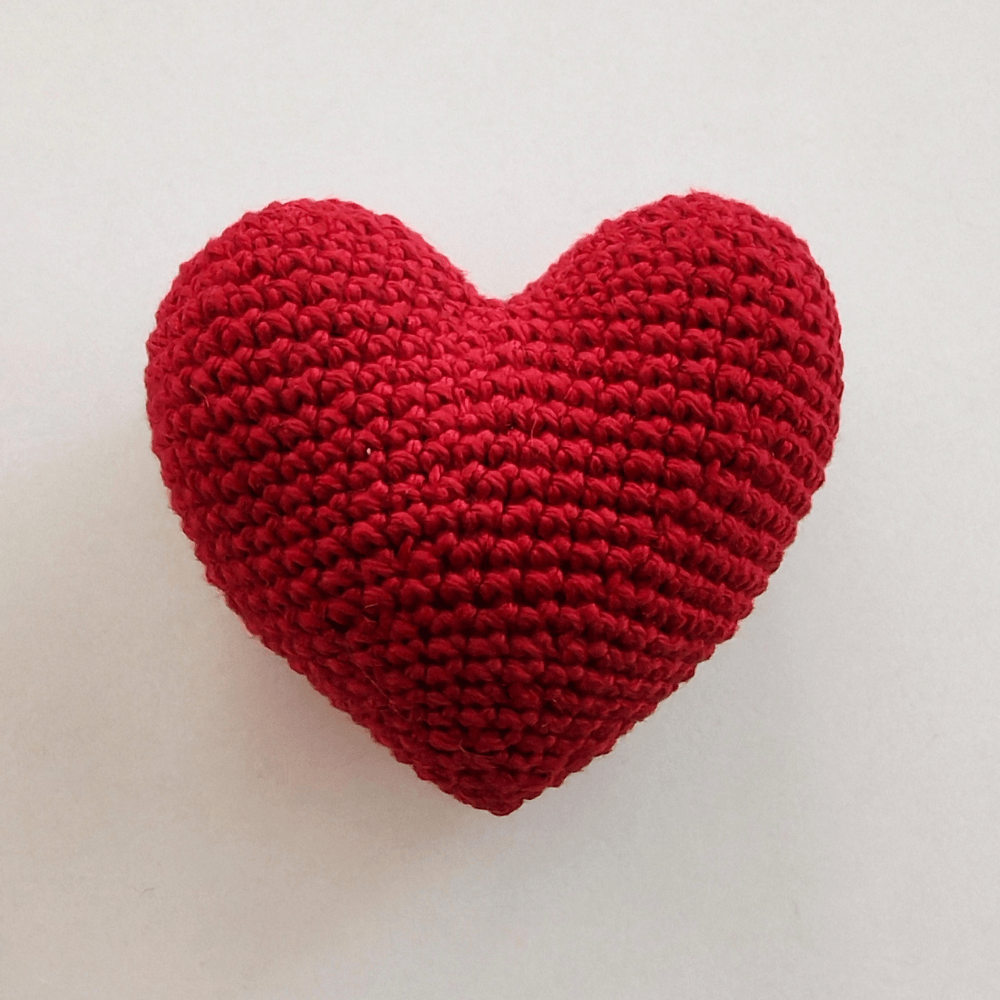
Small Heart Instructions
Make 2.
Round 1: mr, 5sc [5]
Round 2: 5 x inc [10]
Round 3: (sc, inc) x 5 [15]
Part 1: Finish the last round and fasten off, leaving a short tail.
Part 2: Finish the last round but do not fasten off. You will continue working with this piece to join it to Part 1.
Round 4 (Joining): Work 7 sc on Part 2 (the piece with the yarn still attached).
- Join to Part 1 and work 15 sc all the way around it.
- Go back to Part 2 and work the remaining 8 sc. [30]
💡 Tip: You can use the yarn tail from Part 1 to sew up any small gap that may appear at the joining point.
Round 5: 30sc [30]
Round 6: (4sc, dec, 4sc) x 3 [27]
Round 7: (7sc, dec) x 3 [24]
Round 8: (3sc, dec, 3sc) x 3 [21]
Round 9: (5sc, dec) x 3 [18]
Round 10: (2sc, dec, 2sc) x 3 [15]
Round 11: (3sc, dec) x 3 [12]
Round 12: (sc, dec, sc) x 3 [9]
Round 13: (sc, dec) x 3 [6]
Fasten off and close.
Leaf & Stem Instructions
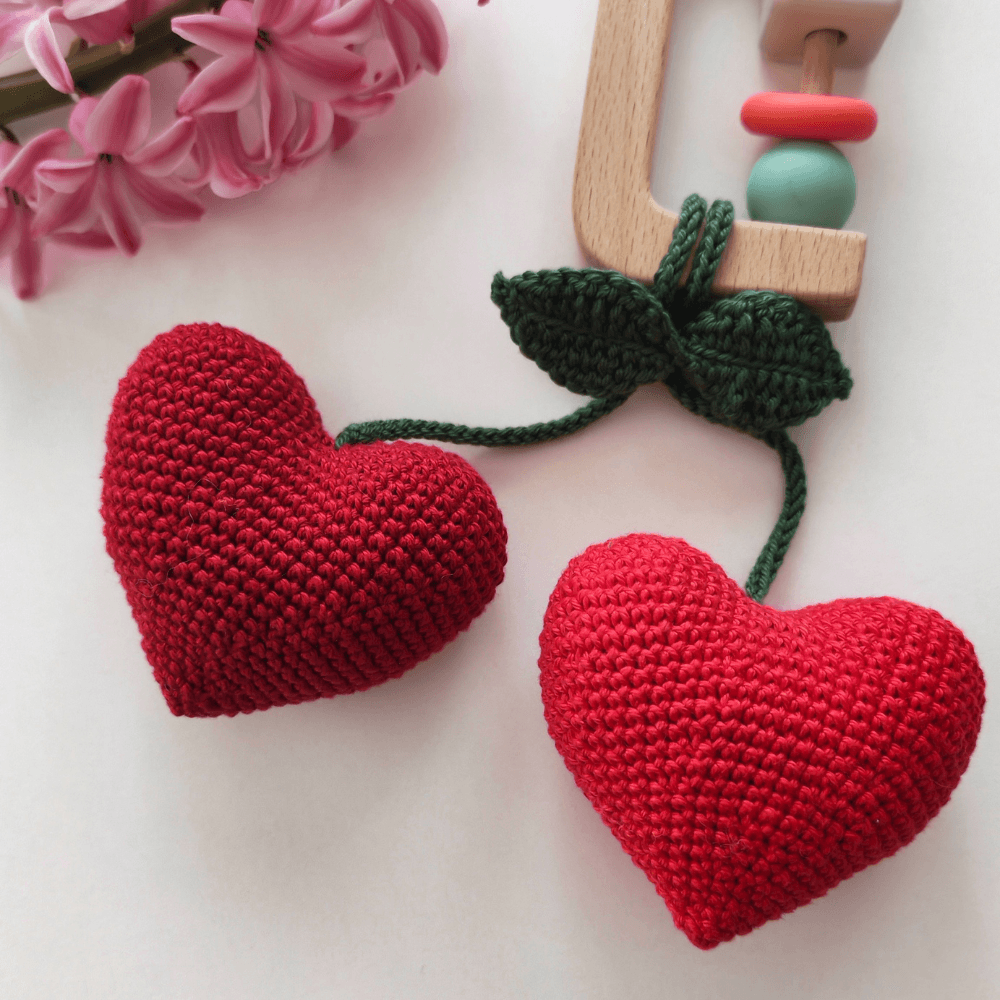
There are two ways to create the stem and leaves. Both methods connect the two hearts, with the leaves positioned right in the middle.
Option 1: I-Cord Method (Used in this example)
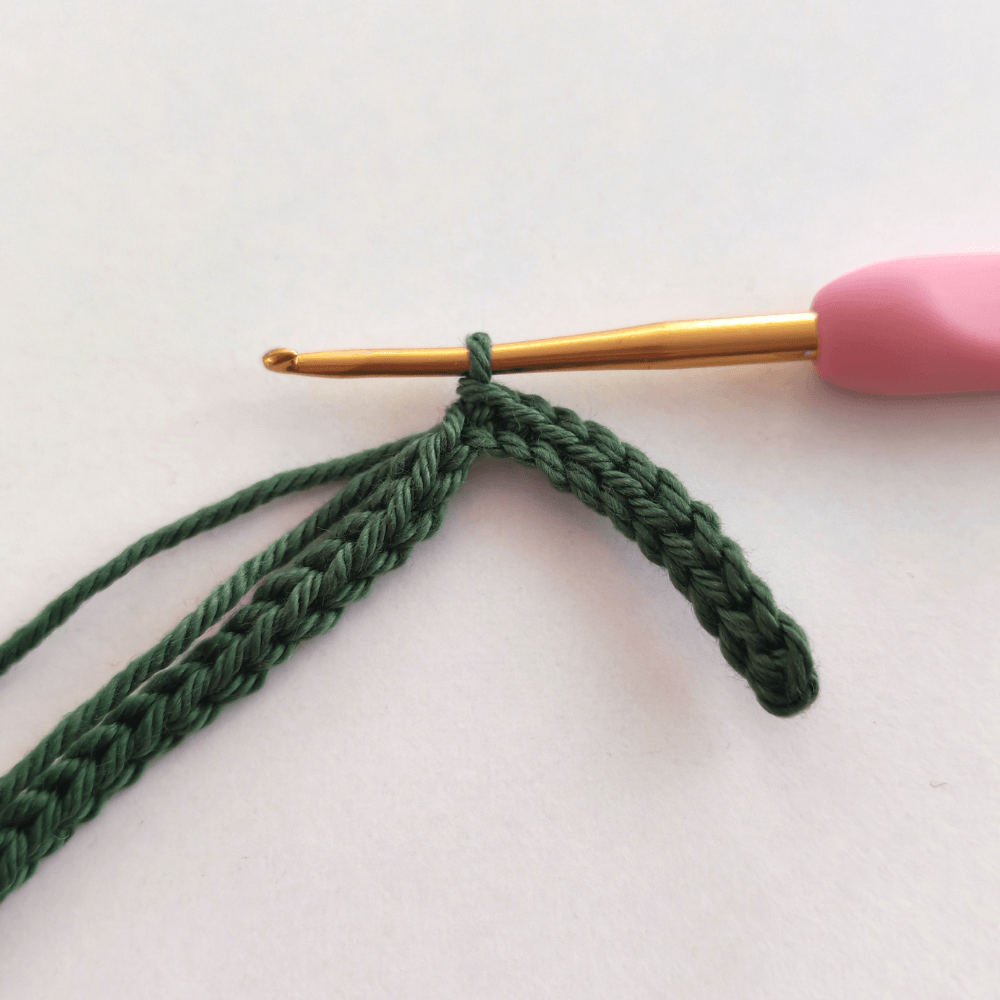
This method uses two strands of yarn to create a sturdy cord.
- Small Heart: Work a total of 30 I-cord rounds.
- Large Heart: Work a total of 70 I-cord rounds.
Instructions:
- Start the I-cord. When you reach the halfway point (15 rounds for small / 35 rounds for large), use one of the two yarn strands to crochet the leaves.
- After completing the leaves, pick up both strands again and continue the I-cord for the remaining rounds (15 for small / 35 for large).
Option 2: Chain & Slip Stitch Method
A simpler alternative if you prefer working with a single strand.
- Crochet a long chain for the total length needed.
- In the return row, work sl st back towards the start.
- When you reach the exact middle of the chain, crochet the leaves.
- Continue with sl st until you reach the end of the chain.
Leaf Instructions
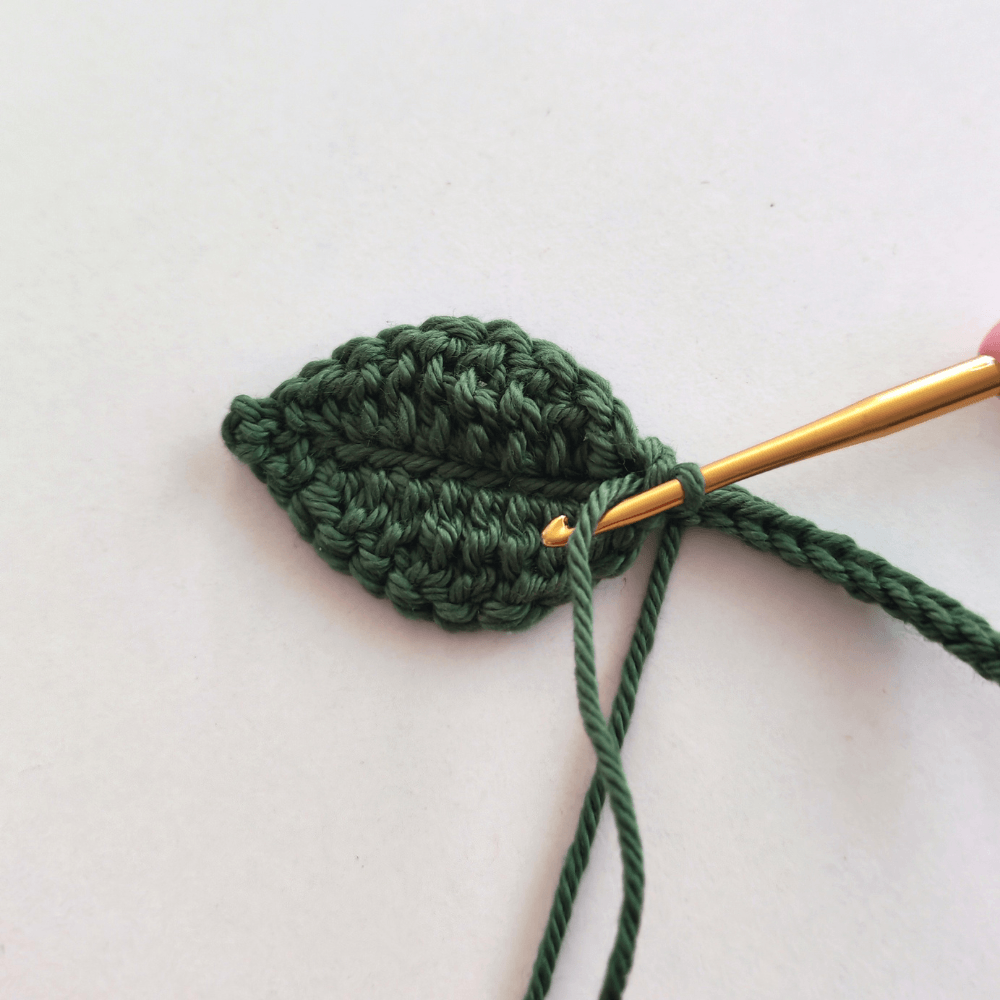
Below are the instructions for both leaf sizes. The leaves are worked by creating a base chain and then crocheting around both sides of it to create the leaf shape.
Large Leaf
- Ch 11. Starting from the second chain from hook, work 10 sl st. Ch 1, turn.
- FLO Sc, hdc, dc, tr, tr, dc, dc, hdc, hdc, sc. Ch 2 at the tip.
- Working on the opposite side: sc, hdc, hdc, dc, dc, tr, tr, dc, hdc, sc.
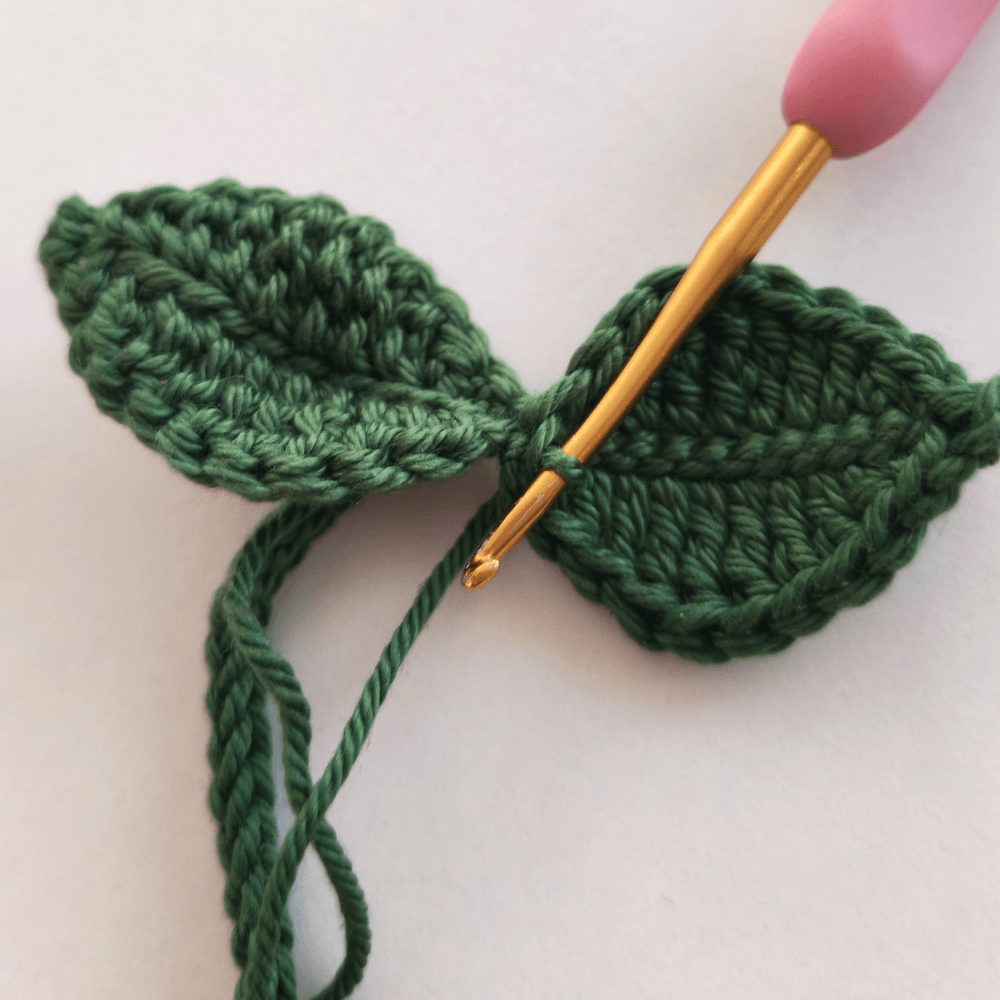
Make 2 leaves. After finishing the second leaf, continue crocheting the rest of the stem without cutting the yarn.
Small Leaf
- Ch 8. Starting from the second chain from hook, work 7 sl st. Ch 1, turn.
- FLO Sc, hdc, dc, dc, hdc, hdc, sc. Ch 2 at the tip.
- Working on the opposite side of the stitches: sc, hdc, hdc, dc, dc, hdc, sc.
Make 2 leaves. After finishing the second leaf, continue crocheting the rest of the stem without cutting the yarn.
Assembly & Finishing Touches
- Attach the Stem: Using a tapestry needle, securely sew each end of the stem to the top center of the cherry hearts, right between the two “heart bumps.”
- Final Step: Weave in all loose ends and trim any excess yarn.
Your Heart Cherries are now finished! Whether you’ve made a rattle for a little one or a charm for yourself, it’s time to enjoy your handmade creation!
More Free Amigurumi Patterns to Try
If you enjoyed making these sweet heart cherries, I have plenty of other quick and adorable designs for you to explore! For more baby gift inspiration, be sure to check out my crochet octopus rattle pattern, which is just as fun and interactive. Or, if you are loving the fruit theme, dive into my free crochet strawberry pattern to build up your handmade play food collection.
Get the Ad-Free PDF Version
Do you prefer working offline, away from screens, and without any ad interruptions? You can find the beautifully formatted, premium PDF version of this pattern in my shop! It is ready for easy printing and includes all instructions in one neat place. Grab your copy today on either Etsy or Ravelry and support my work so I can keep creating more designs for you.
Join the EmmaS Dolls Community!
I would absolutely love to see your finished heart cherries! If you share your creations on social media, don’t forget to tag me @emmasdollsstudio on Instagram, TikTok, and YouTube so I can see and share your beautiful work.
Before you go, make sure to sign up for my newsletter below. By joining the community, you will be the first to know about upcoming free patterns, step-by-step video tutorials, and exclusive discounts for my premium PDF patterns. Happy crocheting!
Pin it for Later!
Important Safety Note: While crochet toys are wonderful for little ones, safety is our top priority. When making toys for babies or toddlers:
- Eyes: I highly recommend embroidering the eyes with black yarn instead of using plastic safety eyes, which can become a choking hazard.
- Small Parts: Ensure all limbs and accessories (like bows or hats) are sewn extra securely with multiple passes of yarn.
- Supervision: Never leave a baby unattended with any handmade toy. Regularly check the toy for any loose threads or wear and tear.
Since this pattern is free, please help me keep it that way by not taking screenshots. Keeping the page open while you work supports my studio! Happy crocheting!✨
Pingback: Perfect Amigurumi Guide Part 2: Why You Should Use the Amigurumi Yarn Under Technique - EmmaS Dolls
Pingback: Free Whale Crochet Rattle Pattern – Cute Amigurumi Baby Toy - EmmaS Dolls